Hello friends,
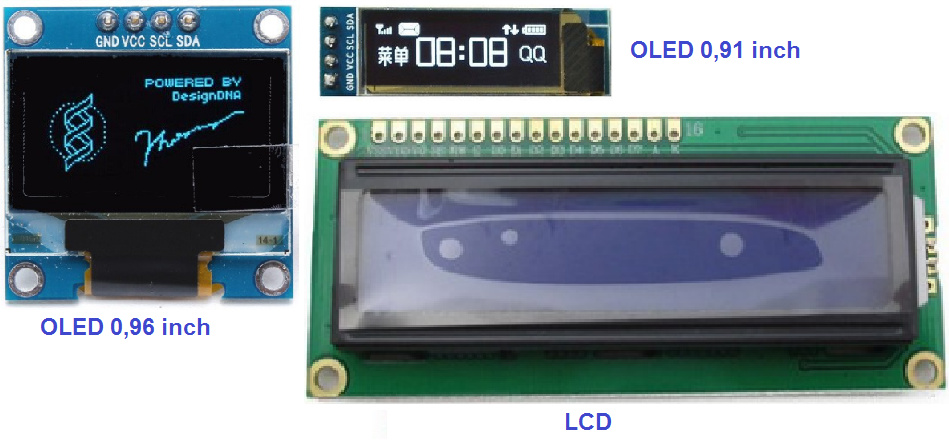
1.- Send message and view it on an LCD screen.
1.- You write a message in TexBox1 and it is sent by WiFi to ESP8266, that message is shown on the LCD screen.
2.- If you write on5, off5, on6, off6, LEDs 5 or 6 turn on/off.

```
// Juan A. Villalpando.
// KIO4.COM
// Send a message
// from  App Inventor

#include <ESP8266WiFi.h>

const char* ssid = "Name_Net_WiFi";
const char* password = "Password_WiFi";

// Static IP.
    IPAddress local_IP(192, 168, 1, 12);
    IPAddress gateway(192, 168, 1, 1);
    IPAddress subnet(255, 255, 255, 0);

#define LED5  D5    // LED in pin 5
#define LED6  D6     // LED in pin 6

#include <LiquidCrystal_I2C.h>
int columns = 16;
int rows = 2;
LiquidCrystal_I2C lcd(0x27, columns, rows);
// LiquidCrystal_I2C lcd(0x3F, columns, rows);

WiFiServer server(80);

void setup() {
  Serial.begin(115200);
  pinMode(LED5, OUTPUT);
  pinMode(LED6, OUTPUT);
  lcd.init();
  lcd.backlight();

// Set Static IP.
   WiFi.config(local_IP, gateway, subnet);

// Connection to WiFi
  Serial.println();
  Serial.print("Connecting with ");
  Serial.println(ssid);

  WiFi.begin(ssid, password);

  while (WiFi.status() != WL_CONNECTED) {
    delay(500);
    Serial.print(".");
  }
  Serial.println("Connected with WiFi.");

  // Start WebServer.
  server.begin();
  Serial.println("WebServer started.");

  // This is IP of WebServer
  Serial.print("IP of WebServer: ");
  Serial.print("http://");
  Serial.print(WiFi.localIP());
}

void loop() {
  // Check if a client has connected.
  WiFiClient client = server.available();
  if (!client) {
    return;
  }

  Serial.print("New client: ");
  Serial.println(client.remoteIP());

  // Wait for the client to send data.
  while(!client.available()){ delay(1); }

  /////////////////////////////////////////////////////
  // Read information of client.
  String req = client.readStringUntil('\r');
  Serial.println(req);
  req.replace("+", " ");          // Spaces without +
  req.replace(" HTTP/1.1", "");   // this delete HTTP/1.1
  req.replace("GET /", "");       // this delete GET /

  lcd.clear(); // Borra pantalla.
  lcd.setCursor(0, 0); // Start cursor
  lcd.print("Mensaje");
  lcd.setCursor(0,1); // Next row.
  lcd.print(req);

  // Make the customer's request.
       if (req.indexOf("on5") != -1) {digitalWrite(LED5, HIGH);}
       if (req.indexOf("off5") != -1){digitalWrite(LED5, LOW);}
       if (req.indexOf("on6") != -1) {digitalWrite(LED6, HIGH);}
       if (req.indexOf("off6") != -1){digitalWrite(LED6, LOW);}

  //////////////////////////////////////////////
  // Página WEB. ////////////////////////////
  client.println("HTTP/1.1 200 OK");
  client.println("Content-Type: text/html");
  client.println(""); //  Important.

  Serial.print("Client disconnected: ");
  Serial.println(client.remoteIP());
  client.flush();
  client.stop();
}
```
-
In this code I use static IP.
-
Utilizo:
Regards,
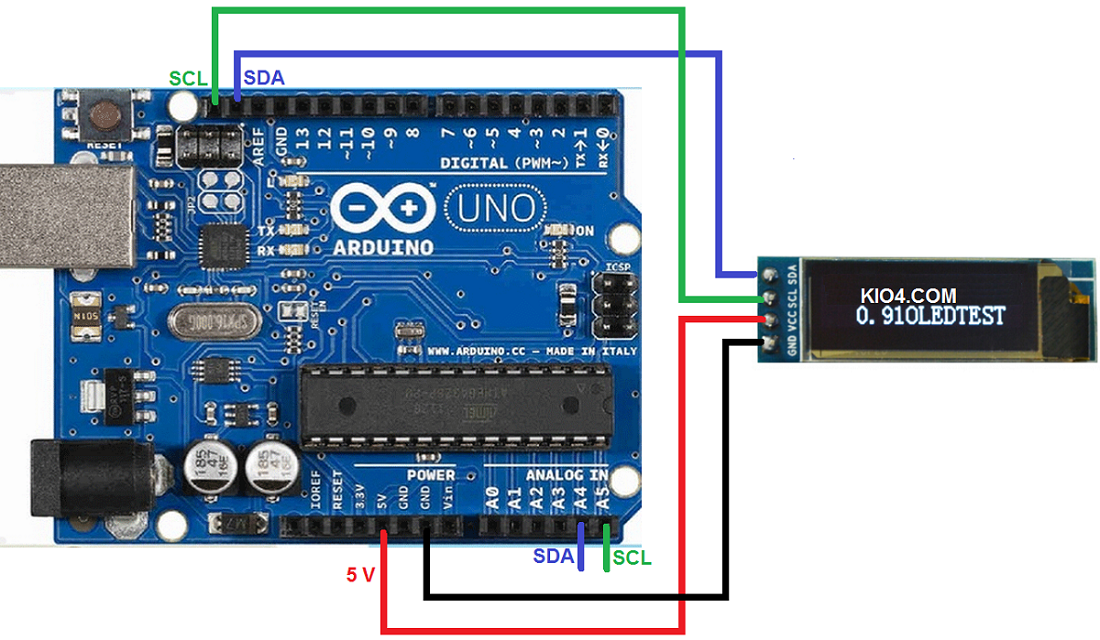
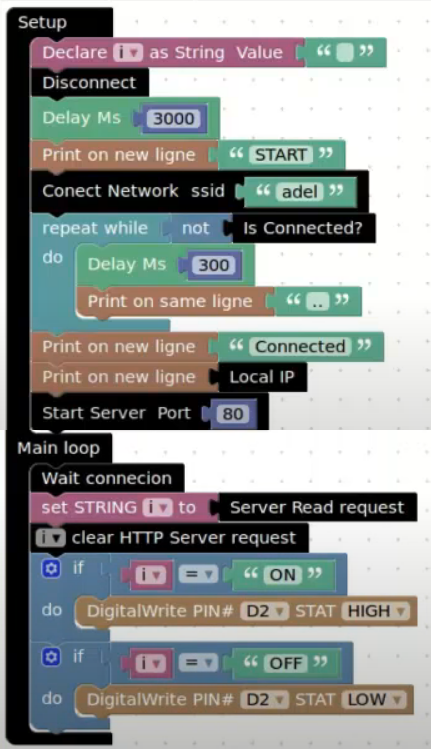
With NodeMcu: