In this guide, you will: Create a credential for Google Sheets to read and write to private spreadsheets
Appendix B: Create a Credential for Google Sheets
- Decide whether you even need a Google Sheets credential!
- A credential is a long password from Google that allows your app to connect to a Google Sheets spreadsheet.
- The password comes in the form of a small computer file, which you upload to App Inventor for use in your app.
- Only the highlighted situation below requires making your own credential using this guide.
| Situation | Solution | What to do |
|---|---|---|
| I want my app to read data from a public Google Sheets spreadsheet with only one sheet. | No credential needed | Create an app and leave CredentialsJson empty on the Spreadsheet component. |
| I want my app to read data from a public Google Sheets spreadsheet to access multiple sheets. | Any credential works | Use App Inventor’s credential in the Appendix folder (easiest), or create one using the process below. |
| I want my app to write data to a public Google Sheets spreadsheet. | Any credential works | Use App Inventor’s credential in the Appendix folder (easiest), or create one using the process below. |
| I want my app to read or write data to a private (“Restricted”) Google Sheets spreadsheet that only my classroom or I can see. | Get a credential tied to your Google account | Create your own credential using the process below. |
Note:
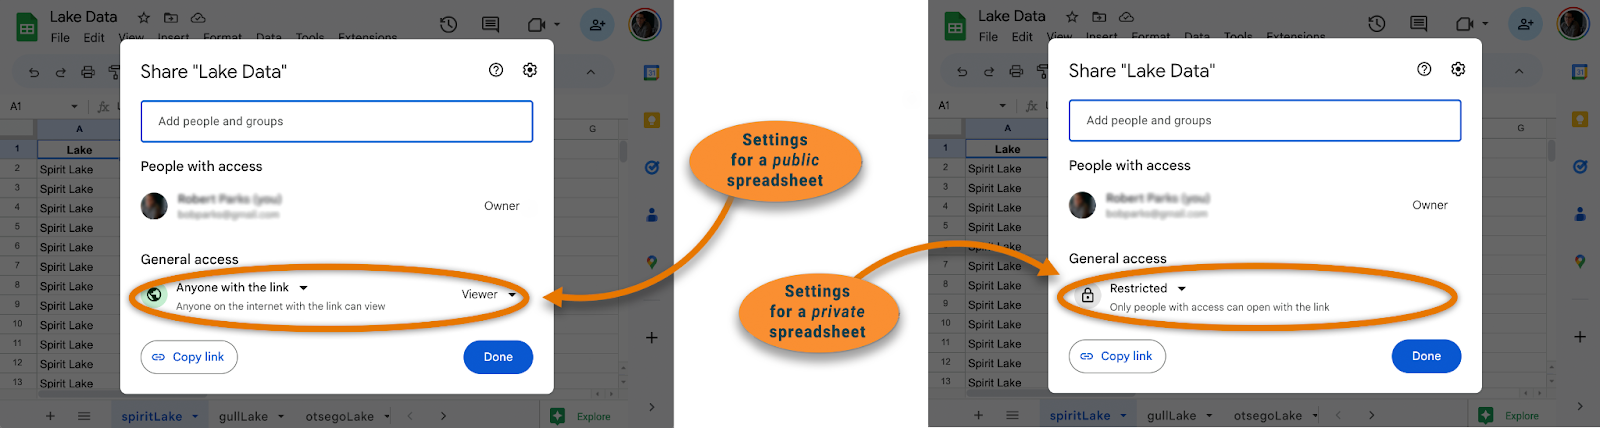
- To know whether your spreadsheet is public or private, examine the following settings in Google Sheets:

- If you don't want to go through the credential steps, change your private spreadsheet to a public one — as long as the spreadsheet is not holding sensitive data.
- Look over the steps to creating a Google Sheets credential.
Here is a quick overview of the steps in this guide:
▢ Gather the username and password for your Google account. (Or create a Google account for free.)
▢ Start a Google Developer Account using your Google password (again — free)
▢ Create a Service Account as a developer
▢ Set up a coding project with Google Sheets
▢ Download a service account key and copy the service account email address
▢ Upload that key to App Inventor when you need your app to connect to Google Sheets. Use the service account email address to access your private spreadsheets online.
- Create a Google Developer Account.
- Do you have a standard Google account for email or Google Drive? If not, create an account at www.google.com.
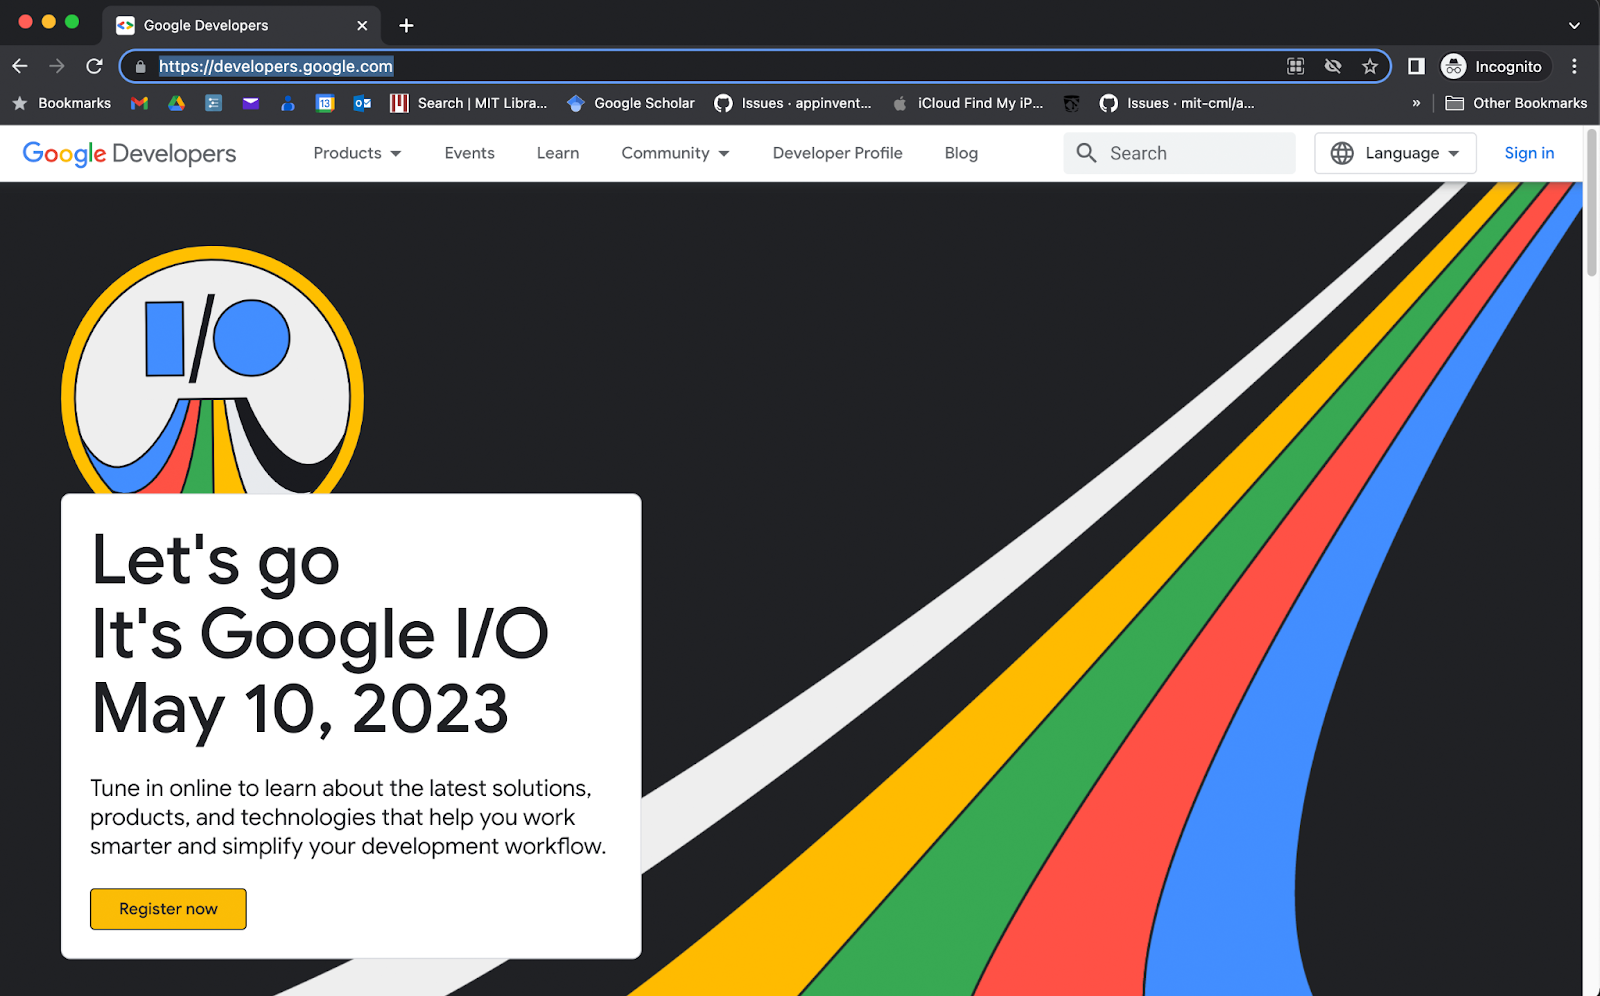
- Go to developers.google.com and sign in with your Google Account username and password.
- Create a “Project”
- Google organizes your developer work into various projects you name and set up. Create a coding project with the steps below.
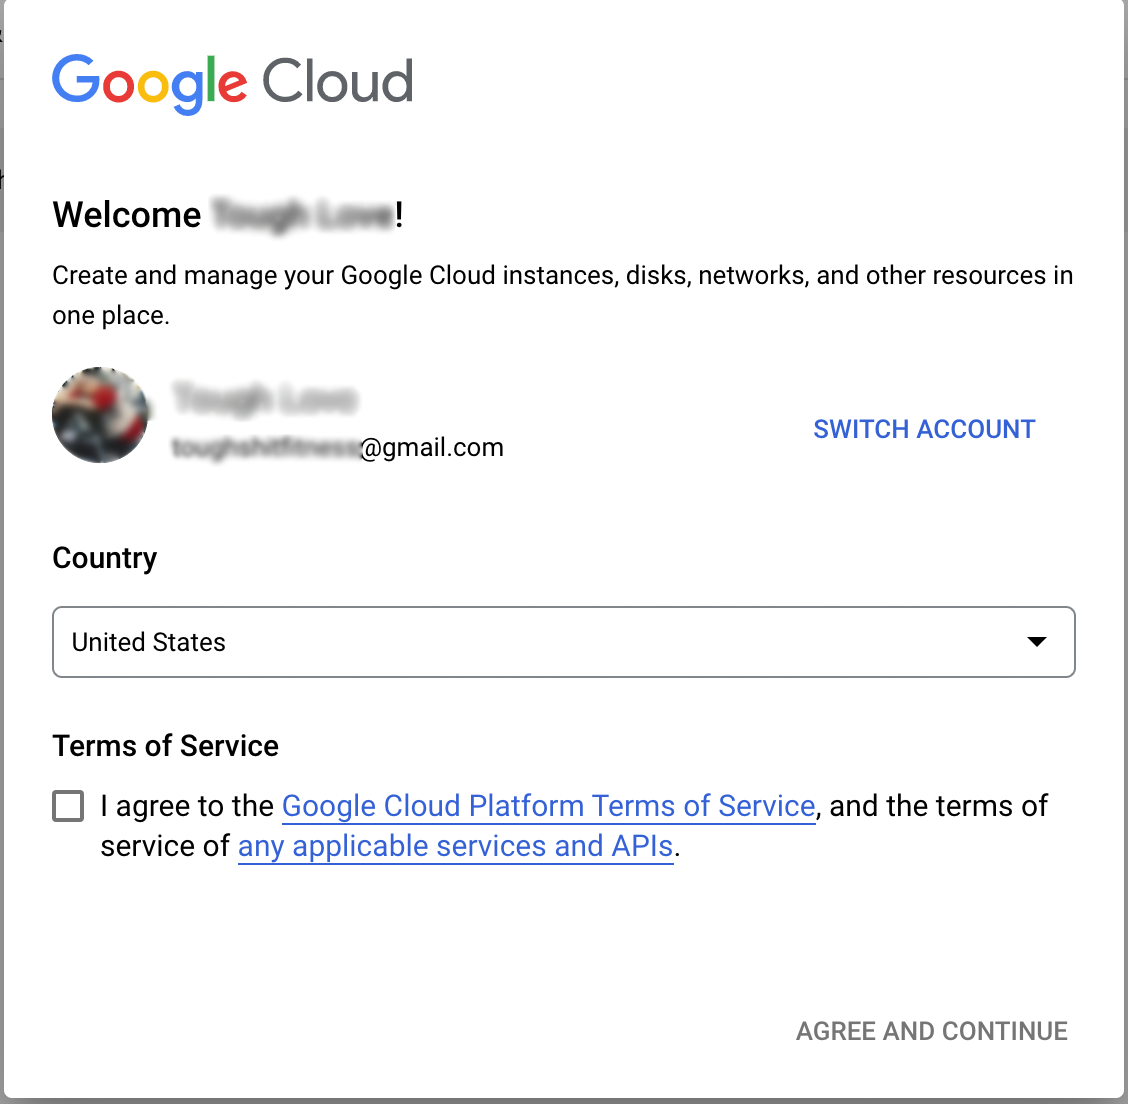
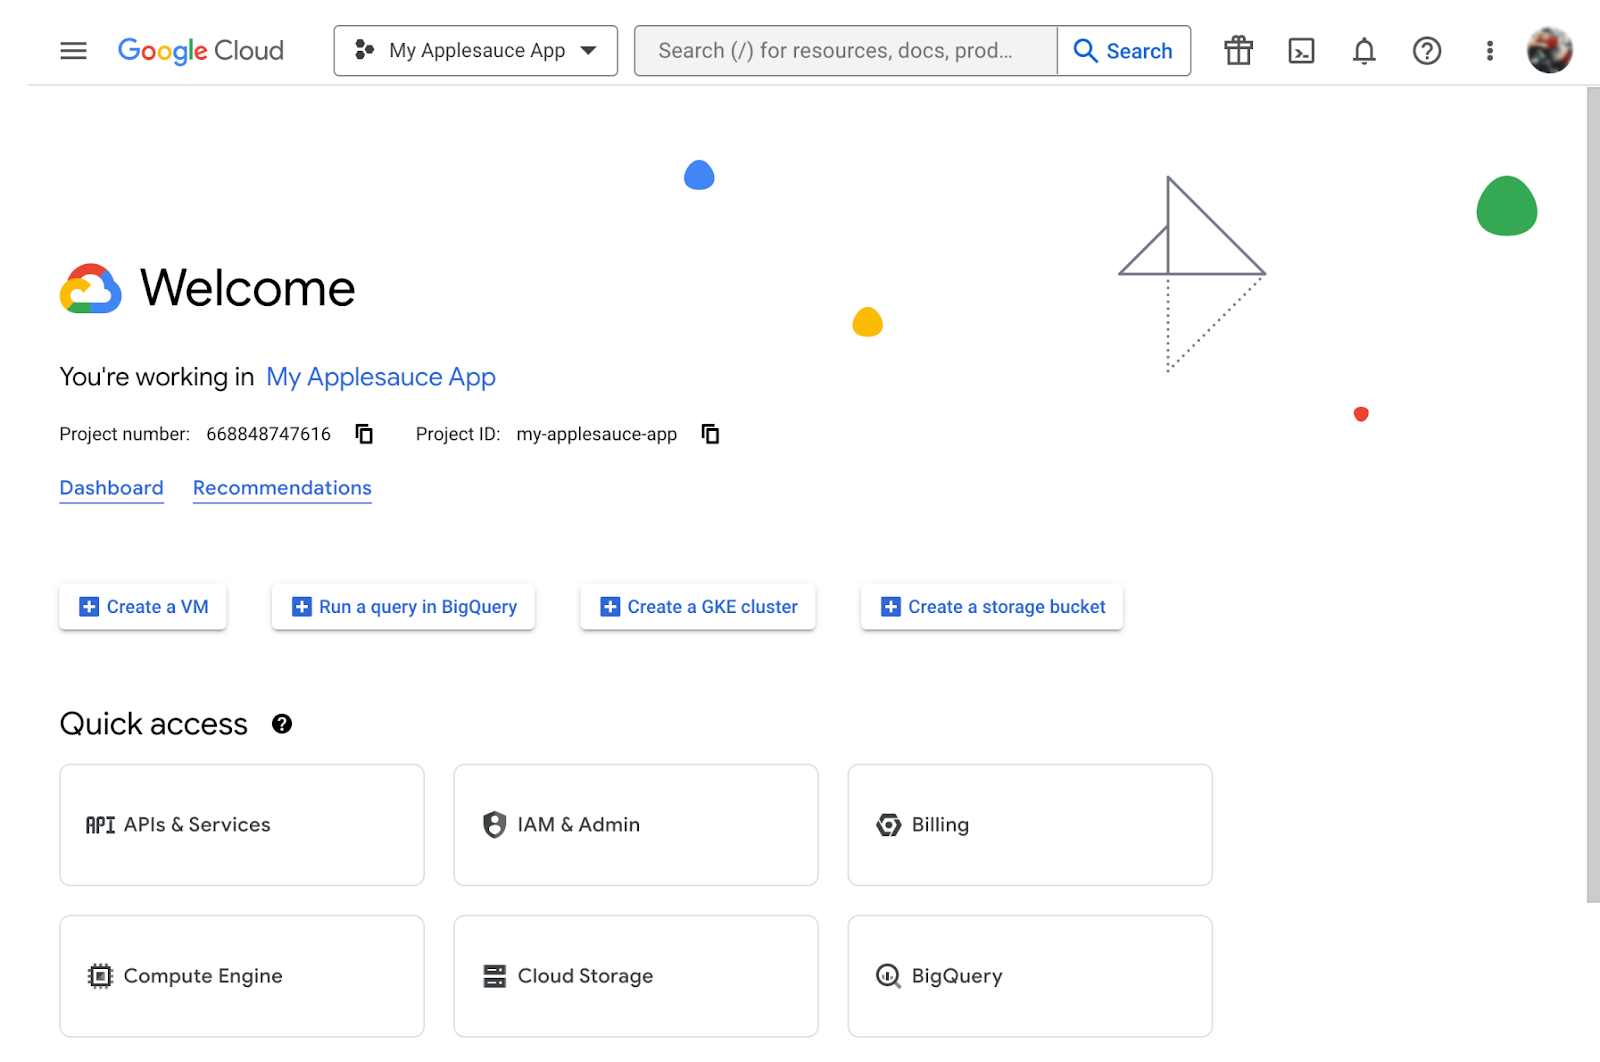
- Once you have logged into your Google Developer Account in the step above, go to console.developers.google.com.
- If this is your first time using your Google Developer Account, you will see a prompt for the Terms of Service. Check the box and continue.
- On the developer dashboard, create a project by selecting CREATE PROJECT.
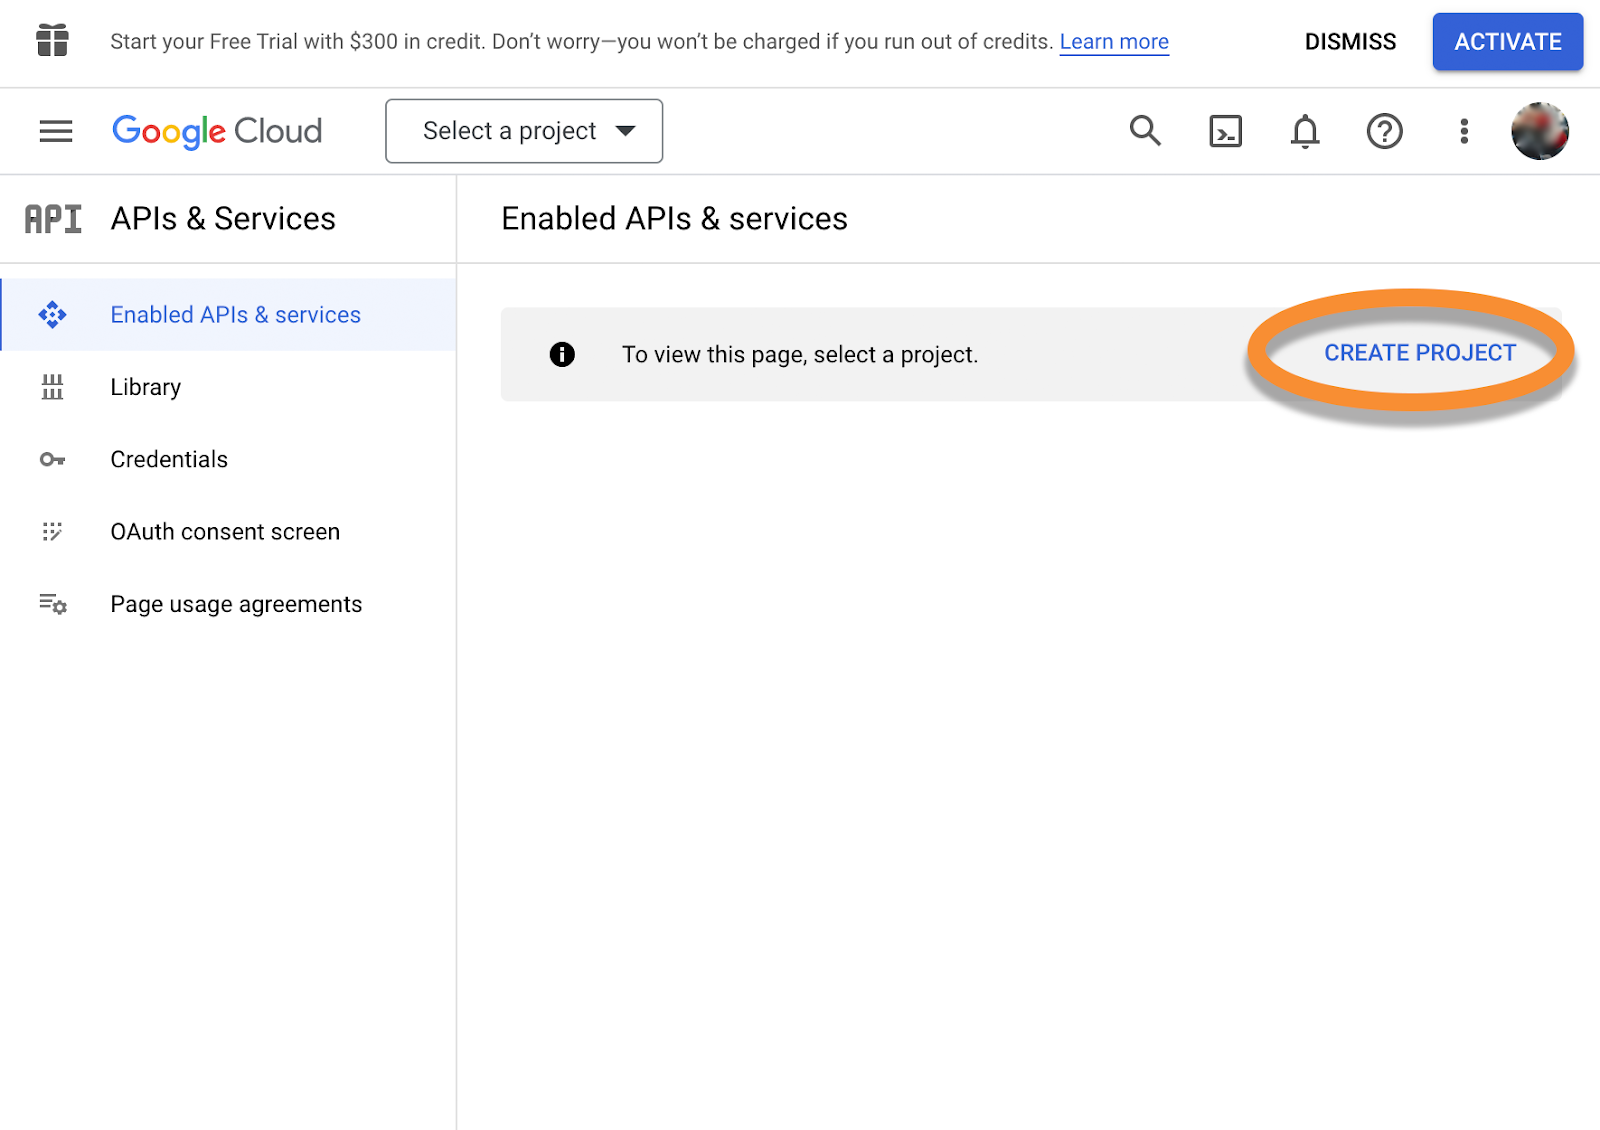
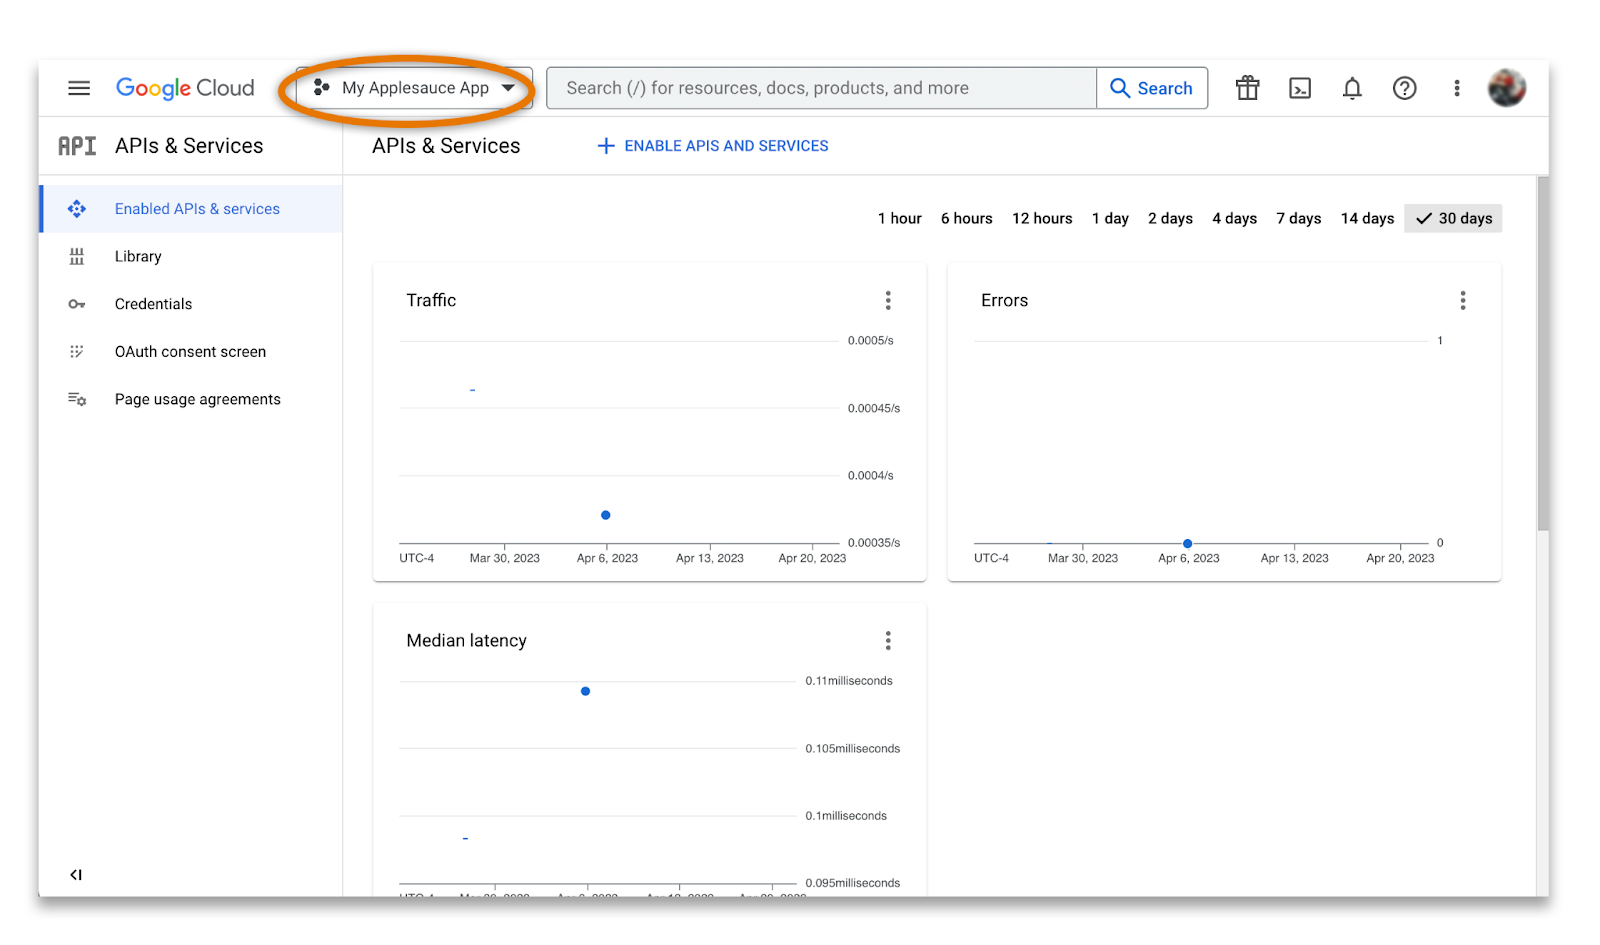
Note: if you have already created projects in Google Cloud before, your screen will look like the one below.
- Click the box shown:
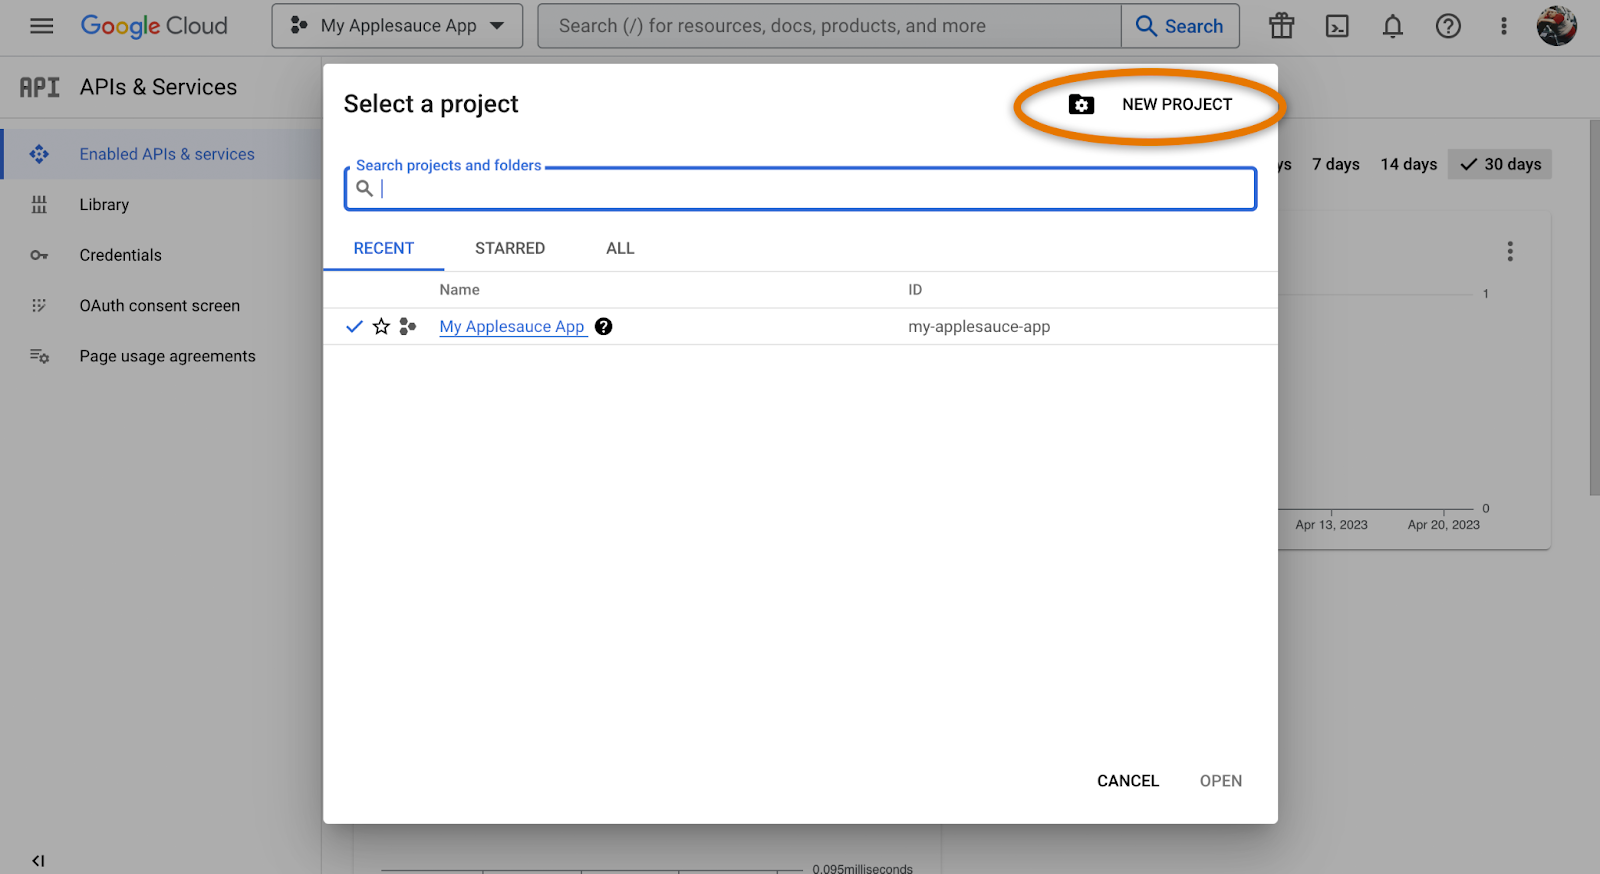
- Click on NEW PROJECT:
- On the New Project page, give the project a name. The name does not matter. For this example, we will name it “My Applesauce App.”
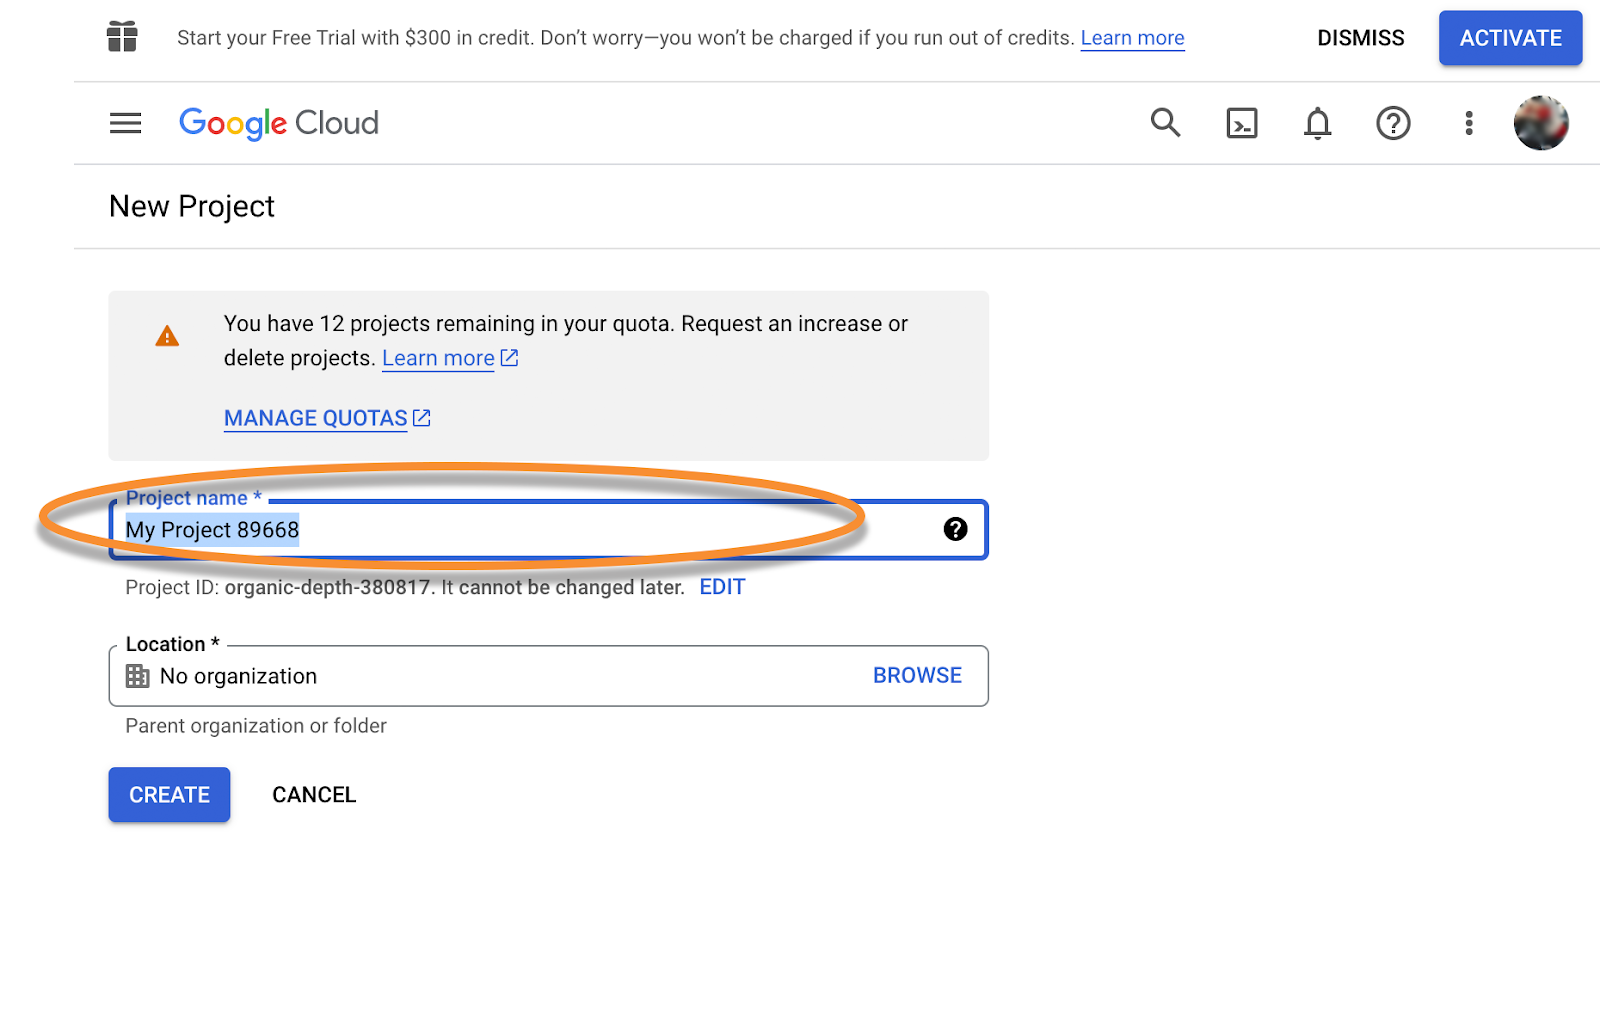
- A coding project does not need to provide an organization, so leave it as No organization.

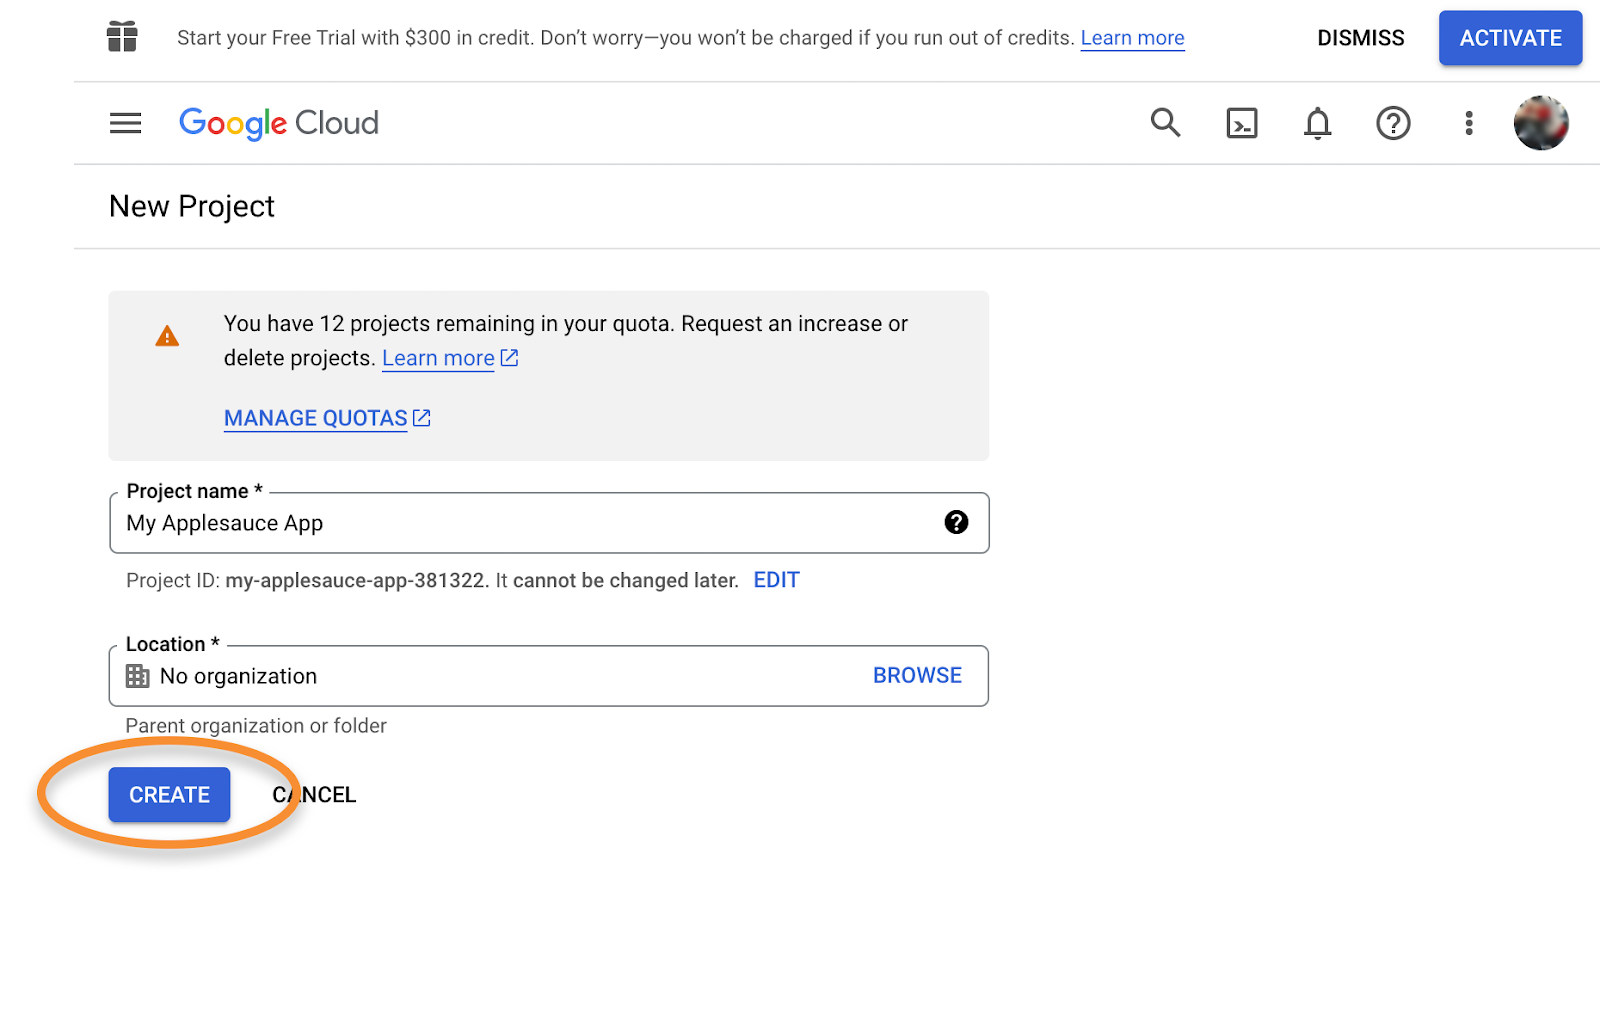
- Click CREATE.
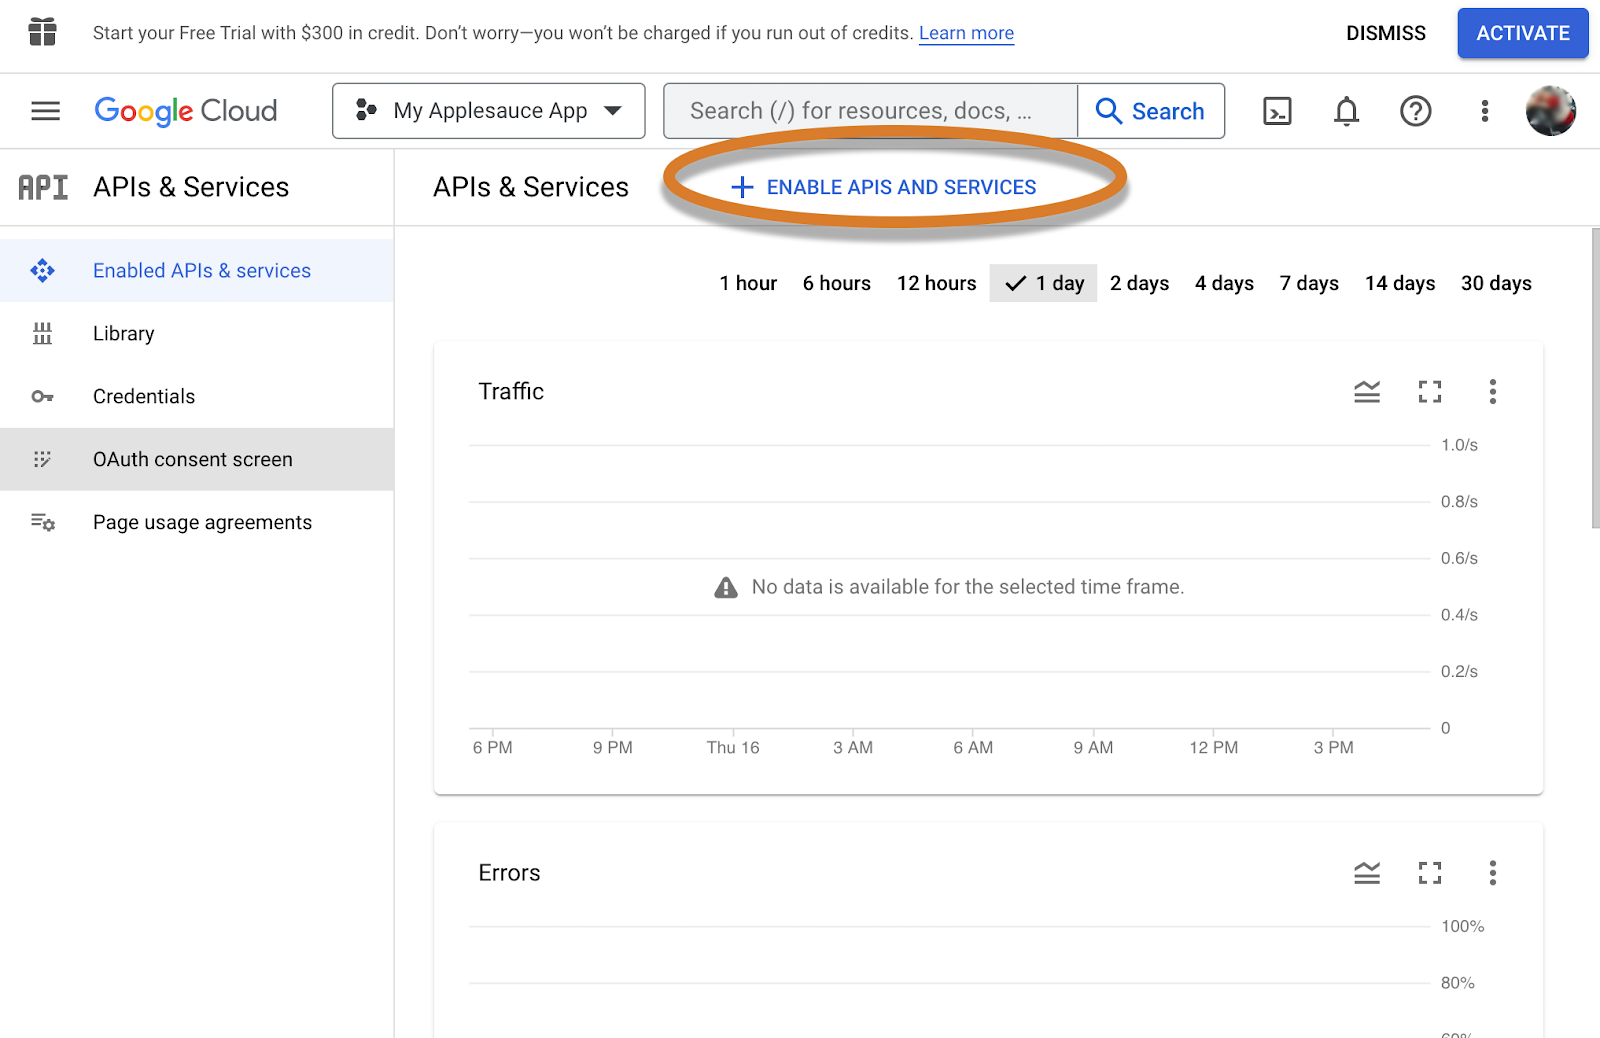
- Enable the Google Sheets API.
- Click + ENABLE APIS AND SERVICES. (APIs or Application Programming Interfaces are a standard way to connect to a service over the internet. For more explanation, check out our restaurant analogy.)
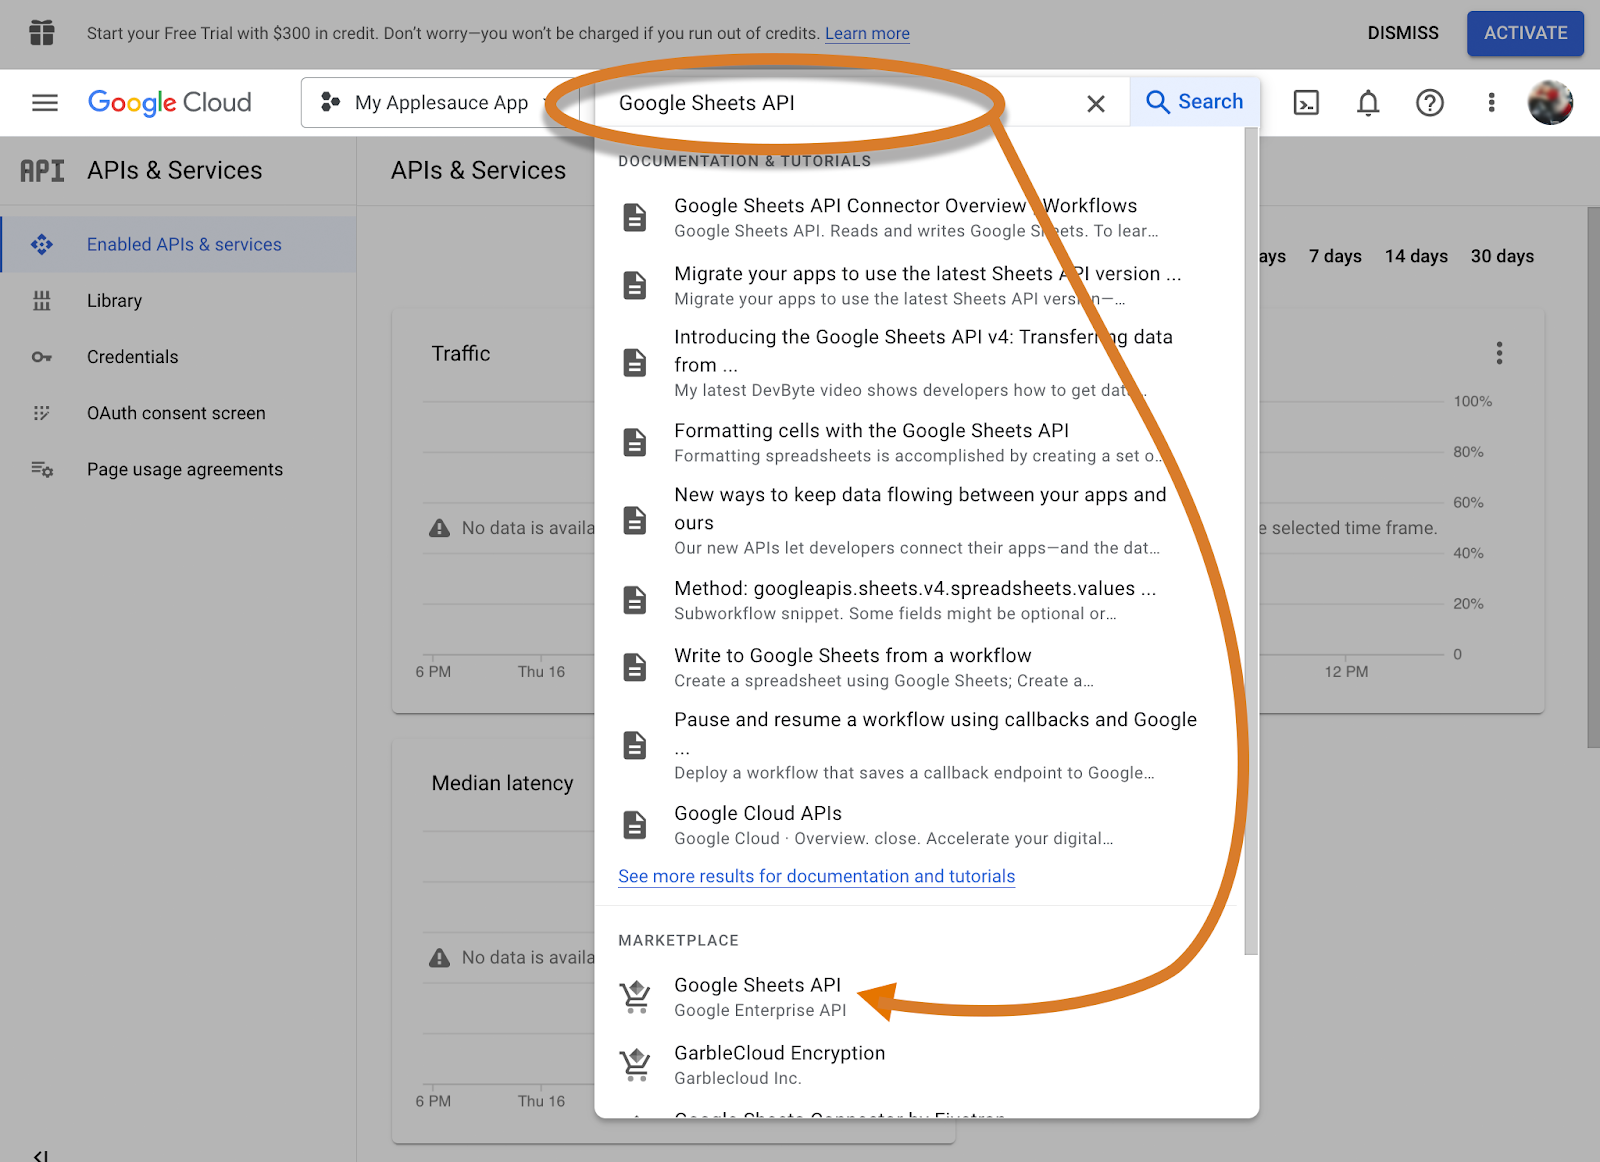
- In the search bar, enter “Google Sheets API” and select the matching entry.
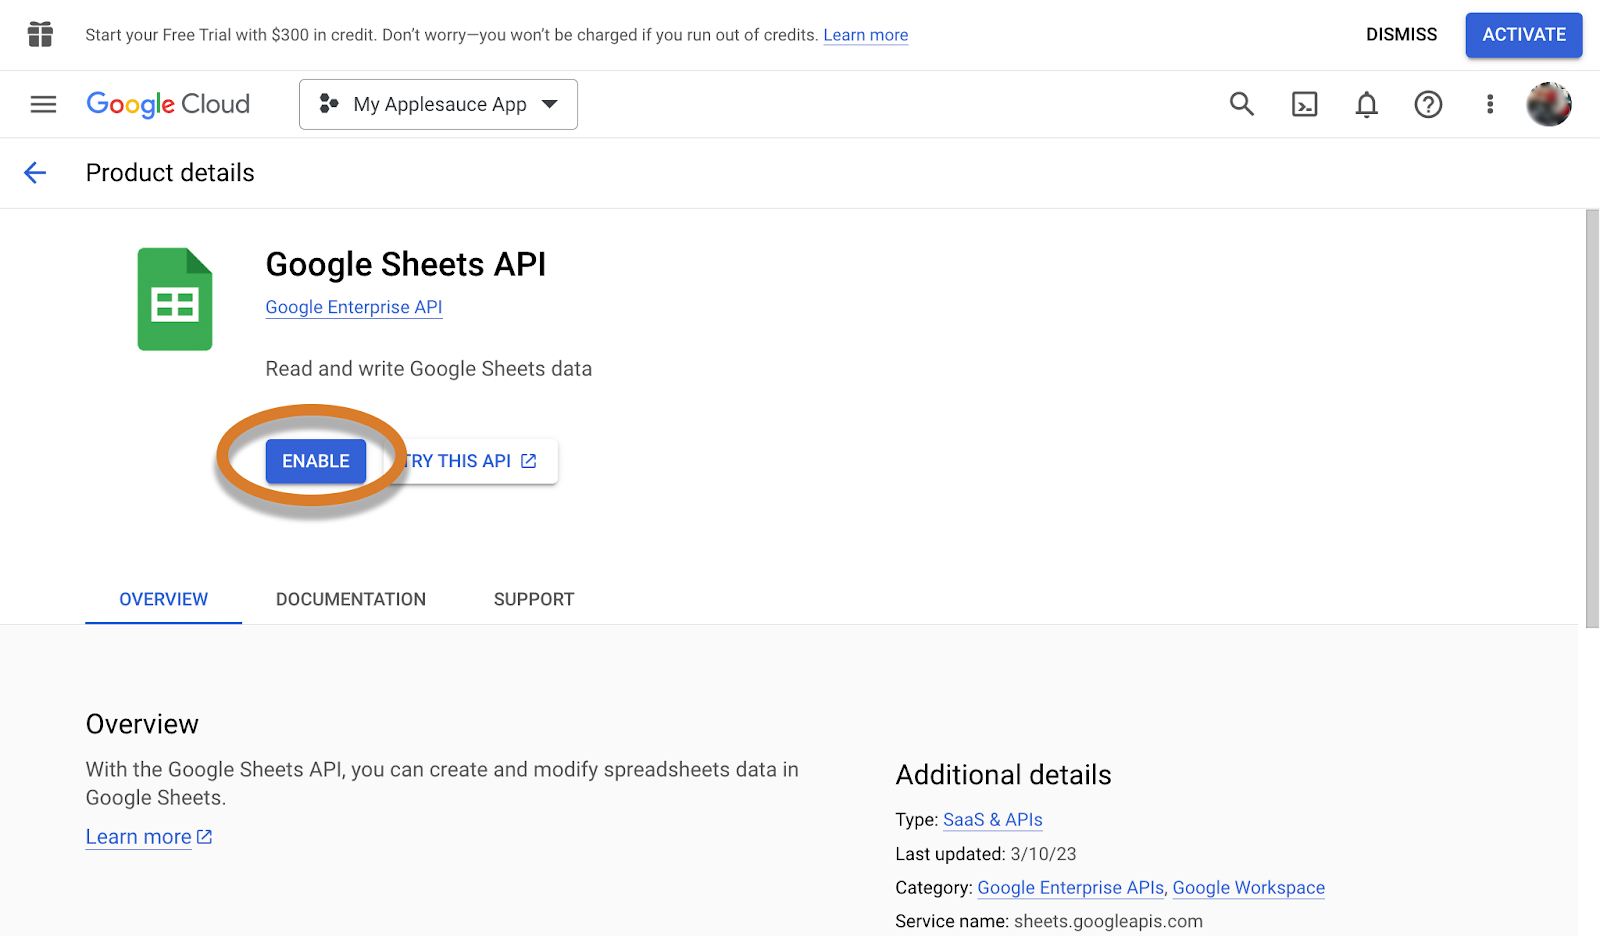
- Click ENABLE.
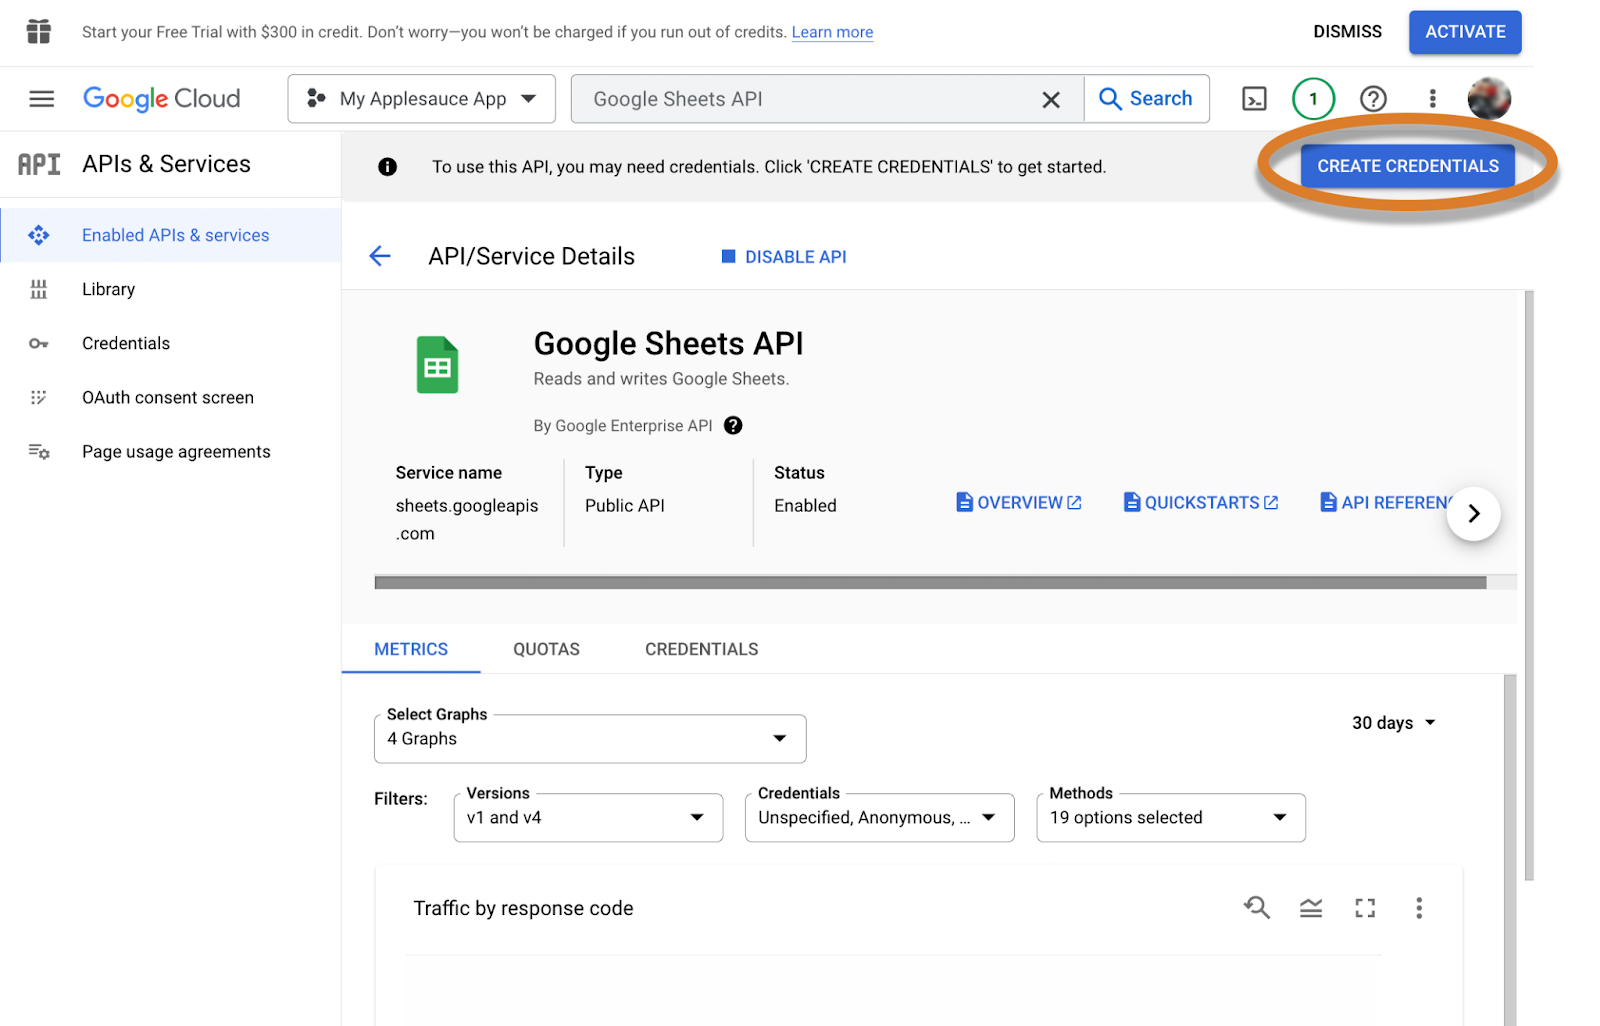
- You should see this screen:
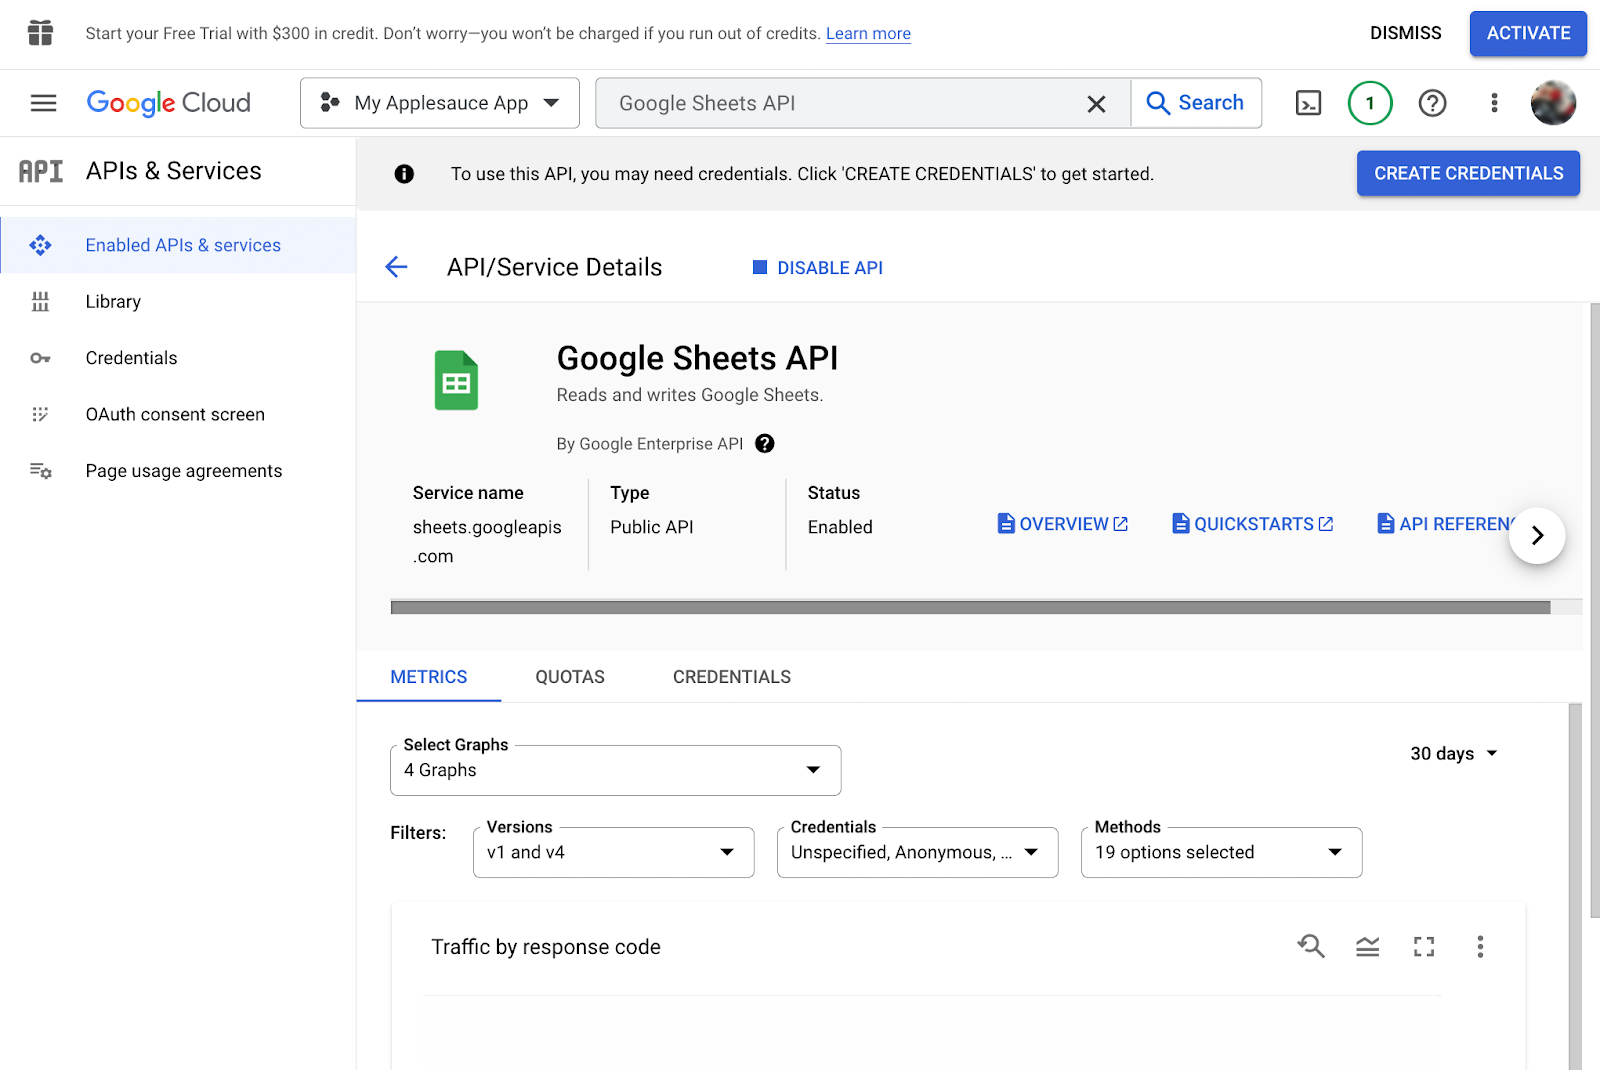
- Create a service account and credential.
- Create a service account for Google Sheets API. The service account provides a unique email address and a password (the credential) to access Google Sheets as a programmer.
- To the right of the screen, click CREATE CREDENTIALS.
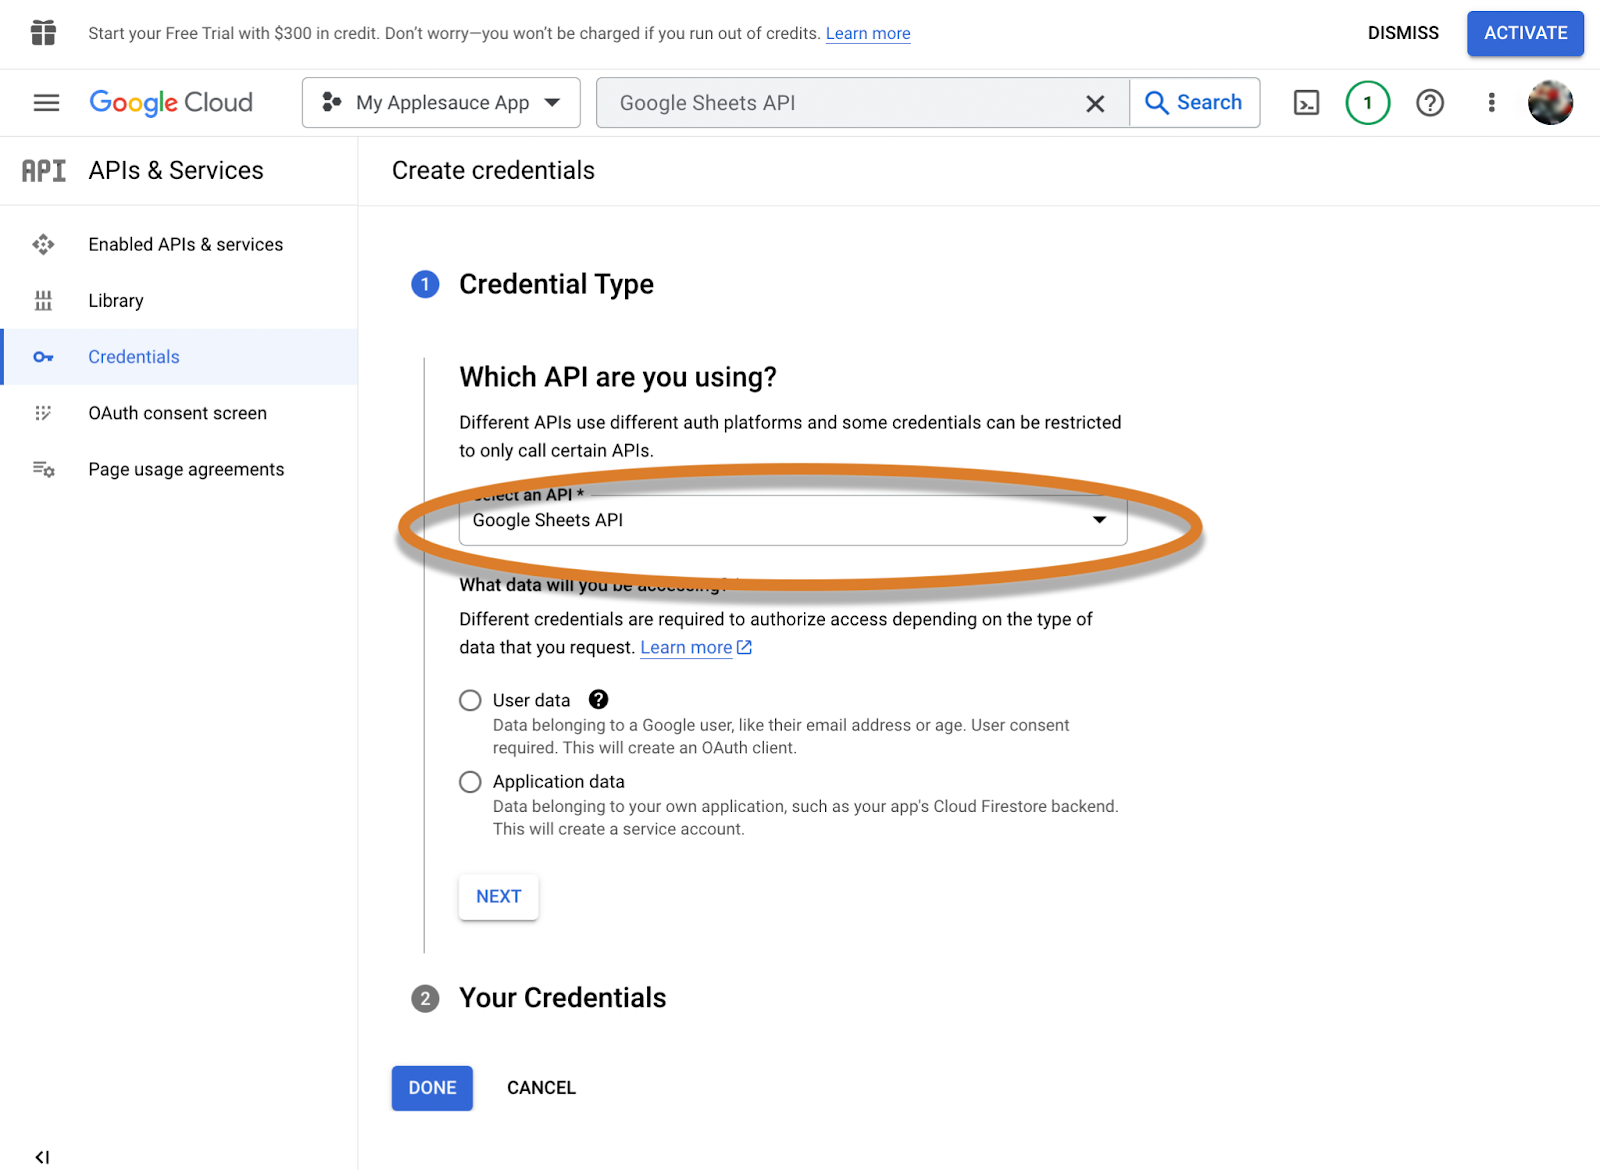
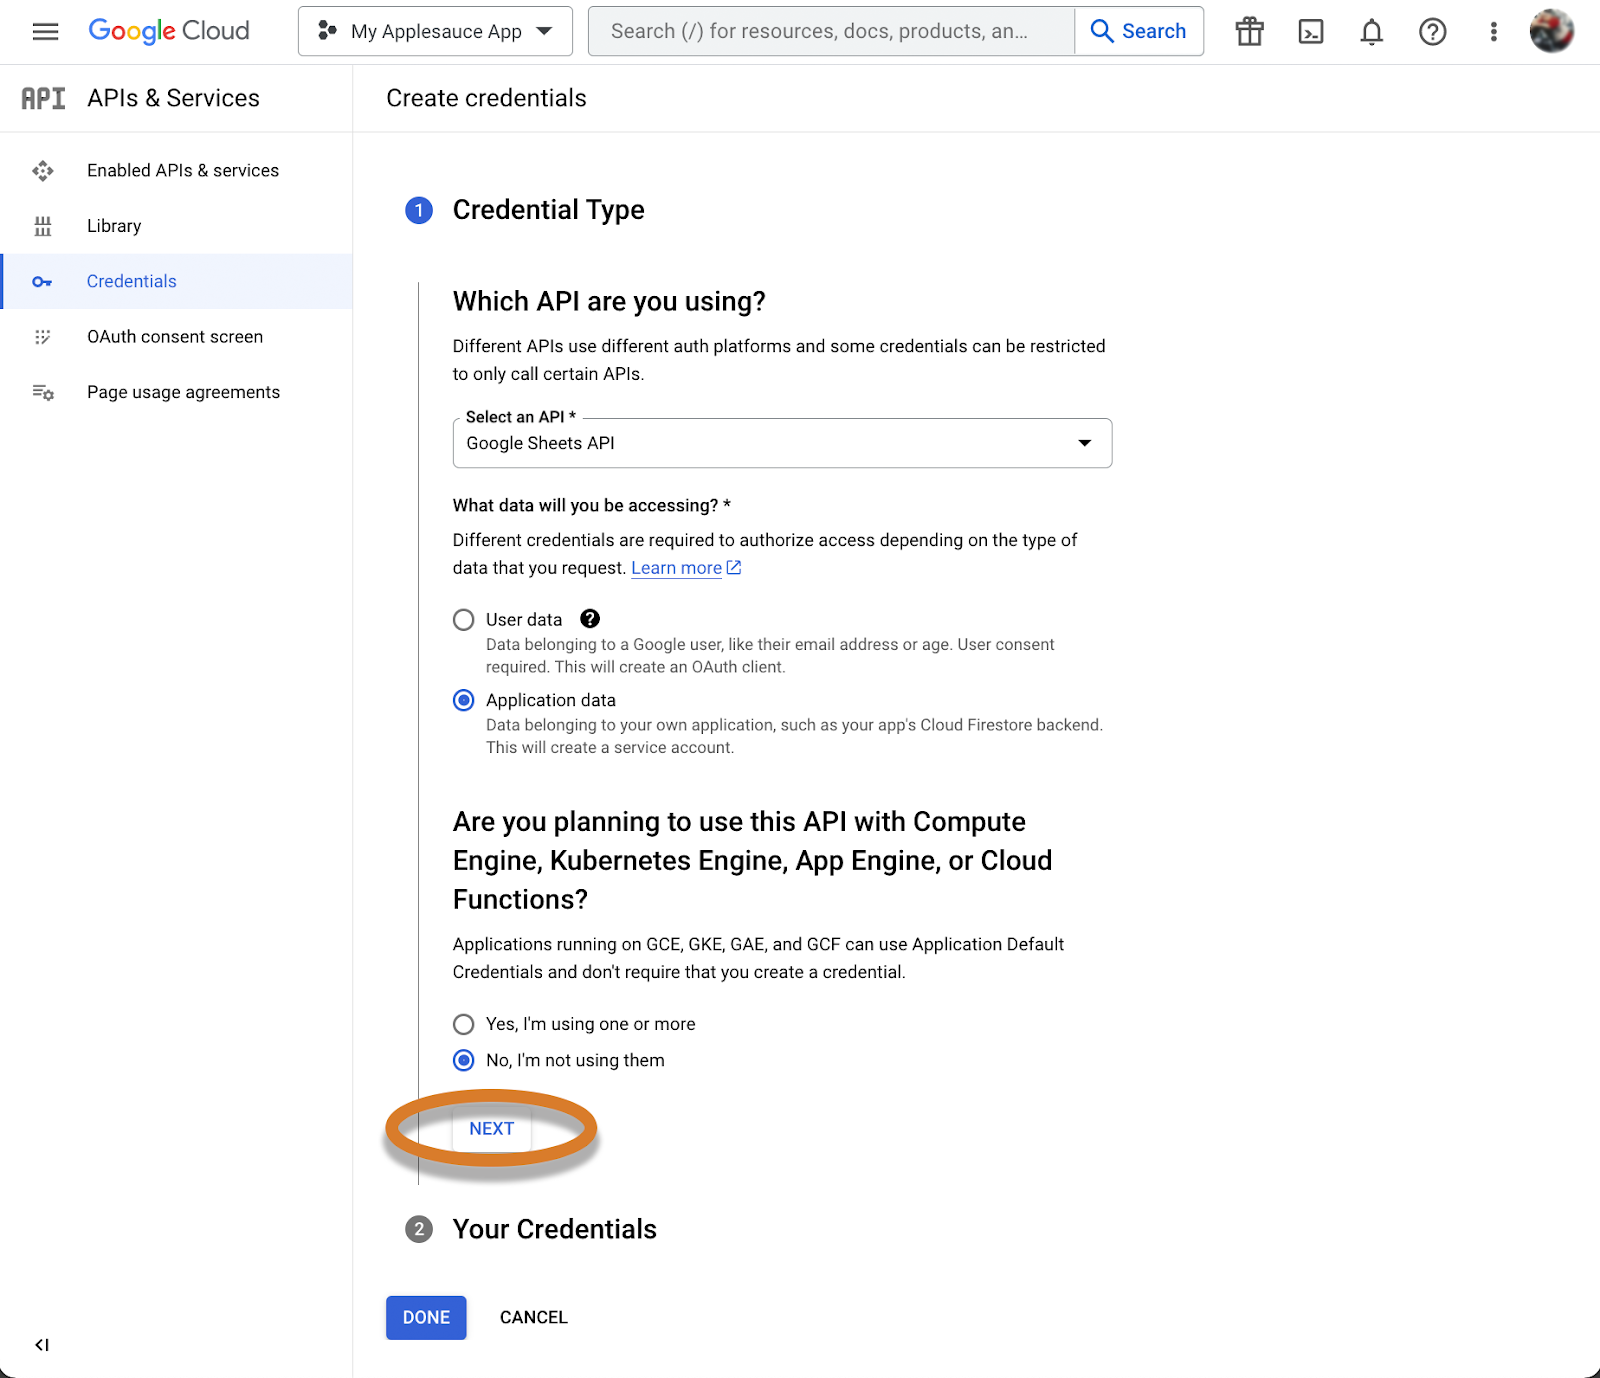
- A guide will ask questions about what kind of project you are making. The top menu under “Which API are you using?” should say “Google Sheets API.” If not, make this selection.
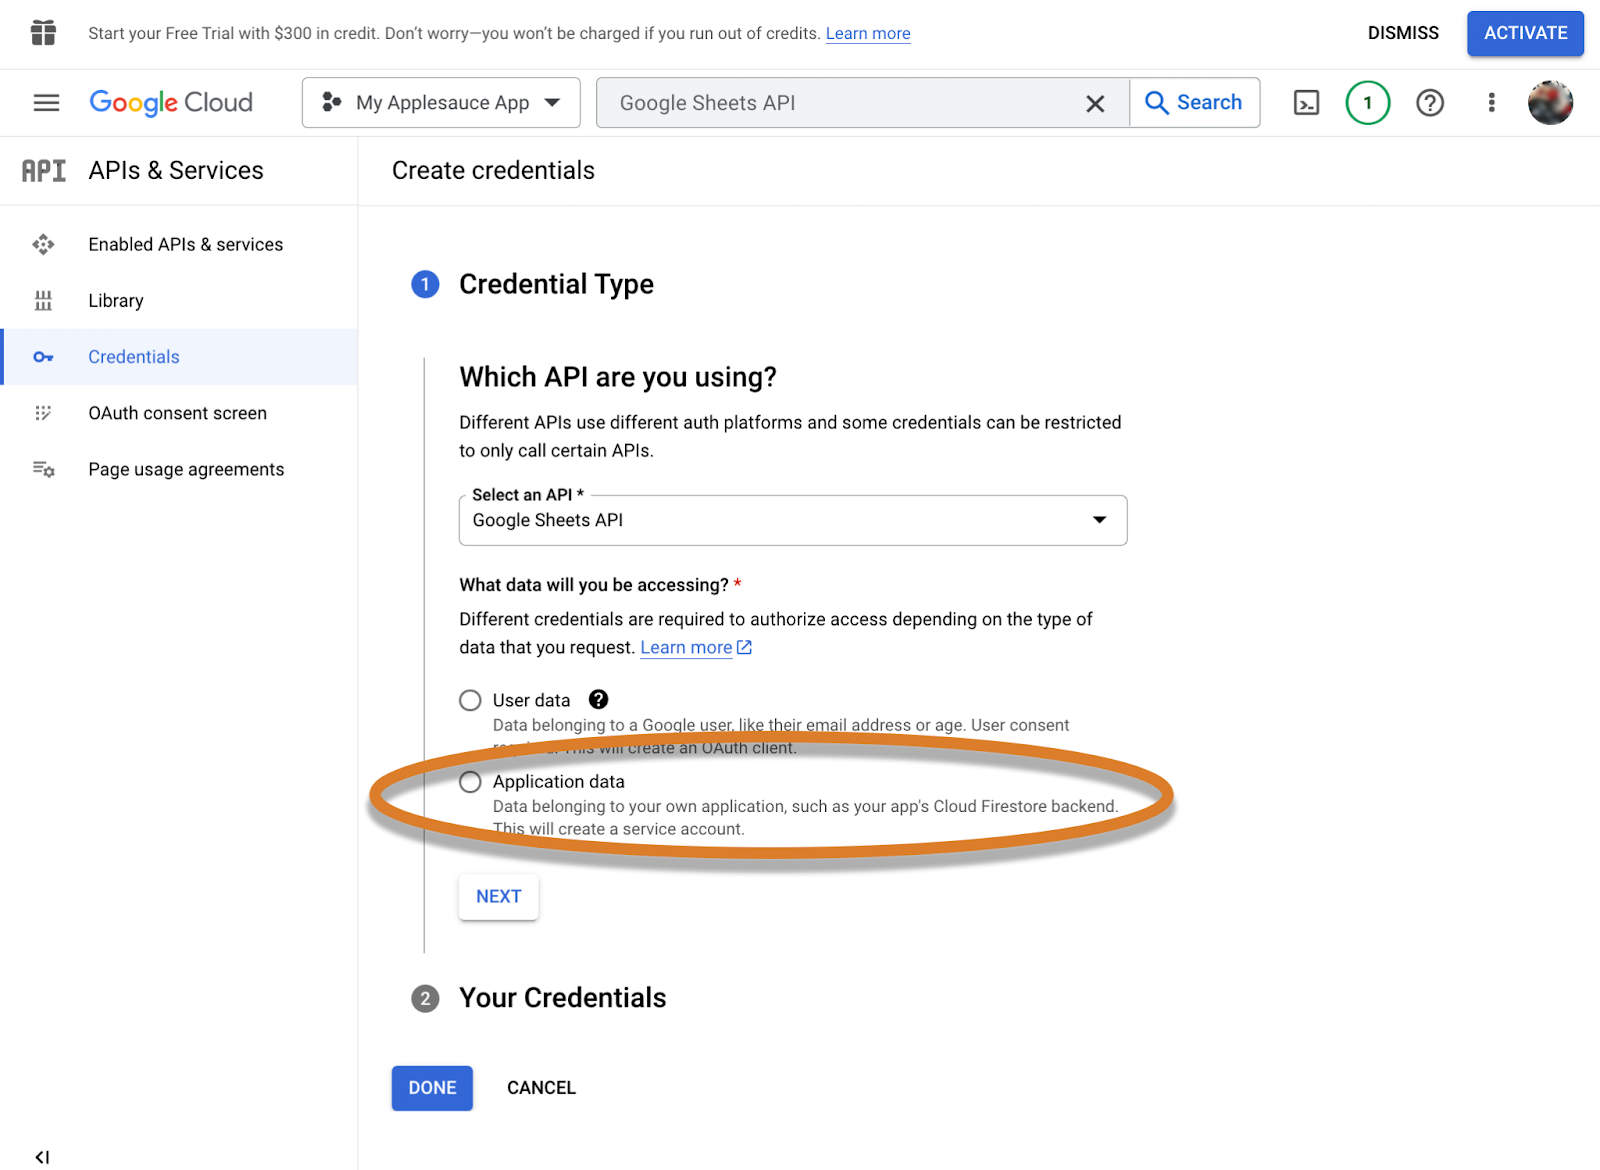
- Under the question, “What data will you be accessing?” select Application data.
- Under the question, “Are you planning to use this API with Compute Engine, Kubernetes Engine, App Engine, or Cloud Functions?” select “No, I’m not using them.”
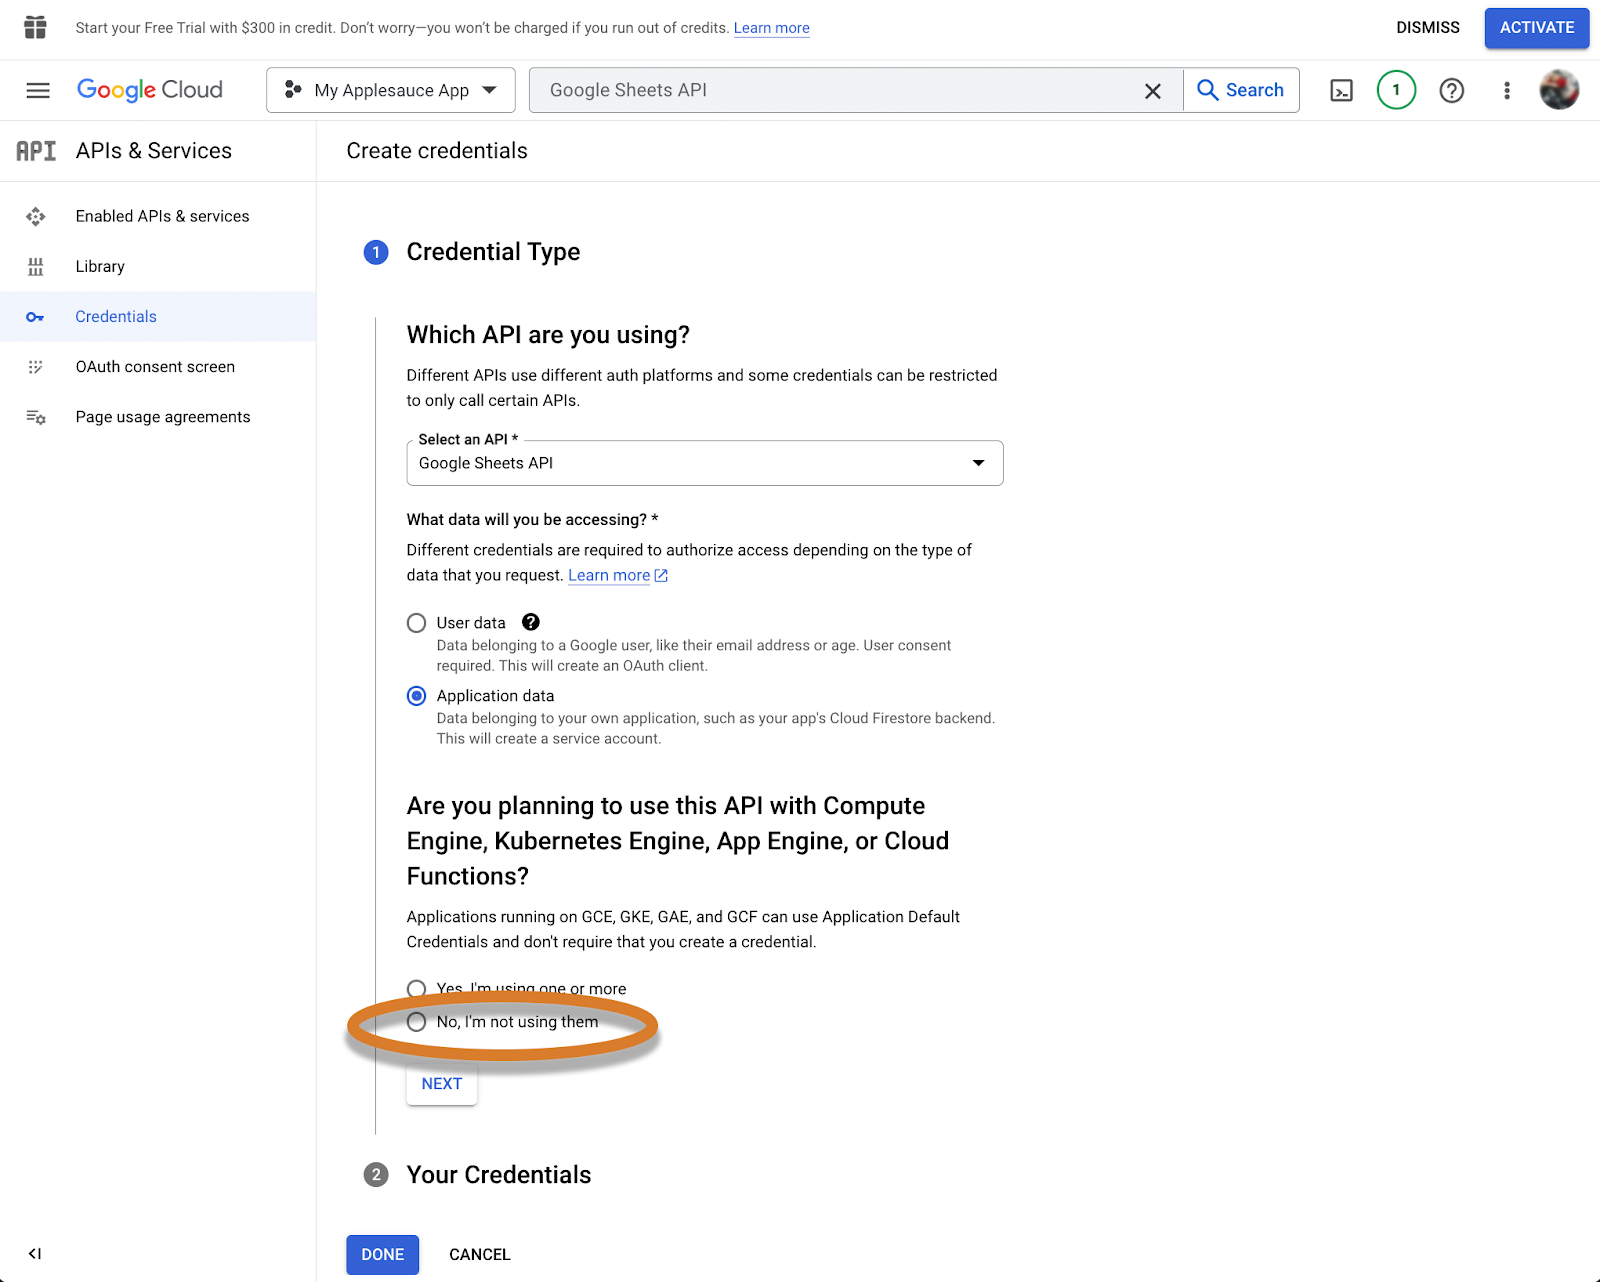
- Click NEXT.
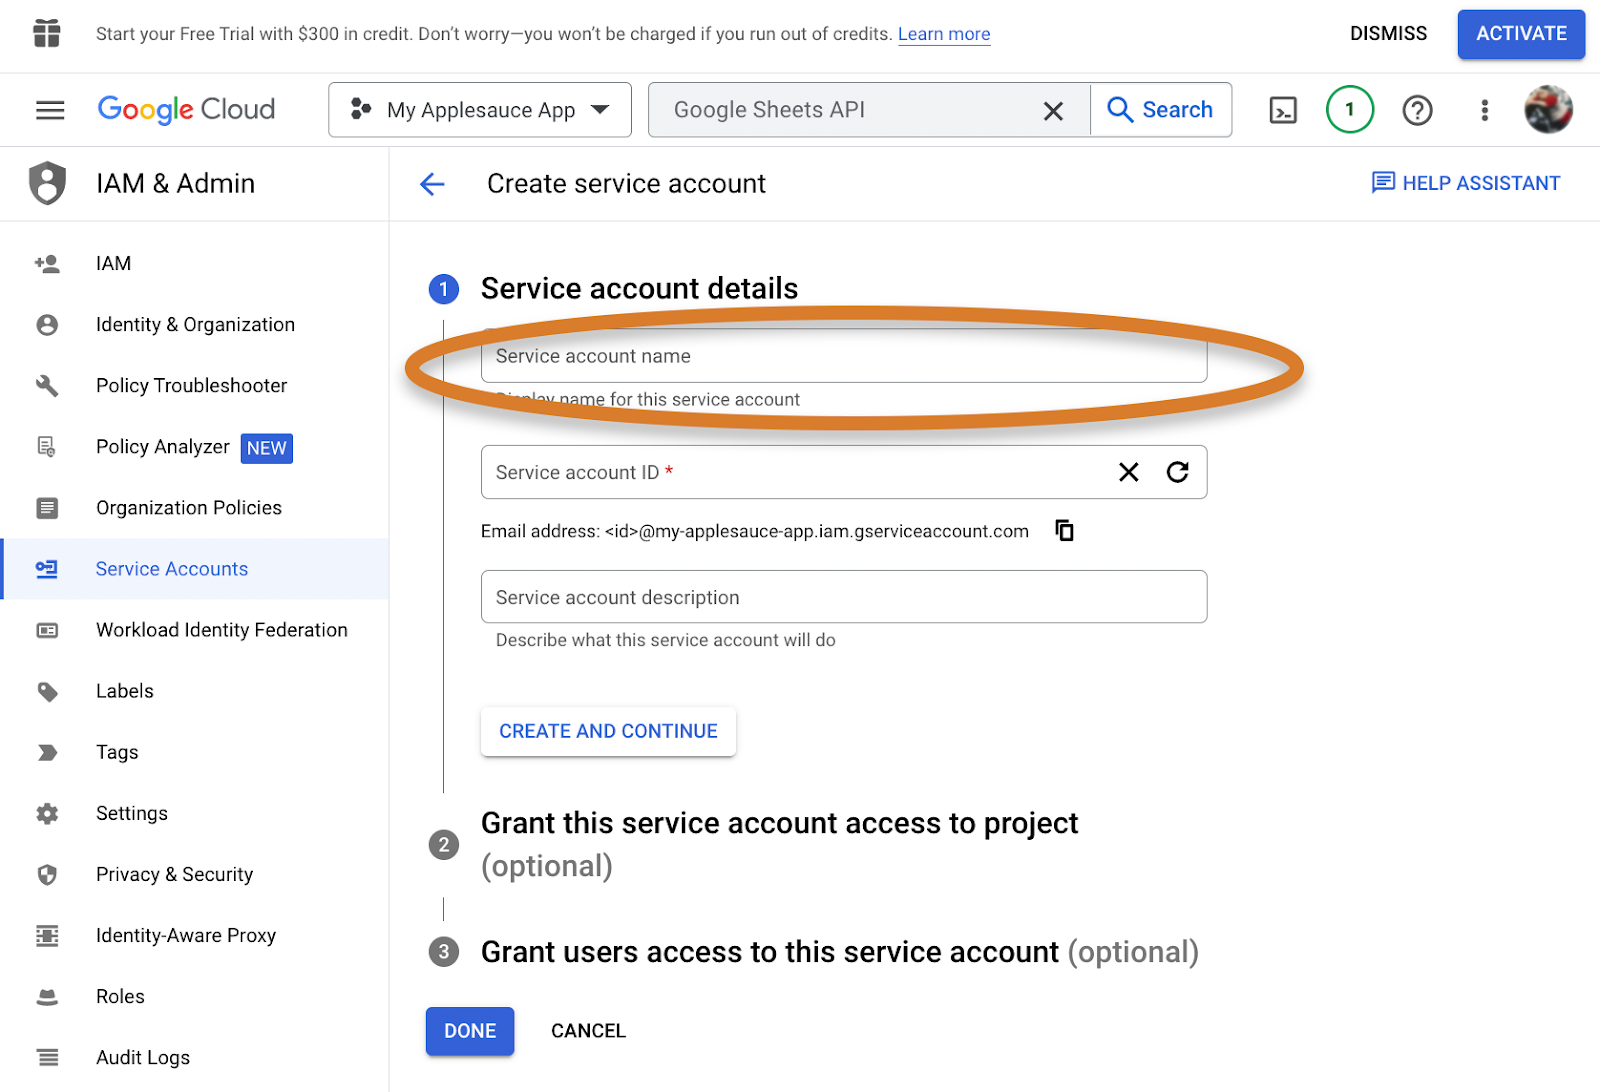
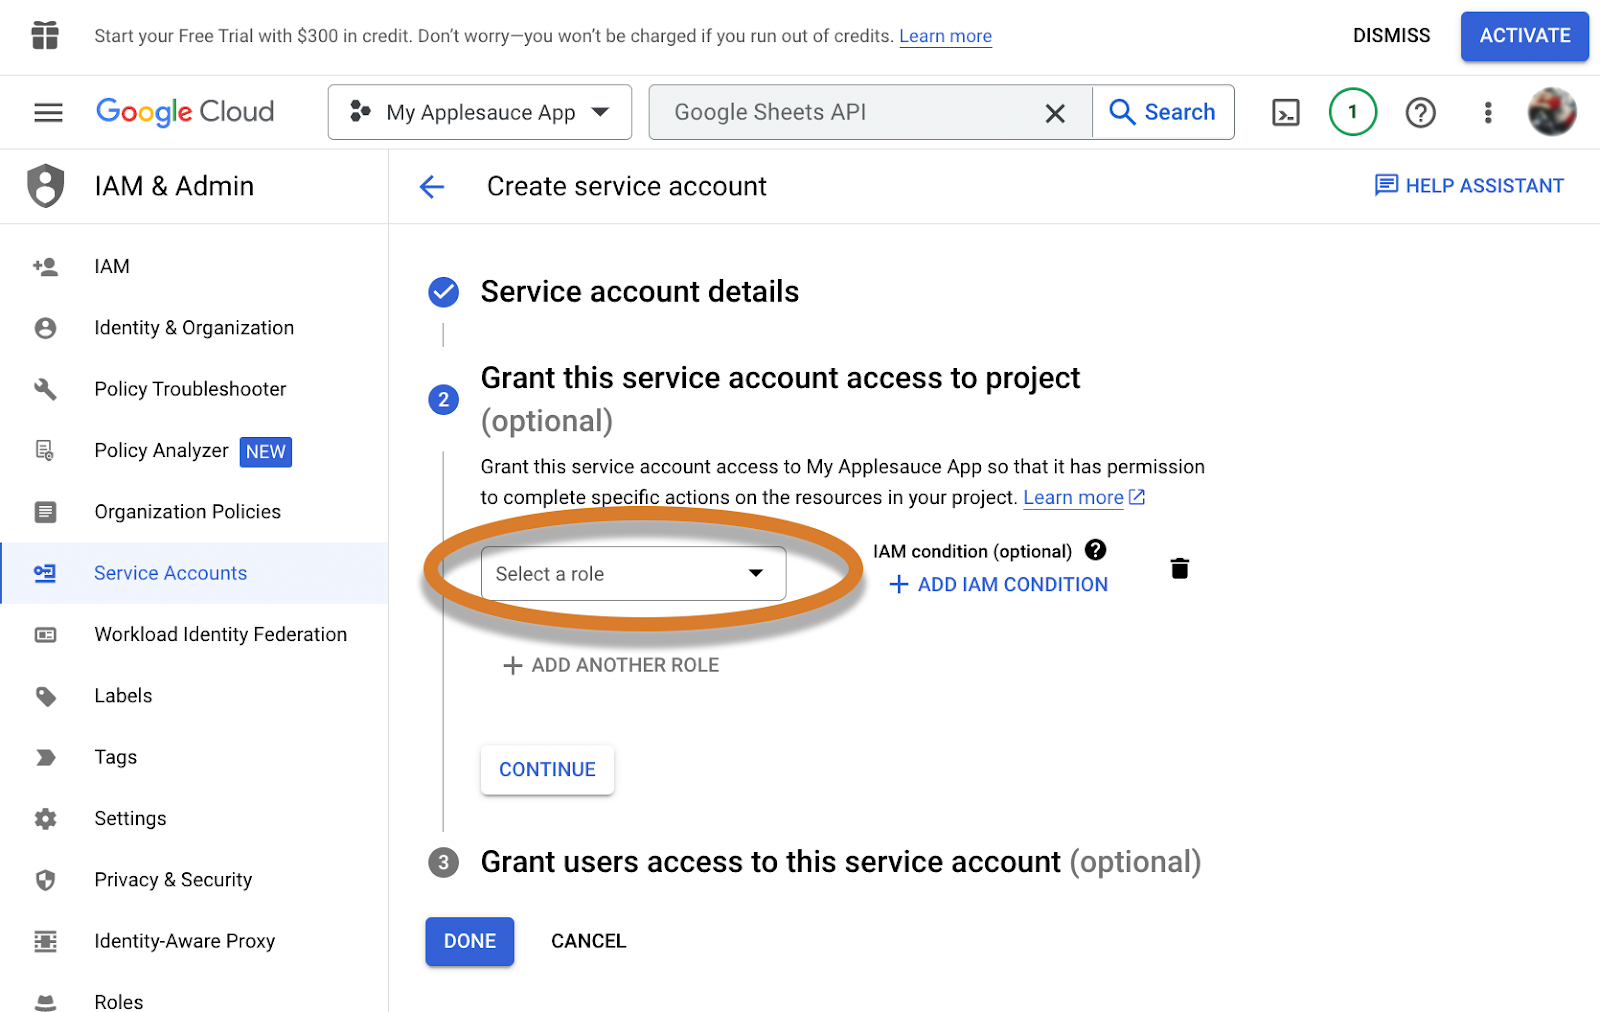
- You should see the screen for creating a service account:
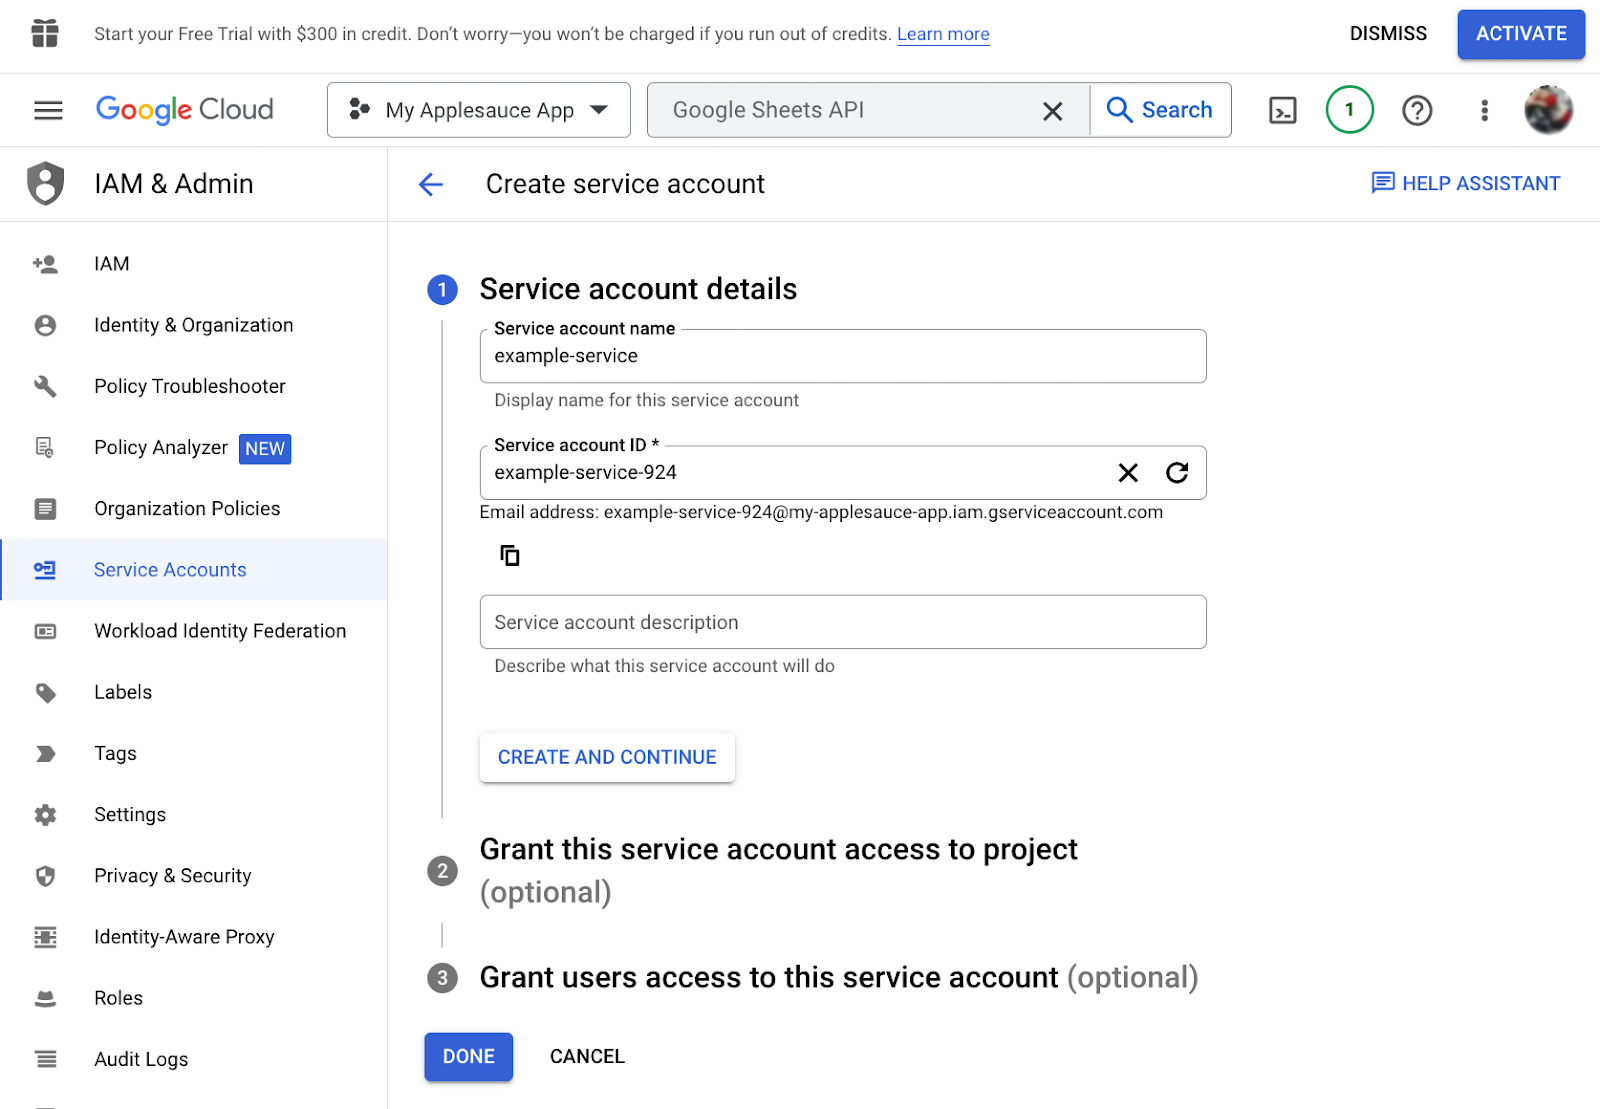
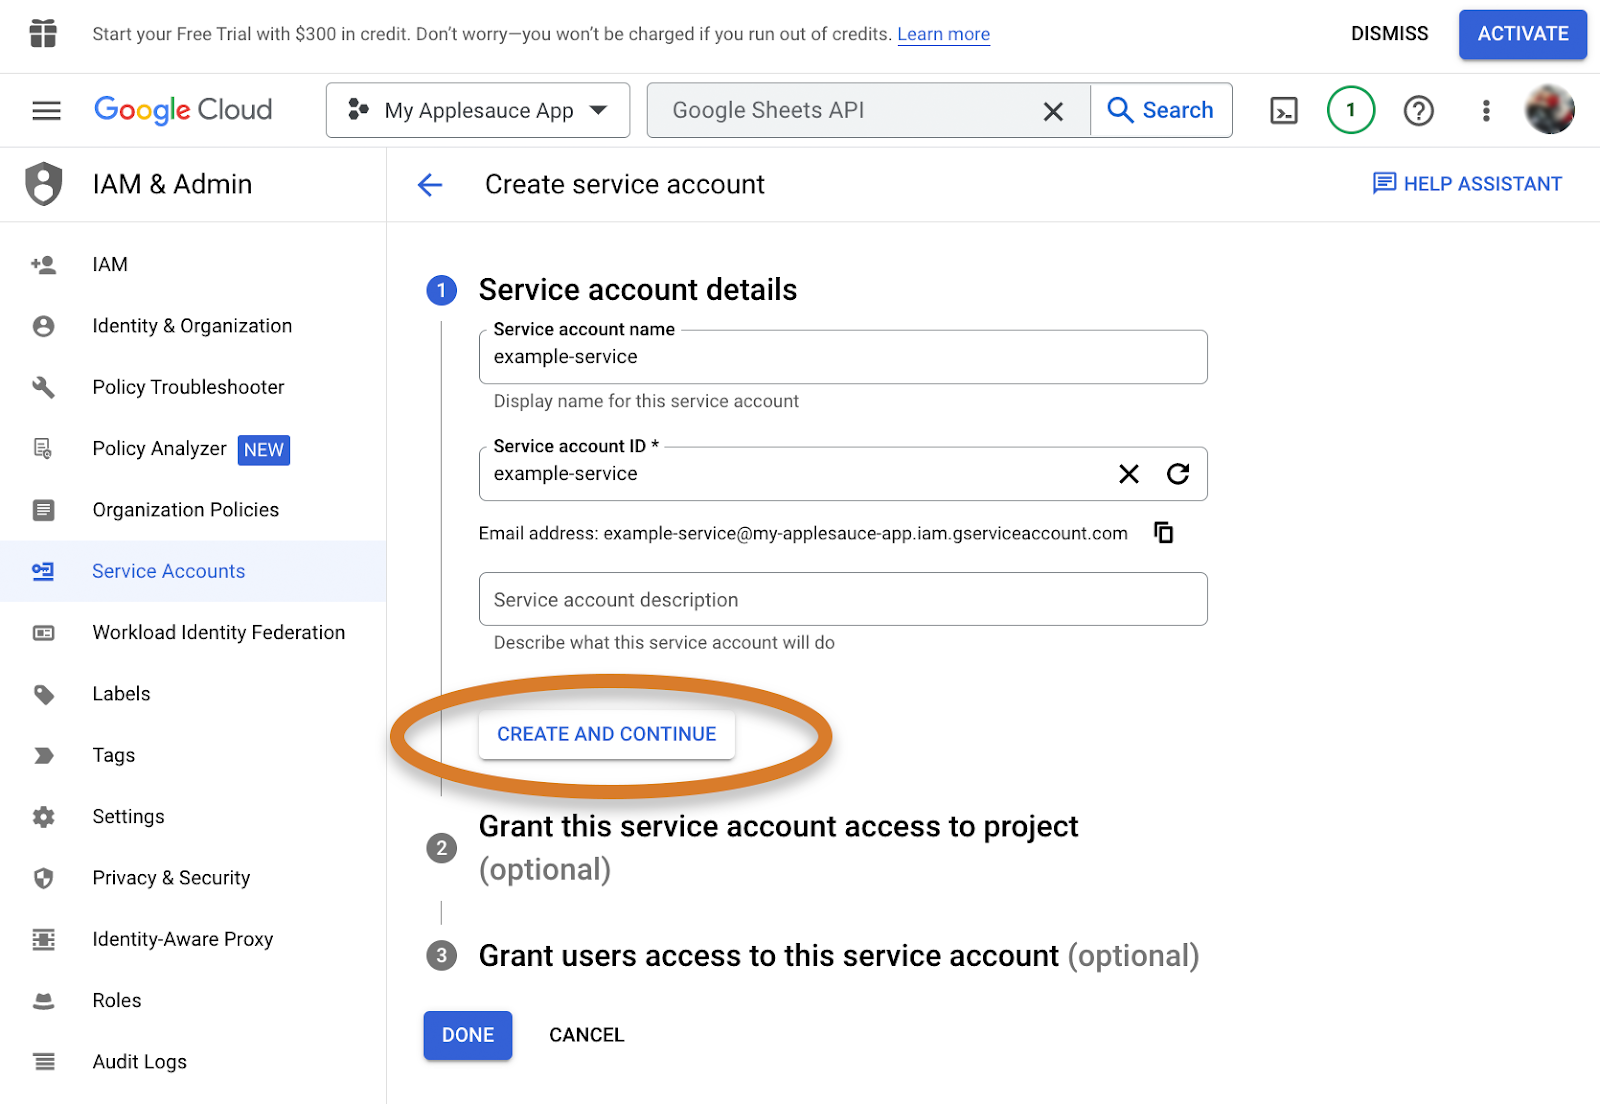
- Fill in the name of the service account. The name does not matter. For this guide, we will name it “example-service”
- Click CREATE AND CONTINUE
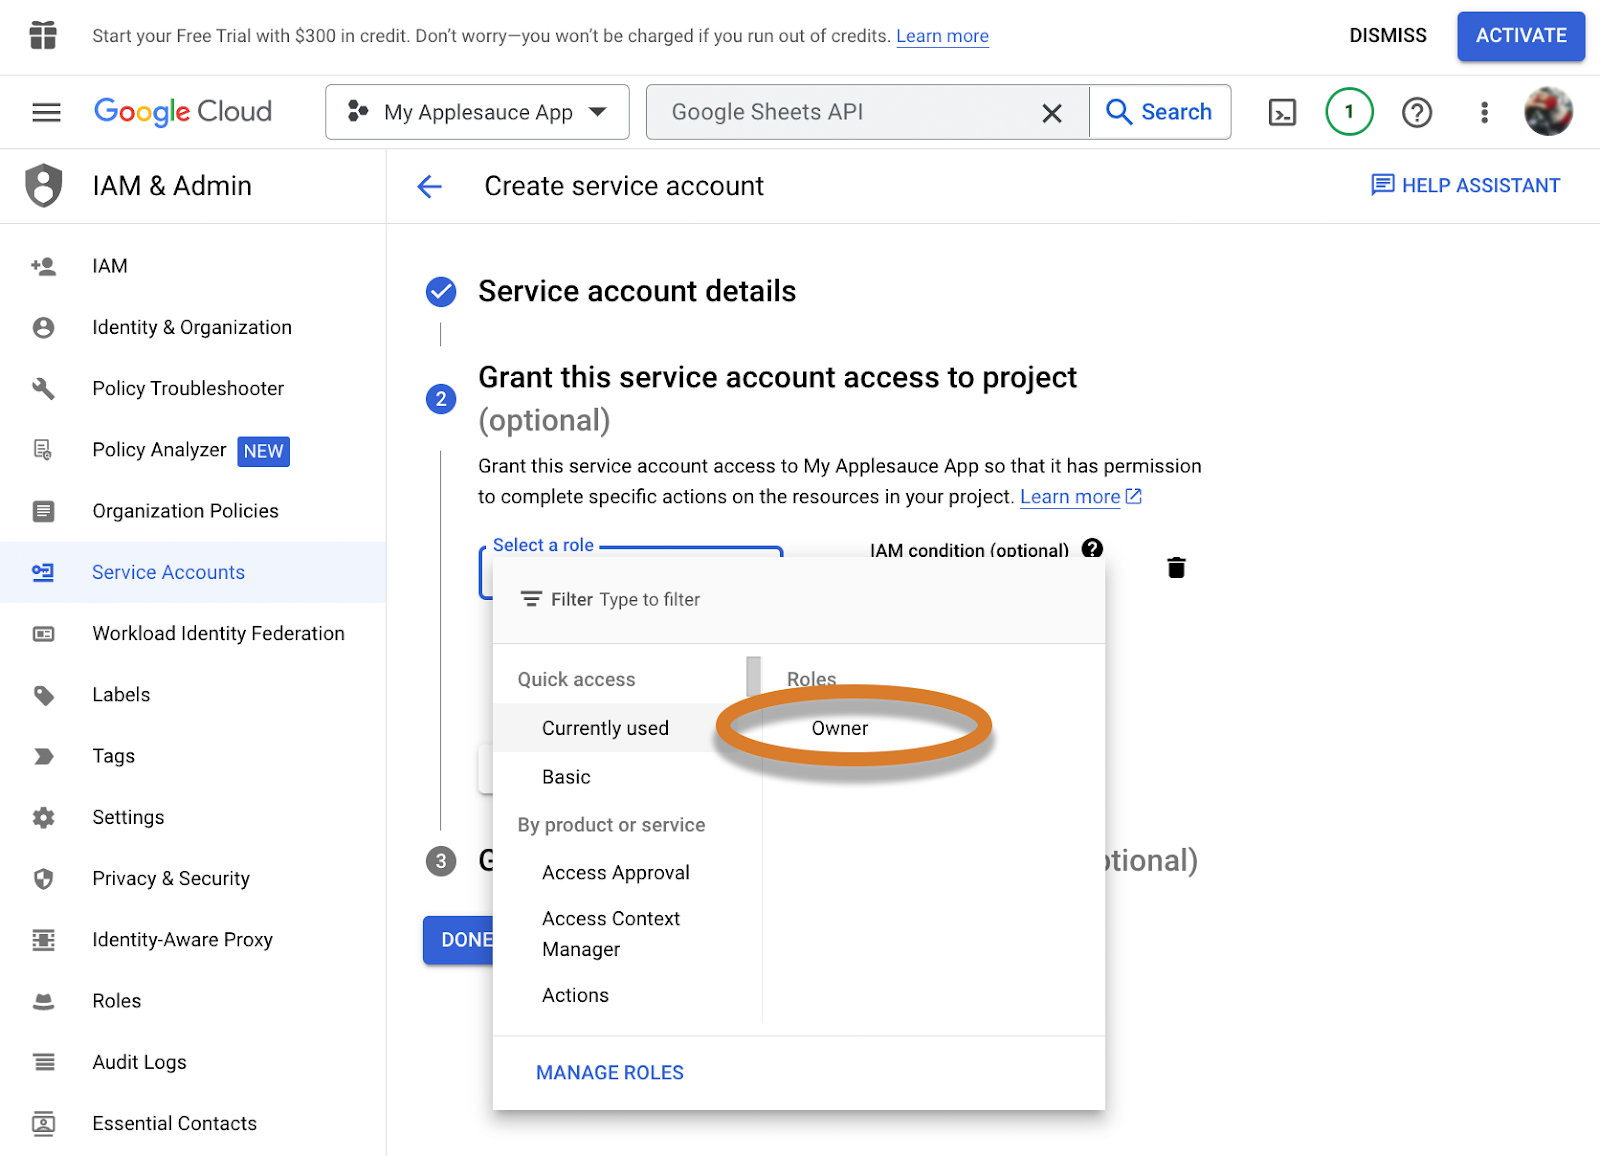
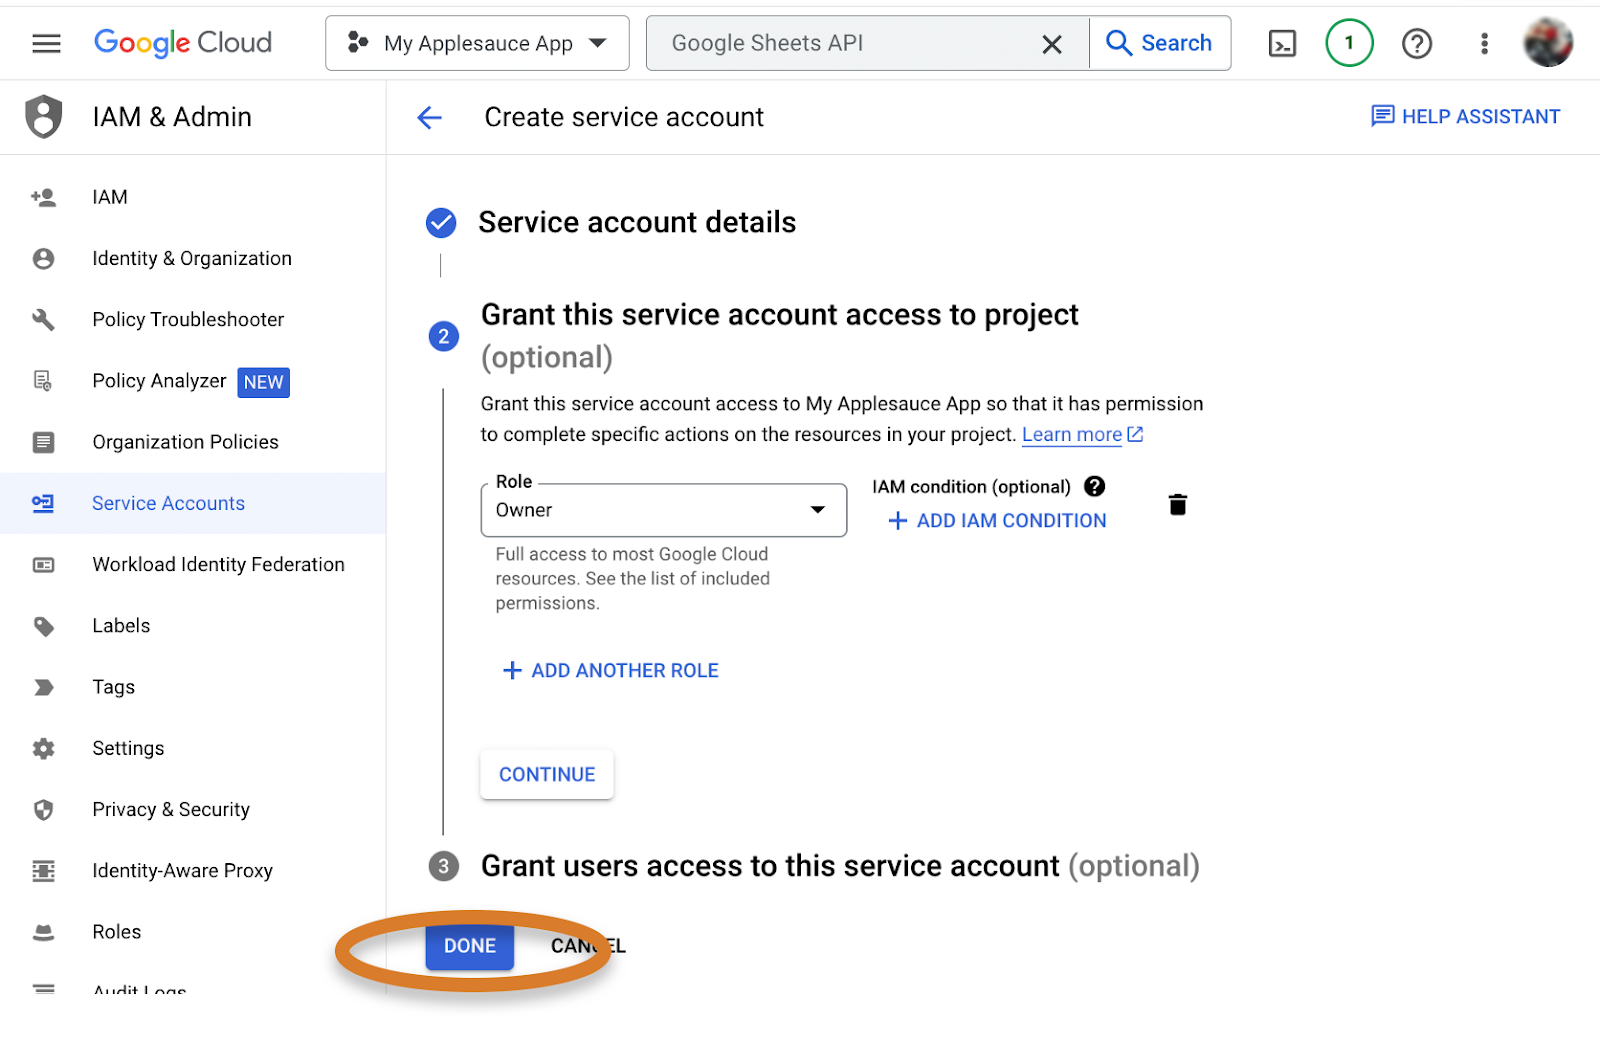
- In the “Select a Role” dropdown menu, select “Owner” to give this service account enough permissions. (If you return to the menu later, it provides even more options under “Owner,” but you can ignore them.)
- Press DONE. (Ignore “3 Grant Users Access to this Service”.)
- Download a key from your service account (and keep it safe!).
- A key is like a password that you can use to give your app access to the Google Sheets API. You will use the key in App Inventor when making your app. (The property in App Inventor is CredentialsJSON.)
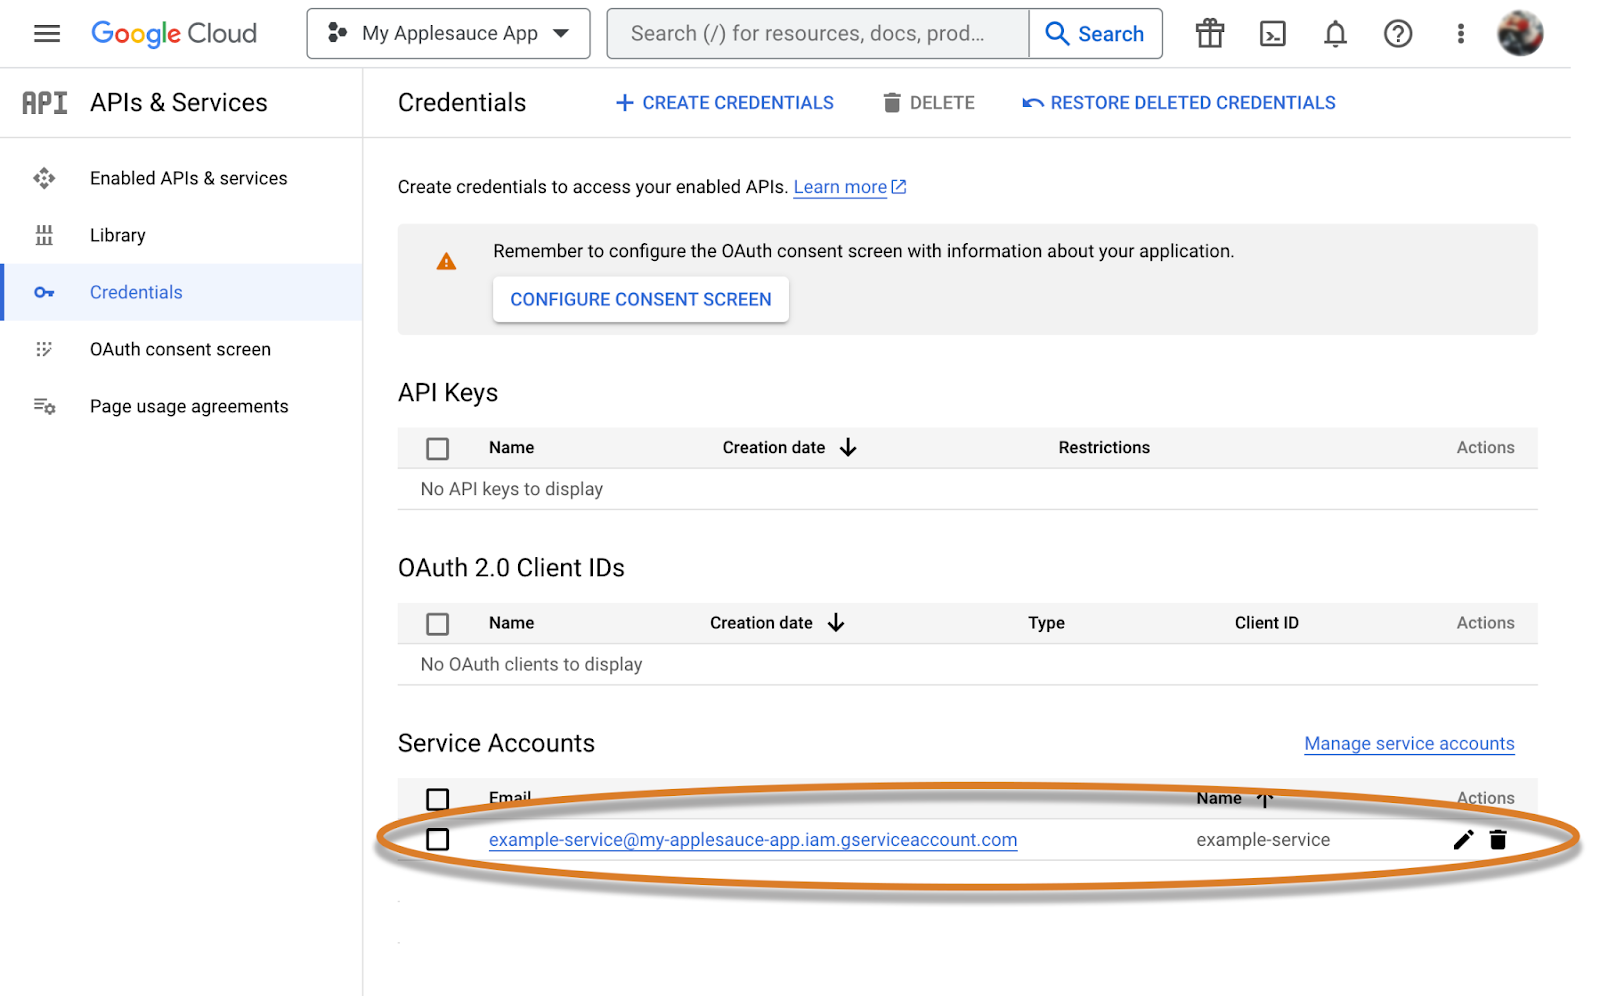
- You may be on one of the following pages depending on your account. Click on the Credentials option to get to your list of credentials. You may see this page:
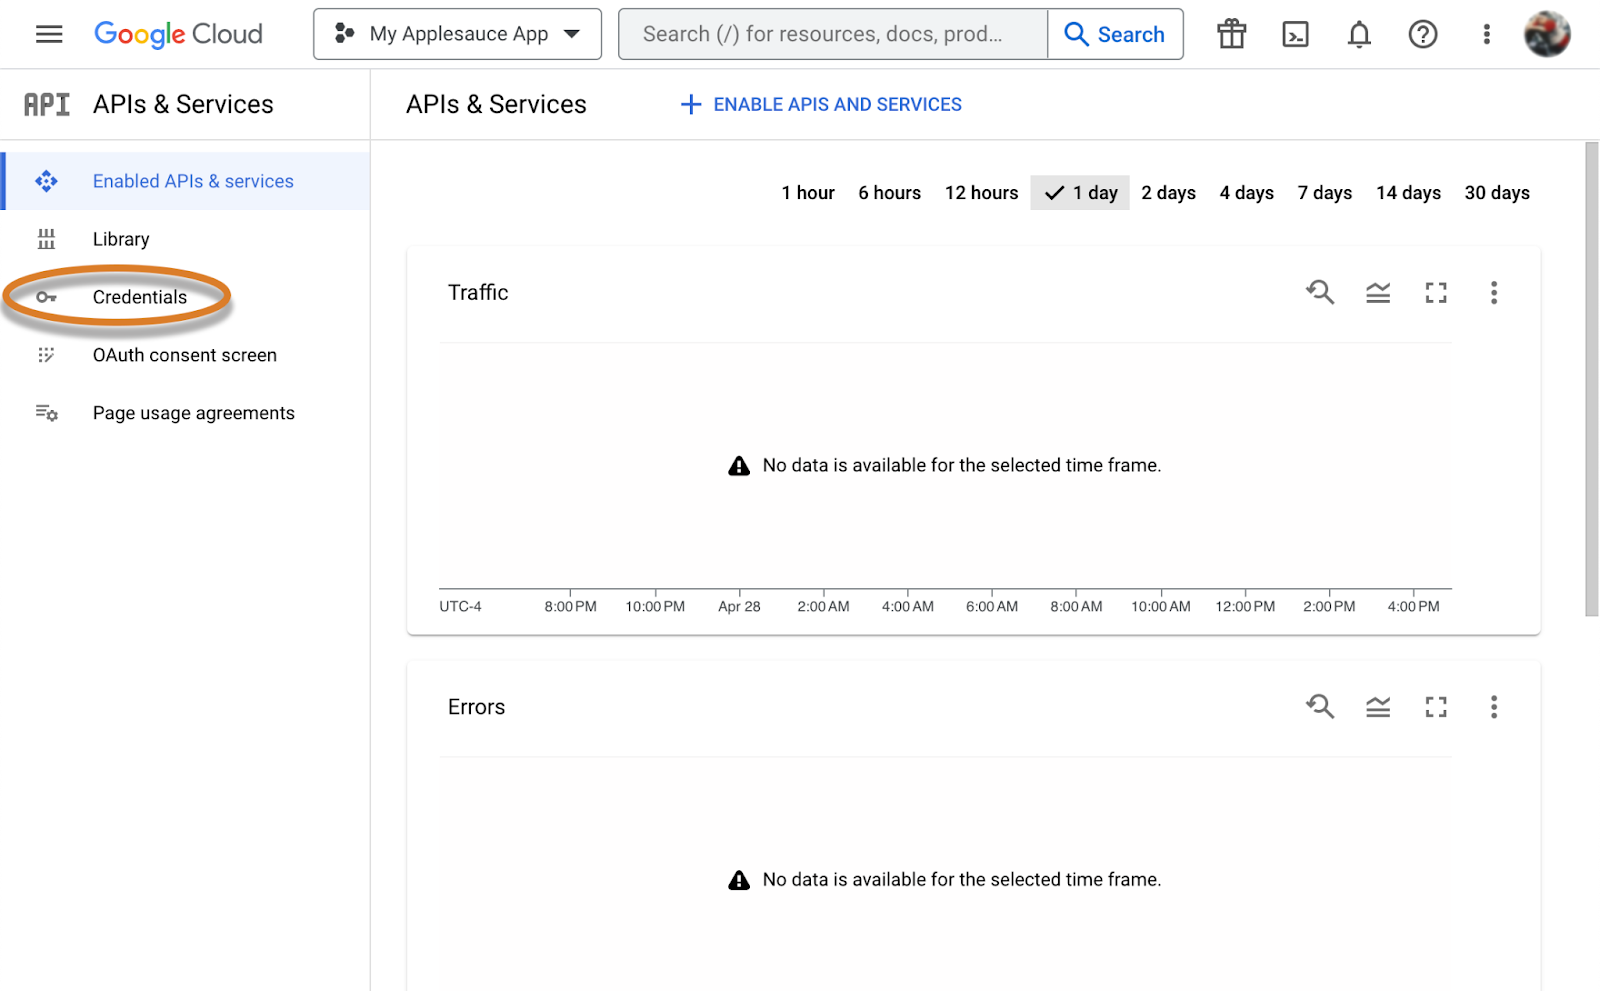
- Or this page:
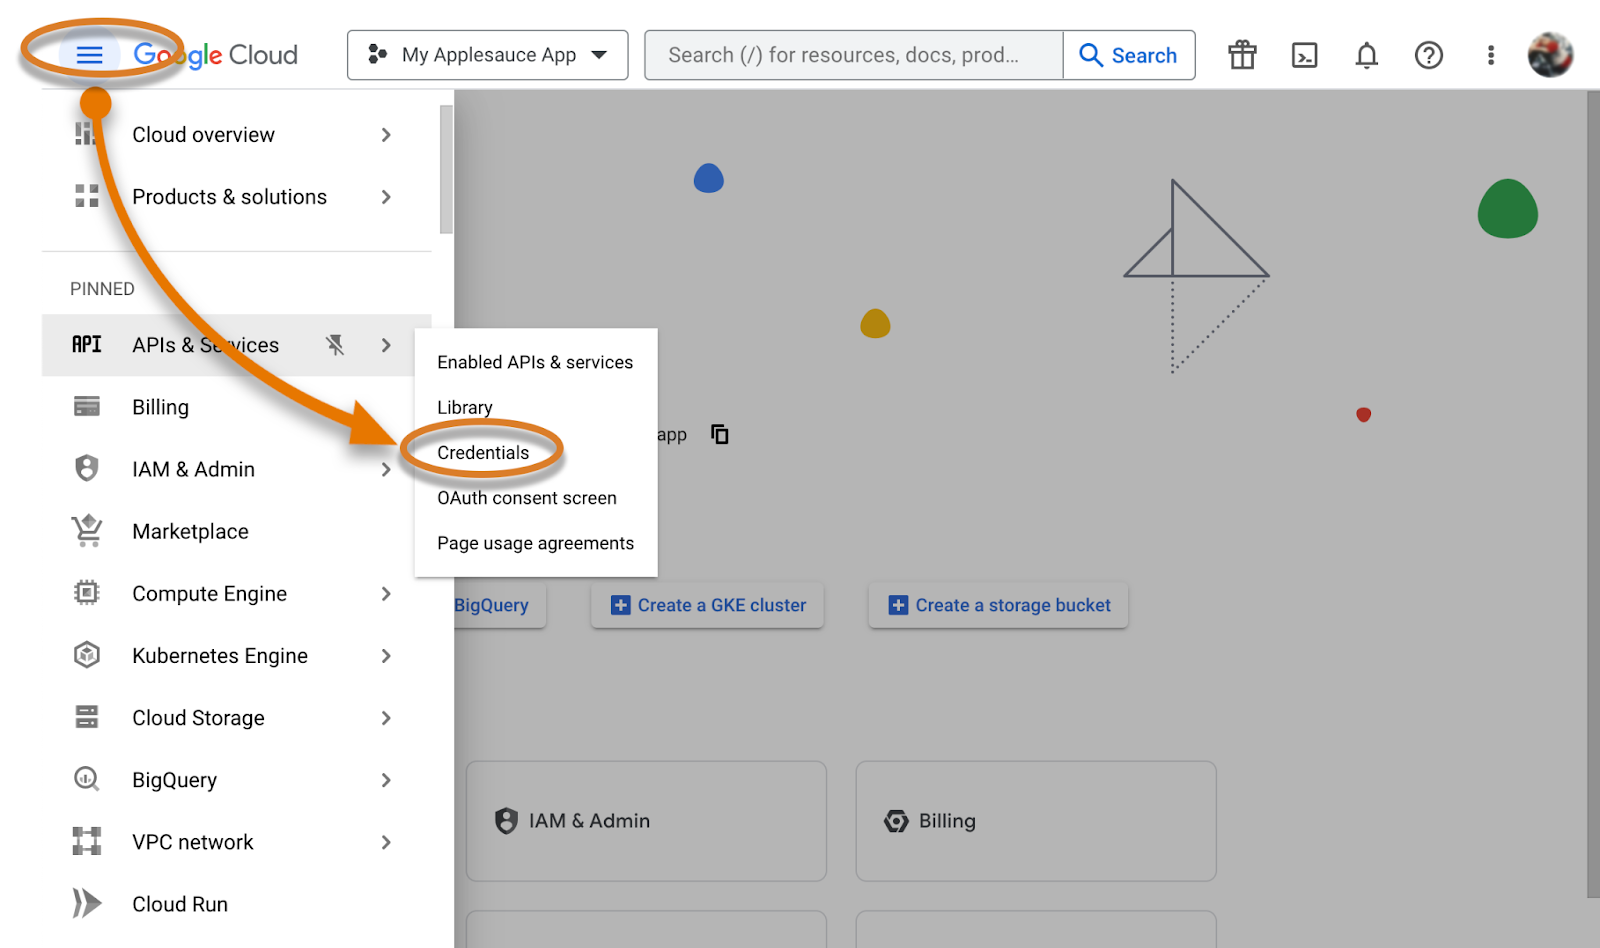
- Once on the Credentials page, click on your Service Account:
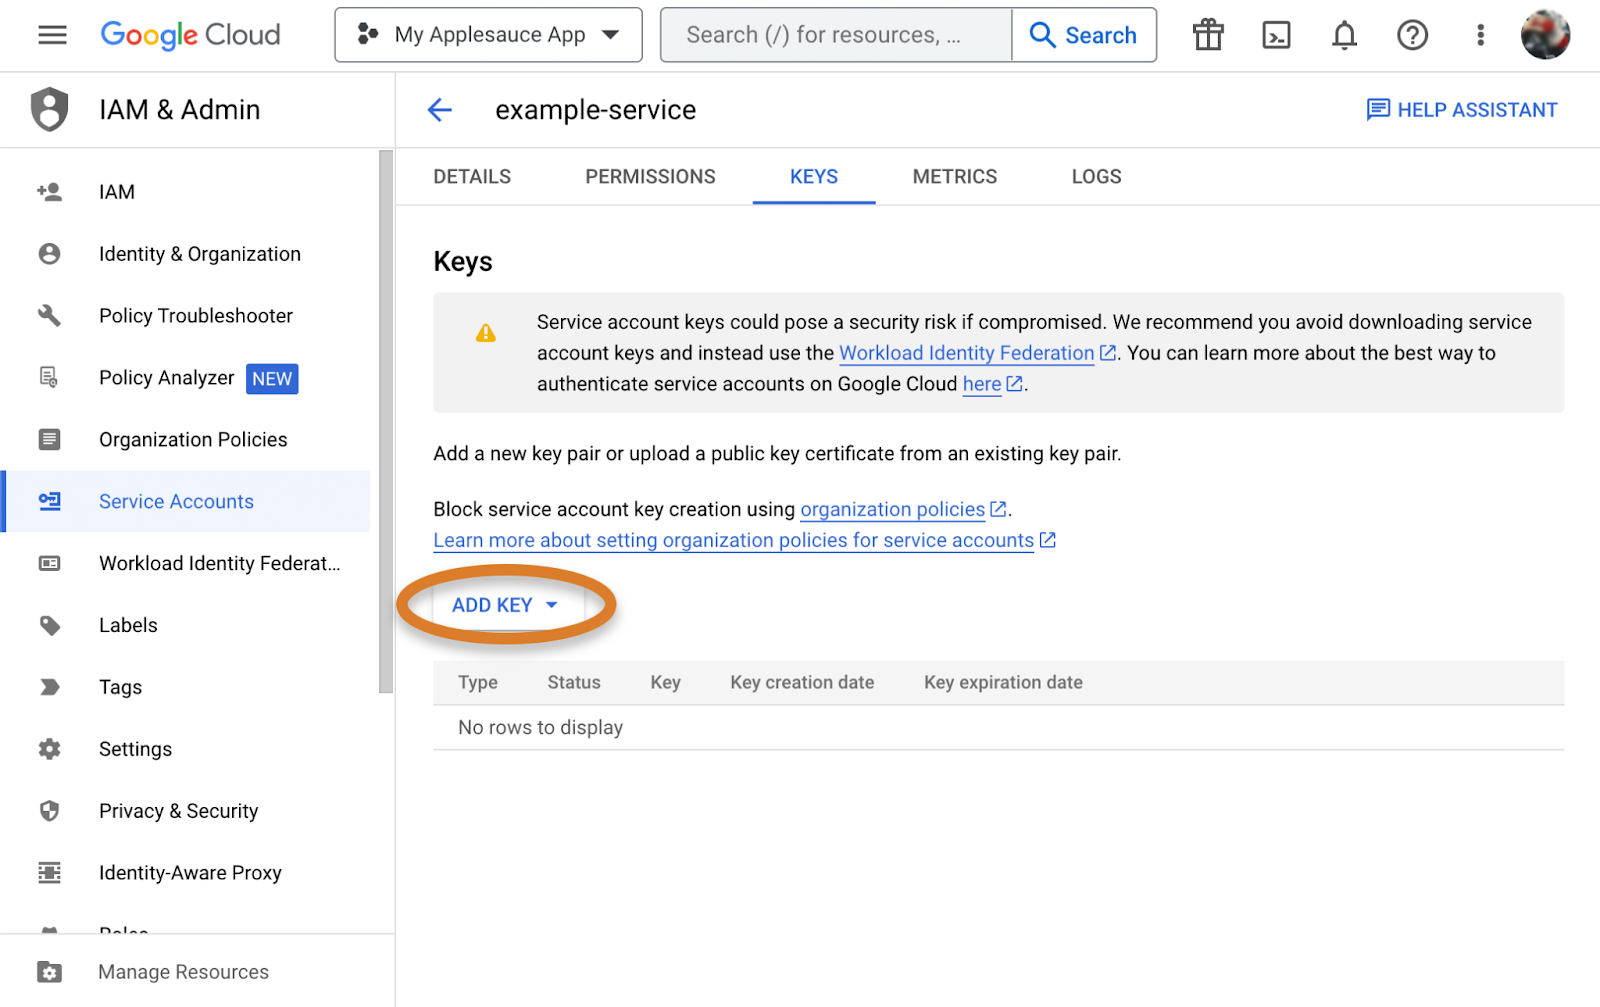
- Click on KEYS.
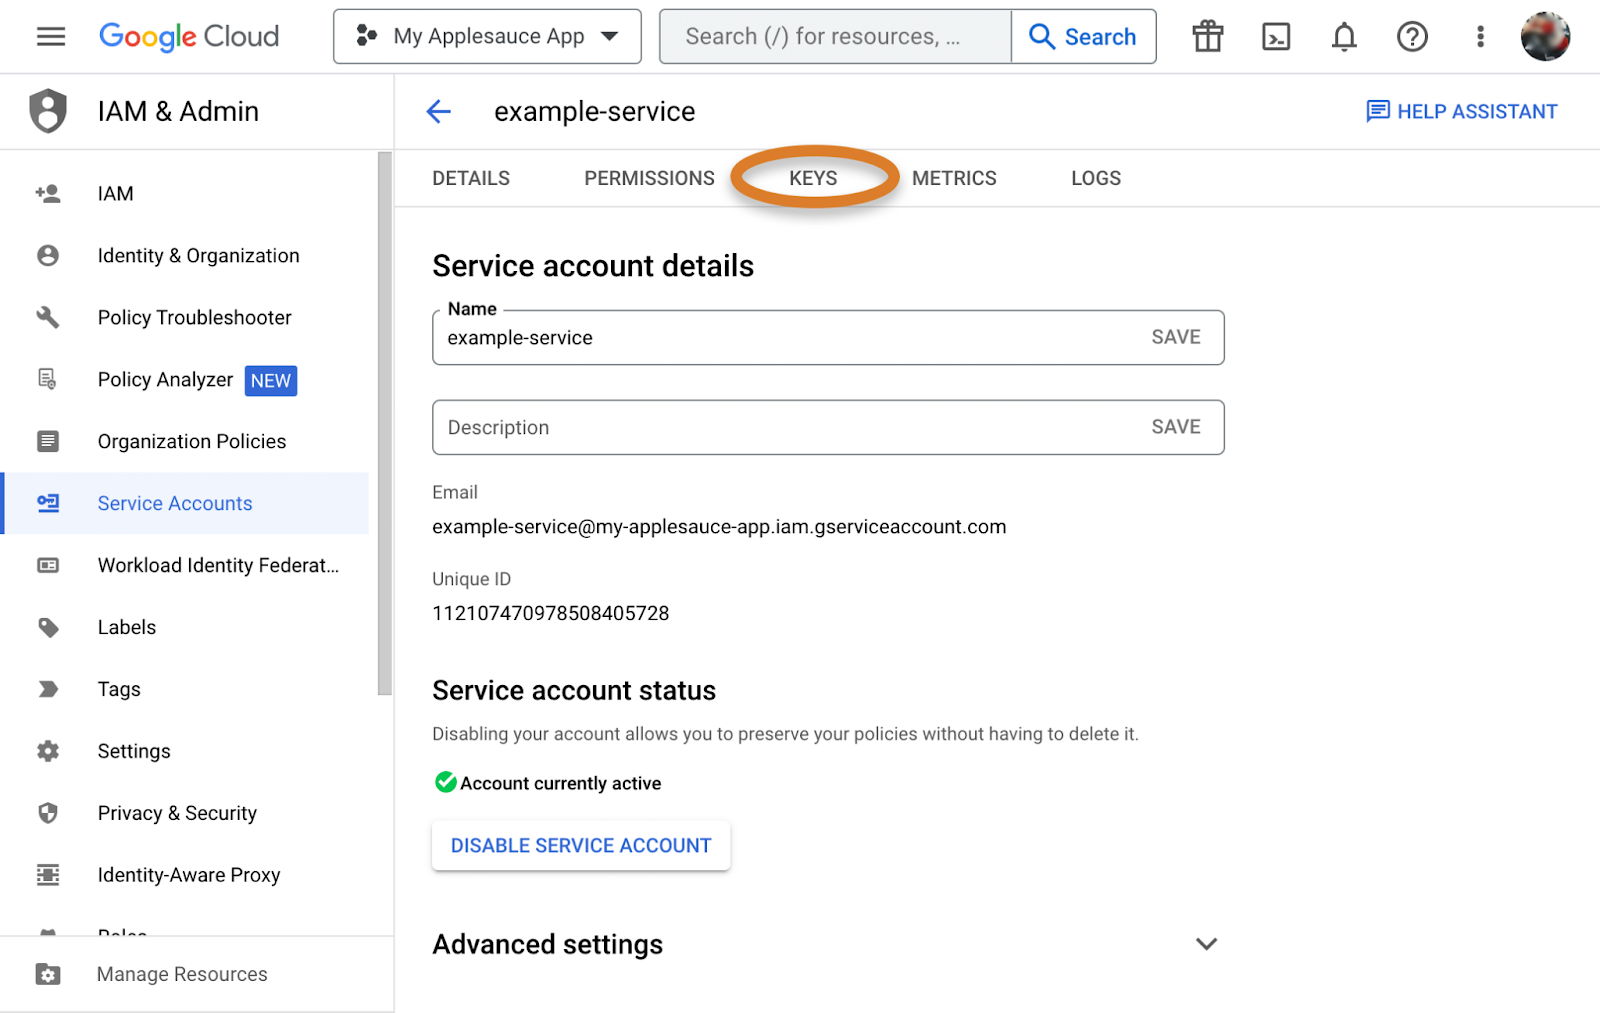
- Click ADD KEY.
- Under “Key type,” choose JSON. The site will download a file to your computer containing a long password. The file format is called JSON (JavaScript Object Notation).
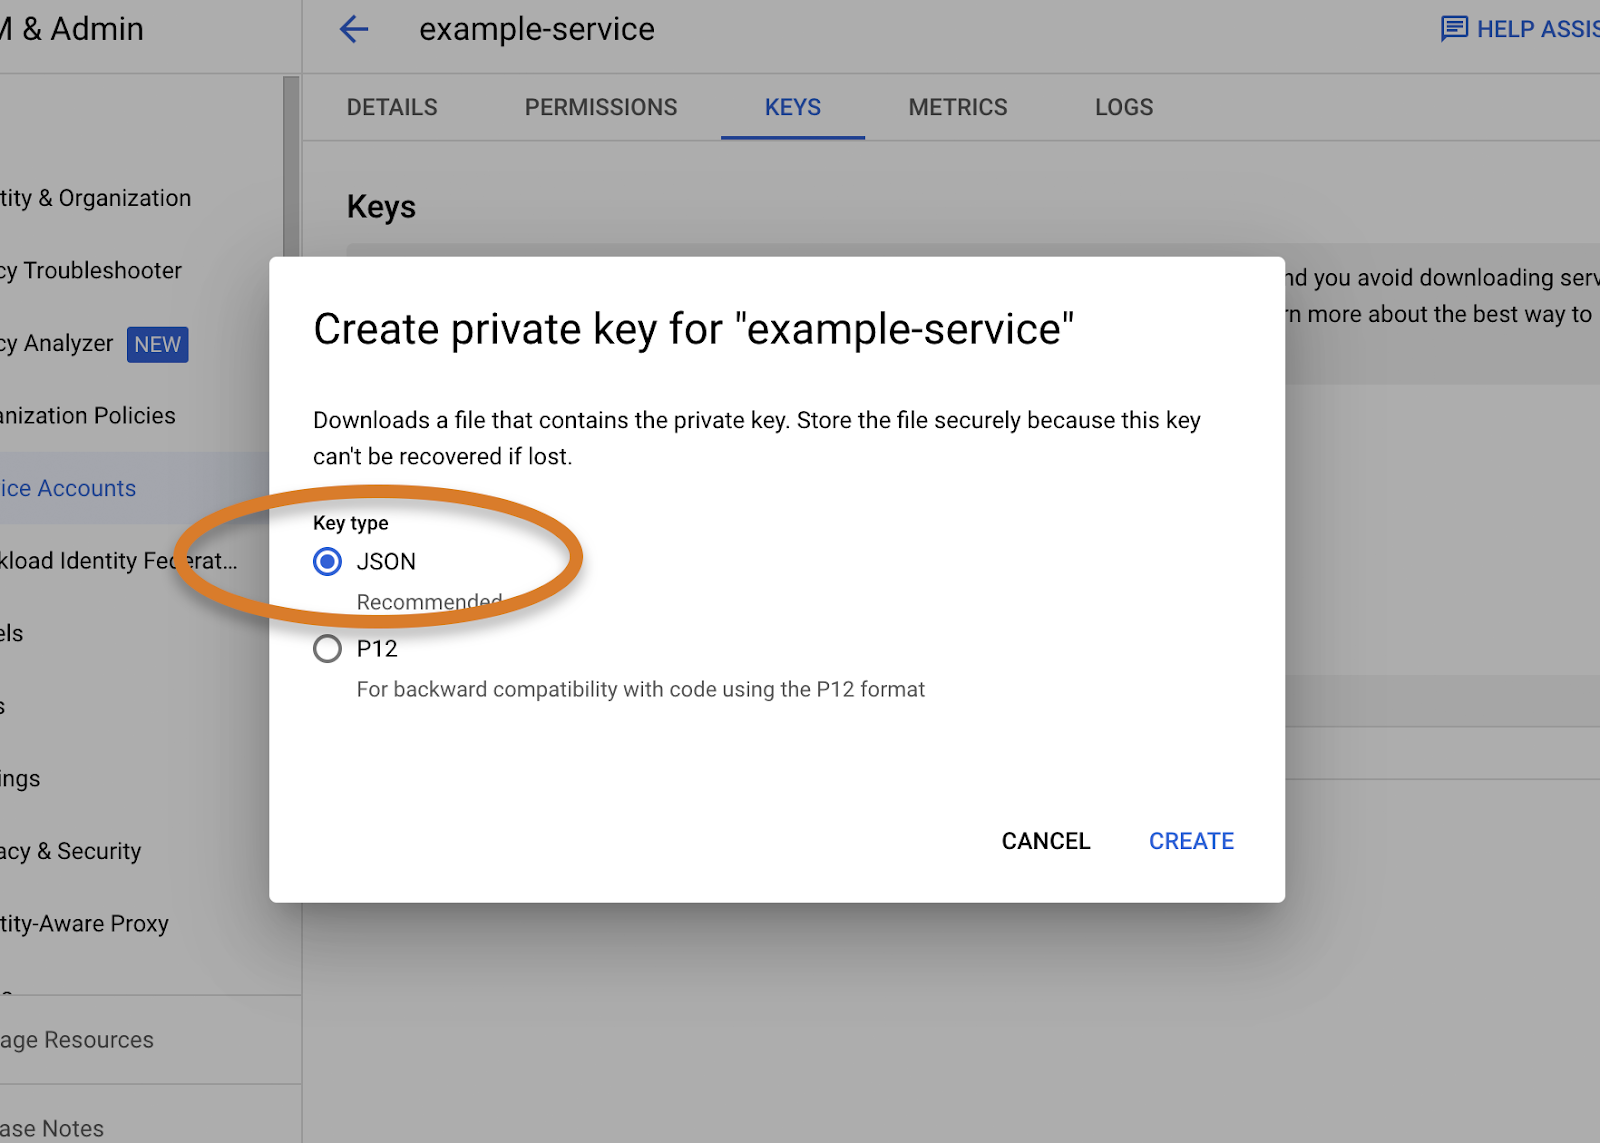
- Keep this JSON file safe! Move this file to an easy-to-remember place on your computer. When using the Spreadsheet component in App Inventor, you will upload this JSON file for the app to work correctly.
- Copy your service account email address.
- Copy the email address associated with your service account. You will use this address when working with Google Sheets and your app.
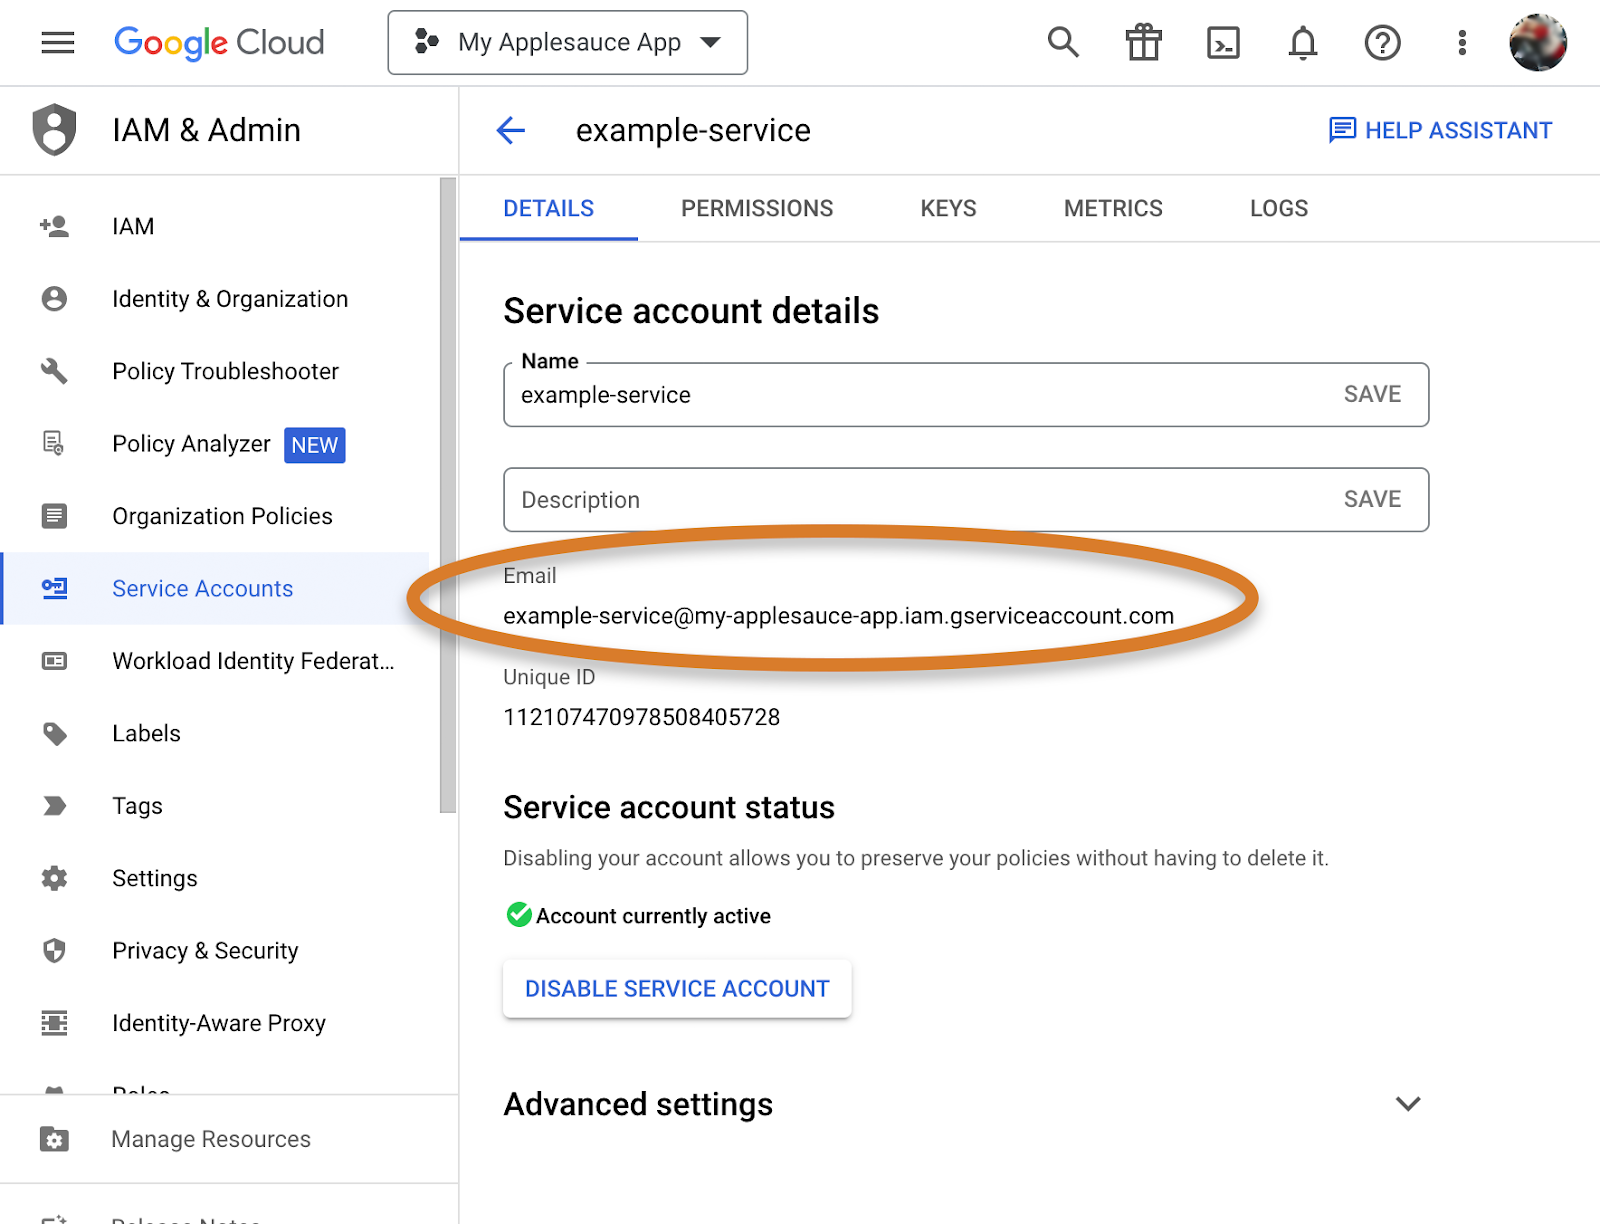
- Make sure to save the complete email address.
- Paste the address somewhere on your phone or computer to find it later. (If you lose it, you can always log back into your developer console to copy it again.)
- Use your new credential in your app!
-
Add your new credential to the app.
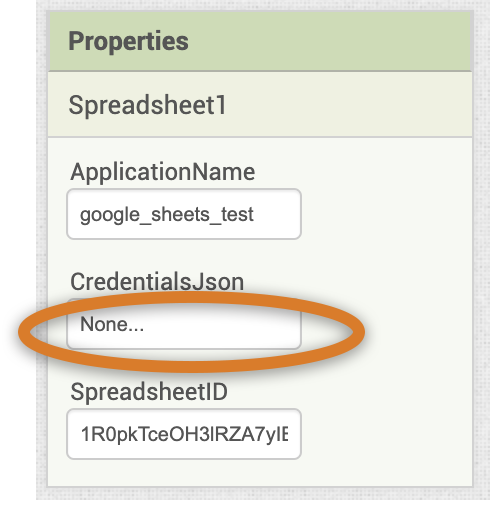
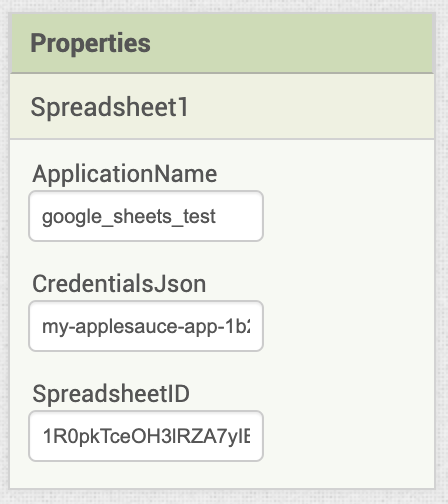
- In Designer, select a Spreadsheet component and look at the CredentialsJson property
- In Designer, select a Spreadsheet component and look at the CredentialsJson property
-
Is there an existing App Inventor credential (as shown here)? You can delete the App Inventor credential or simply change the credential to your own.

- To add your credential, click on the CredentialsJson box.

- Click on Upload File, find your Google Sheets credential on your hard drive (as described in the “Data in Action: Using Spreadsheets and Charts in MIT App Inventor” guide), and upload it to your app.
-
Here’s how it should look:
-
Add your service account email to a Google Sheets spreadsheet you want to make private (“Restricted”)
-
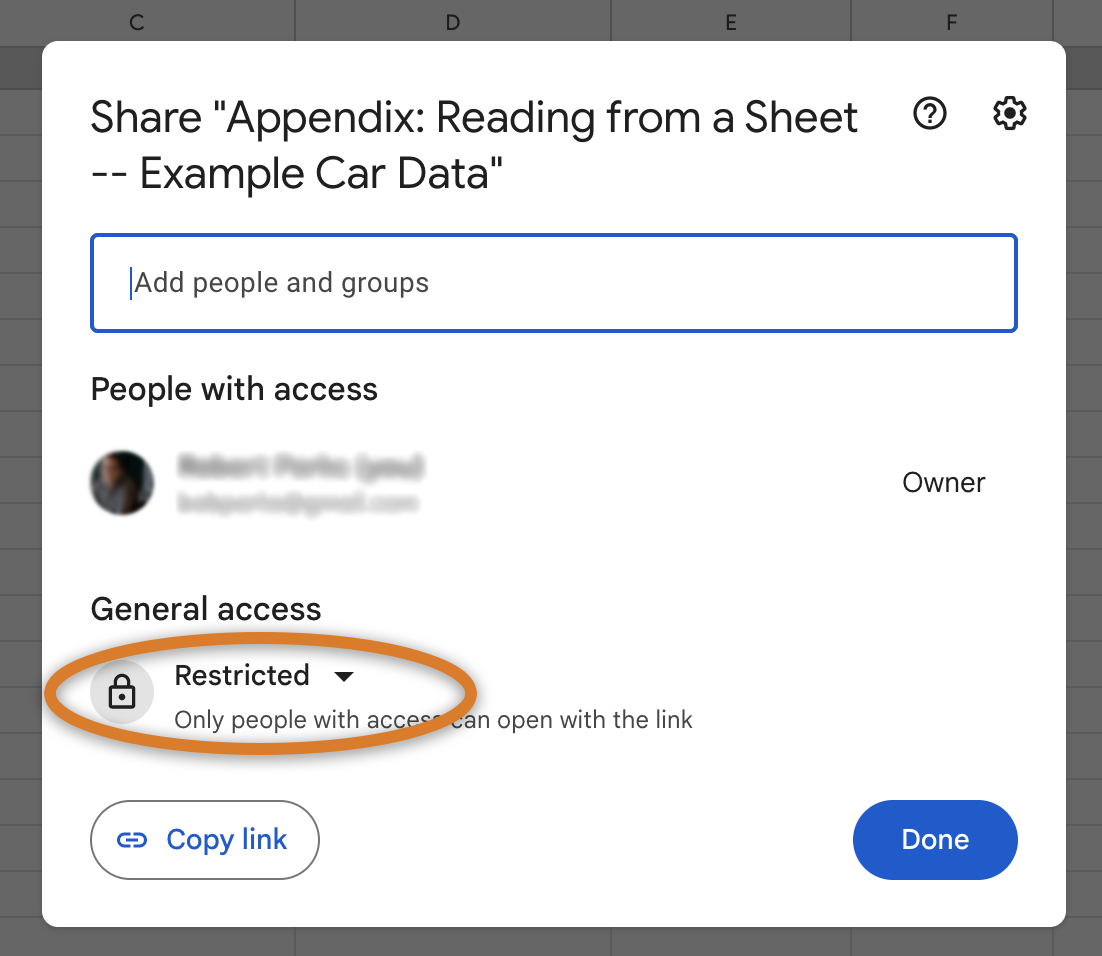
Click on the Share settings in Google Sheets, and set your spreadsheet to Restricted.
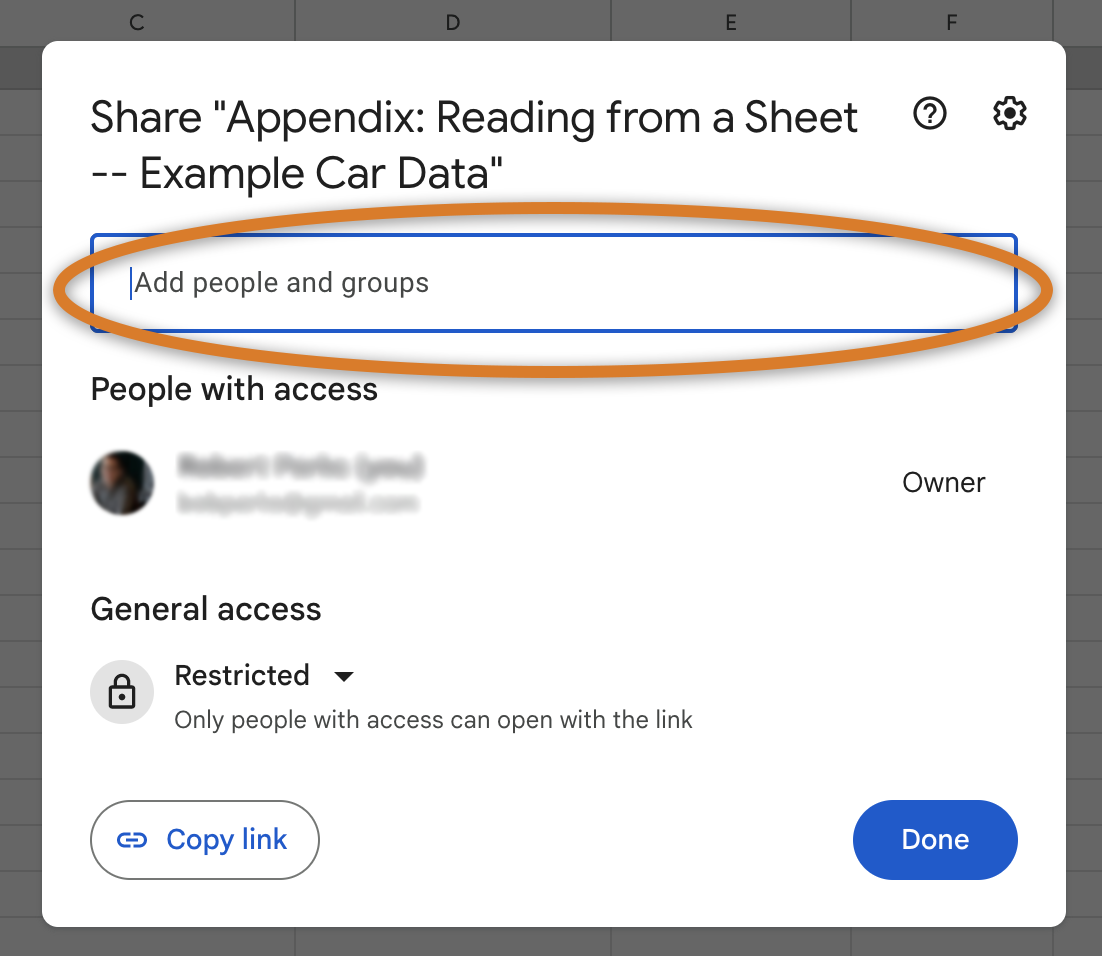
- Click on the box labeled “Add people and groups”
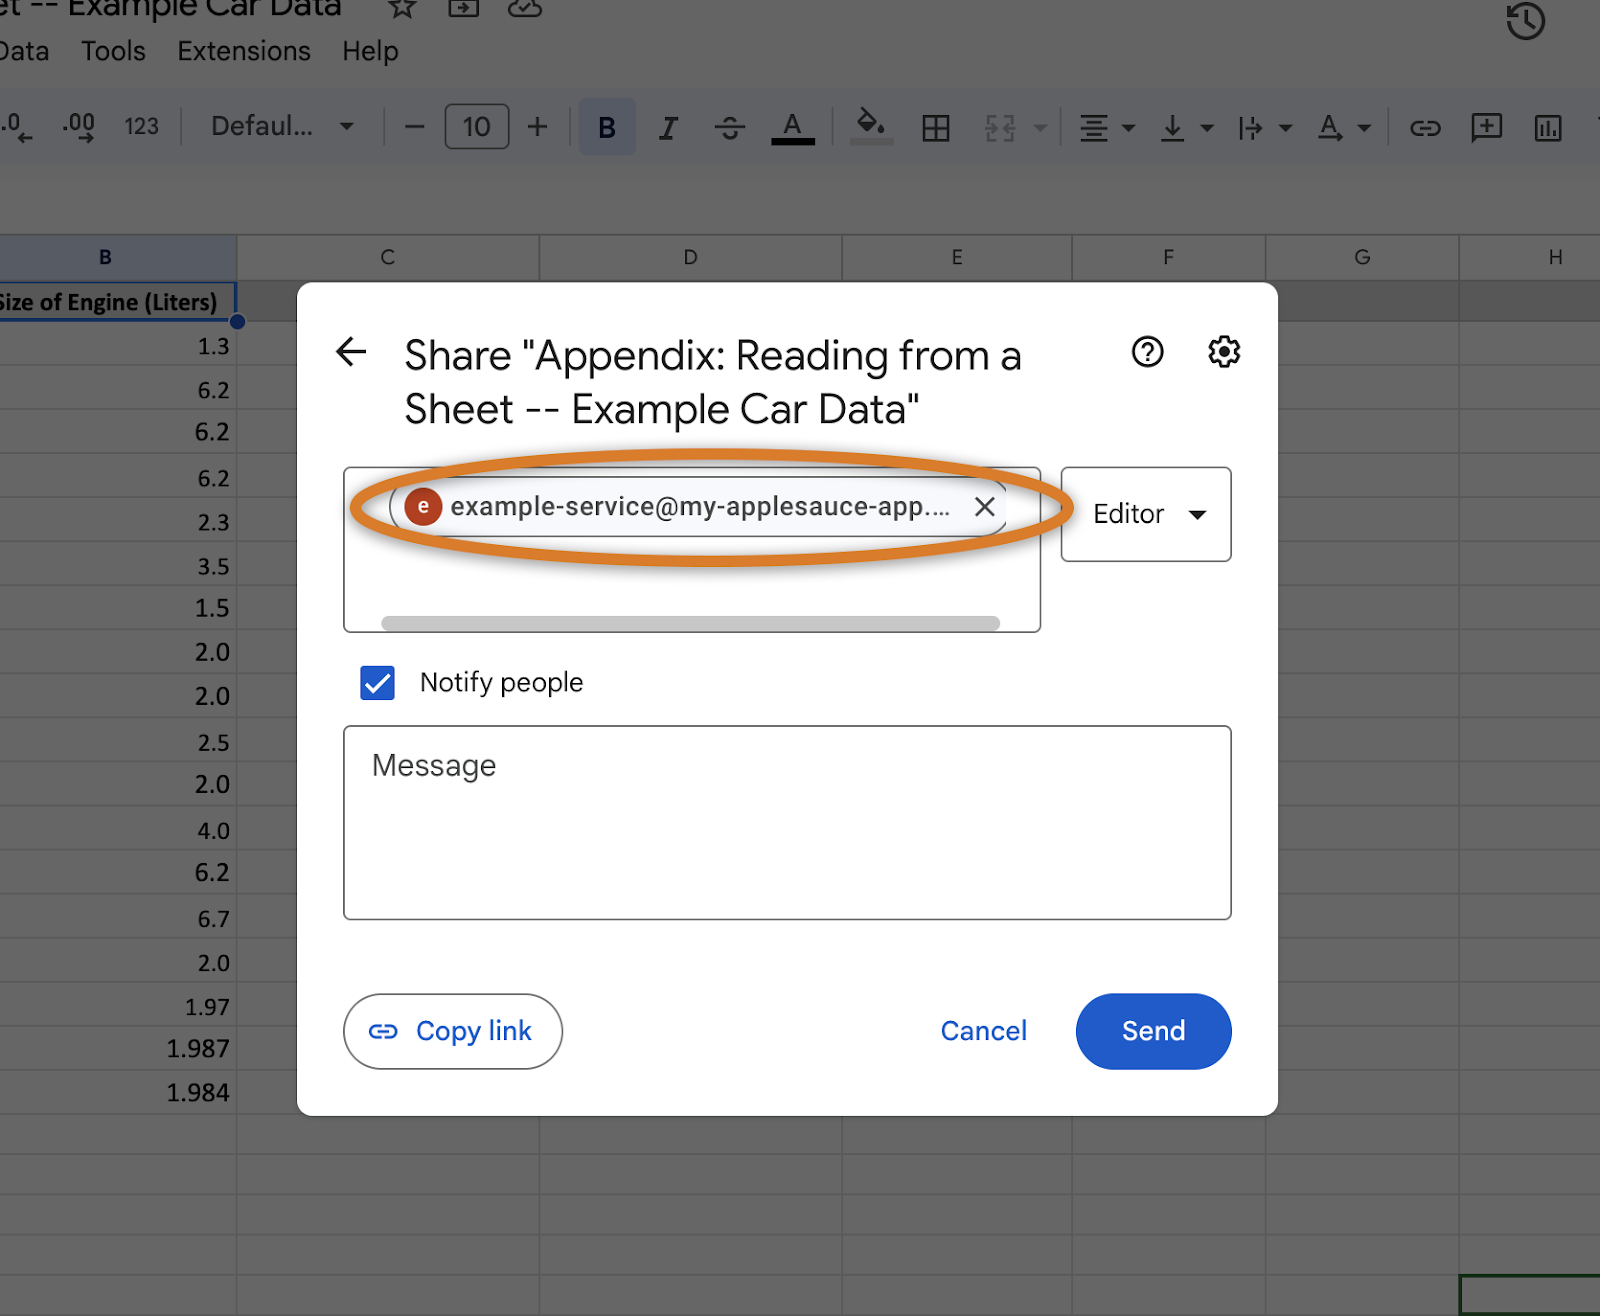
- Add the service account email that you created above.