Please see the Setup Instructions (manual) section of the README. In particular, the slideshow by our former team member Jose can serve as a good step-by-step reference.
App Inventor uses their own fork of Blockly, so you don't have to use node/npm for this project =)
Also if you have any questions about Blockly feel free to reach out on our developer forums. Best of luck with your project!
thanks for all help and wishes
I have seen all idea list of gsoc 2022 and technical skills required for Blocks Editor Projects are matched with my tech stacks. but, I am facing some problem in understanding the project. I need help in understanding what actually the project wants to fixed
For that I would recomend for you to know what App Inventor is all about and its capabilities, and the projects listed under Potential Projects are to add more to the current version of app inventor - simply add-ons to the existing arrangement. So what add-ons is supposed to do, first you need to work on what existing project is doing. For example, one project from list, is to add Drag a set of blocks functionality, mean this waht is missing and would be great if added to the app inventor's current version.
actually, what i am asking is there is a lot of .js file in project and I am bewildered at which particular .js file require updates
Welcome.
Before you start contributing to App Inventor Open Source, I suggest you to understand about App Inventor, how it works, and its structure. @RamNaresh gave you a list of potential projects that you can use. Before you start, play around with App Inventor Sources in GitHub, for example, components.
I have never joined GSoC, but I think if you want to contribute to App Inventor via GSoC, you can take a look at previous proposals and learn from them. Also, look at other builders and try to find out what extra features they have, for example, custom font support (already proposed), helper blocks (already proposed), title bar menu items, etc. Think about useful features that can make App Inventor even better. You can also use the Site Feedback category to find some user suggestions to App Inventor. Or, read guides in the Open Source Development category about how to make your own App Inventor.
Take a look at these proposals.
-
What is *your* opinion about helper blocks in App Inventor? (GSoC Project - User Feedback)
-
Request for User Feedback on the Animation Improvements Project
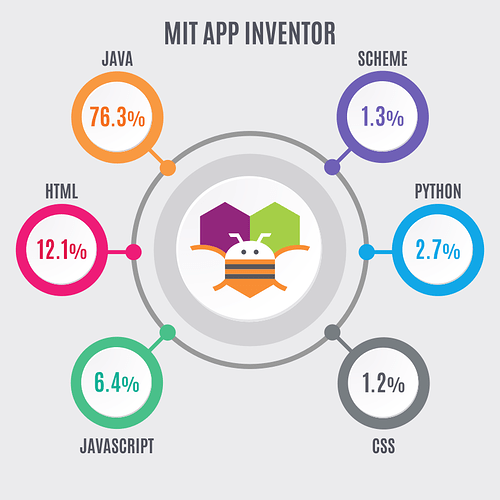
This gives you a general idea about the languages App Inventor uses. Taken from Peter.

Have a nice summer.
Gordon
Hey the process of pull request seems to be different in this case. can you help to know what are the git commands for pull request.
majorly i used:
- git clone GIT_REPO_LINK.
- cd GIT_REPO.
- git checkout -b BRANCH_NAME.
- git add .
- git commit -m MESSAGE.
- git pull -u origin BRANCH_NAME.
that's how but, in this app inventor I am little bit confused
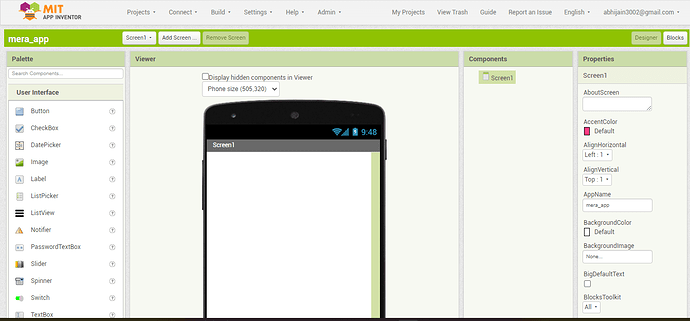
Ya actually I tried this I made some apps using the app inventor. but the problem I am facing is I search the whole codebase but, I didn't find out the HTML and CSS file of this landing page
Did you check this?
Yes, defiantly there are lot of .js files in blockeditor directory. but, you do not need to look each and every .js file.
Sorry @abhi0 but I think no one can tell you particular which file or files require updates, you need to figure out by your self if you want to add new .js file then add to source code. We all are interested in output.
I was a part of GSoC-2021 last summer and here are my documents related to GSoC with MIT App Inventor...
Accepted Project Proposal:
Project Summary:
Community Post:
Most of commands are same as you mention in your post, tell me where you got stuck.
The UI of the App Inventor is made using Google Web Toolkit(GWT) and written in java programming language after that some how it will compile by GWT and converted to javascript and the compiled javascript is responsible for UI which you are seeing during development.
Generally we are following these method for development...
- Create your own fork of the App Inventor source in your GitHub account.
- Clone the App Inventor source which you have forked in previous step.
- Make your set-up and run App Inventor locally.
- For the contribution create your feature branch from
masterif your changes do not need companion update else create feature branch fromucr. - Make your changes to your local feature branch and commit you changes and than create new PR as we do generally.
ok I'll try thanks for all replies man. it's really helpful
- fork it.
- git clone REPO_LINK.
- cd appinventor-sources/
- I run it locally.
- Now open another command prompt.
- cd appinventor-sources/
- git checkout -b NEW_BRANCH
- ( I made some changes ) and run "ant" ( someone had told me ).
- git add .
10 git commit -m MESSAGE. - git push -u origin NEW_BRANCH.
but all these process failed and shows an error
What is the error?
Have you added parent repository's remote to local environment?
no first i forked it and then,
I used git clone GitHub - abhijain2003/appinventor-sources: MIT App Inventor Public Open Source which is forked file
error shows : failed to push
Okay, first make sure the remote name origin is pointing to this URL
https://github.com/abhijain2003/appinventor-sources.git
The error showing this only or any other detailed message if yes then please share it here.
Github has been having outages lately. A "failed to push" message may be because github is down 
Also note in most cases it is better to use SSH instead of HTTPS. Consider setting up a SSH keypair and adding the public key to your GitHub account.
