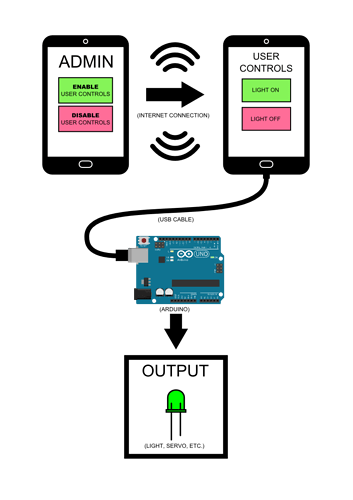
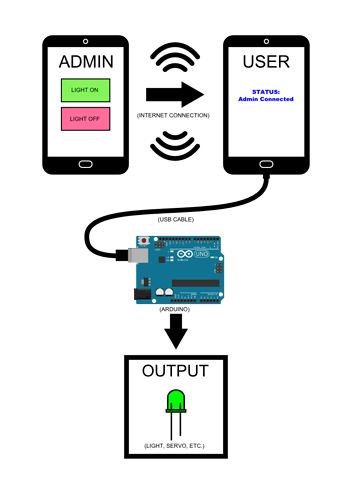
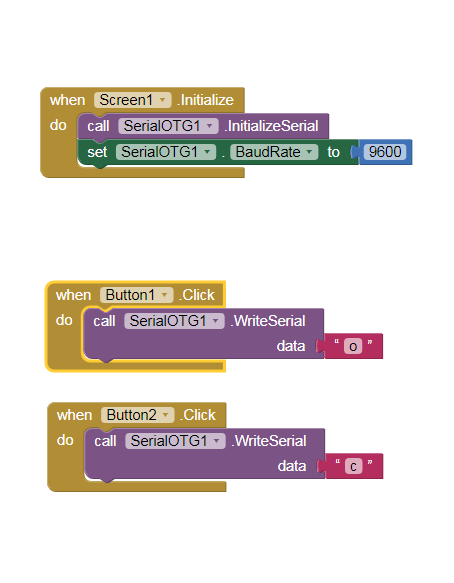
Not far at all. I created a GUI in Processing on my desktop that controlled a servo, but I wasn't able to make it compatible with Android. There are two buttons that output a character. When I started looking at the blocks in MIT, I didn't understand how to replicate that.
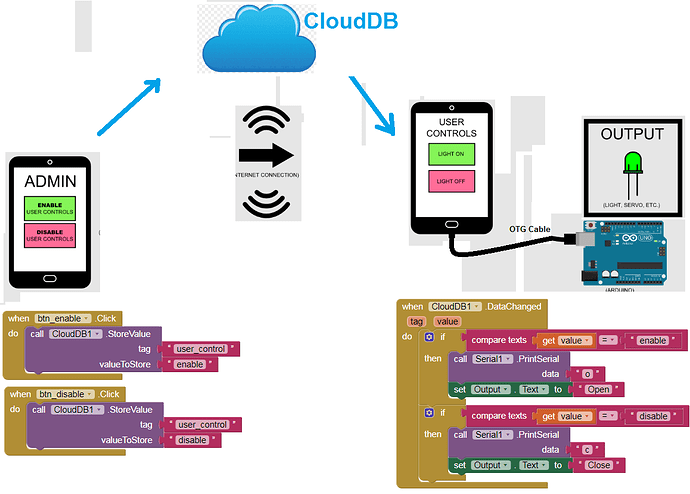
But my biggest concern is creating the functionality for the remote admin. And I have no idea in the slightest how to go about that, or what to search.
The receiving phone will be connected to the premises WiFi most of the time. Power supply is not a concern.
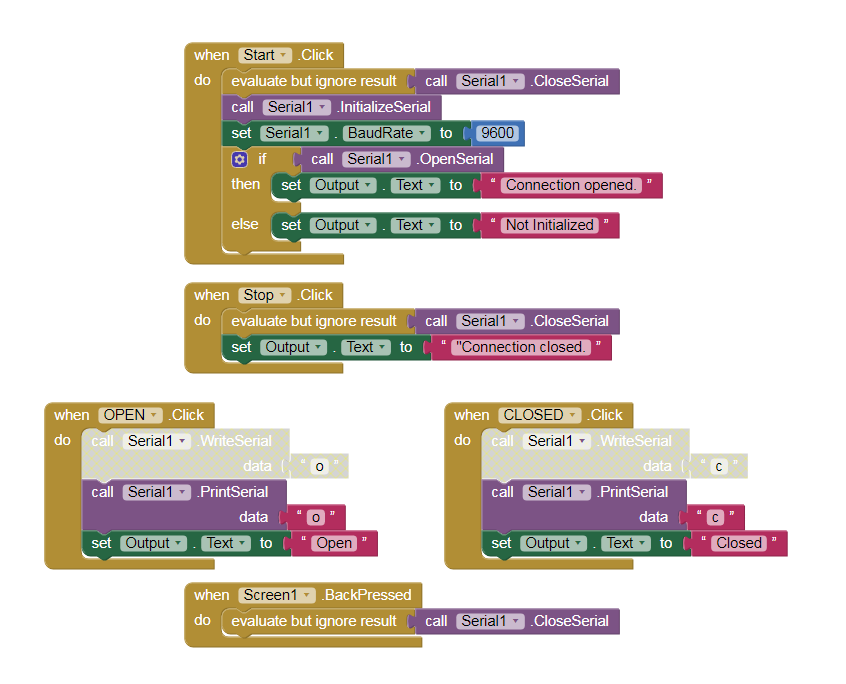
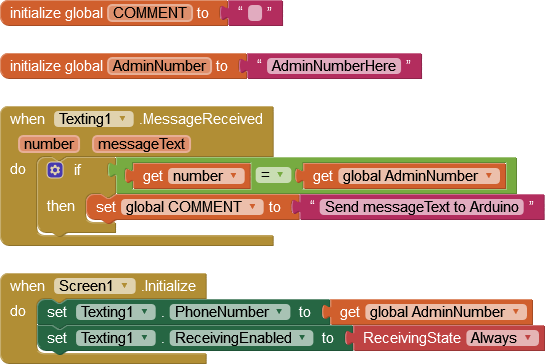
Here is my current progress. I have included the programming in the Arduino IDE and the GUI created in Processing. They worked together from my desktop. Now I'm trying to replicate that in MIT App Inventor. I've included a screenshot of my progress thus far. I'm a bit stumped at this point.
Arduino IDE:
#include <Servo.h>

Servo myservo;  // (Library) create servo object to control a servo
// twelve servo objects can be created on most boards

int pos = 0;    // variable to store the servo position


void setup() {
  myservo.attach(9);  // attaches the servo on pin 9 to the servo object

  Serial.begin(9600); // start serial communication @9600 bps
}

void loop() {

  if(Serial.available()) { // ID data is available to read

    char val = Serial.read();

    if (val == 'o') {     // if o recieved

        myservo.write(180);

         delay(1000);    // waits 1000ms (1 seconds) for the servo to reach the position


    }
    else if (val == 'c') {  // if c received

       myservo.write(0);

         delay(1000);    // waits 1000ms (1 seconds) for the servo to reach the position
    }

  }
}
Processing:
import controlP5.*; //import ControlP5 library
import processing.serial.*;

Serial port;

ControlP5 cp5; //create ControlP5 object
PFont font;

void setup(){ //same as arduino program

  size(300, 400); //window size WxH

  printArray(Serial.list()); //prints all available serial ports

  port = new Serial(this, "COM14", 9600); // Connection to Arduino on com14

  // Create Button
  cp5 = new ControlP5(this);
  font = createFont("Impact", 34); // font type and size on button


  cp5.addButton("OPEN") // "OPEN" is name of button
    .setPosition(100, 50) // X and Y coordinates of upper left corner of button
    .setSize(100, 60) // (Width, Height)
    .setFont(font)
    .setColorForeground(color(134, 175, 28))
    .setColorActive(color(167, 165, 115))
    .setColorBackground(color(148, 182, 112))
    ;

     cp5.addButton("CLOSE") // "CLOSE" is name of button
    .setPosition(100, 140) // X and Y coordinates of upper left corner of button
    .setSize(100, 60) // (Width, Height)
    .setFont(font)
    .setColorForeground(color(234, 111, 117))
    .setColorActive(color(182, 143, 111))
    .setColorBackground(color(205, 112, 112))
    ;

}

void draw(){ //same as loop in arduino

  background (143, 123, 100); //background color of window (R, G, B) or (0 to 255)

  //title for window
  fill(0, 255, 255);   // color of text (R, G, B)
  text(":P", 100, 30); // ("text", x coordinate, y coordinate)
}

// add functionality to buttons

void OPEN(){
  port.write('o');
}

void CLOSE(){
  port.write('c');
}
MIT App Inventor:
