Hello everyone,
I have made a basic guide on how to use the clock component.
Here, I will explain all the blocks associated to the clock component and a few sample projects which use the clock.
1.DESIGNER PROPERTIRES OF THE CLOCK
1.1Timer Always Fires
This is a Boolean property, i.e it accepts only true or false.
If you wish the clock to run even if the application is not the active screen, i.e the user is using some other application.
- Can this be set using blocks? Yes!
- Default: True

Possible uses:
- To run a timed game
- While the user is giving a quiz
1.2 Timer Enabled
This is a Boolean property, i.e it accepts only true or false.
When you want the clock to run it’s timer, then you have to set it to true.
- Can this be set using blocks? Yes!
- By default: True

Note: If the property is set to true in the designer, then the clock will automatically fire as soon as the screen initizalizes.
1.3 Timer Interval
This property accepts a number.
With this property we can specify the interval (in milliseconds) between each time the click.timer event is called.
- Can this be set using blocks? Yes!
- By default: 1000 milliseconds (1 second)

Note: The clock starts to leg when the interval is set to a very small value such as 10 milliseconds.
2.BLOCKS
2.1 EVENTS
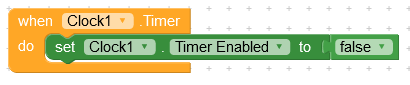
There is only 1 event for this component that is the .timer event.
This is called every time the timer interval is completed.
Note: After executing all the blocks in the event is when the next interval begins. That is why a lag can be produced. Also have a look at a test done by @ScottFromScott
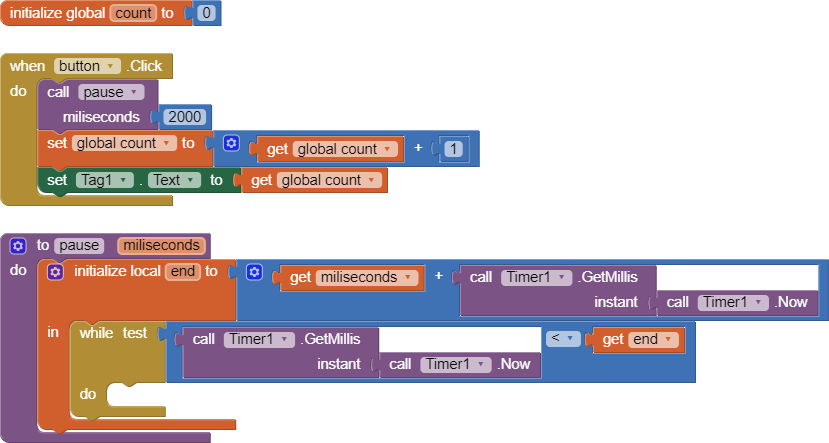
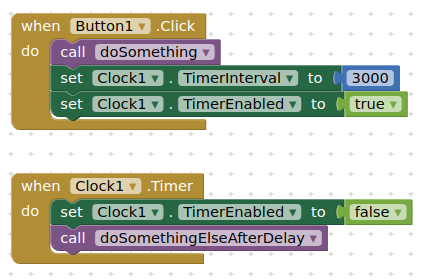
Example usage –
2.2 METHODS
2.2.1 “Add”
This method is used to add the amount of time specified to the given instance of time.
Under the add method, we can add the following quantities.
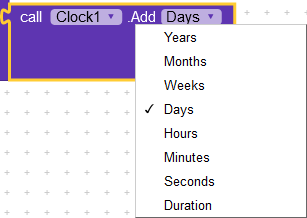
- Days
Result: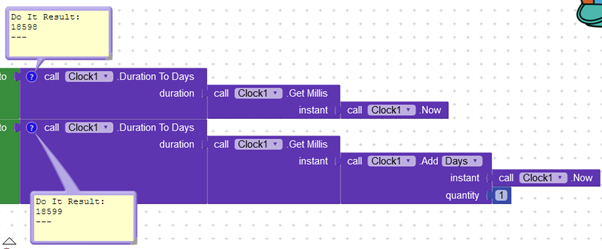
![]() How to use this blocks and why does the clock1.now return 18598 days, will be explained later in the guide. For now, it is important to notice that when we added 1 to the days, it worked!
How to use this blocks and why does the clock1.now return 18598 days, will be explained later in the guide. For now, it is important to notice that when we added 1 to the days, it worked!
-
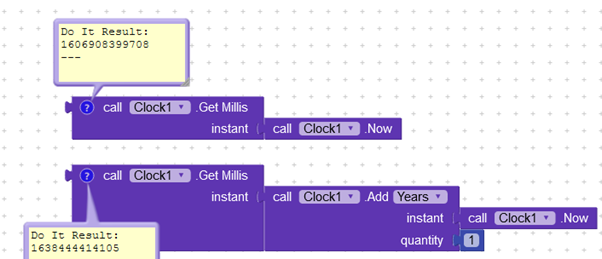
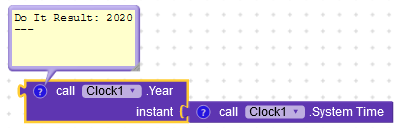
Year
Result:
-
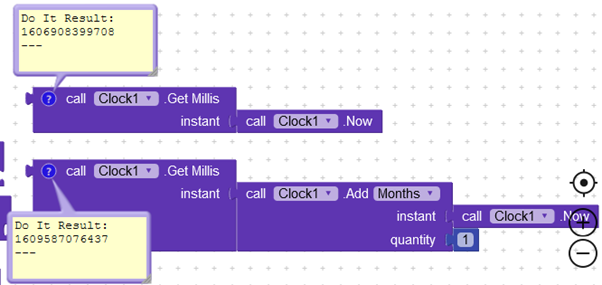
Month
Result:
-
Weeks
Result:

-
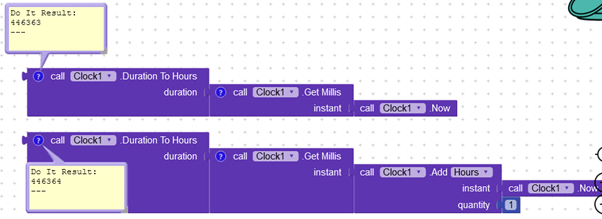
Hours
Result:
-
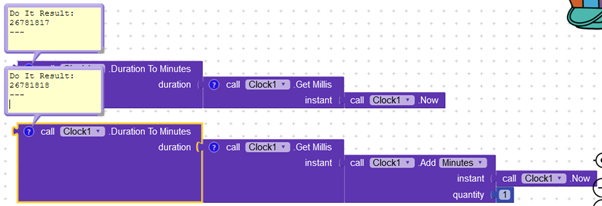
Minutes
Result:
-
Seconds
Result:
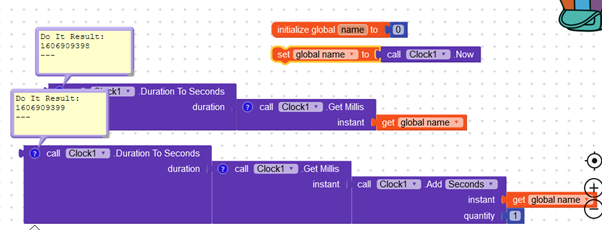
I had to use a variable as 2 Do It’s in a second isn’t possible
-
Duration:
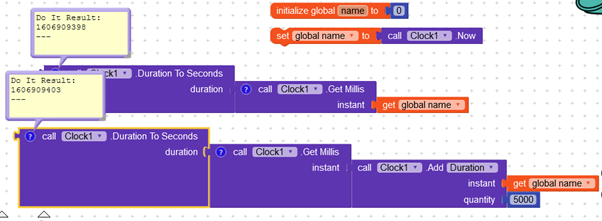
Here duration accepts milliseconds, so using 5000 milliseconds resulted in 5 seconds being added.
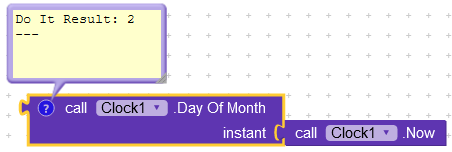
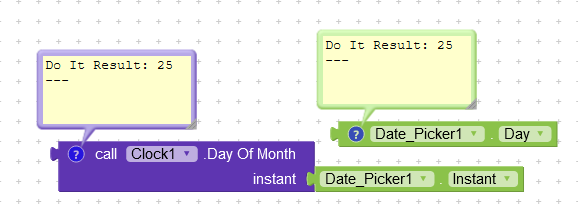
2.2.2 Get day of the month.
This is a simple method and just returns the day of the month in the given instance.
Accepts: instant
Returns: Number
Usage:
2.2.3 Duration
With the help of this block, we can get the duration between two instances in milliseconds.
Accepts: Milliseconds or Instance
Returns: Milliseconds
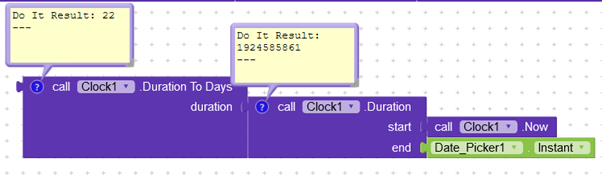
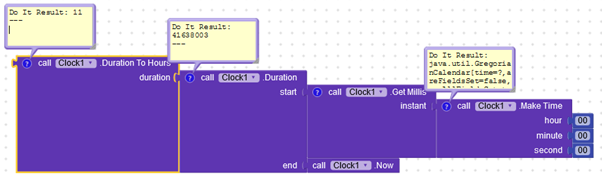
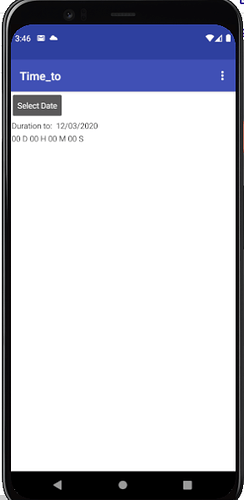
2.2.4 Duration to…
The Duration to blocks can process milliseconds to the amount of the time mentioned on them.
They can accept milliseconds and give an output of seconds, minutes, hours, days and weeks.
Remember: All duration parameters accept number as milliseconds.
All these blocks have already been used in explanation of the “add” blocks, please refer them.
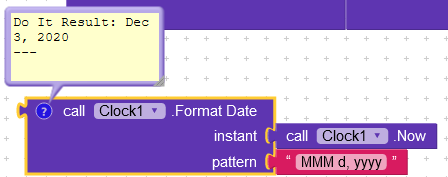
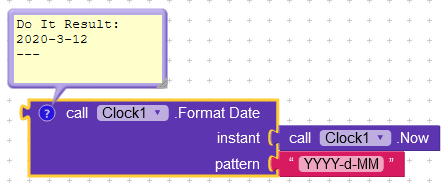
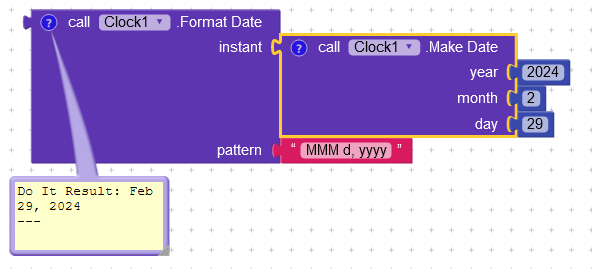
2.2.5 Format Date
The format date block is useful when we want to return an instant into a properly formatted date.
Accepts Instant and Text.
Return Text.
 )
)
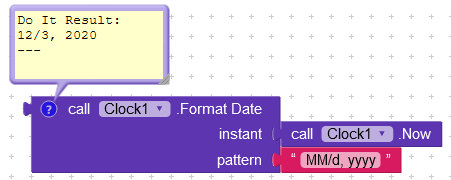
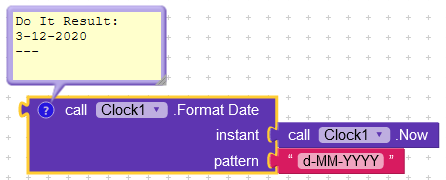
These are some formats the pattern accepts.
We can separate the year, date and time by a comma (,), a slash (/) or a hyphen (-).
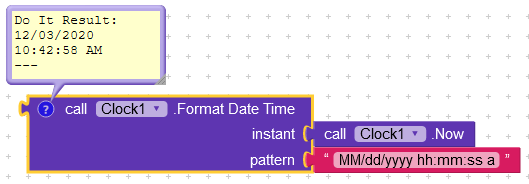
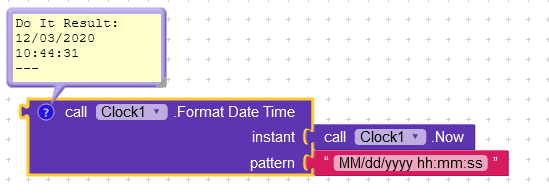
2.2.6 Format Date and Time
This block is an add on to the Format Date block. It also allows us to format the date along with the time in the given instance.
Accepts: Instant and text
Returns: text.
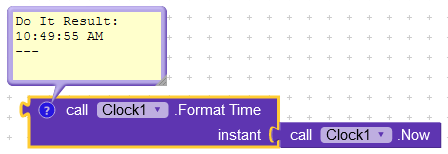
2.2.7 Format Time
This block is used to format time in a particular instance. Here there is no option for specifying the format of the output and always returns time in the format – hh:mm:ss a
For more info on all possible time formats, have a look at this link.
https://docs.oracle.com/javase/7/docs/api/java/text/SimpleDateFormat.html
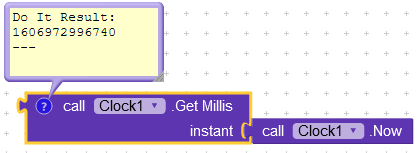
2.2.8 Get Millis
The get Millis block is used to get the milliseconds occurred between 1970 and the specified instance.
And this is the answer to why we had received 18598 days in the start.
Accepts: Instant
Returns: Number
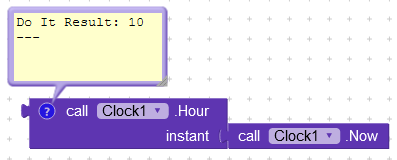
2.2.9 .Hour
This method simply returns the hour of the day of the specified instance.
Accepts: Instant
Returns: Number
2.2.10 Make Date
The make date method takes in an input of year, month and date and forms an instant from the given data.
Accepts: Numbers
Returns: Instant

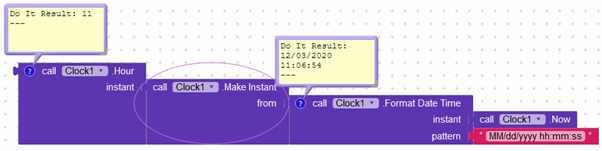
2.2.11 Make Instant
Make Instant makes an instant of the text specified in the format MM/dd/YYYY hh:mm:ss or MM/dd/YYYY hh:mm.
Accepts: Text
Returns: Instant
TO clear the usage of this method, I have just complicated stuff a bit!
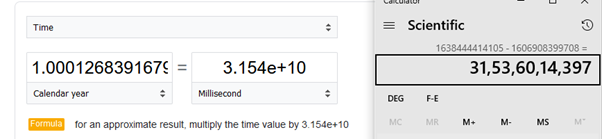
2.2.12 Make Instant from Millis
The make instant from millis block makes an instant of time from the specified milliseconds calculated since 1970.
For your information a year has 3.154e+10 milliseconds. So, let us test it now.
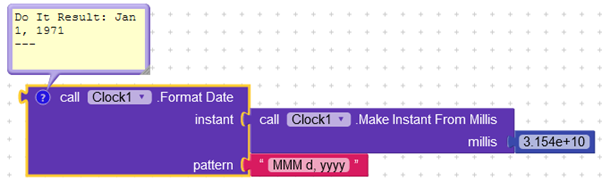
1 year from 1970.
2.2.13 Make Instant from Parts
-
Date and Time
This block makes an instant from time combining the user inputs of year, month, day, hour, minute and seconds.
Acepts: Numbers
Returns: Instant
-
Time
2.2.14 Get from instant
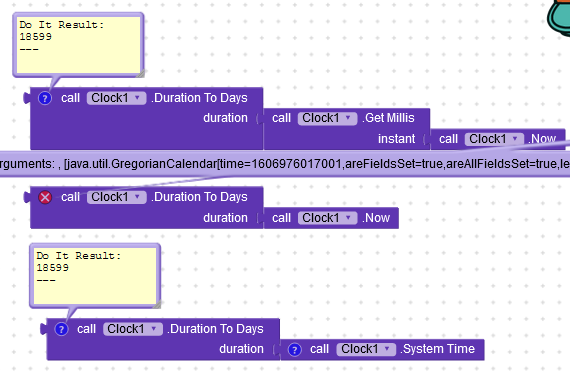
NOTE: In AppInventor you need to use Clock1.Now block, not SystemTime, for all the following examples: e.g.

This block returns the quantity of the given measure from the given instant.
- Minute
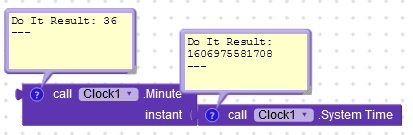
System time was 11:36 AM.
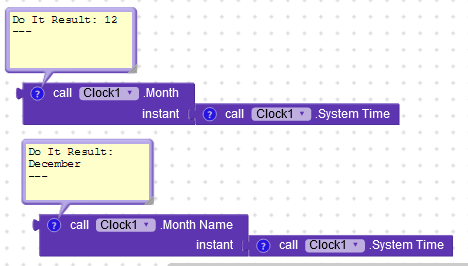
- Month and month name
- Weekday and Weekday Name
Weekday returns number (position of day in the week starting from Sunday).

- Year
2.2.15 Clock1.Now
This is the method I have used the most in the guide and expect that those who did not know about it would have understood it by now.
Still here what it is.
It returns the instant of time that has occurred when it was called.
For more info on what is an instant of time, see here –
https://docs.oracle.com/javase/8/docs/api/java/time/Instant.html
2.2.16 System Time
This is a method that returns the number of milliseconds elapsed since 1970 and the time at which the method was called.
Difference b/w .Now and .System Time
The only difference between them is that .Now returns an instance of the current time whereas . System Time returns milliseconds.
An example
2.3 PROPERTIES
All the properties have been explained in the start already.
We can set these properties by blocks using these blocks –
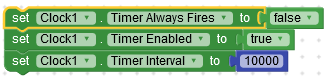
We can get the current values of the properties by using these blocks –

That was the end of the guide.
Here is the aia file.
Clock(1).aia (22.7 KB)
What is in the aia file?
Hope it helps!!
Please give your suggestions
Thank you


 Lyn
Lyn Scott
Scott