
Hello, developers! today I am Introducing the "Image Editor Extension " by Mr_Koder is a versatile and powerful Extension that enables users to easily manipulate and transform images within their applications. This comprehensive tool provides a range of features and functions designed to make image editing simple and efficient.
With the "Image Editor Extension," users can effortlessly customize and process images to suit their requirements, making it an indispensable tool for any application that deals with images.
let us explain more
Documentation
Blocks
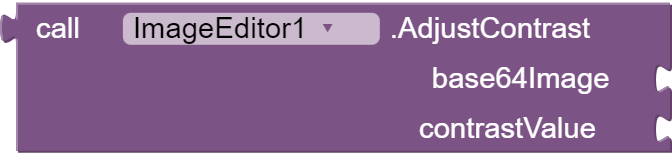
This block, AdjustContrast, modifies the contrast of an image based on the given contrast value.
How to use it:
- Input a base64 encoded image string as base64Image.
- Input an integer between -100 to 100 as contrastValue. A value of -100 minimizes the contrast, 0 keeps the original contrast, and 100 maximizes the contrast.
This block returns a new base64 encoded image with the adjusted contrast.


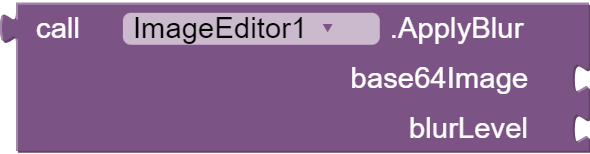
This block, ApplyBlur, applies a blur or sharpen effect to an image based on the specified blur level.
How to use it:
- Input a base64 encoded image string as base64Image.
- Input a float between -100 to 100 as blurLevel. Positive values apply a blur effect, while negative values apply a sharpen effect.
This block returns a new base64 encoded image with the blur or sharpen effect applied.

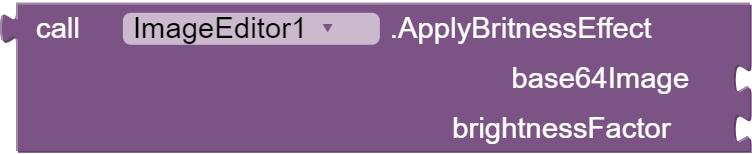
This block, ApplyBritnessEffect, adjusts the brightness of an image based on the given brightness factor.
How to use it:
- Input a base64 encoded image string as base64Image.
- Input an integer between -100 to 100 as brightnessFactor. Positive values increase brightness, while negative values decrease it.
This block returns a new base64 encoded image with the adjusted brightness.

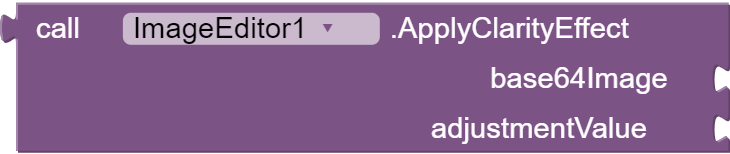
This block, ApplyClarityEffect, applies a clarity effect to a Base64 image with the specified adjustment value.
How to use it:
- Input a Base64 encoded image string as base64Image.
- Input an integer value for adjustmentValue between -100 and 100 to control the clarity effect. Negative values will smooth the details, positive values will enhance the details, and values close to zero will have little effect on the image.
This block returns a new Base64 encoded image with the clarity effect applied.
The ApplyClarityEffect Block first scales down the input image to speed up processing. Then, it applies a Gaussian blur to the scaled image. Next, it processes the original and blurred images in parallel using an ExecutorService to enhance or smooth the details based on the adjustment value. Finally, it scales the processed image back to its original size before returning the Base64 encoded result.

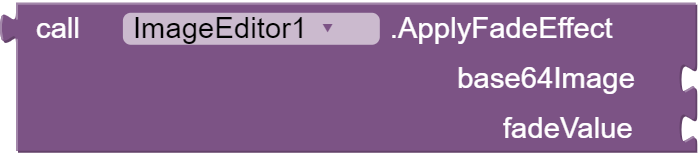
This block, ApplyFadeEffect, applies a fade effect to a Base64 image with the specified fade value.
How to use it:
- Input a Base64 encoded image string as base64Image.
- Input an integer value for fadeValue between 0 and 100 to control the amount of fade. A value of 0 results in no fade effect (the original image), while a value of 100 results in the maximum fade effect.
This block returns a new Base64 encoded image with the fade effect applied.
The ApplyFadeEffect Block calculates the fade factor based on the input fade value and creates a new ColorMatrix that scales the input image's color channels based on the fade factor. This is applied to the source image , which modifies the output image's colors based on the specified matrix.

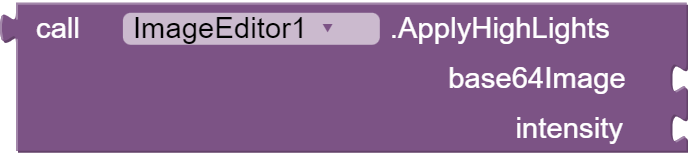
This block, ApplyHighLights, applies a highlights effect to a Base64 image with the specified intensity.
How to use it:
- Input a Base64 encoded image string as base64Image.
- Input a float value for intensity between 0 and 100 to control the intensity of the highlights effect. A value of 0 results in no change, while a value of 100 results in the maximum highlights effect.
This block returns a new Base64 encoded image with the highlights effect applied.
The ApplyHighLights Block creates a new ColorMatrix that scales the input image's color channels based on the given intensity. This is applied to the source image using the ColorMatrixColorFilter class, which modifies the output image's colors based on the specified matrix.

This block, ApplyPixelate, applies a pixelate effect to a Base64 image with the specified intensity.
How to use it:
- Input a Base64 encoded image string as base64Image.
- Input a float value for intensity between 0 and 100 to control the pixelation effect. A value of 0 results in no pixelation (the original image), while a value of 100 results in the maximum pixelation effect.
This block returns a new Base64 encoded image with the pixelate effect applied.
The ApplyPixelate block first decodes the Base64 image string to a Bitmap. Then, it calculates the blockSize based on the input intensity value.
If the blockSize is less than or equal to 1, the block returns the original Base64 image as no pixelation is applied.
Otherwise, it creates a new Bitmap and Canvas for the pixelated image. It iterates through the input image in blocks of the calculated size, obtaining the color of the central pixel in each block and drawing a filled rectangle with that color on the new canvas. The result is a pixelated version of the input image. The block returns the Base64 encoded pixelated image.

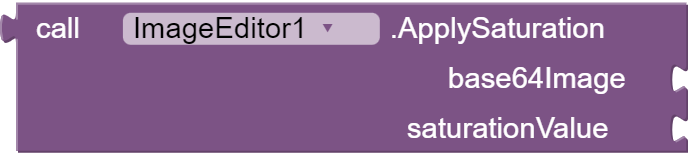
This block, ApplySaturation, adjusts the saturation of an image based on the specified saturation value.
How to use it:
- Input a base64 encoded image string as base64Image.
- Input an integer between -100 to 100 as
saturationValue. A value of -100 completely desaturates the image (grayscale), 0 keeps the original saturation, and 100 maximizes saturation.
This block returns a new base64 encoded image with the adjusted saturation.


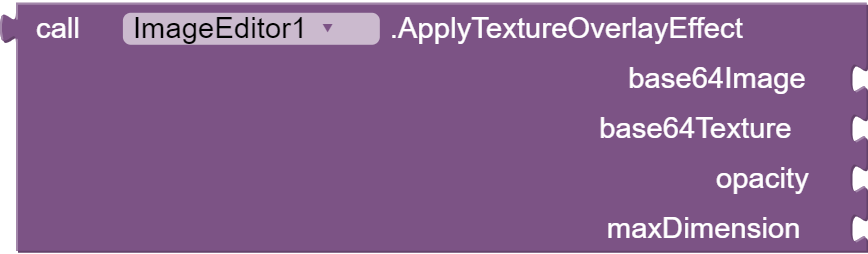
this block ApplyTextureOverlayEffect, a powerful feature of the "Creative Image Transformer" that allows you to enhance your images with a custom texture overlay. This block enables blending of textures and images with adjustable opacity, creating a unique and captivating visual effect.
How to use it:
- Input a Base64 encoded image string as
base64Image. - Input a Base64 encoded texture string as
base64Texture. - Input an integer value for
opacityto control the transparency of the texture overlay (0-100). - Input an integer value for
maxDimensionto scale down the input image and texture, improving performance.
This block returns a new Base64 encoded image with the texture overlay applied and the specified opacity.
The ApplyTextureOverlayEffect block first decodes the input image and texture into Bitmaps. Then, it scales down the input image and texture according to the specified maxDimension to improve performance. Next, it creates an output Bitmap and draws the scaled input image on a Canvas. The block then configures a Paint object with the desired opacity and blend mode (PorterDuff.Mode.SCREEN) to blend the texture with the input image. The scaled texture Bitmap is drawn on the Canvas with the configured Paint object. Finally, the output Bitmap is encoded as a Base64 string and returned.


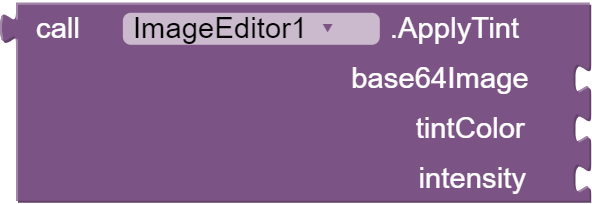
This block the ApplyTint block , an essential feature of the "Creative Image Transformer" that allows you to add a tint effect to your images with a specified color and intensity. This block enables customization of the appearance of your images, giving them a fresh and unique look.
How to use it:
- Input a Base64 encoded image string as
base64Image. - Input an integer value for
tintColorrepresenting the color of the tint (in the format 0xAARRGGBB). - Input a float value for
intensityto control the intensity of the tint (0.0 to 1.0).
This block returns a new Base64 encoded image with the tint effect applied and the specified color and intensity.
The ApplyTint block first removes the header from the input Base64 image and decodes it into a Bitmap. It then creates a new tinted Bitmap with the same dimensions as the input image. A Canvas is created for drawing on the tinted Bitmap. Next, the block sets up a Paint object with the specified tint color, intensity (alpha), and blend mode (PorterDuff.Mode.SRC_ATOP). The input image is drawn on the Canvas, followed by a rectangle with the configured Paint object, which applies the tint effect. Finally, the tinted Bitmap is encoded back into a Base64 string and returned.


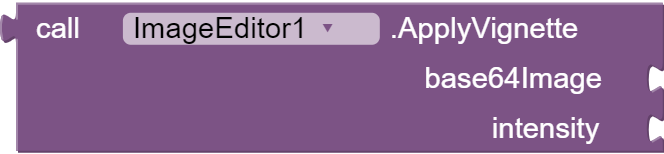
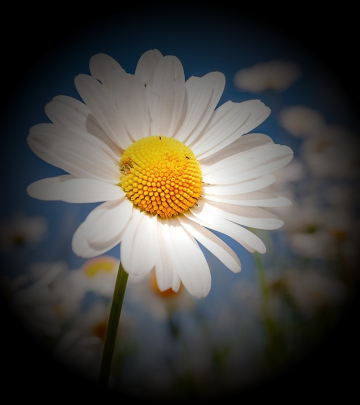
This block, ApplyVignette, applies a vignette effect to a Base64 image with the specified intensity.
How to use it:
- Input a Base64 encoded image string as base64Image.
- Input a float value for intensity between 0 and 100 to control the intensity of the vignette effect. A value of 0 results in no vignette, while a value of 100 results in the maximum vignette effect.
This block returns a new Base64 encoded image with the vignette effect applied.
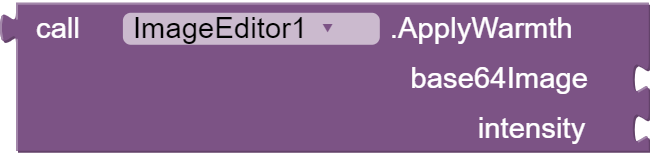
This block, ApplyWarmth, applies a warmth effect to a Base64 image with the specified intensity.
How to use it:
- Input a Base64 encoded image string as base64Image.
- Input a float value for the intensity between
-100and100to control the warmth of the image.
A value of -100 results in the coldest effect (bluish tones), while a value of 100 results in the warmest effect (reddish tones).
This block returns a new Base64 encoded image with the warmth effect applied.
The calculateColorMatrixValues block calculates the color transformation matrix based on the input temperature, which is derived from the input intensity. It adjusts the red, green, and blue channels of the image to achieve the desired warmth effect.


his block, ApplyXProcess, applies an X-process effect to a Base64 image with the specified intensity.
How to use it:
- Input a Base64 encoded image string as base64Image.
- Input a float value for intensity between -100 and 100 to control the intensity of the X-process effect.
A value of -100 results in the lowest intensity, while a value of 100 results in the highest intensity.
This block returns a new Base64 encoded image with the X-process effect applied.
The ApplyXProcess block creates two ColorMatrix instances, one for contrast and one for the X-process effect.
The contrast matrix scales the input image's color channels based on the given intensity, while the X-process matrix adds a cross-color effect by modifying the color channels based on the intensity.
These matrices are concatenated and applied to the source image using the ColorMatrixColorFilter class, which modifies the output image's colors based on the specified matrices.


This block CompressImageBase64 , is a handy feature of the "Creative Image Transformer" that allows you to compress your images by resizing their height while maintaining their original aspect ratio. This block helps in optimizing images for faster performance and lower file sizes.
How to use it:
- Input a Base64 encoded image string as
base64Image. - Input an integer value for
newHeightas the desired height for the resized image.
This block returns a new Base64 encoded image with the specified height and the original aspect ratio maintained.
The CompressImageBase64 block first decodes the input Base64 image into a Bitmap. It calculates the new width based on the input image's aspect ratio and the desired new height. The input image is then resized using the calculated dimensions, creating a new Bitmap. Finally, the resized Bitmap is encoded back into a Base64 string and returned.
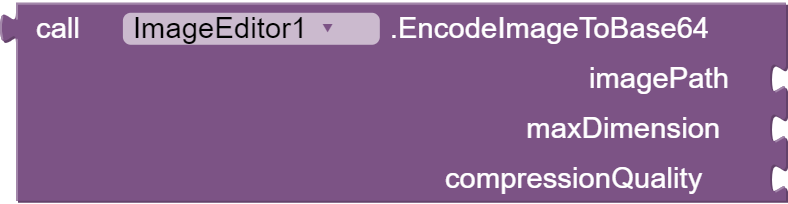
This block, EncodeImageToBase64, converts an image file from the local path into a Base64 encoded string with optional resizing and compression.
How to use it:
-
Input the local image path as imagePath.
-
Input an integer for maxDimension to resize the image. The image will be resized so that the width and height do not exceed this value.
-
Input an integer for compressionQuality
(between0and100Preformatted text Preformatted textPreformatted text) to control the compression level.
Lower values result in higher compression and smaller file sizes, while higher values result in lower compression and larger file sizes.
This block returns the Base64 encoded image string.

This block EncodeImageToBase64WithCompression,is a practical feature of the "Creative Image Transformer" that allows you to encode an image from the local file system into its Base64 representation with optional compression. This block is useful for converting images into a format that can be easily transmitted or stored.
How to use it:
- Input a string as
imagePathcontaining the local path to the image file. - Input an integer value for
compressionQualityto control the compression quality (0-100) when encoding the image. Lower values result in higher compression, smaller file sizes, and lower image quality.
This block returns a new Base64 encoded image with the specified compression quality applied.
The EncodeImageToBase64WithCompression block first tries to open an InputStream for the image file at the specified local path. If the file is not found, it returns an empty string. Next, the block decodes the InputStream into a Bitmap. A ByteArrayOutputStream is then used to compress the Bitmap with the specified compression quality as a JPEG. The compressed byte array is then encoded into a Base64 string and returned.

This block, GetImageDimensions, retrieves the width and height of a Base64 encoded image.
How to use it:
- Input a Base64 encoded image string as base64Image.
This block returns a YailList containing two elements: the width and height of the image.
The GetImageDimensions block first decodes the Base64 image string using Base64.decode. Then, it creates a BitmapFactory.Options object with the inJustDecodeBounds property set to true.
This allows the function to obtain the dimensions of the input image without actually decoding the image data and allocating memory for the Bitmap. The dimensions are then extracted from the BitmapFactory.Options object and returned as a YailList.
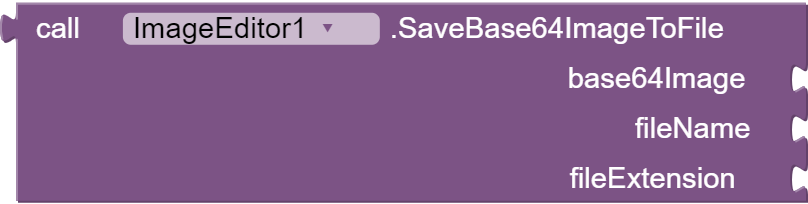
This block, SaveBase64ImageToFile, saves a Base64 encoded image to a file with the given filename and extension in the /Download directory.
How to use it:
- Input a Base64 encoded image string as base64Image.
- Input a string value for fileName to specify the desired filename for the saved image.
- Input a string value for fileExtension to specify the desired file format for the saved image (e.g., "jpg", "png", or "webp").
This block returns the saved file's path if successful or an empty string otherwise.
The SaveBase64ImageToFile block first decodes the Base64 image string to a Bitmap. Then, it creates the /Download directory if it doesn't exist. Next, it saves the image as a file with the specified filename and extension using the appropriate Bitmap.CompressFormat based on the input file extension.
The block returns the saved file's absolute path if the operation is successful or an empty string in case of errors.

This block ApplyGlitchArtEffect ,is an artistic feature of the "Creative Image Transformer" that allows you to apply a Glitch Art effect to your images. This block creates visually intriguing images with a combination of color channel shifts, giving your images a unique and eye-catching appearance.
How to use it:
- Input a Base64 encoded image string as
base64Image.
This block returns a new Base64 encoded image with the Glitch Art effect applied.
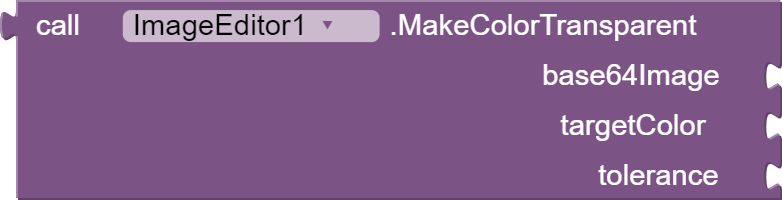
The first Java function, MakeColorTransparent, takes a Base64-encoded image, a target color, and a tolerance as input. It converts the image to a Bitmap object, iterates through each pixel, and checks if the color difference between the current pixel color and the target color is within the specified tolerance. If it is, the pixel color is set to transparent; otherwise, it remains unchanged. The resulting image is encoded back to Base64 and returned.
You have the option to utilize the canvas component, where upon touching a specific color, the block will eliminate that color and render it transparent.
Example for making red color transparent with tolerance value 100 ![]()


The second Java function, ExtractColorsFromImage, takes a Base64-encoded image as input. It converts the image to a Bitmap object, iterates through each pixel, and collects unique colors in a set. Then, it converts the set of colors to a list of hexadecimal color codes. Finally, it returns the list of all color codes in the image.

The ExtractColorsFromImageUrl function takes an image URL as input. It downloads the image, extracts the unique colors from it, converts them to hex code colors, and triggers the ColorsExtracted event with the resulting list of colors.
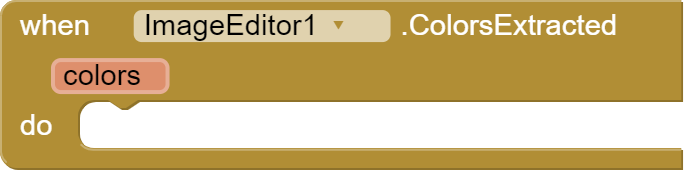
The ColorsExtracted event is triggered when the colors have been extracted from the image URL. It sends the extracted colors as a YailList to the event listeners.

The ConvertImageUrlToBase64 function converts an image from a specified URL to a Base64 encoded string. It downloads the image, decodes it into a Bitmap, converts the Bitmap to Base64 encoding, and triggers the ImageConvertedToBase64 event with the resulting Base64 string.
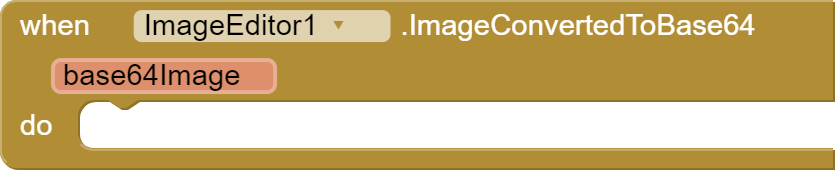
The ImageConvertedToBase64 event is triggered when the image has been successfully converted to a Base64 encoded string. It dispatches the event with the Base64 string as a parameter.

ReplaceColor : This function replaces a specific color area in a Base64-encoded image with another color. It takes the input image in Base64 format, the target color to be replaced, the replacement color, and a tolerance value. It decodes the input image, creates an output bitmap with the same dimensions, and iterates through each pixel of the input image. It calculates the color difference between the current pixel color and the target color and checks if the difference is within the tolerance. If it is, the pixel color is replaced with the replacement color; otherwise, the pixel color remains the same. Finally, the modified image is encoded back to Base64 format and returned.
Examples:
original image

affected images :


ReplaceColorWithImage: This function replaces a specific color area in a Base64-encoded image with another image specified by its Base64 code. It takes the input image in Base64 format, the target color, the replacement image in Base64 format, and a tolerance value. It decodes both the input image and the replacement image, creates an output bitmap with the same dimensions, and iterates through each pixel of the input image. It calculates the color difference between the current pixel color and the target color and checks if the difference is within the tolerance. If it is, the pixel color is replaced with the corresponding pixel from the replacement image. If the replacement image is smaller than the input image, it wraps around to repeat the replacement pattern. If the difference is not within the tolerance, the pixel color remains the same. Finally, the modified image is encoded back to Base64 format and returned.
Example:
original image
Affected image:

Video
AIA and AIX files
you can buy both of them in zip file both of the costs 8$ via PayPal , after you complete your payment you will be directly redirected to download URL to download you zip file . pay here ![]()
https://www.paypal.com/cgi-bin/webscr?cmd=_s-xclick&hosted_button_id=HFKDRVJ5Z7H6N
if you do not have PayPal you can PM me to get solution .
Note :
AIA Project is for Kodular try it with kodular
my website that has all of my extensions
Thanks
this extension was created by Mr_Koder
enjoy ![]()
