How to Create extension java code help with chatgpt and Create extension in Eide app in mobile device.
description
in this tutorial i am show how to create appinventor java code help with chatgpt and to create extension in Eide app in mobile devices. No need any external compiler or online platform its totaly working offline.
in past no any standalone ide for mobile to create extension. thank eide developer to create this ide for mobile.
Video tutorial : yes
find on bottom
What is ChatGPT?
- ChatGPT is a conversational AI model developed by OpenAI. It is based on the GPT (Generative Pre-trained Transformer) architecture, which uses deep learning techniques to understand and generate human-like text. ChatGPT can perform a variety of tasks, such as answering questions, providing explanations, engaging in dialogue, and even generating creative content. It is designed to understand and produce text based on the input it receives, making it useful for a wide range of applications, from customer support to personal assistants and educational tools.
Requirments
-
chatgpt app playstore here
-
Eide extension ide for mobile playstore here
-
most of java knowledge or java basic.
impportent
chatgpt result is ai generated code and every time result is not same and accurate. result is based on your quiry to find in ai engine. It's only help your doubt. And your choice the generated code is properly working or not.
tutorial Step
1st Step : Create java code
- open chatgpt app
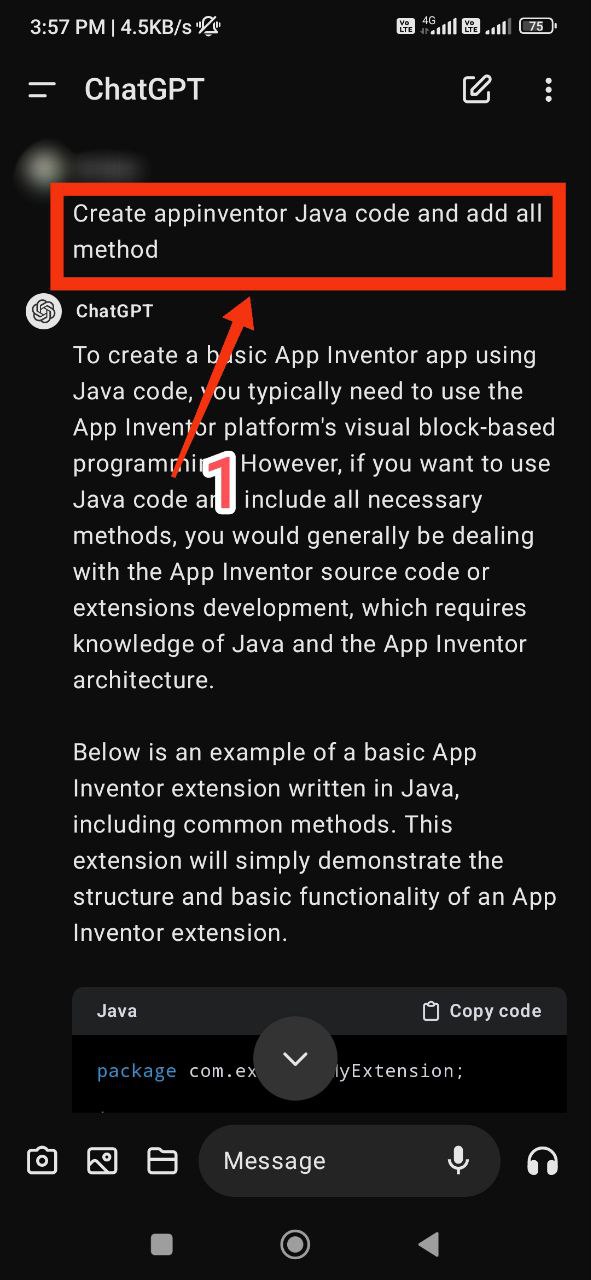
Task 1
Create appinventor Java code and add all method
get result on chatgpt
To create a basic App Inventor app using Java code, you typically need to use the App Inventor platform's visual block-based programming. However, if you want to use Java code and include all necessary methods, you would generally be dealing with the App Inventor source code or extensions development, which requires knowledge of Java and the App Inventor architecture.
Below is an example of a basic App Inventor extension written in Java, including common methods. This extension will simply demonstrate the structure and basic functionality of an App Inventor extension.
package com.example.MyExtension;

import com.google.appinventor.components.annotations.*;
import com.google.appinventor.components.common.ComponentCategory;
import com.google.appinventor.components.runtime.AndroidNonvisibleComponent;
import com.google.appinventor.components.runtime.ComponentContainer;
import com.google.appinventor.components.runtime.EventDispatcher;

@DesignerComponent(
    version = 1,
    description = "My Extension Example",
    category = ComponentCategory.EXTENSION,
    nonVisible = true,
    iconName = "http://example.com/icon.png"
)
@SimpleObject(external = true)
public class MyExtension extends AndroidNonvisibleComponent {

    public MyExtension(ComponentContainer container) {
        super(container.$form());
    }

    @SimpleFunction(description = "This function returns a greeting message.")
    public String Greet(String name) {
        return "Hello, " + name + "!";
    }

    @SimpleEvent(description = "Event triggered when greeting is made.")
    public void GreetingMade(String message) {
        EventDispatcher.dispatchEvent(this, "GreetingMade", message);
    }

    @SimpleFunction(description = "This function triggers the GreetingMade event.")
    public void TriggerGreetingEvent(String name) {
        String message = Greet(name);
        GreetingMade(message);
    }

    @SimpleProperty(description = "This is a sample property.")
    public String SampleProperty() {
        return "Sample Property Value";
    }

    @SimpleProperty(description = "Set the sample property.")
    public void SampleProperty(String value) {
        // Store the value if needed
    }

    @SimpleEvent(description = "A sample event.")
    public void SampleEvent() {
        EventDispatcher.dispatchEvent(this, "SampleEvent");
    }

    @SimpleFunction(description = "Trigger the sample event.")
    public void TriggerSampleEvent() {
        SampleEvent();
    }
}
Explanation:
- @DesignerComponent: Annotation that provides metadata about the extension, including version, description, category, and icon.
- @SimpleObject: Marks this class as an App Inventor component.
- @SimpleFunction: Defines a method that can be called from the App Inventor blocks.
- @SimpleEvent: Defines an event that can be triggered from the extension and handled in App Inventor.
- @SimpleProperty: Defines a property that can be set and retrieved in App Inventor.
Key Methods:
- Greet(String name): A function that returns a greeting message.
- GreetingMade(String message): An event triggered when a greeting is made.
- TriggerGreetingEvent(String name): A function that triggers the
GreetingMadeevent. - SampleProperty() / SampleProperty(String value): Getters and setters for a sample property.
- SampleEvent() / TriggerSampleEvent(): Defines and triggers a sample event.
This example provides a basic structure for creating an App Inventor extension in Java, including functions, properties, and events.
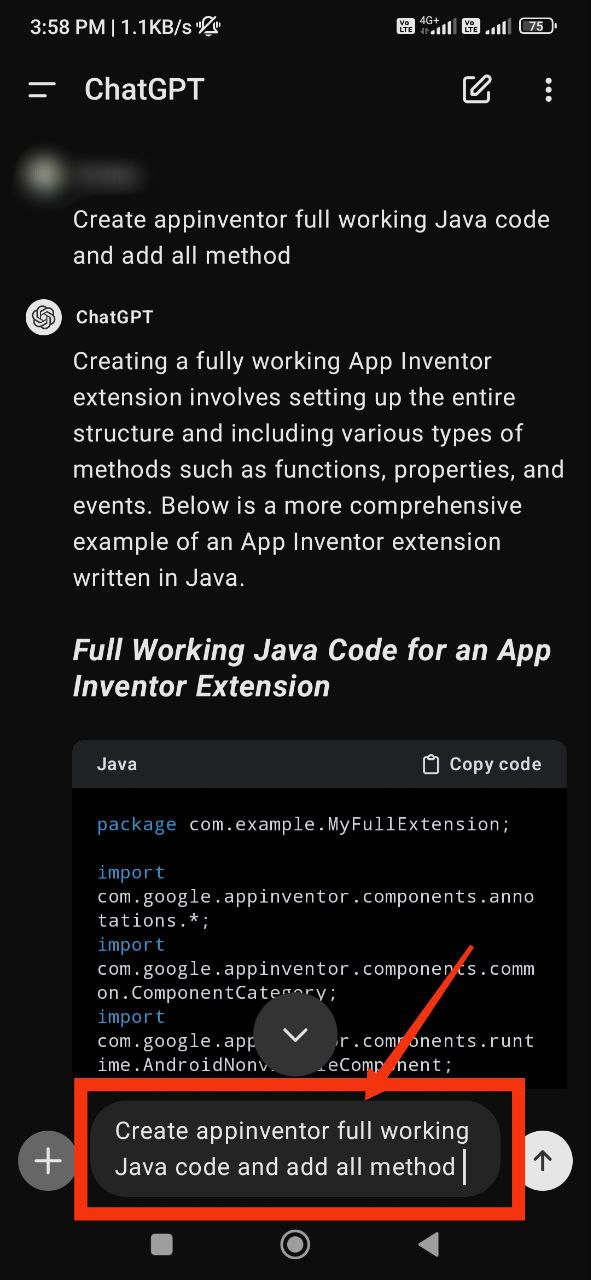
Task 2
Create appinventor full working Java code and add all method.
get result on chatgpt
Creating a fully working App Inventor extension involves setting up the entire structure and including various types of methods such as functions, properties, and events. Below is a more comprehensive example of an App Inventor extension written in Java.
Full Working Java Code for an App Inventor Extension
package com.example.MyFullExtension;

import com.google.appinventor.components.annotations.*;
import com.google.appinventor.components.common.ComponentCategory;
import com.google.appinventor.components.runtime.AndroidNonvisibleComponent;
import com.google.appinventor.components.runtime.ComponentContainer;
import com.google.appinventor.components.runtime.EventDispatcher;

@DesignerComponent(
    version = 1,
    description = "My Full Extension Example",
    category = ComponentCategory.EXTENSION,
    nonVisible = true,
    iconName = "http://example.com/icon.png"
)
@SimpleObject(external = true)
public class MyFullExtension extends AndroidNonvisibleComponent {

    private String sampleProperty;

    public MyFullExtension(ComponentContainer container) {
        super(container.$form());
        sampleProperty = "Default Value";
    }

    @SimpleFunction(description = "This function returns a greeting message.")
    public String Greet(String name) {
        return "Hello, " + name + "!";
    }

    @SimpleFunction(description = "This function calculates the sum of two numbers.")
    public int AddNumbers(int num1, int num2) {
        return num1 + num2;
    }

    @SimpleFunction(description = "This function checks if a number is even.")
    public boolean IsEven(int number) {
        return number % 2 == 0;
    }

    @SimpleEvent(description = "Event triggered when a greeting is made.")
    public void GreetingMade(String message) {
        EventDispatcher.dispatchEvent(this, "GreetingMade", message);
    }

    @SimpleFunction(description = "This function triggers the GreetingMade event.")
    public void TriggerGreetingEvent(String name) {
        String message = Greet(name);
        GreetingMade(message);
    }

    @SimpleProperty(description = "This is a sample property.")
    public String SampleProperty() {
        return sampleProperty;
    }

    @SimpleProperty(description = "Set the sample property.")
    public void SampleProperty(String value) {
        sampleProperty = value;
    }

    @SimpleEvent(description = "A sample event.")
    public void SampleEvent() {
        EventDispatcher.dispatchEvent(this, "SampleEvent");
    }

    @SimpleFunction(description = "Trigger the sample event.")
    public void TriggerSampleEvent() {
        SampleEvent();
    }

    @SimpleFunction(description = "This function reverses a string.")
    public String ReverseString(String input) {
        return new StringBuilder(input).reverse().toString();
    }

    @SimpleFunction(description = "This function calculates the factorial of a number.")
    public int Factorial(int number) {
        if (number < 0) return -1; // Error case
        int result = 1;
        for (int i = 1; i <= number; i++) {
            result *= i;
        }
        return result;
    }

    @SimpleFunction(description = "This function returns the current sample property value.")
    public String GetSampleProperty() {
        return SampleProperty();
    }

    @SimpleEvent(description = "Event triggered when the sample property is set.")
    public void SamplePropertyChanged(String newValue) {
        EventDispatcher.dispatchEvent(this, "SamplePropertyChanged", newValue);
    }

    @SimpleFunction(description = "Set the sample property and trigger event.")
    public void SetSamplePropertyAndTriggerEvent(String value) {
        SampleProperty(value);
        SamplePropertyChanged(value);
    }
}
Explanation:
- @DesignerComponent: Provides metadata about the extension.
- @SimpleObject: Marks this class as an App Inventor component.
- @SimpleFunction: Defines methods that can be called from the App Inventor blocks.
- @SimpleEvent: Defines events that can be triggered and handled in App Inventor.
- @SimpleProperty: Defines properties that can be set and retrieved in App Inventor.
Methods Included:
- Greet(String name): Returns a greeting message.
- AddNumbers(int num1, int num2): Returns the sum of two numbers.
- IsEven(int number): Checks if a number is even.
- GreetingMade(String message): Event triggered when a greeting is made.
- TriggerGreetingEvent(String name): Triggers the
GreetingMadeevent. - SampleProperty(): Getter for the sample property.
- SampleProperty(String value): Setter for the sample property.
- SampleEvent(): A sample event.
- TriggerSampleEvent(): Triggers the sample event.
- ReverseString(String input): Reverses a given string.
- Factorial(int number): Calculates the factorial of a number.
- GetSampleProperty(): Returns the current sample property value.
- SamplePropertyChanged(String newValue): Event triggered when the sample property is changed.
- SetSamplePropertyAndTriggerEvent(String value): Sets the sample property and triggers the
SamplePropertyChangedevent.
How to Use:
- Install Extension: Compile this Java code into a
.aixfile and upload it to the App Inventor platform. - Use Blocks: Use the blocks corresponding to these methods, properties, and events in the App Inventor project.
This code provides a comprehensive example of an App Inventor extension, covering various functionalities and best practices.
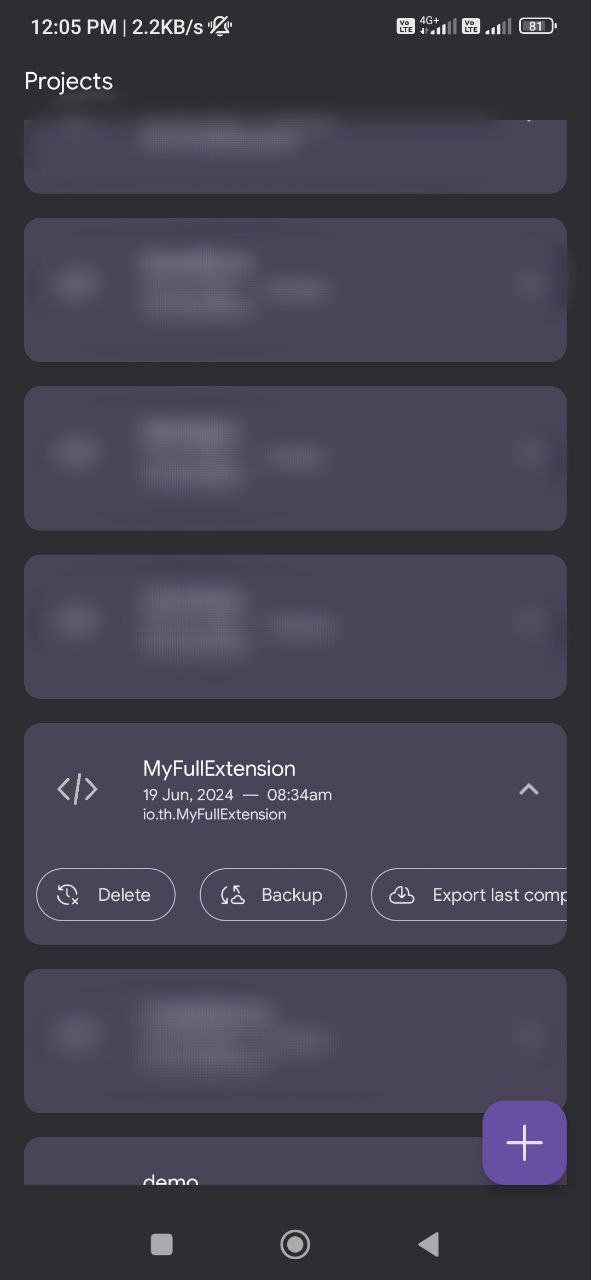
2nd Step to Creating extension of generated java code
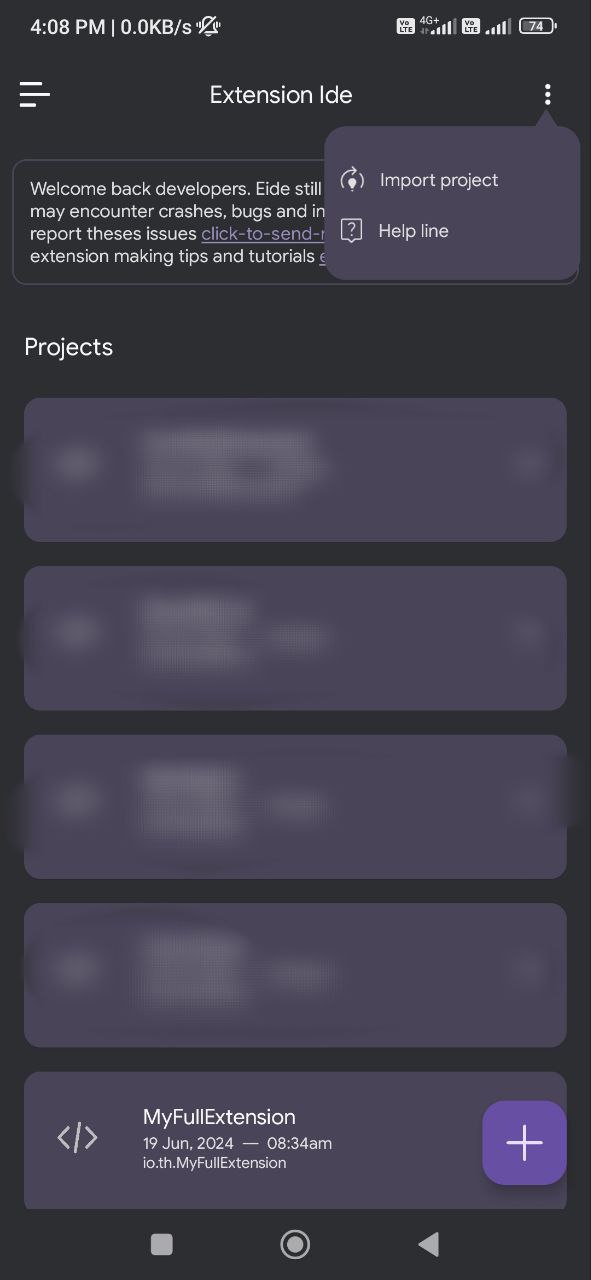
- EIDE is appinventor extension maker ide
link here
- open Eide App
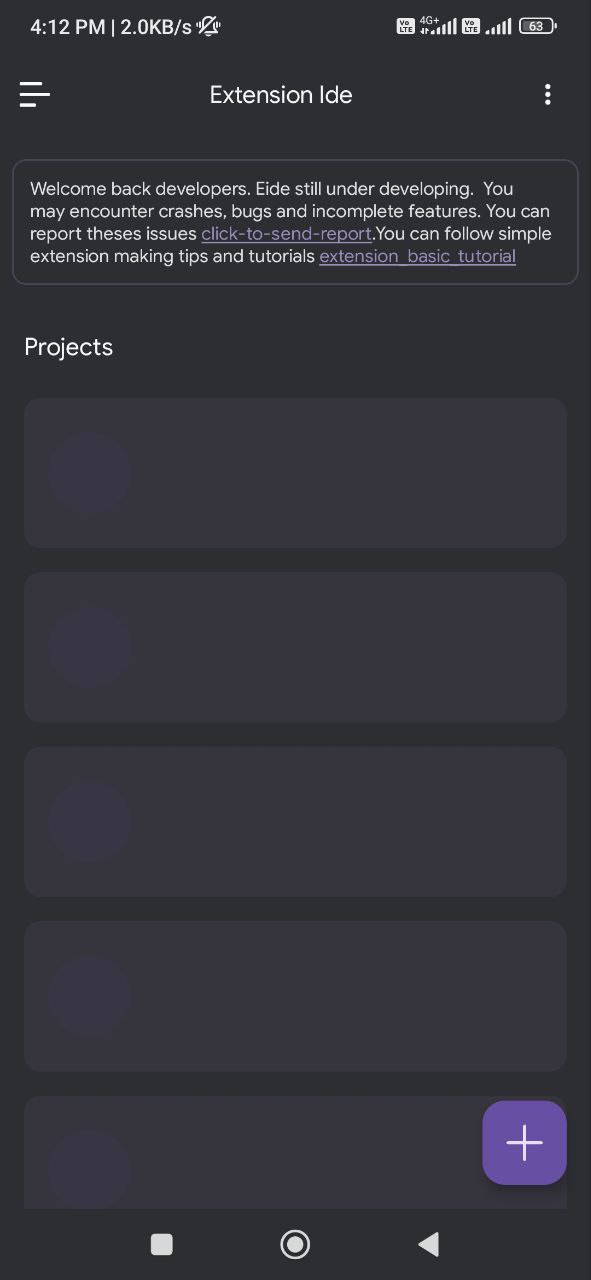
shee the home page bottom right on click on + icon Button
then
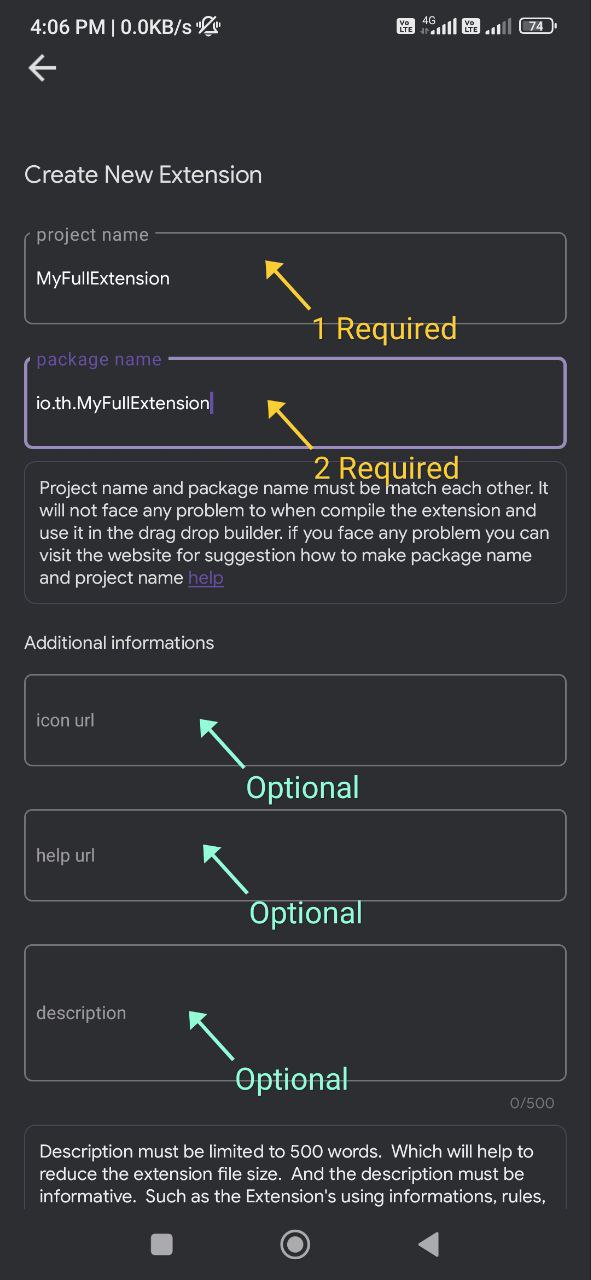
- enter project name
- package name as (name of same as project)
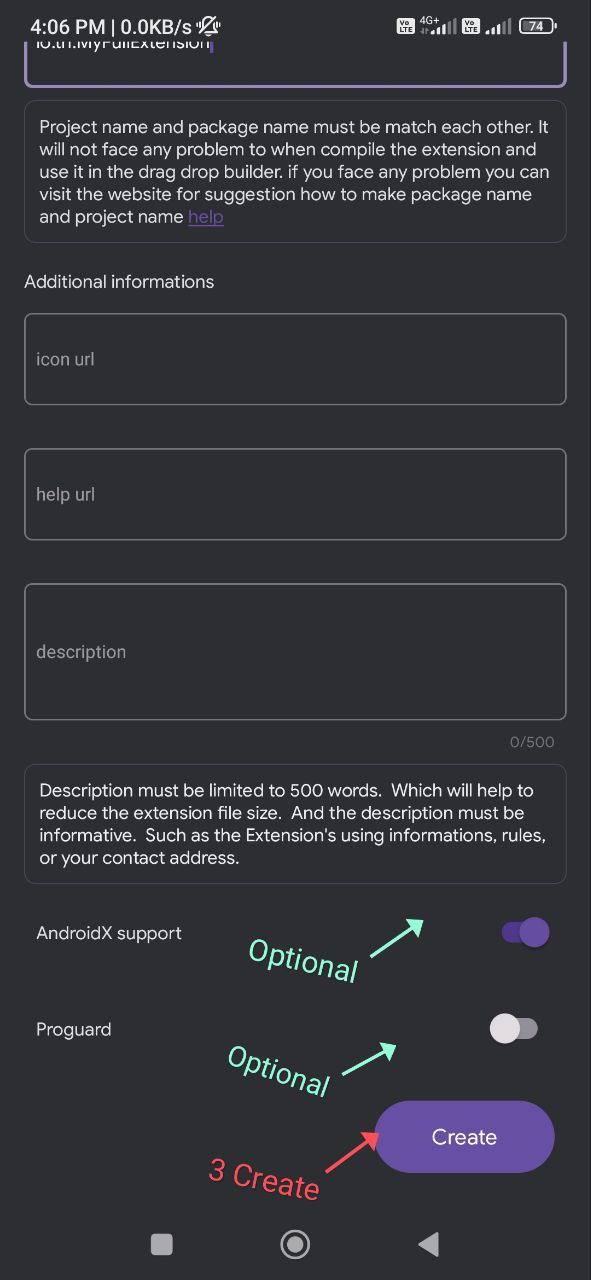
- and add optional icon url, help url, description and proguard.
-
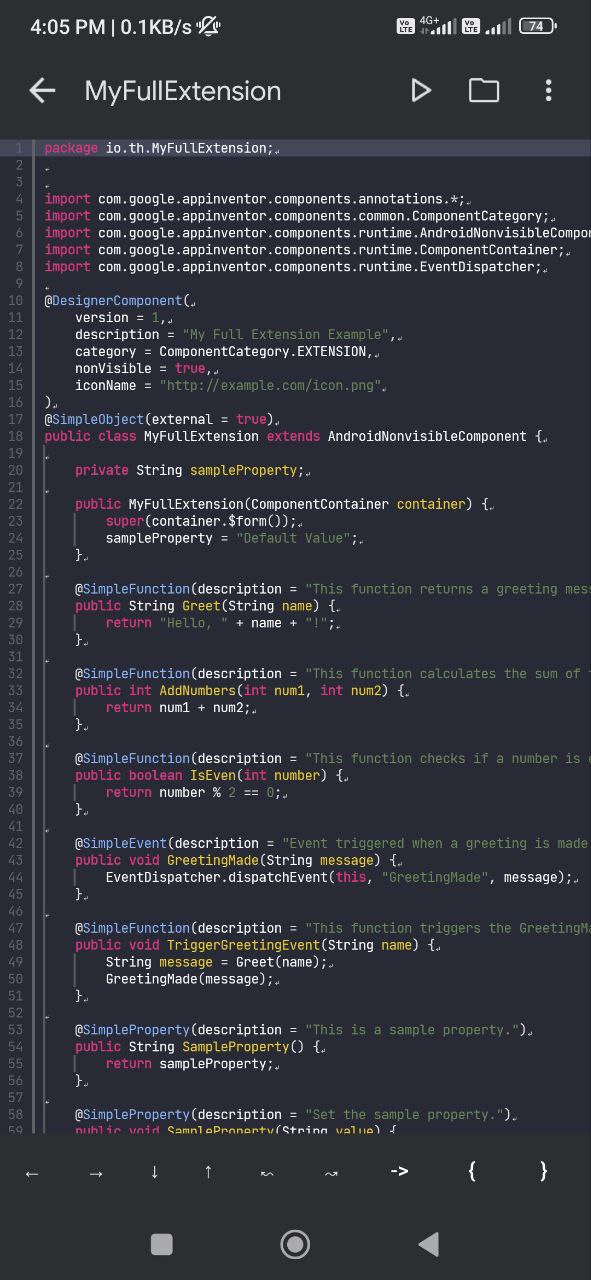
Home page paste the copy java code generated of chatgpt and check packege name of your project name.
-
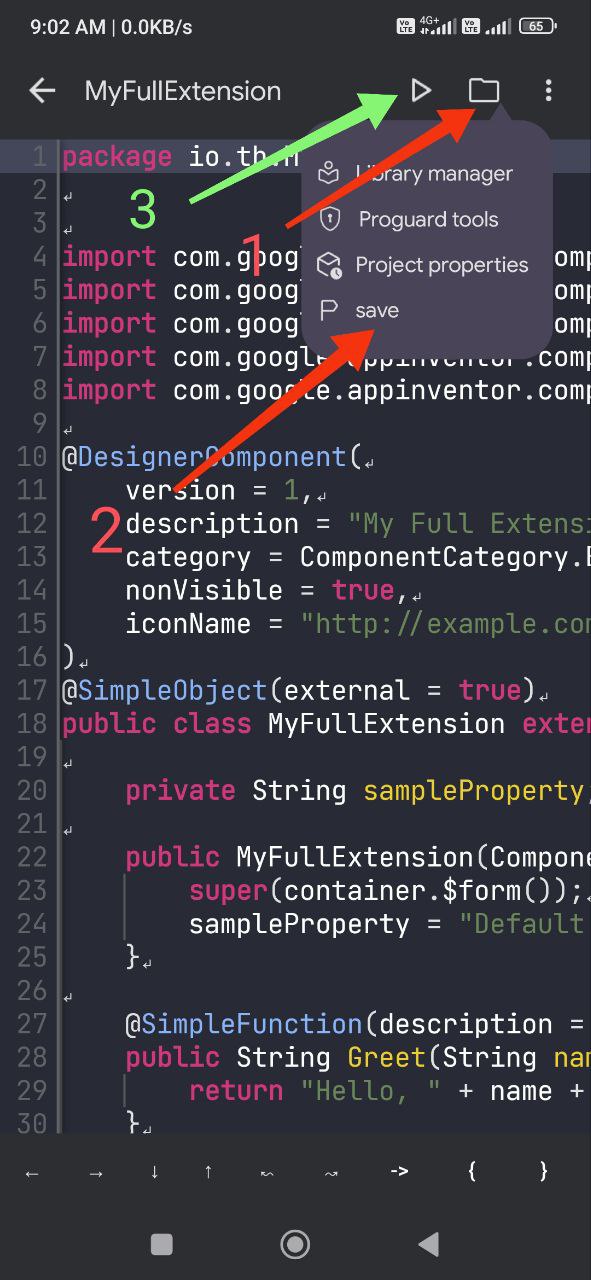
and build extension in top right corner Button. build succesfuly and next save your extension in file location.
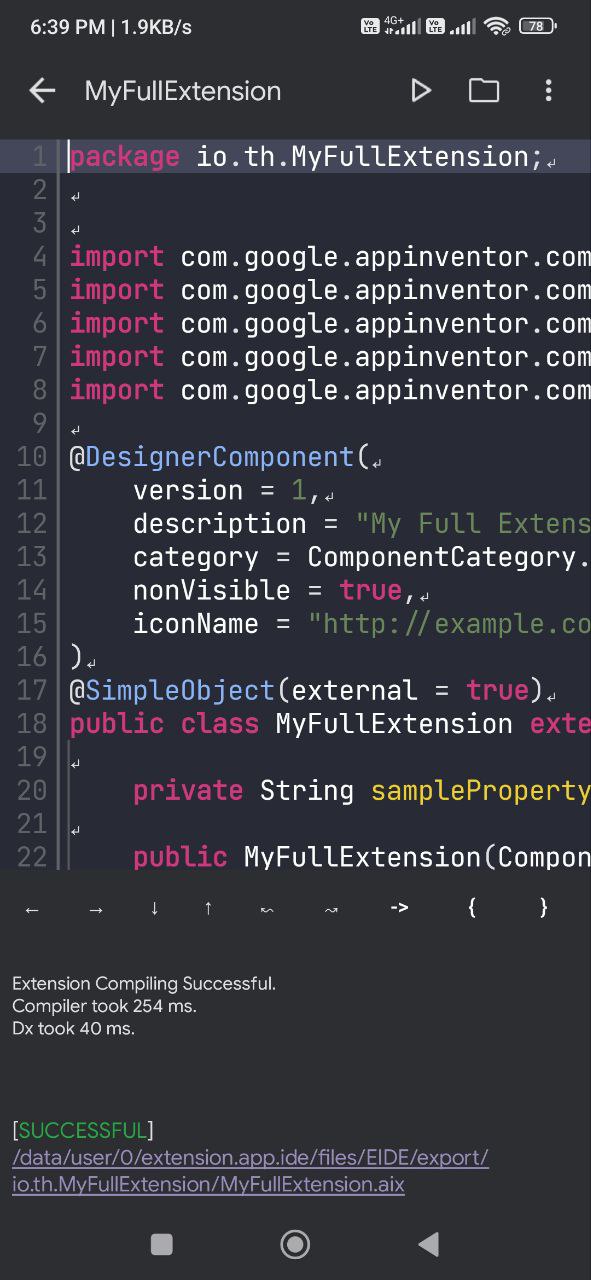
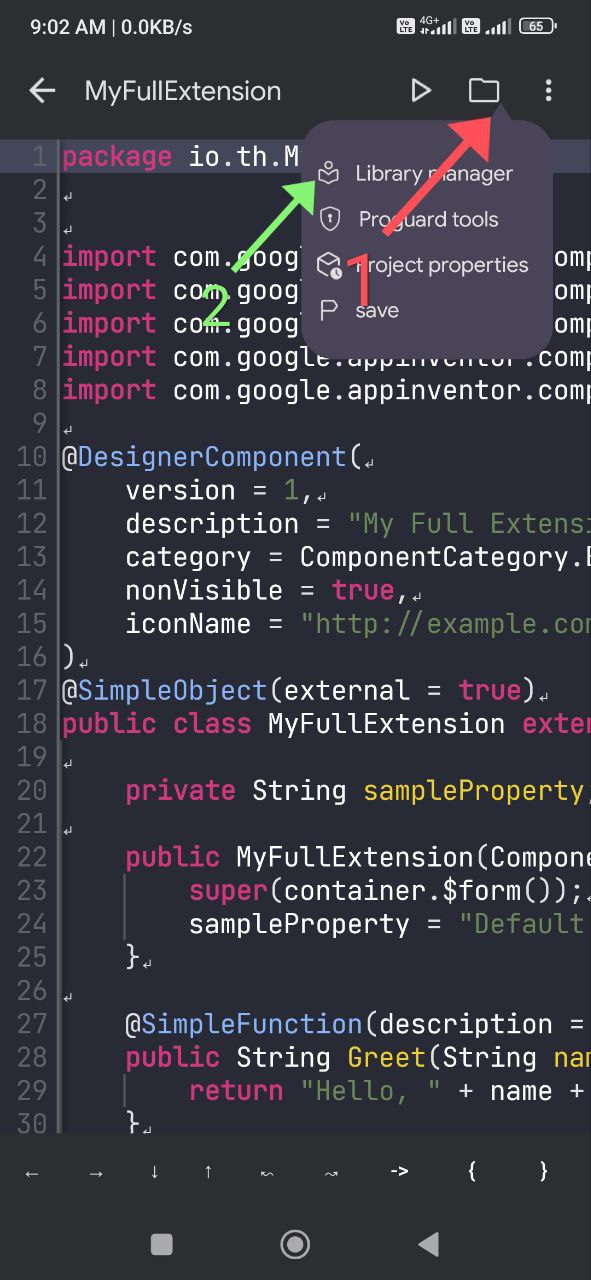
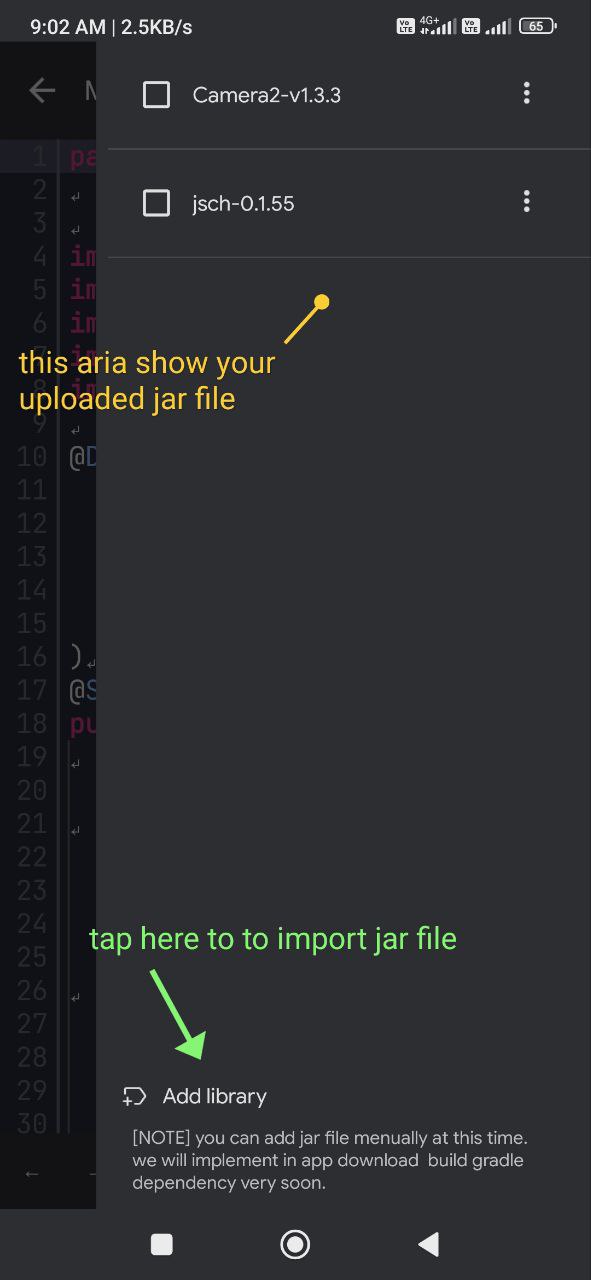
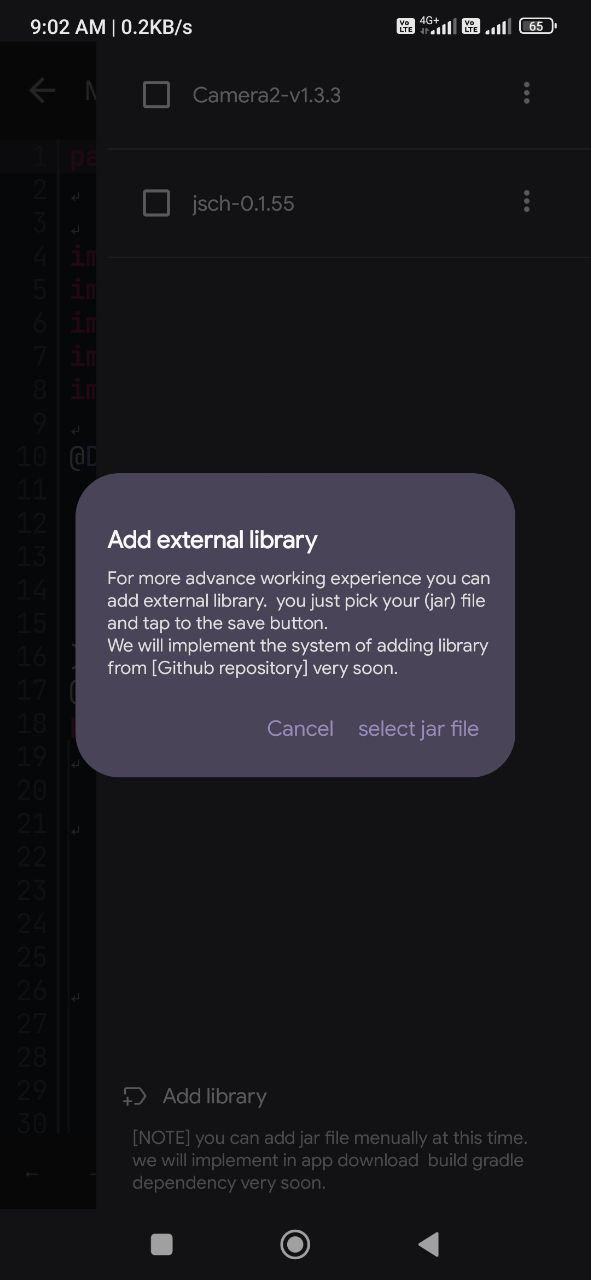
in the project page add neccesary library in java code and library .jar file in top right corner file icon to click to add.
-
build Error
if found any Error then shee bottom Error message, and solve this Error and build again. then shee build succesfuly.- Backup ande impport
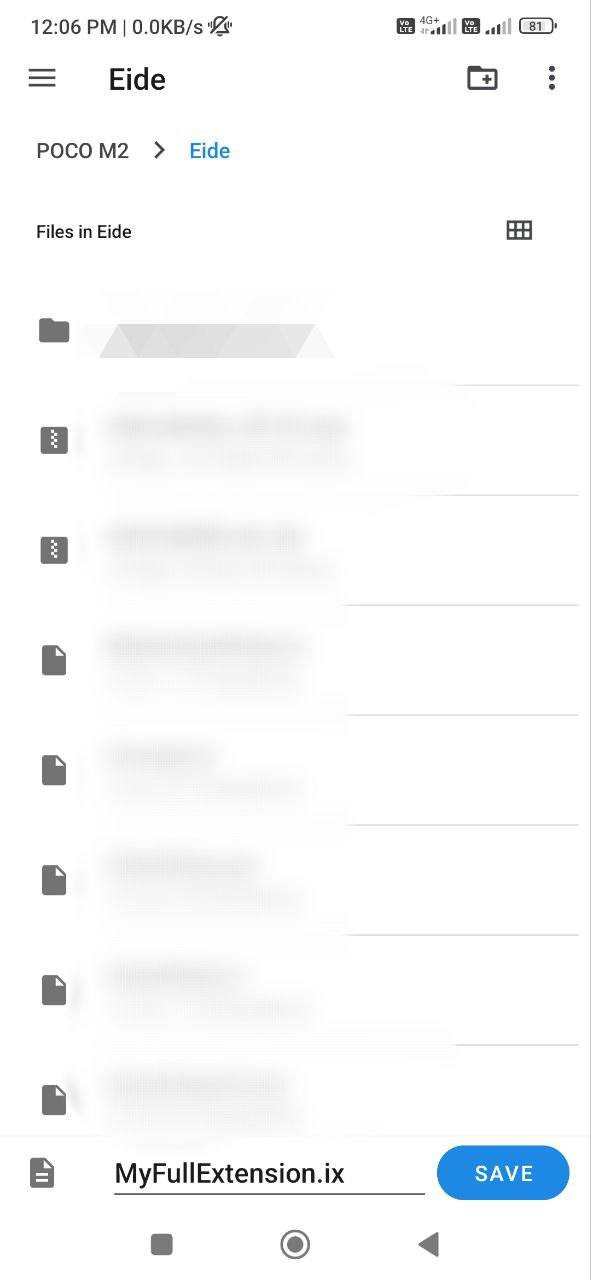
if you wish to Backup your java code and save file location, in future continue of extension development then import it in eide ide. (example: .ix extension )
- Backup ande impport
Download
demo aix drive link
here
demo ix file
here
- aix file
MyFullExtension.aix (6.1 KB)
Conclusion
- benefit of chatgpt help to Creating appinventor ai generated java code to implement this code to your extension java code.
- solve Error and Error hendling.
- Explanation of code.
- how to uses and more.
- Chatgpt code is not 100% accurate. It's helping us your any idea and improve it your code.
YouTube tutorial
https://youtu.be/cDsopS7JaDU?si=u4ZWrScMxZ27WZQq
FAQs:
How to Create extension in chatgpt ?
- No, chatgpt create only ai generated java code for Creating extension and if any error then solve them, and solve your requires.
Any tutorial how to impliment green blocks or event blocks.
- yes, in this ide tutorial on menu page, show the details how to use green blocks or event blocks in own extension.
Any Desktop version to develop extension.
Yes, rush extension template and more find in community
Thanks and Regards
@TechHamara to Creating this Guide
Thanks chatgpt to solve Error and manage java code, Thanks to the super eide @Edu_Book extension maker for mobile devices. Thanks to the Community and builder to Create app without codding. and Thanks to Community member to learn this tutorial.
if you helpful this Guide please like and share this tutorial.