Hosting your own TinyWebDB
This tutorial will help you to host your own TinyWebDB Instance for FREE using simple a simple 1-click deployment. You will not need to run any command, manually upload, or even manage anything; just simply choose a provider and press "Deploy".
Step 1: Choose A Provider
This 1-click deployment is available in both Cloudflare Workers and Vercel Functions. Both providers offer a generous free tier which will suffice for most projects, without having to enter a single credit card.
Once you have decided one of them, just create a free account with them.
Step 2: Deploy
Then, perform the 1-click deployment by pressing either of the following buttons. Make sure to only use one of the 3 options available for the provider you have signed up with:
| Hosting | Database | Deploy |
|---|---|---|
| Cloudflare Workers | KV (Key-Value) | |
| Cloudflare Workers | D1 (SQLite) | |
| Cloudflare Workers | R2 (Object Storage) | |
| Vercel Edge Functions | KV (Redis) | |
| Vercel Edge Functions | Postgres | |
| Vercel Functions | Blob Storage |
Each provider offers different database options with different free tiers and characteristics (for example, faster response times or larger value contents). For exploring and testing, either of the options works more than fine.
To learn more about each database option, see below.
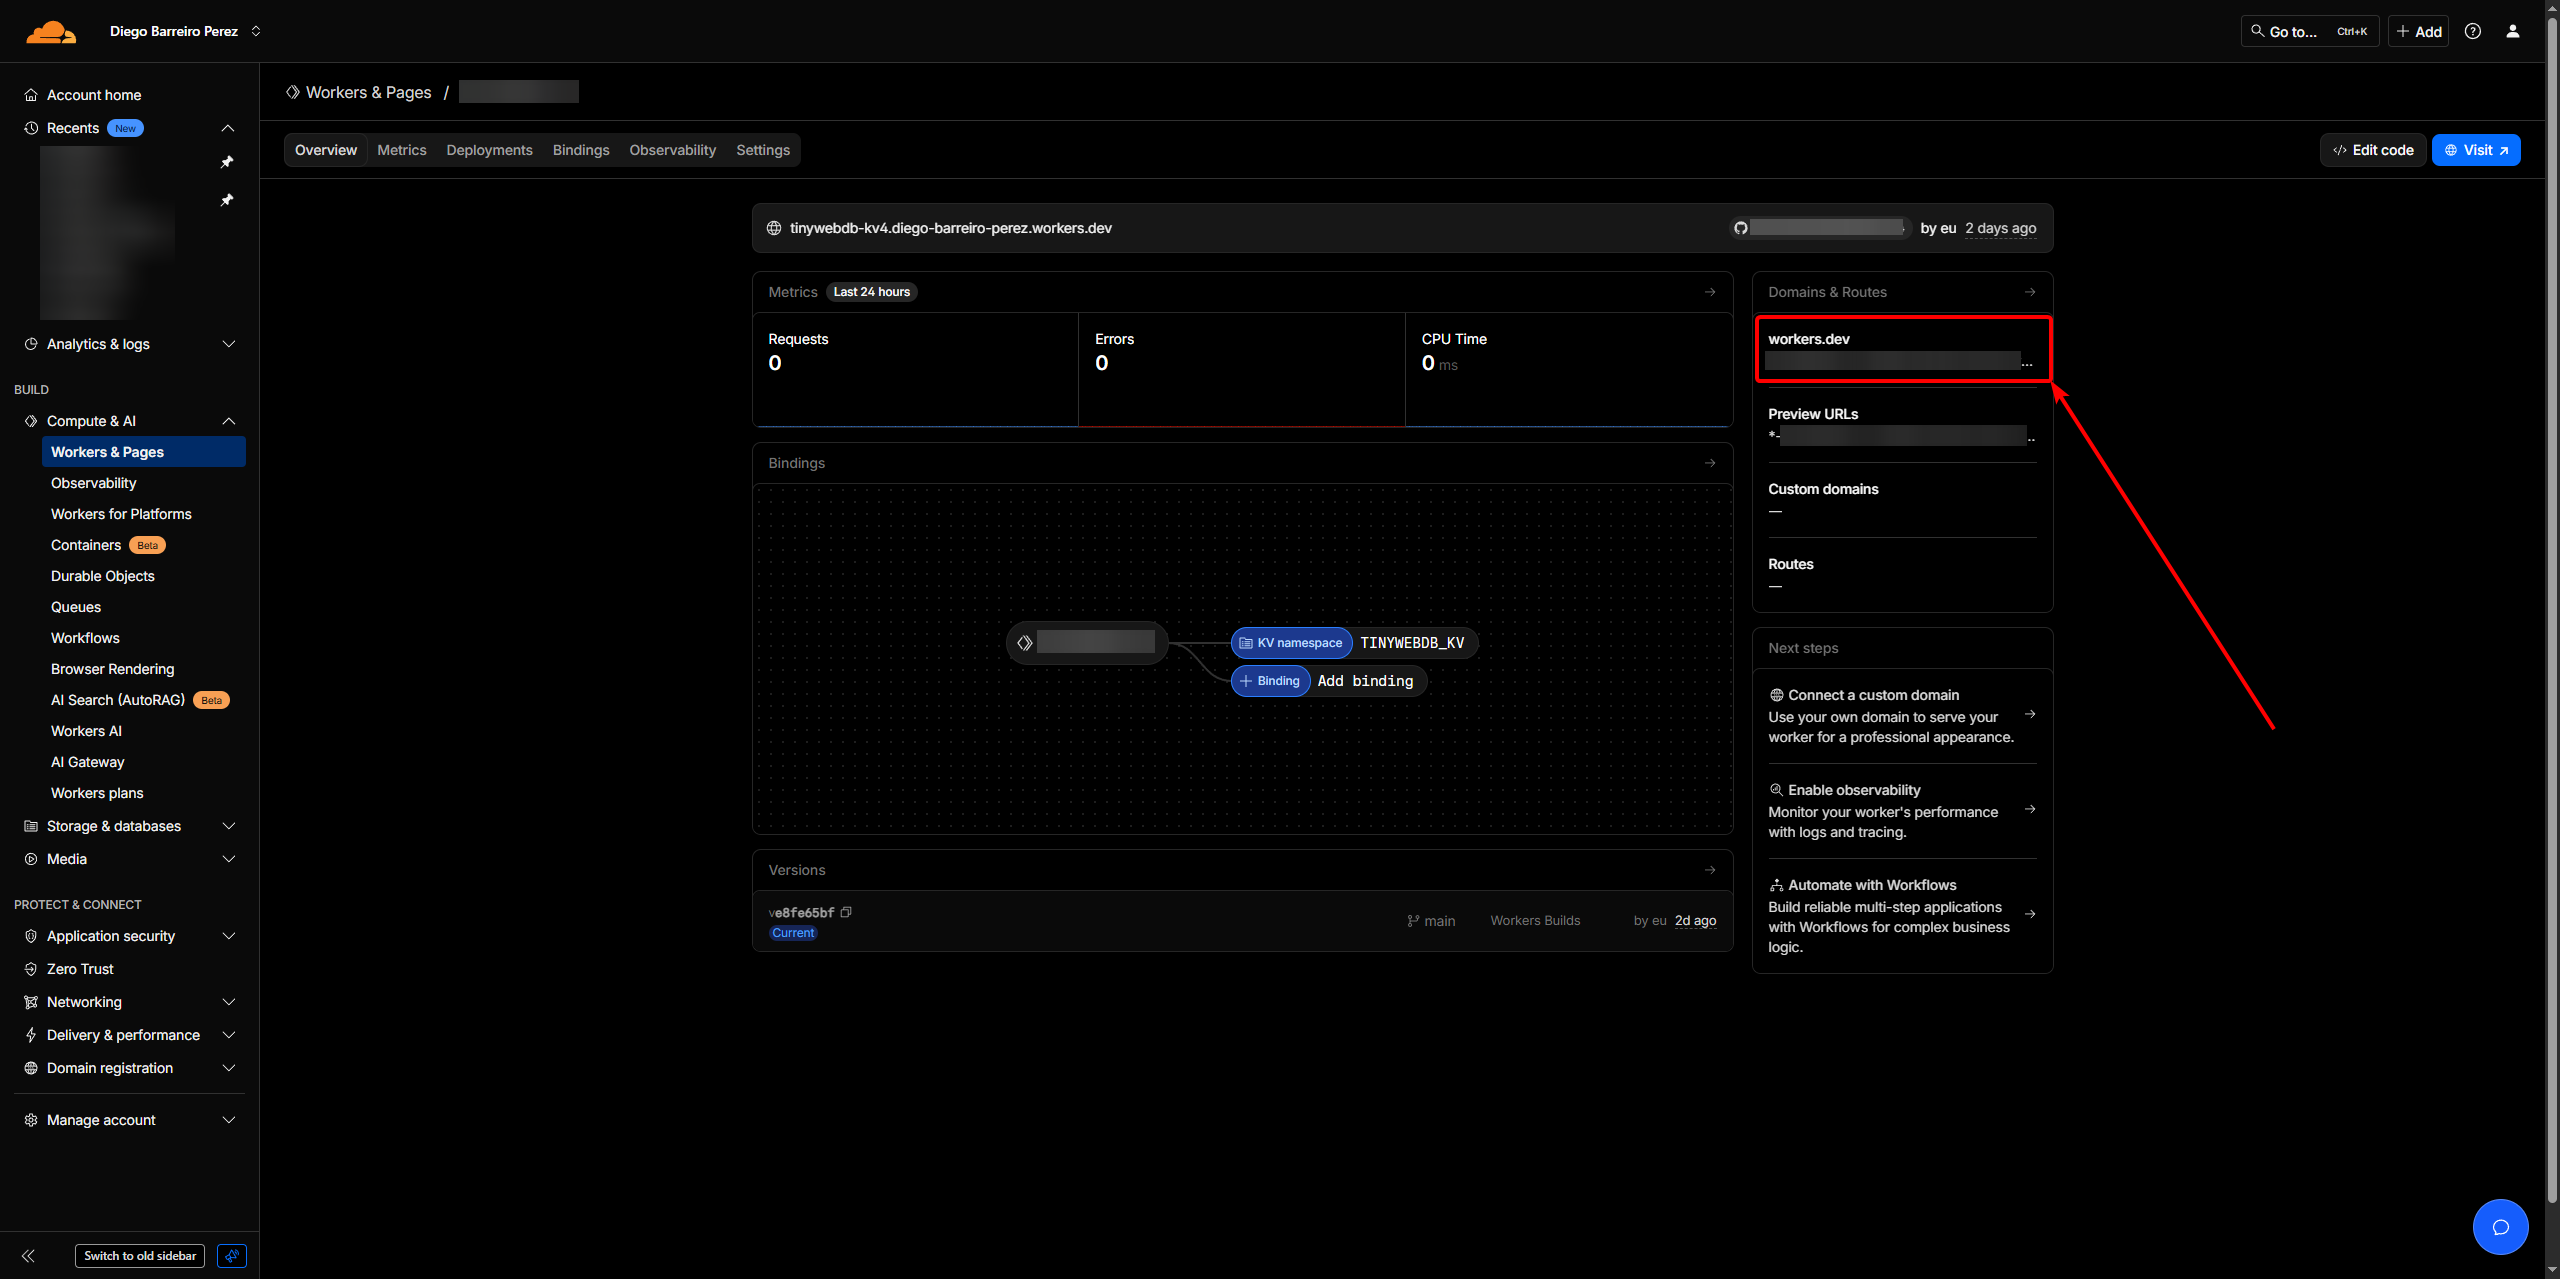
Step 3: Update Your Components
Finally, just update the Service URL property in your TinyWebDB components to the URL either Vercel or Cloudflare gave to you. You can find the exact locations in here:

Original Sources
The project is open source under MIT license. A more detailed guide and provider/database comparison is available in the README of the original repository:
How does it work?
In case of curious minds, there is some "core" logic written in JavaScript which handles all the operations TinyWebDB interacts with (TinyWebDB-OneClick/packages/core at main · Kodular/TinyWebDB-OneClick · GitHub), being provider and database agnostic. Then, there are adapter layers for both APIs and database which allow interacting with the core logic input and outputs (like TinyWebDB-OneClick/packages/cloudflare-d1 at main · Kodular/TinyWebDB-OneClick · GitHub).