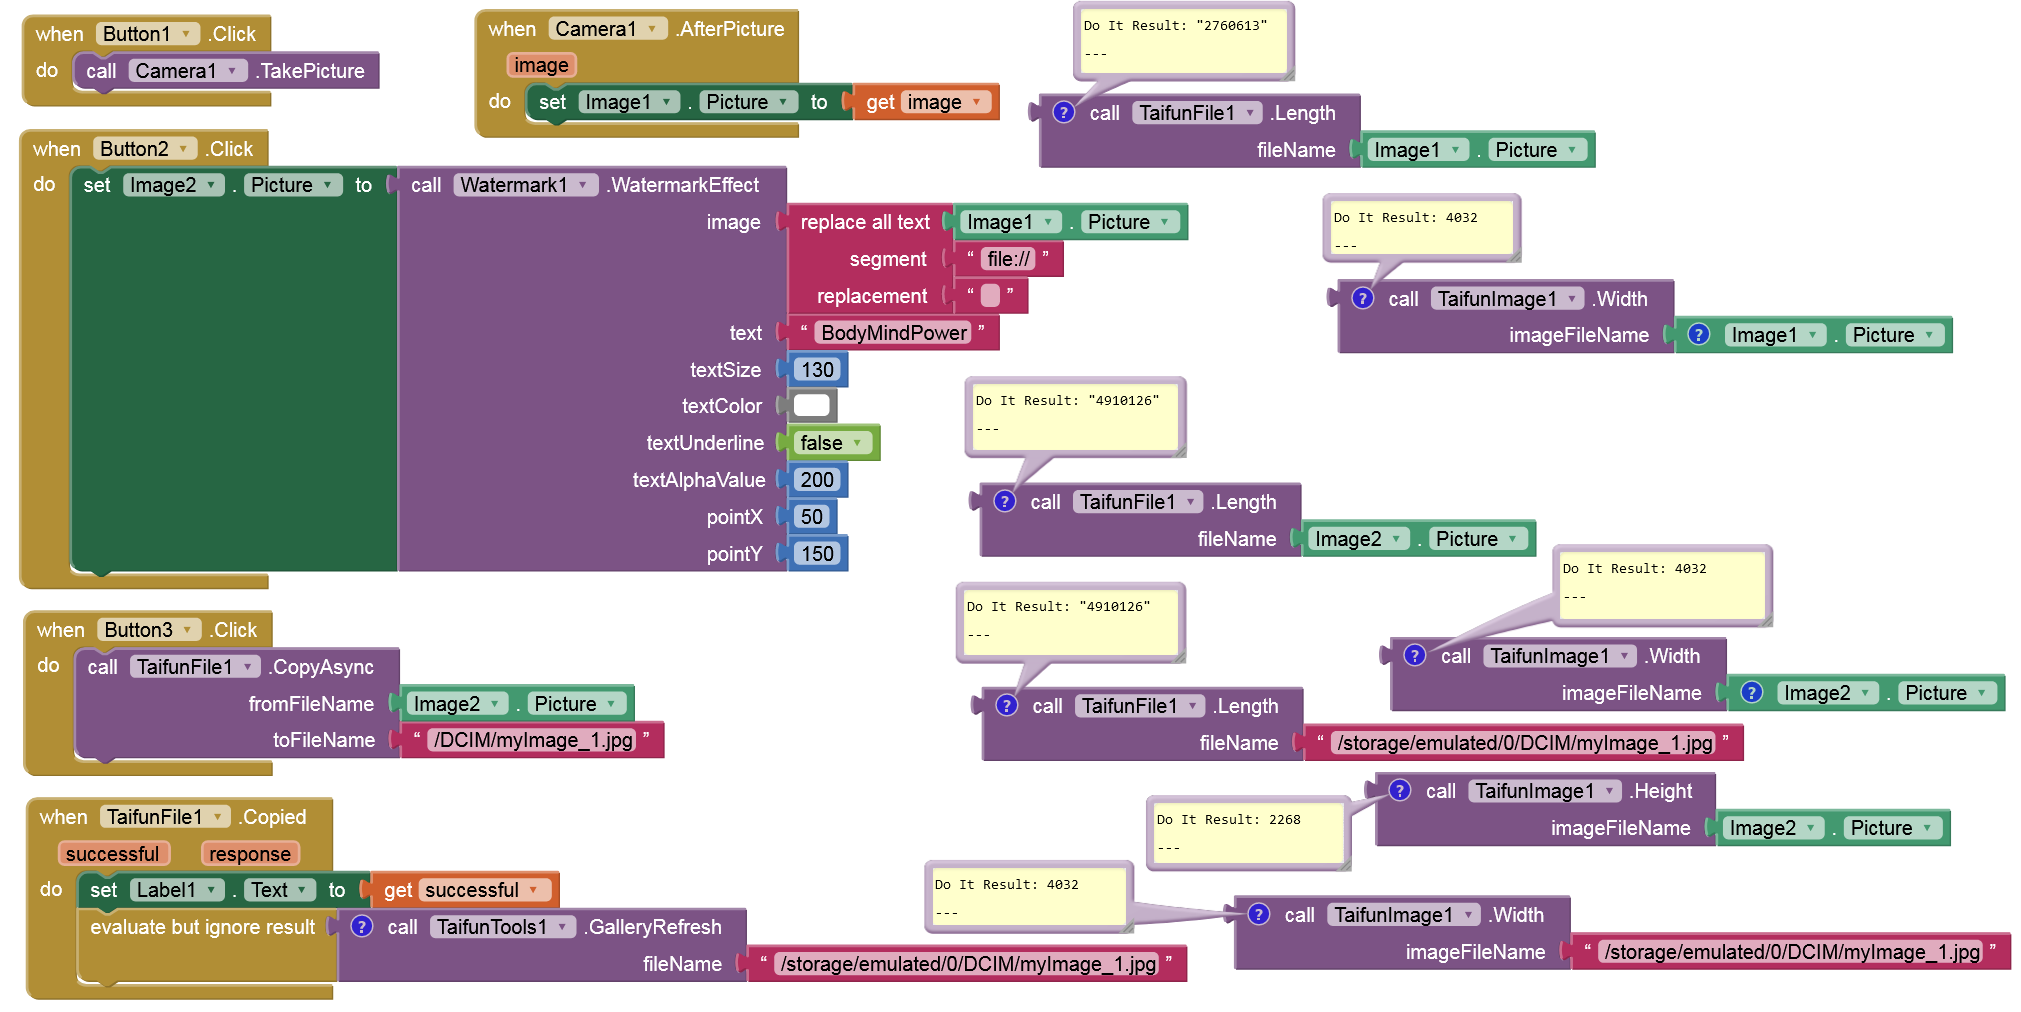
Thank you TIMAI2!
I tried your suggestion to use component to image to save the image, and I managed to get to this result (I still have some issues, but I'm getting closer to the solution): with the "save original image" command, I’m able to save the original photo, renamed as I want, into a specific folder. With the "save edited image" command, I can save the photo with the overlaid text, also renamed as I want, into the same folder as the other one.
The problem is that the photo with the overlaid text loses a lot of quality (I think it’s because of the conversion through the Image component, or maybe the component to image block). The original photo is about 4.3 MB, while the edited one is only 400 KB.
You will lose image quality if you do not set the image component to the actual dimensions of the image to be displayed.Doing this will massively overflow the screen and probably misplace the text overlay.
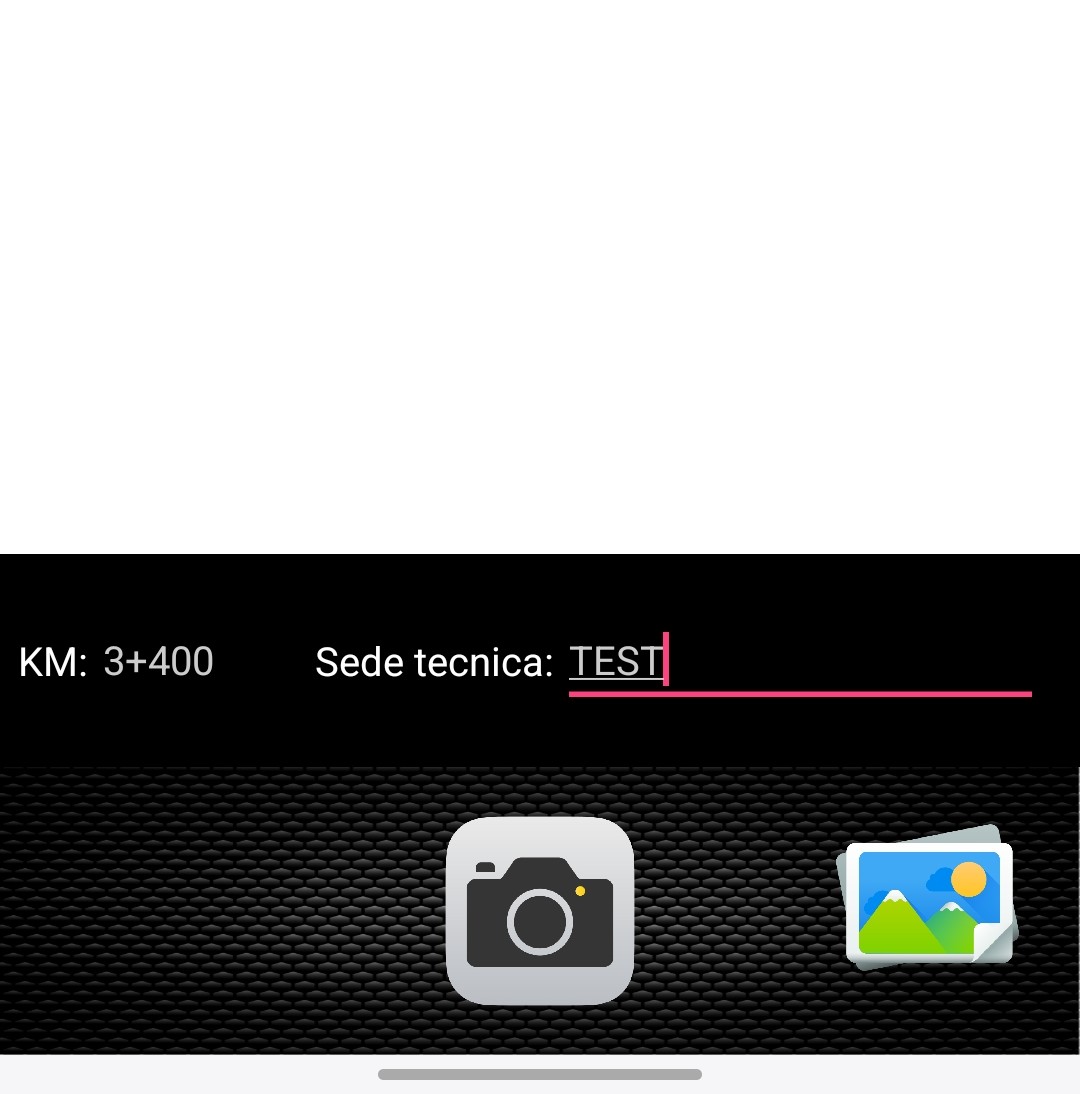
I left the Image component with height and width set to "Automatic" because sometimes the photos are horizontal, sometimes vertical; if they're taken with the wide-angle lens, the size changes, and if they're taken with the front camera, they have a different size again. Not to mention that, depending on the phone's sensor and settings, the photos can have different dimensions.
For this reason, I didn’t want to set a fixed size for the Image component, and I left it as automatic.
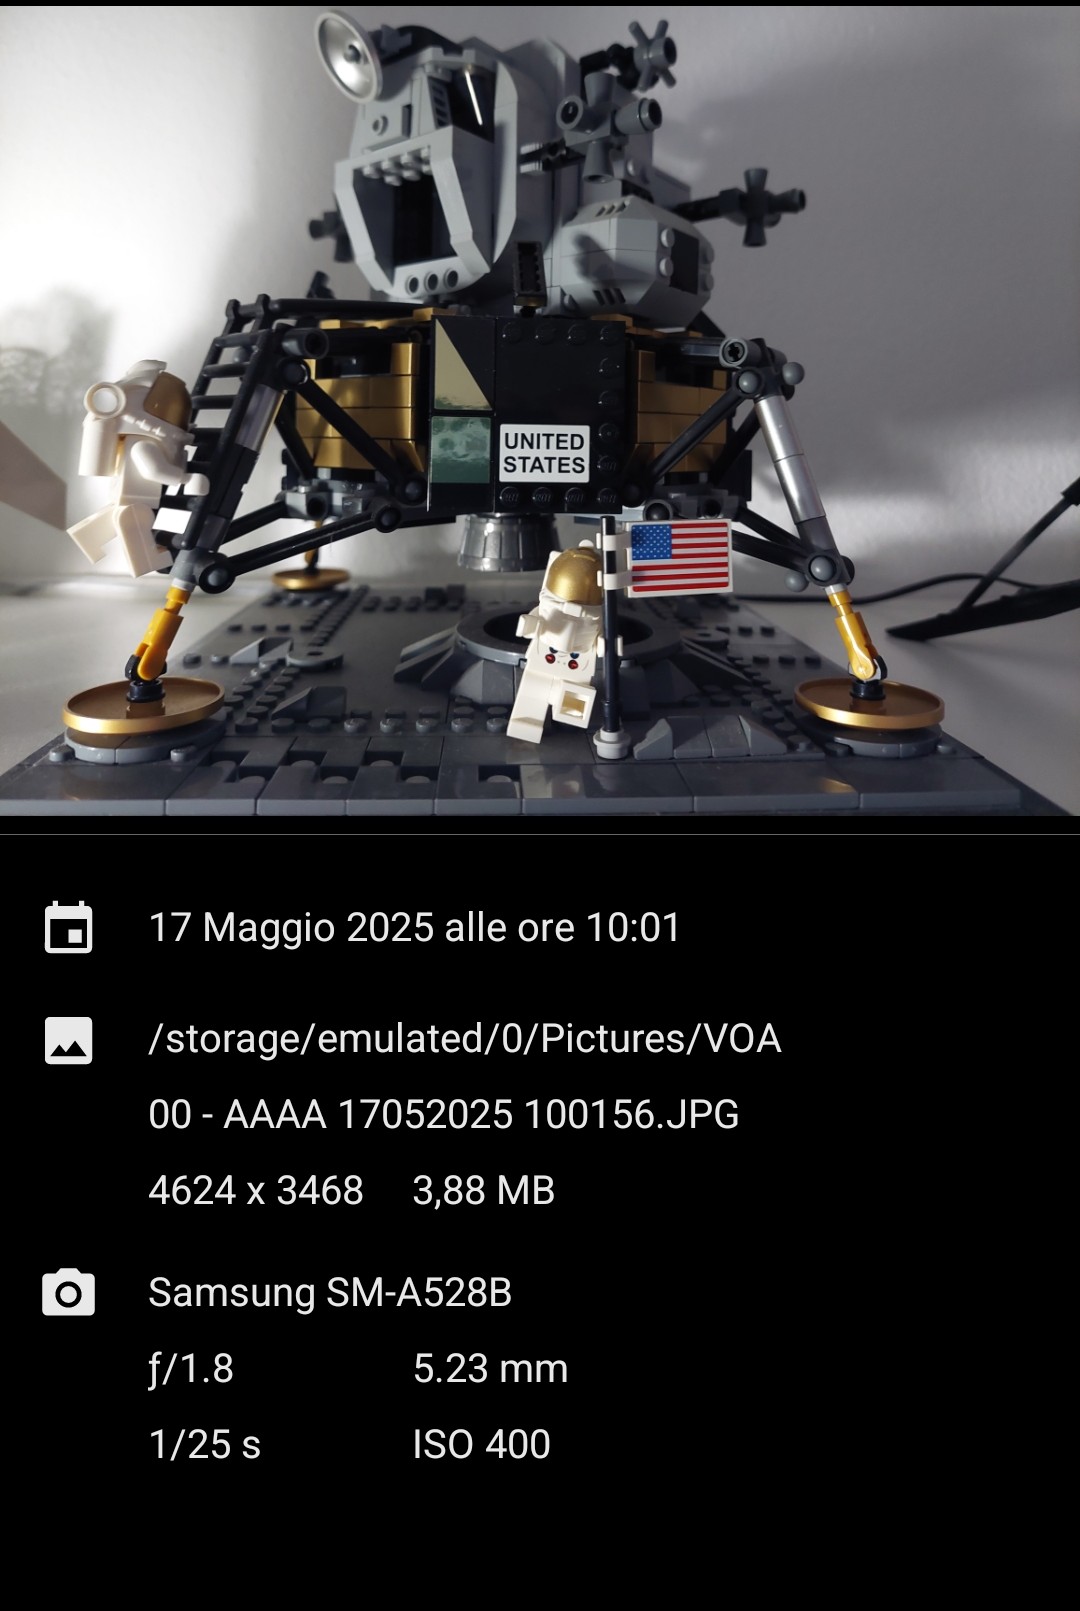
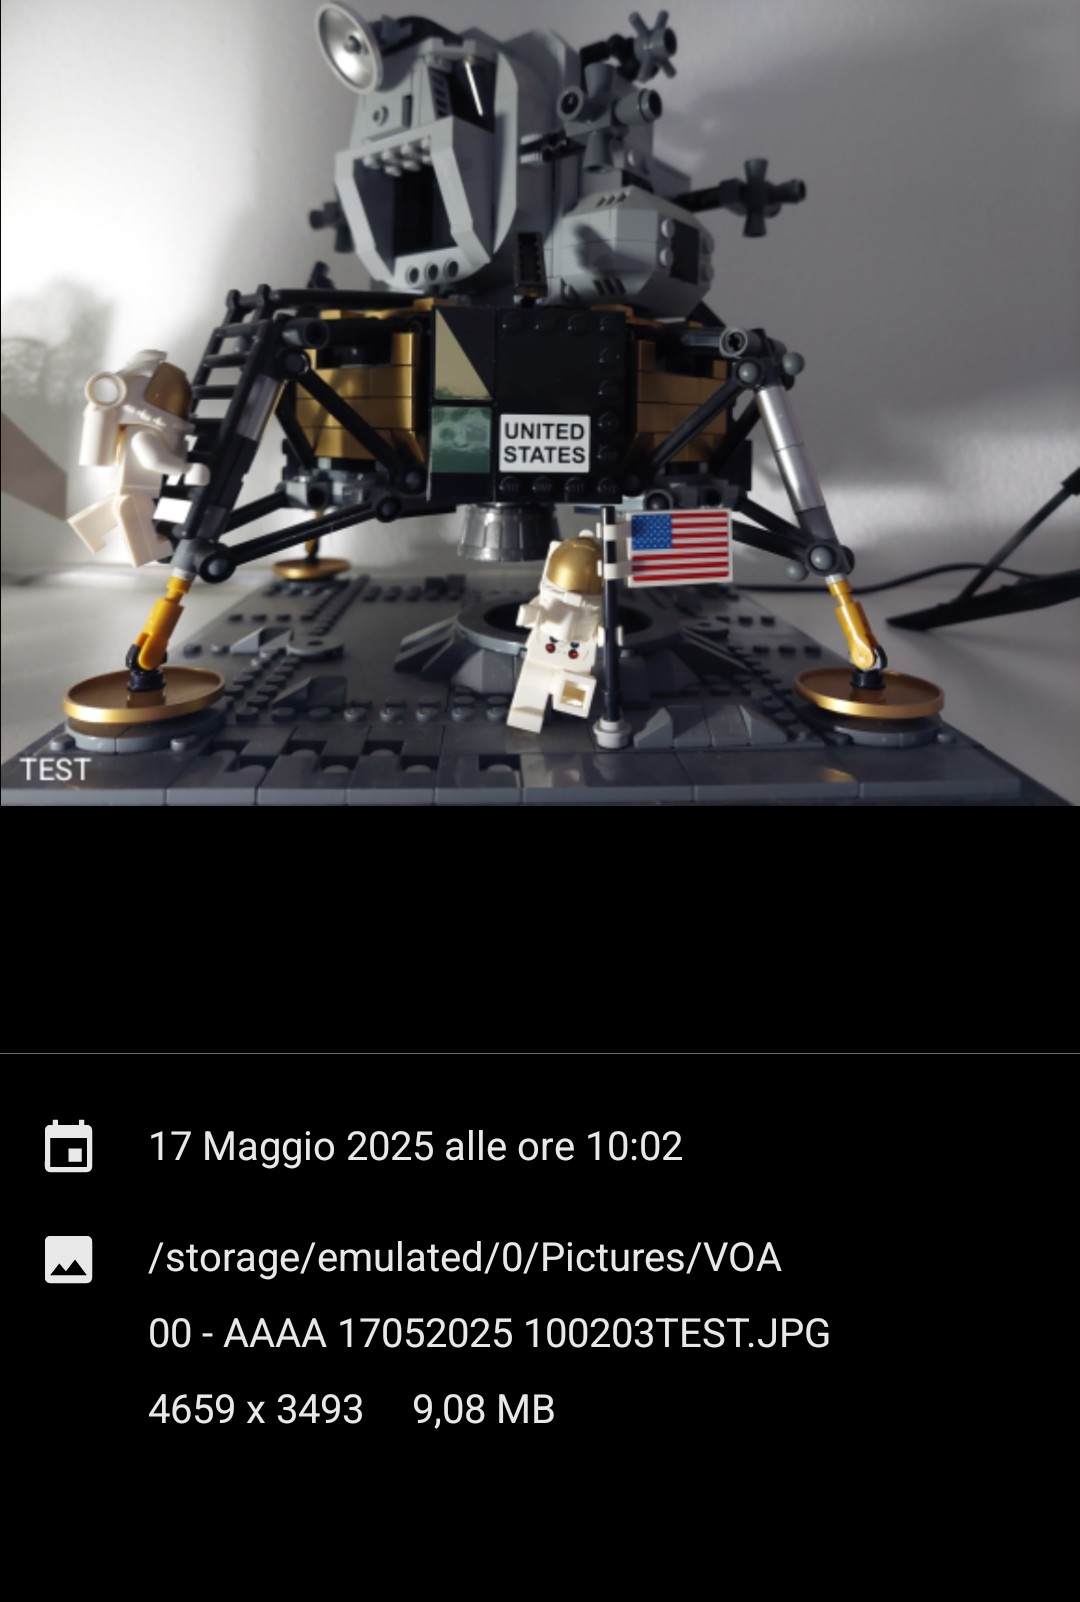
I did several tests to see what happens when I increase the size of the image component. I found out that if I set the width to 1775 and the height to 1331, the exported image ends up being approximately the same size as the original photo (4624x3468), (I have no idea why).
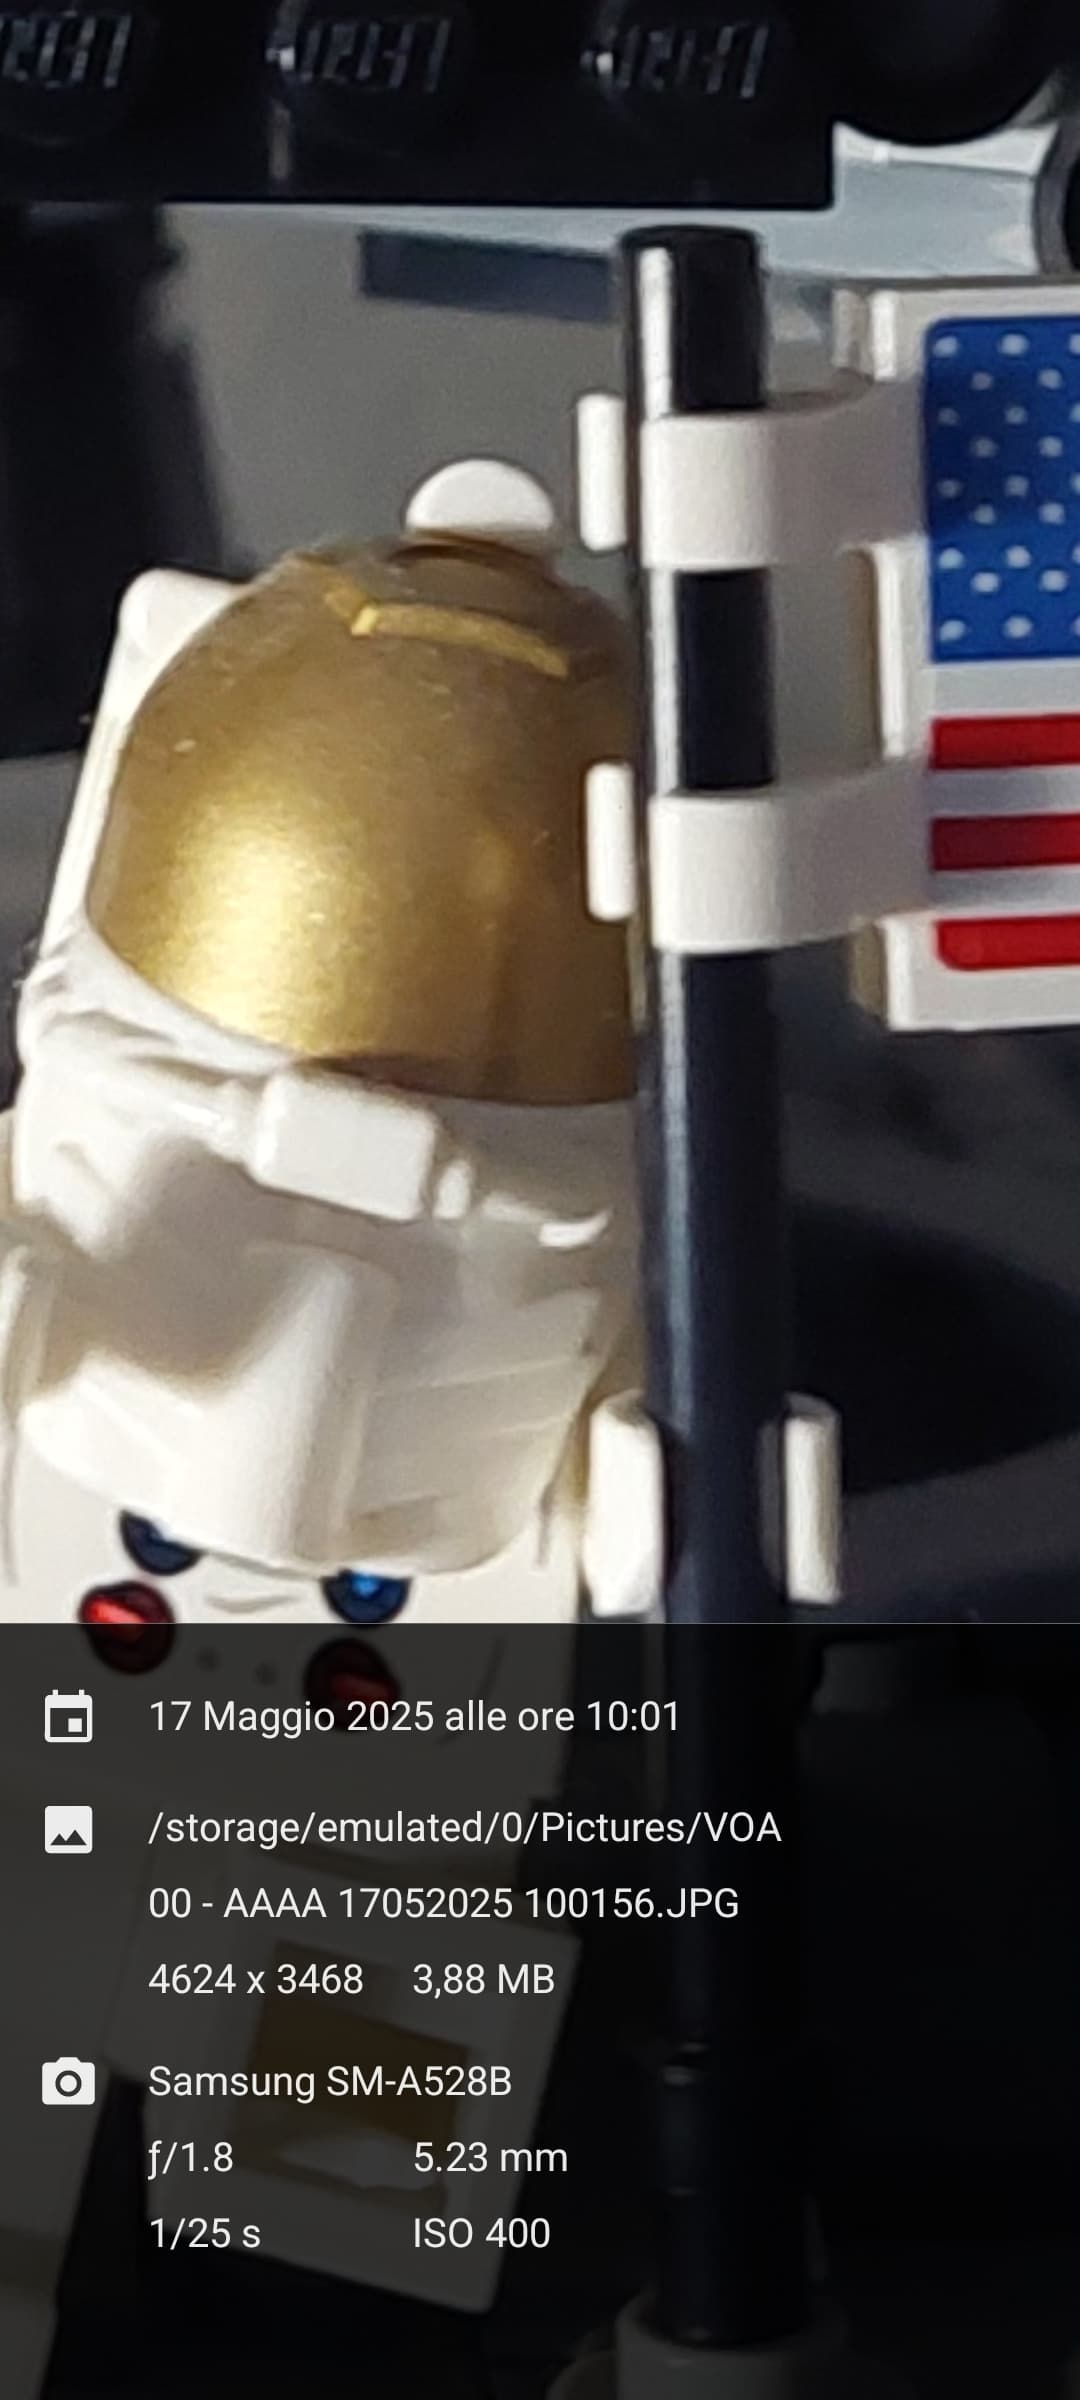
As you can clearly see, in the edited photo (which has pixel dimensions roughly equal to the original), the file size in MB is more than twice as large, and the image quality is lower. So in my opinion, it's not about the size of the Image component, but rather App Inventor itself, which compresses the image and causes quality loss when processing it through this component. Is there any solution?
Looks like, if the original image dimensions are important to you, that you need to apply the watermark to the original image, not one loaded into an image component. I am not sure if there is an extension available that does that (it should be possible).
Still may be possible with the canvas, but would need to test.
Here is a test app with a small extension (only one method) that creates a new image with watermark using compressionQuality = 100. So the new image should have the best quality and the same dimension as the original one (taken by the Camara component).
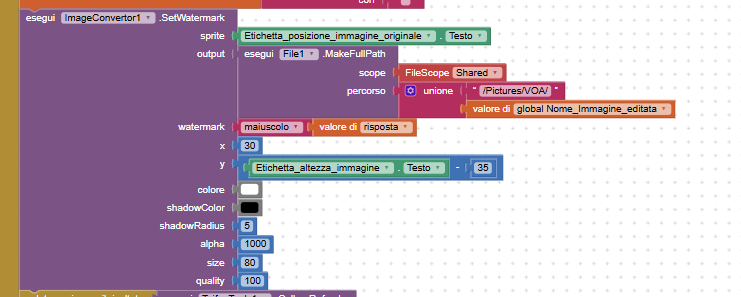
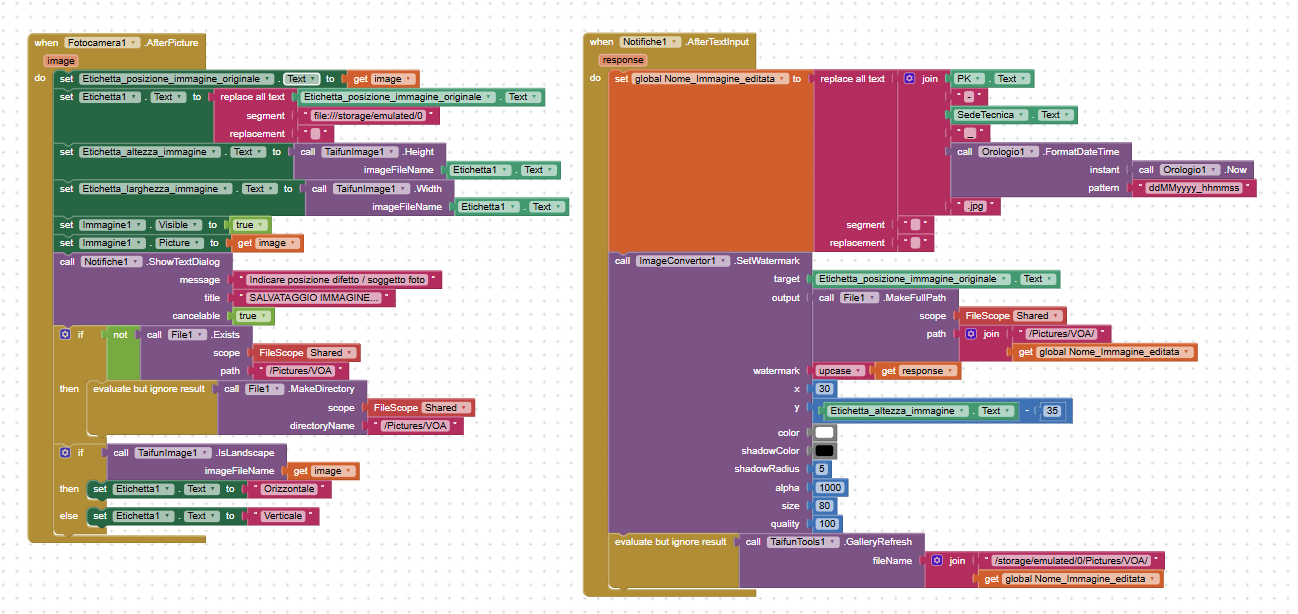
Watermark feature now added to the Image Convertor extension. This will take the path of an image on the device and output the modified image as a PNG.
I have noticed that the methods used to modify the file can vastly increase the file size of the image (a large image can take quite a few seconds to complete) If this is the case for you, and the file size is too large, you can use the Image Convertor extension to resize the output image back to what it was...
Yes, and it seems to vary depending on device. I am sure we are doing much the same thing in our extensions, not figured out yet what is doing it in mine.
Have added the BitmapFactory options, this may help:
Thank you very much for the support! I solved the problem by using your application "ImageConvertor" instead of "ImageUtil", and now everything works! The app is exported at the desired quality without compression loss.
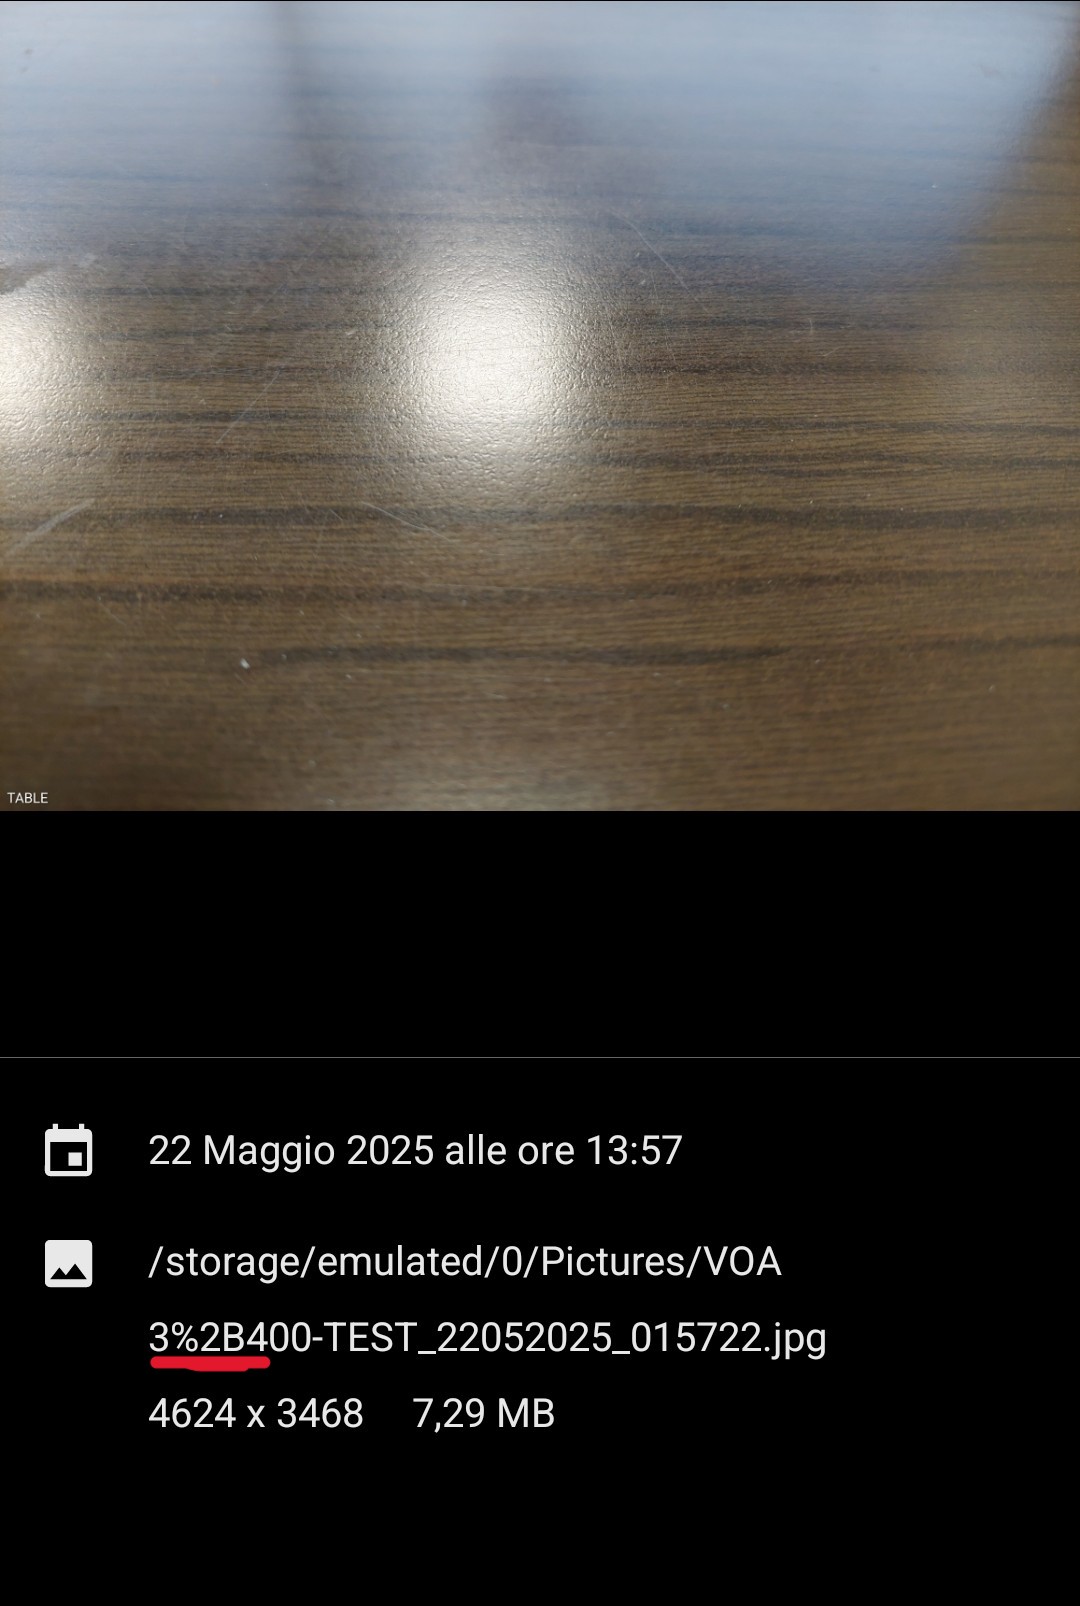
Actually, there is still a "bug" this time... When the file is saved using ImageUtil, it gets renamed correctly as I want. But with ImageConvertor, some characters cause issues — for example, the "+" character is transformed into "%2B", and I haven’t found a way to fix this.
I tried copying the image with the wrong name and pasting it with the correct one, but the File component doesn’t find the bugged photo, because App Inventor reads the name correctly as if the "+" were there (I don’t know why).
Is it possible to fix these bugs? Below are the ones I found: