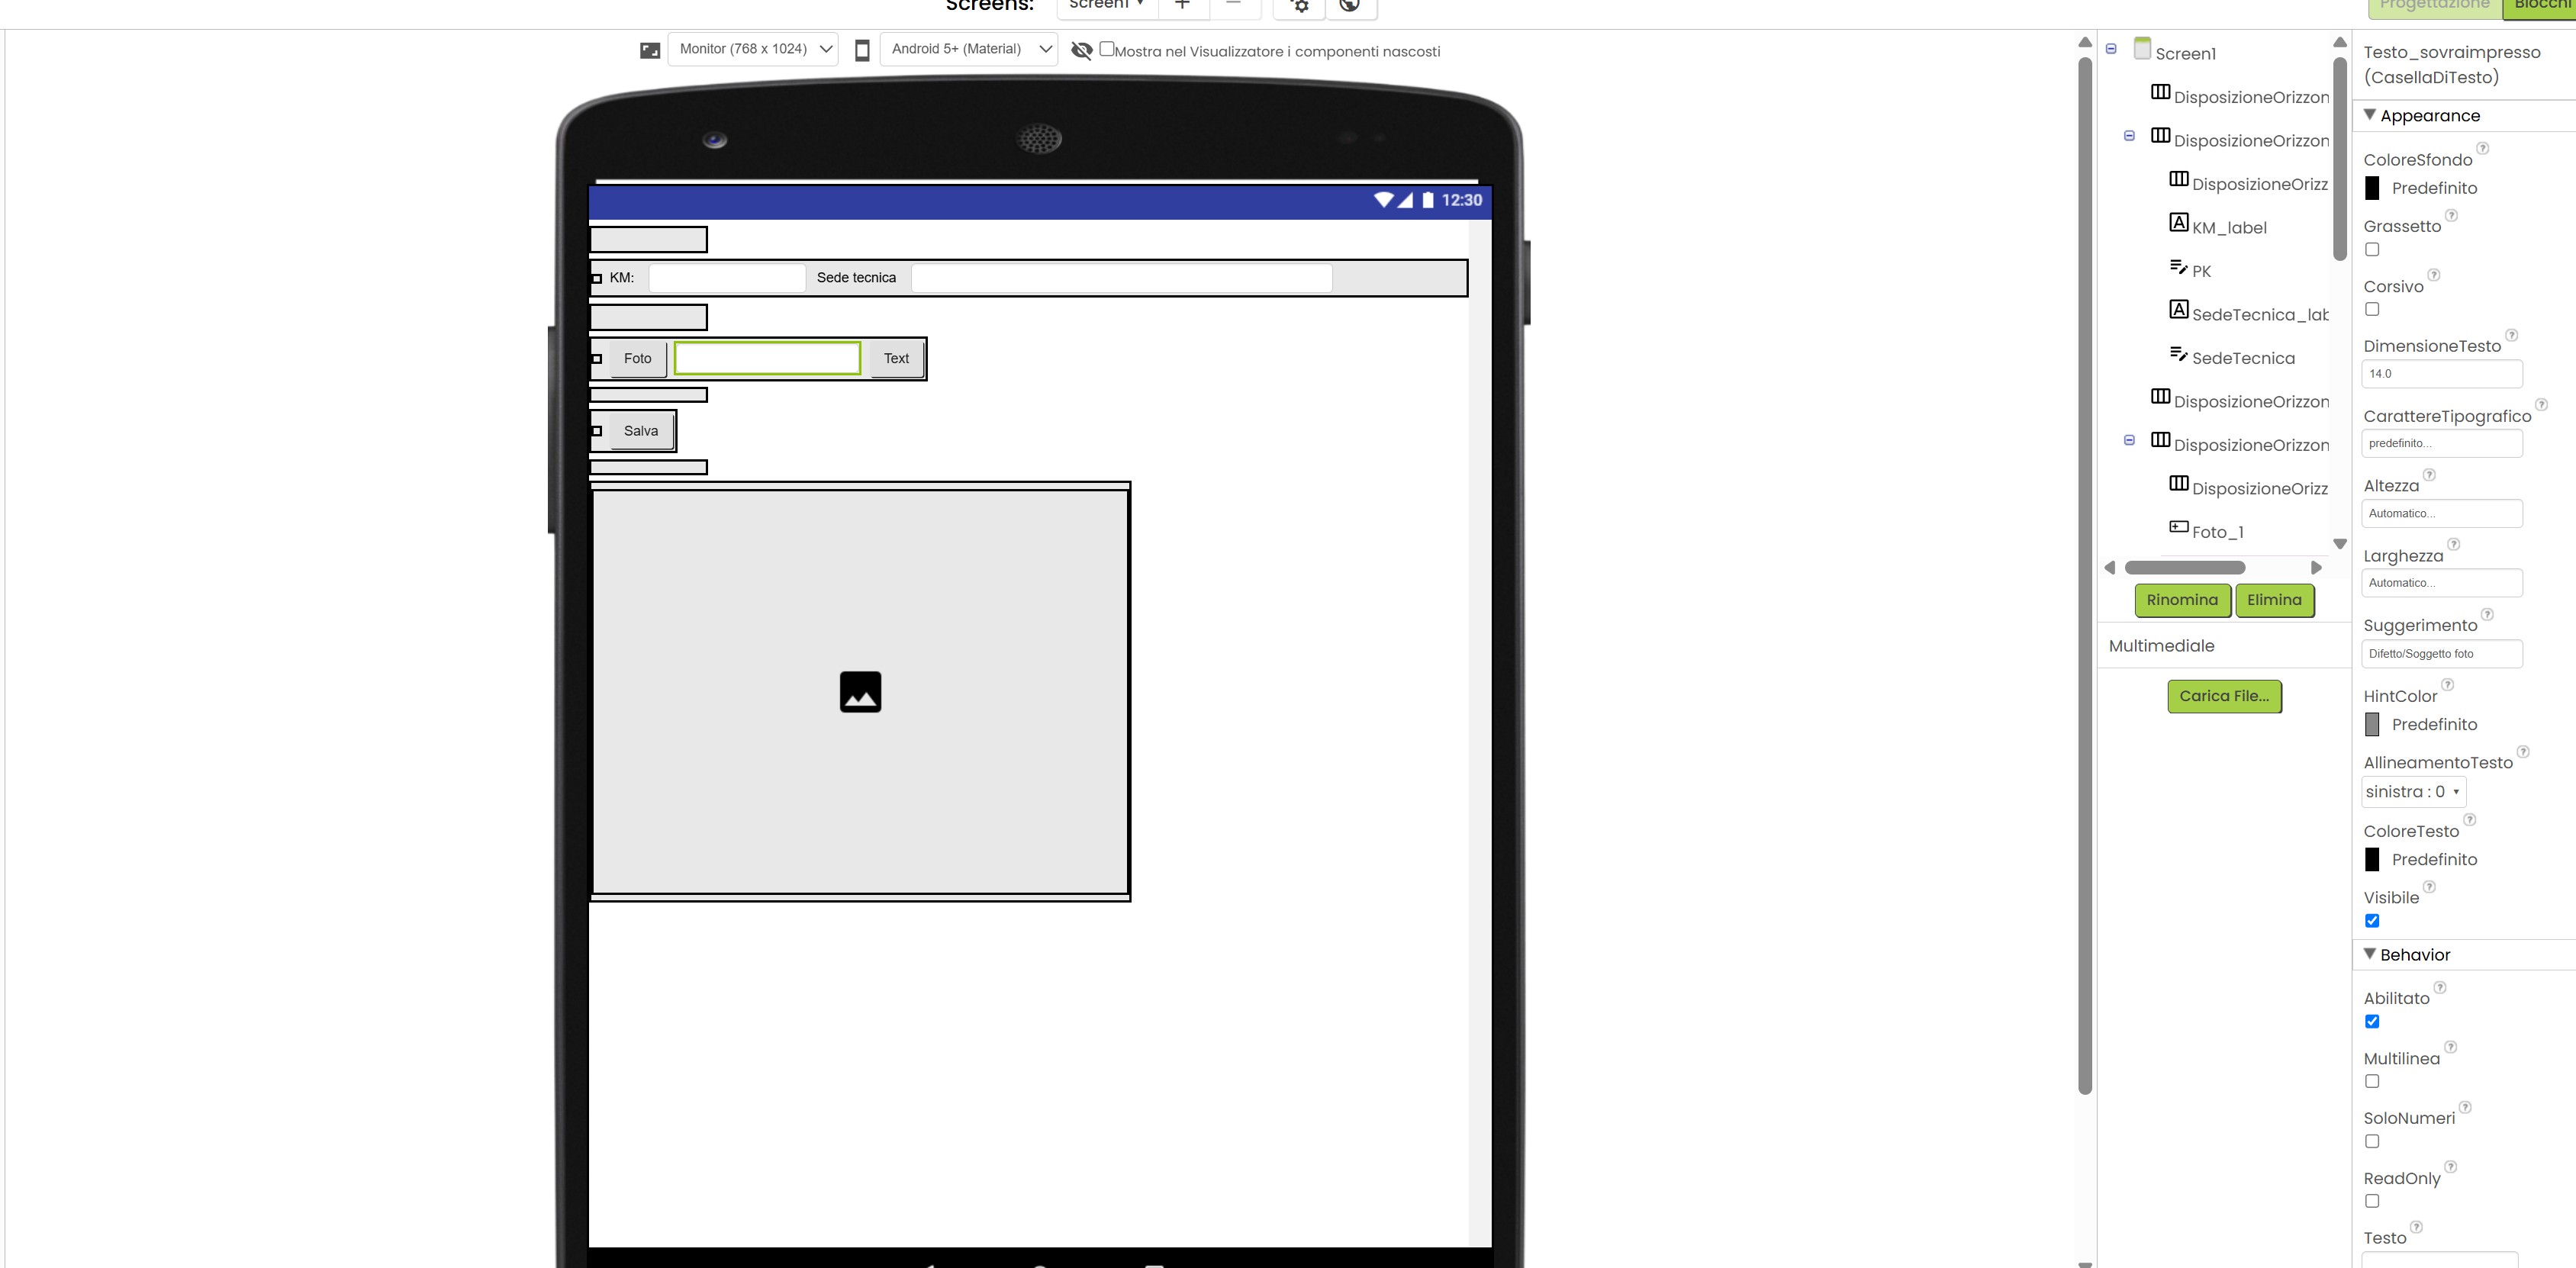
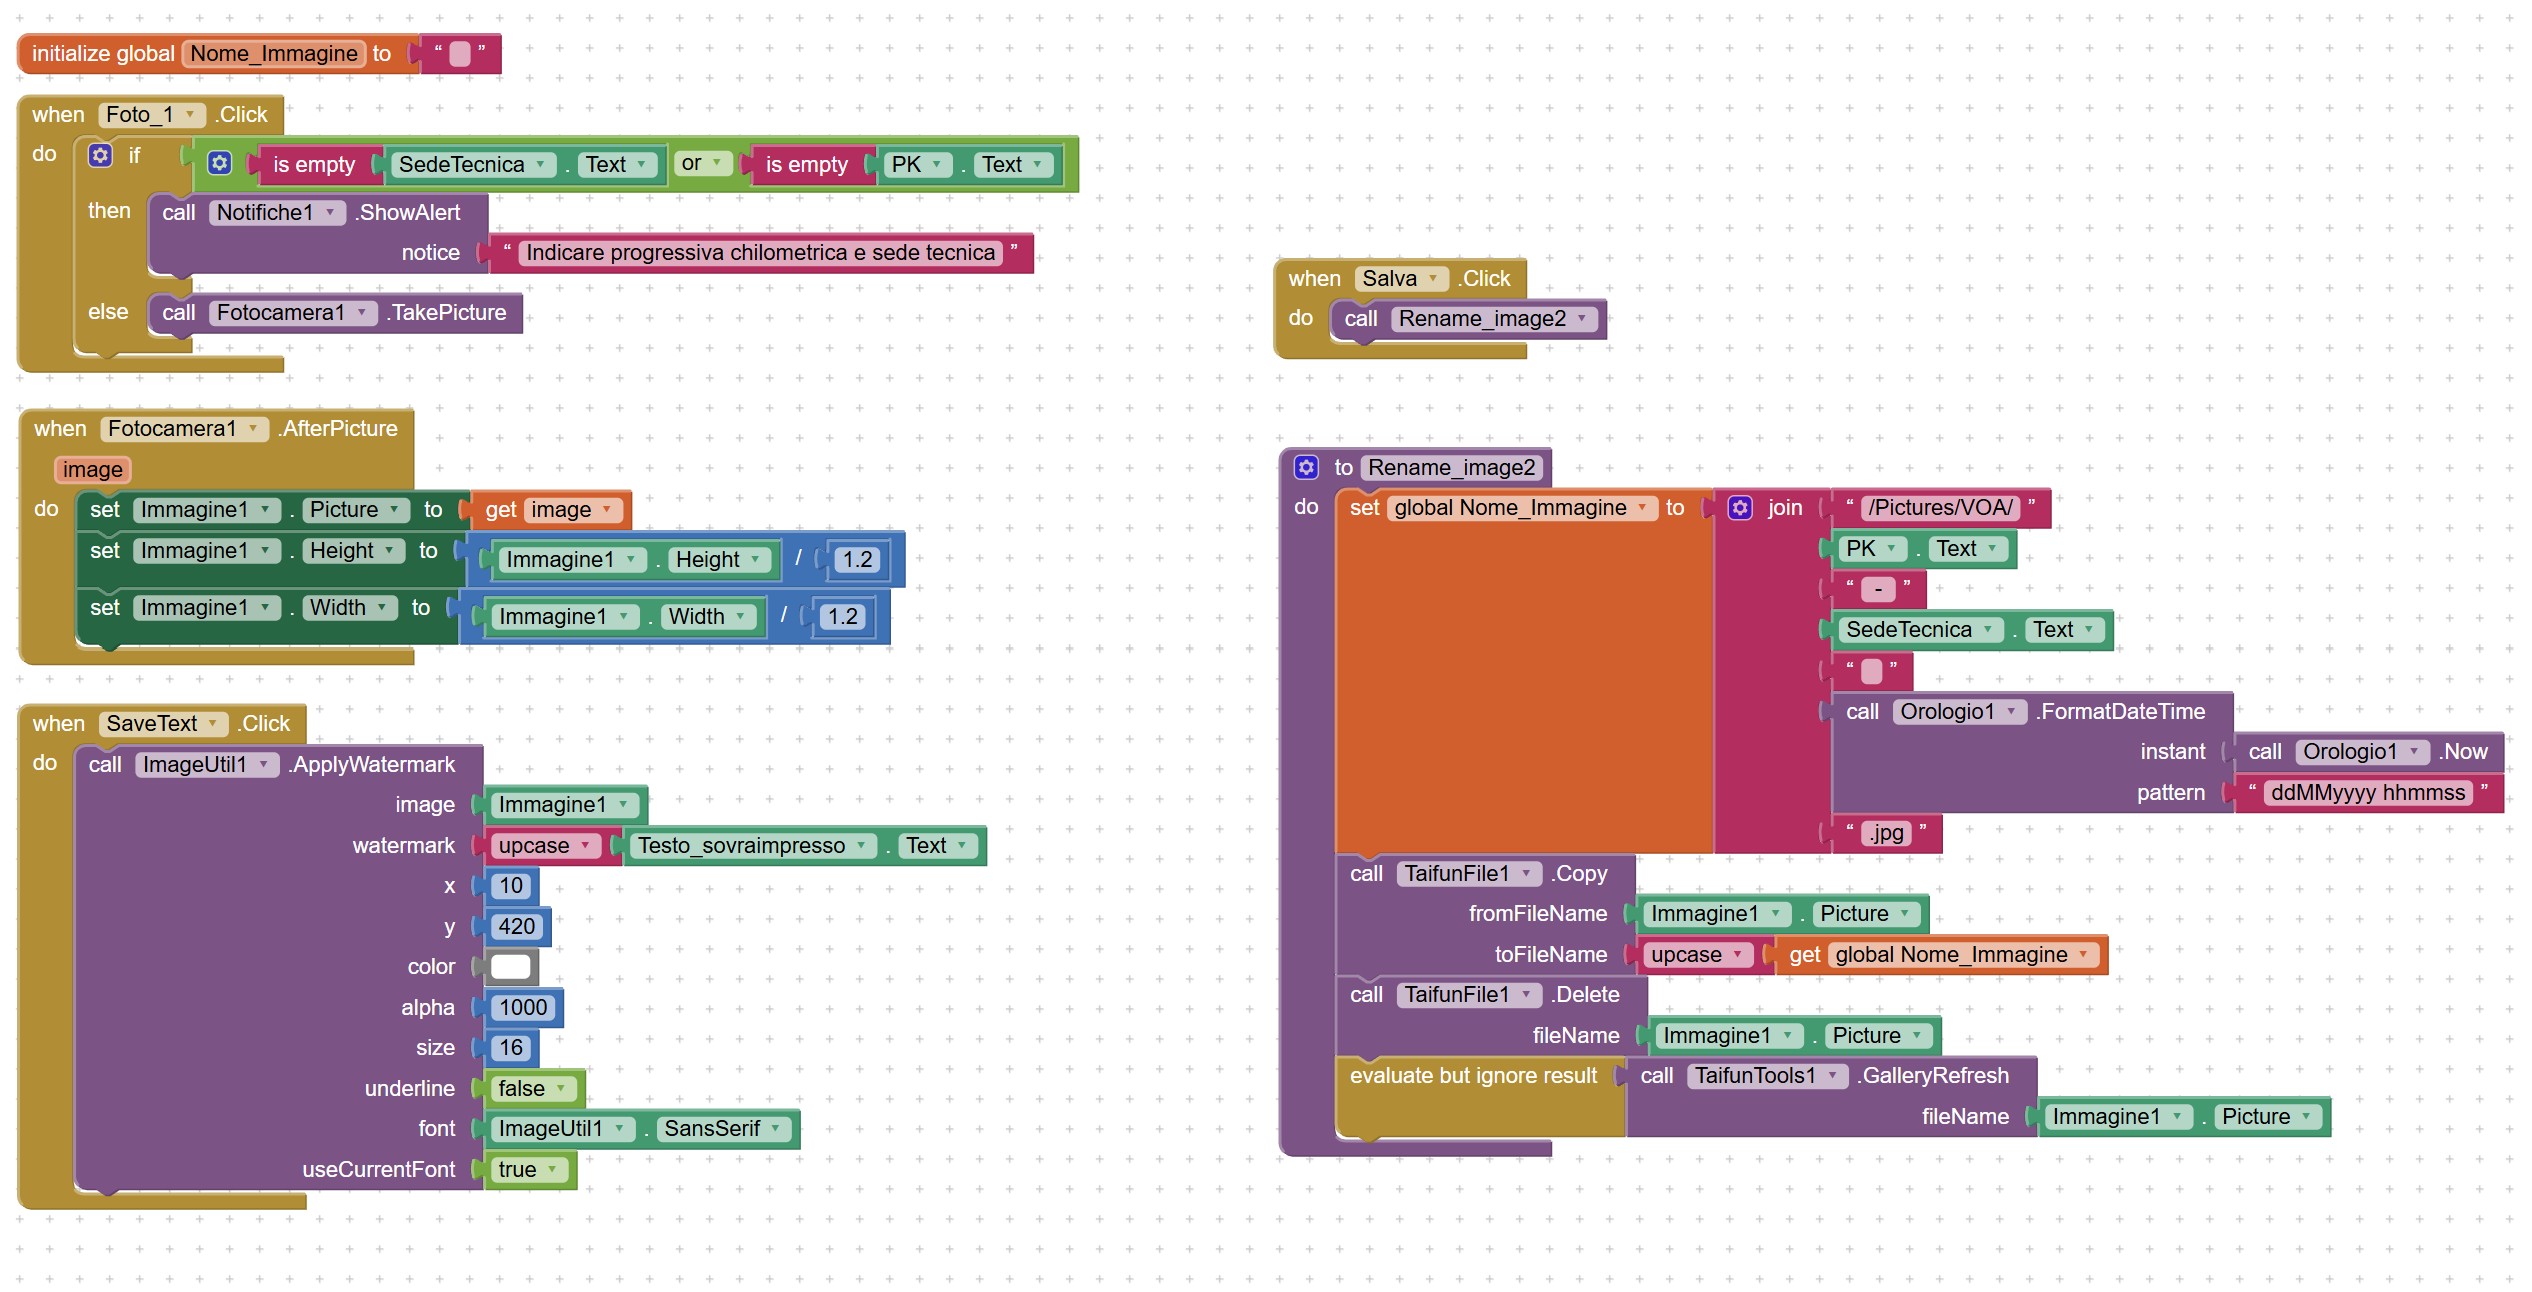
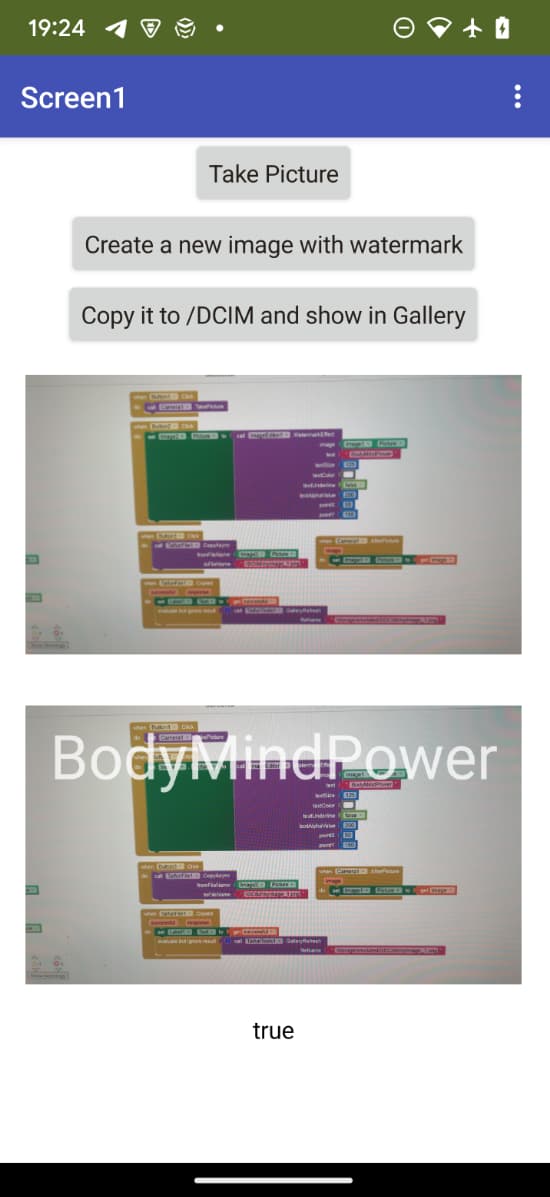
Hi everyone, I need some help. I have to create an app that does the following things:
Take a photo
Give the photo a specific name
Write a line of text on the photo
Save the edited photo to the gallery
I was able to do steps 1 and 2, but I can't move forward.
The final result I get is the photo saved in the gallery with the correct name, but without the text overlaid on the image.
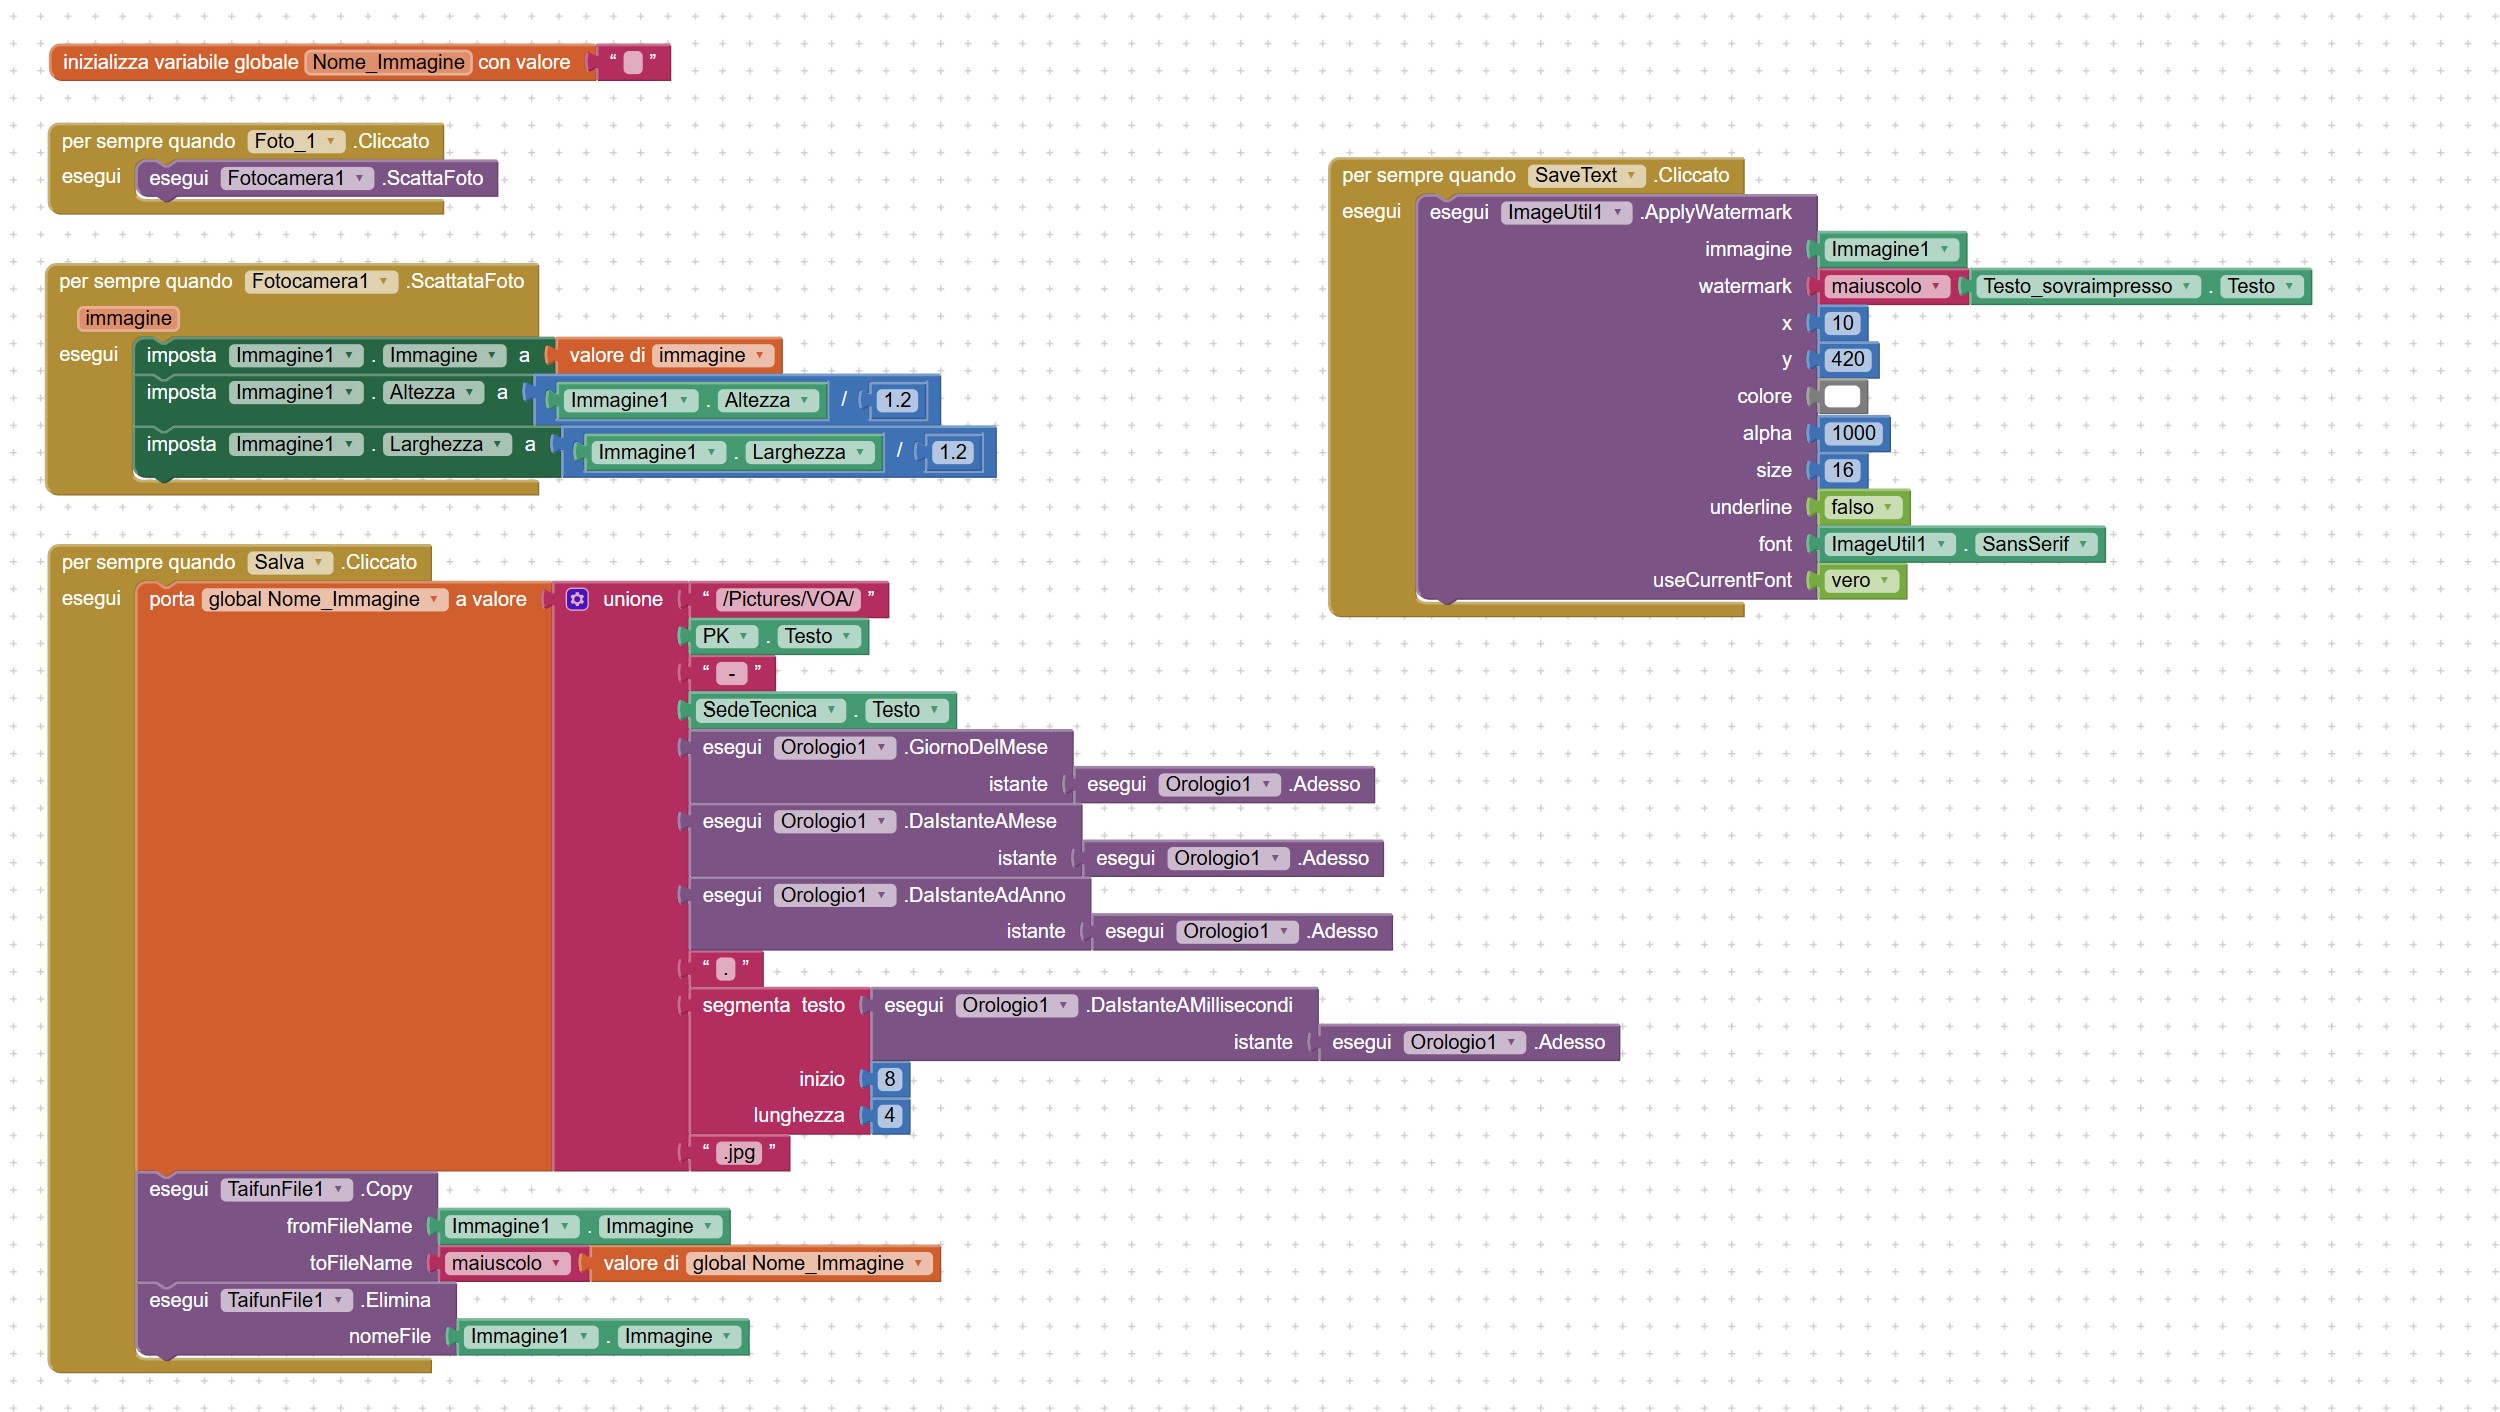
For example, the "SaveText" block correctly writes the line of text on the image component, but it doesn't save the edited image to the gallery.
Or you could try to use canvas component, It has a write text feature built into it. And combined with the KIO4 Pdf extension you can do all the steps you have in a smaller amount of blocks.
_Junko
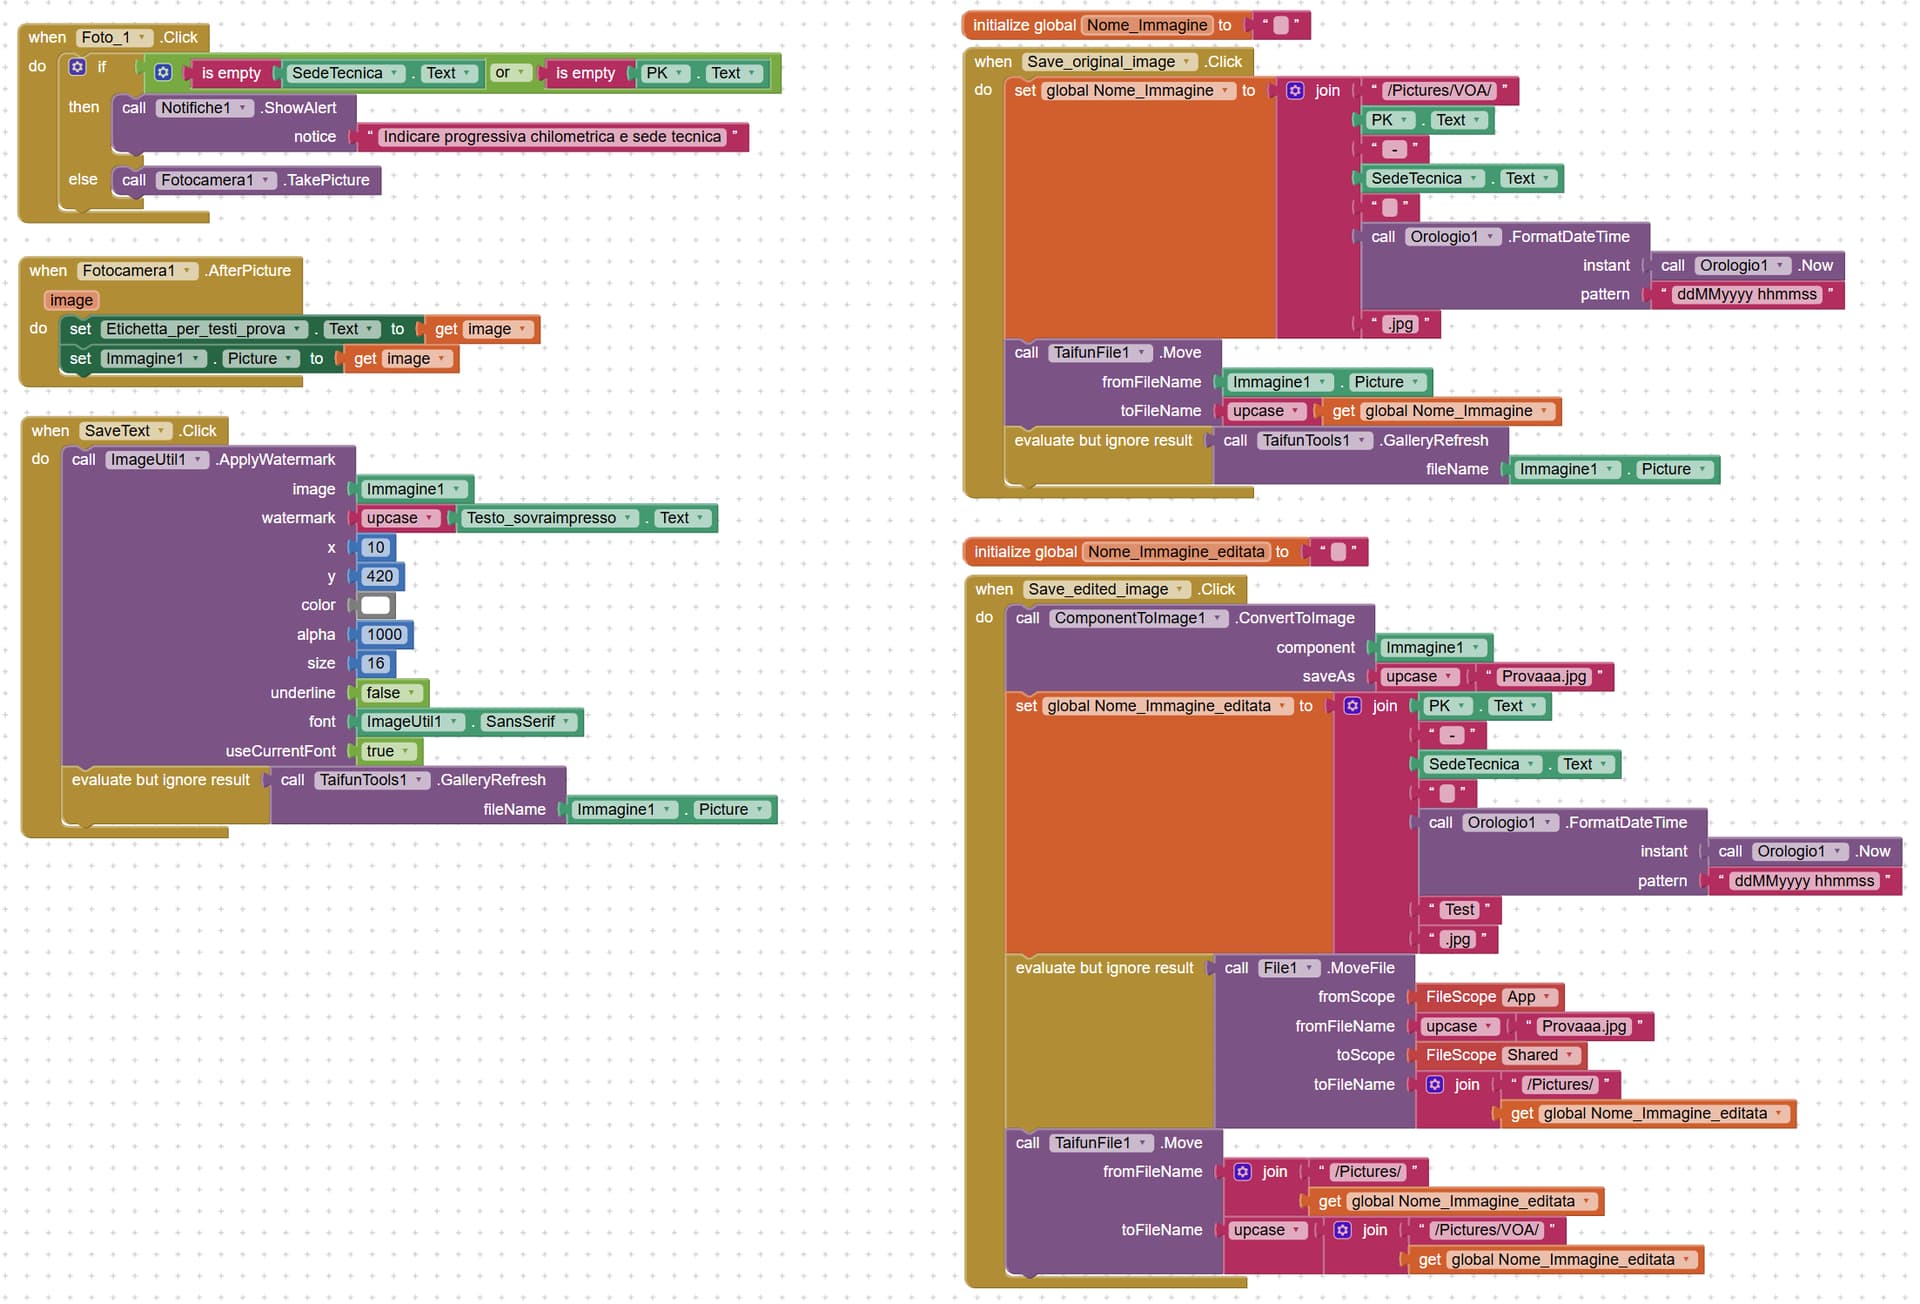
The canvas component has a very low limit for height and width. If I put an image inside, it loses a lot of quality (I've already tried — in this case the text works, but the quality is not acceptable).
I am not sure if the extension actually commits the changes to file, it only changes the image component view.
You may need another extension Component To Image to actually save the modified image
Another option may be to export the image view to base64, then save this as a file (the watermark would probably need to be on the same layer for this to work:
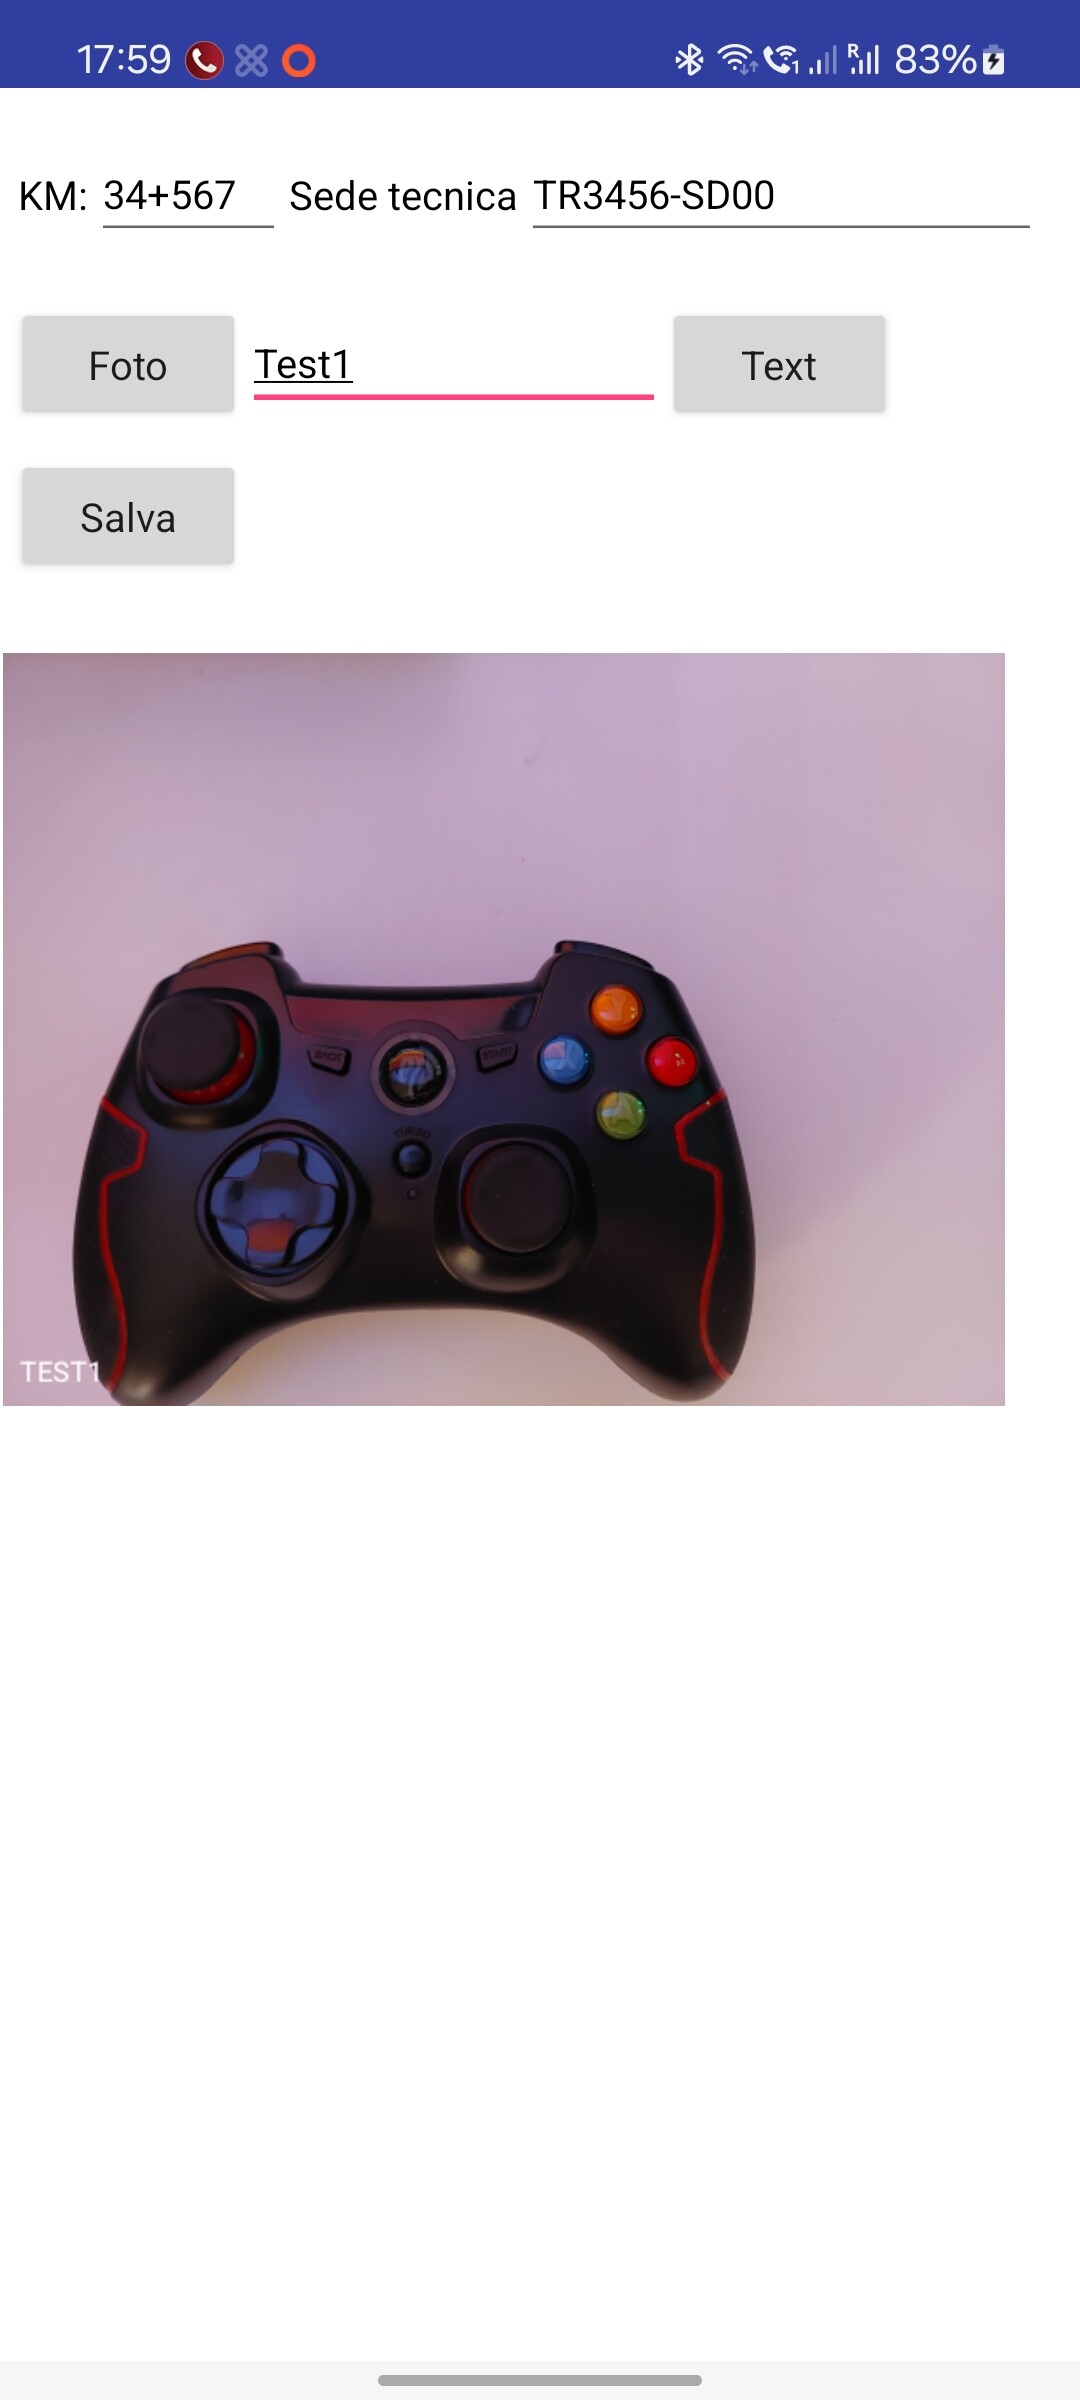
I also tried adding the 'upcase' block as you suggested, but it still doesn't work. The image displayed in the image component has a watermark — I didn’t forget to mention it, it’s in the first message I sent, where there’s a screenshot of the app.
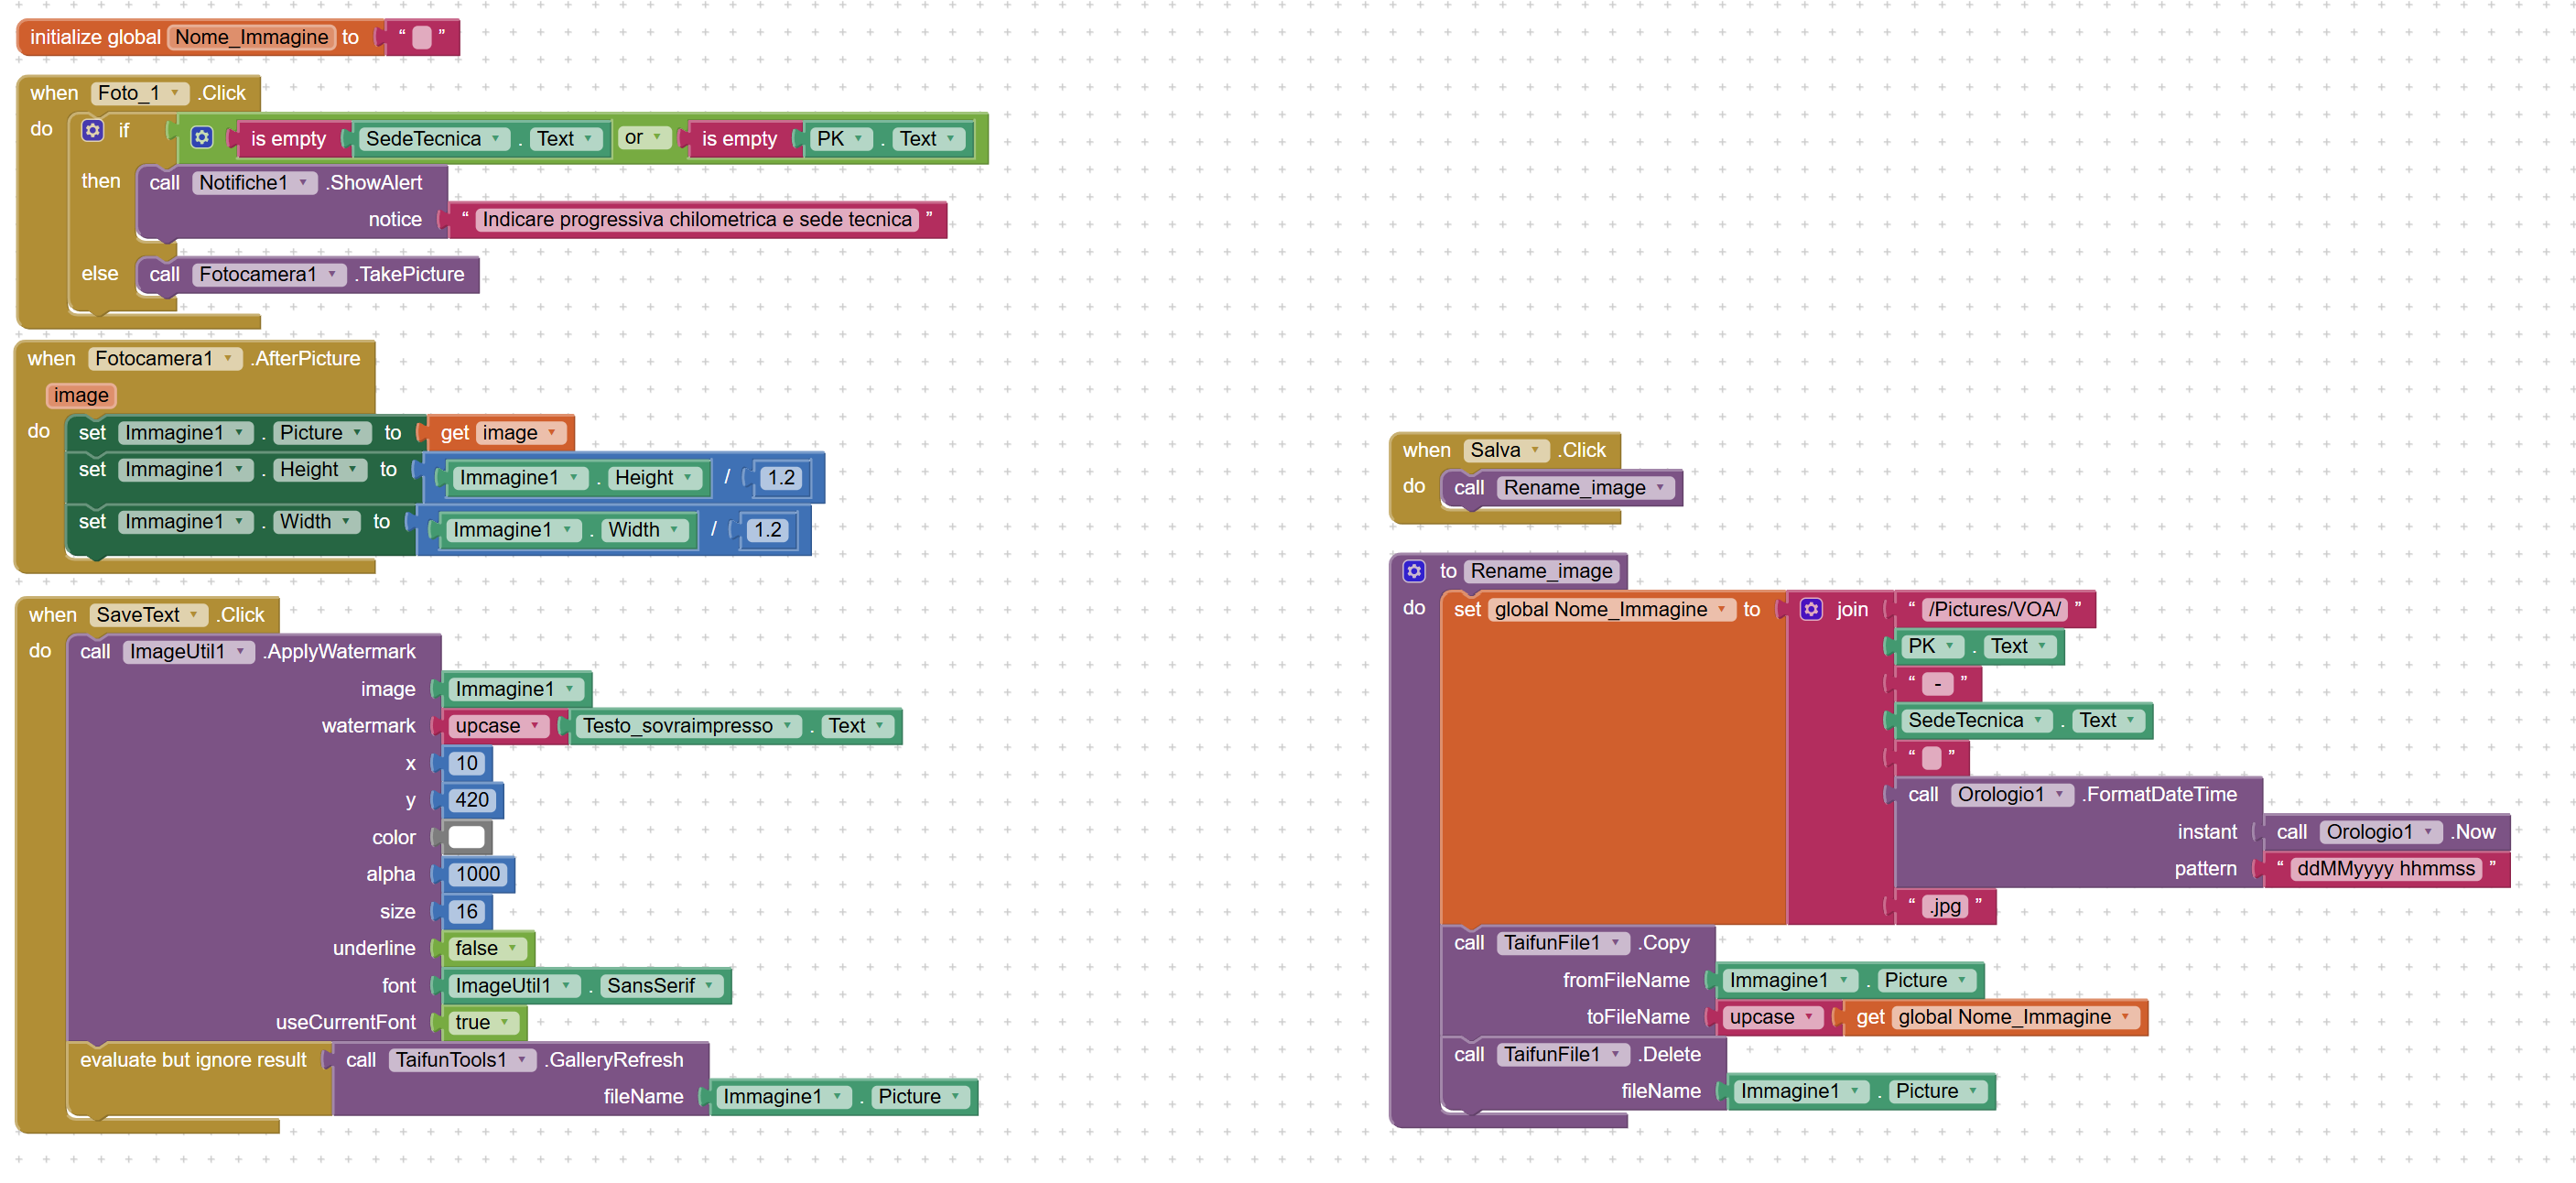
Now I'll try the solution suggested by TIMAI2
Thank you TIMAI2!
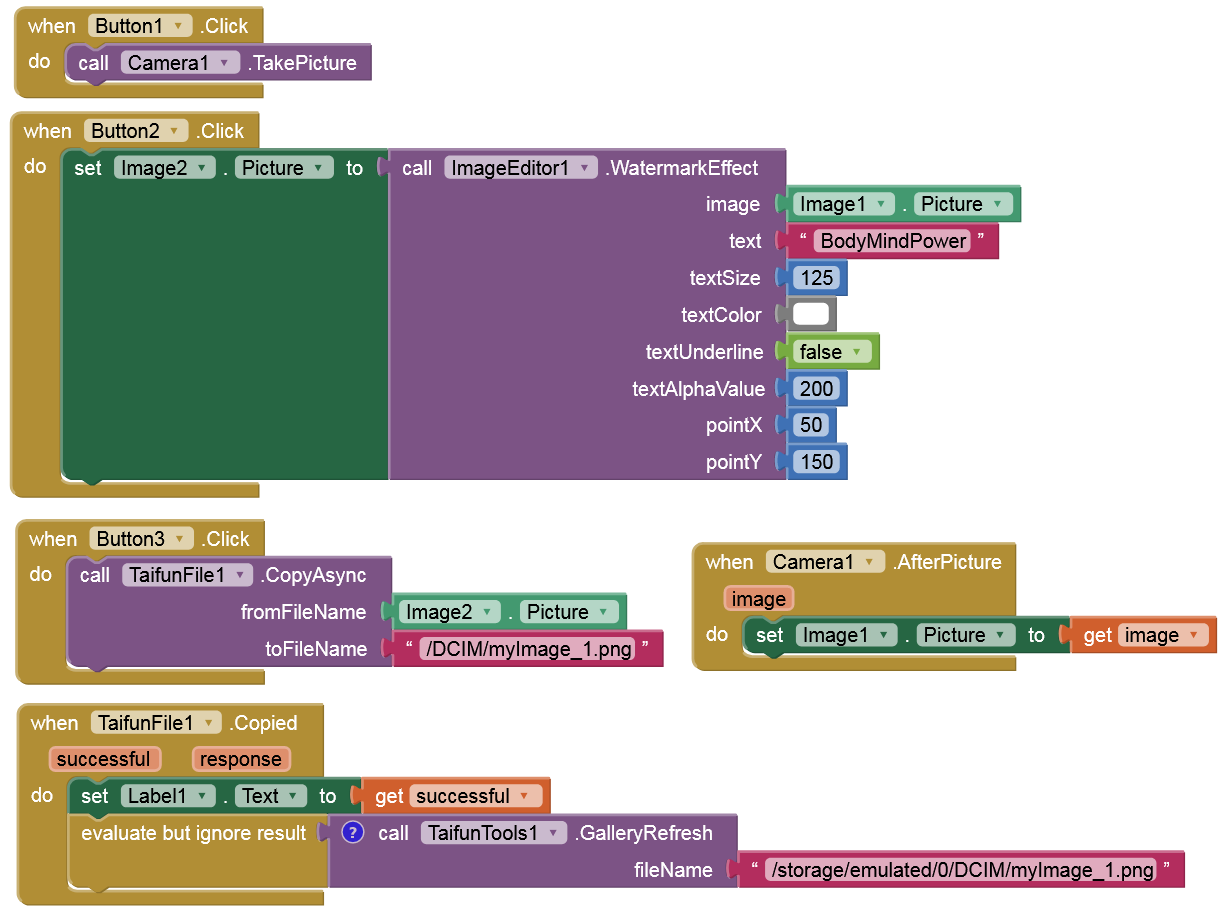
I tried your suggestion to use component to image to save the image, and I managed to get to this result (I still have some issues, but I'm getting closer to the solution): with the "save original image" command, I’m able to save the original photo, renamed as I want, into a specific folder. With the "save edited image" command, I can save the photo with the overlaid text, also renamed as I want, into the same folder as the other one.
The problem is that the photo with the overlaid text loses a lot of quality (I think it’s because of the conversion through the Image component, or maybe the component to image block). The original photo is about 4.3 MB, while the edited one is only 400 KB.
You will lose image quality if you do not set the image component to the actual dimensions of the image to be displayed.Doing this will massively overflow the screen and probably misplace the text overlay.
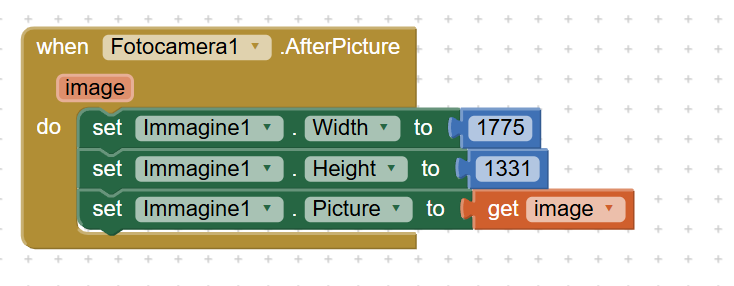
I left the Image component with height and width set to "Automatic" because sometimes the photos are horizontal, sometimes vertical; if they're taken with the wide-angle lens, the size changes, and if they're taken with the front camera, they have a different size again. Not to mention that, depending on the phone's sensor and settings, the photos can have different dimensions.
For this reason, I didn’t want to set a fixed size for the Image component, and I left it as automatic.
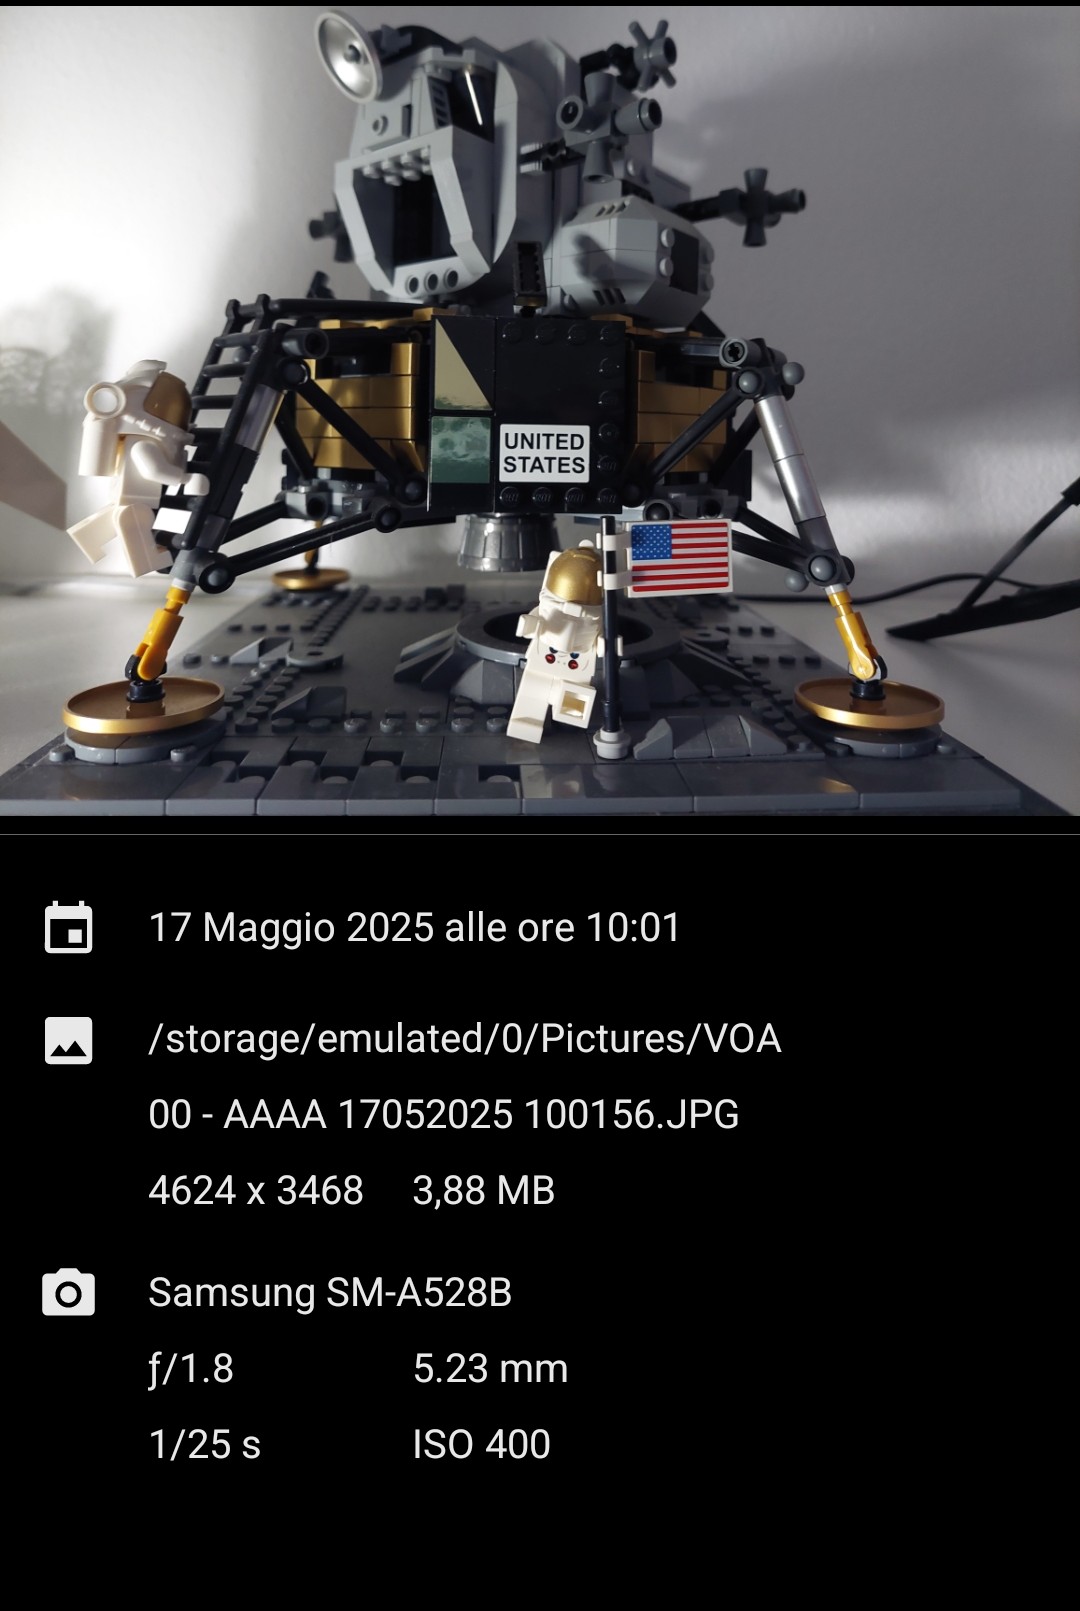
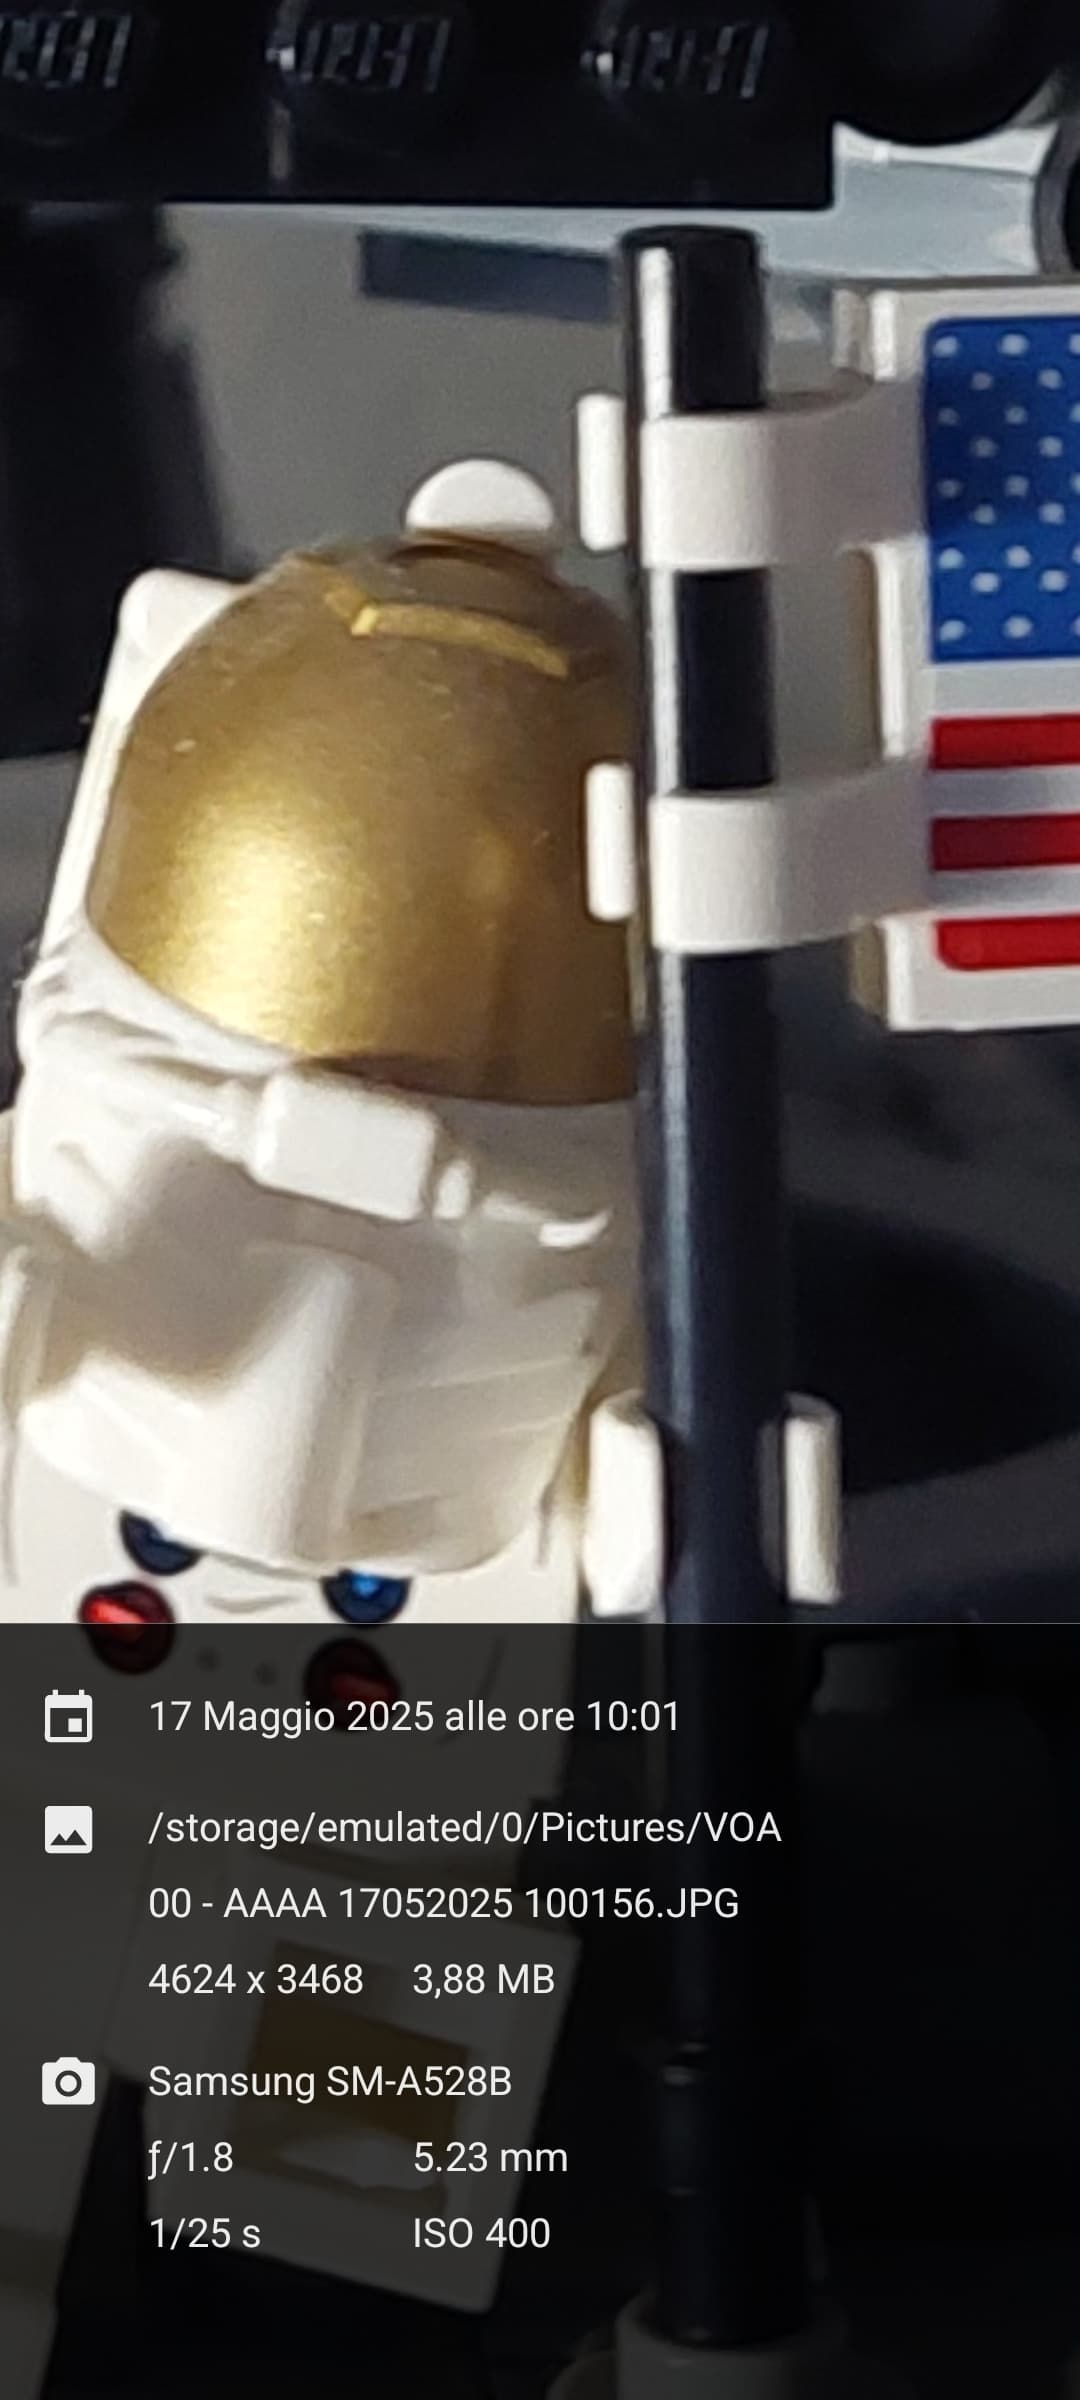
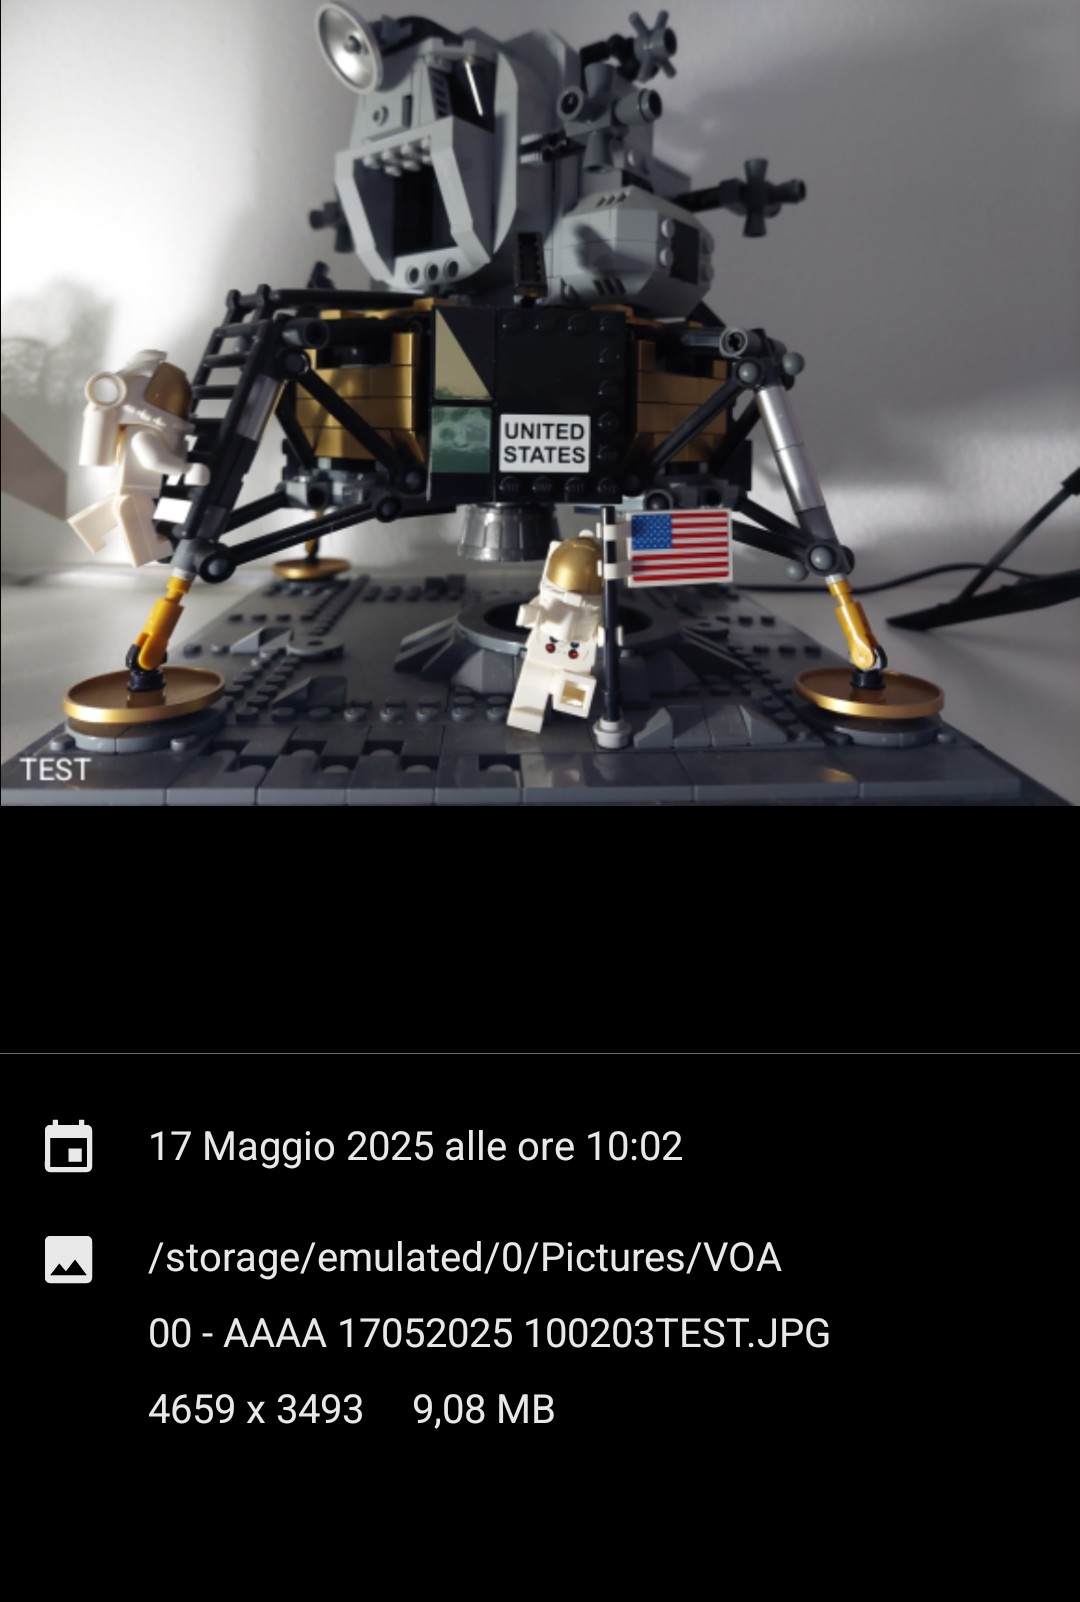
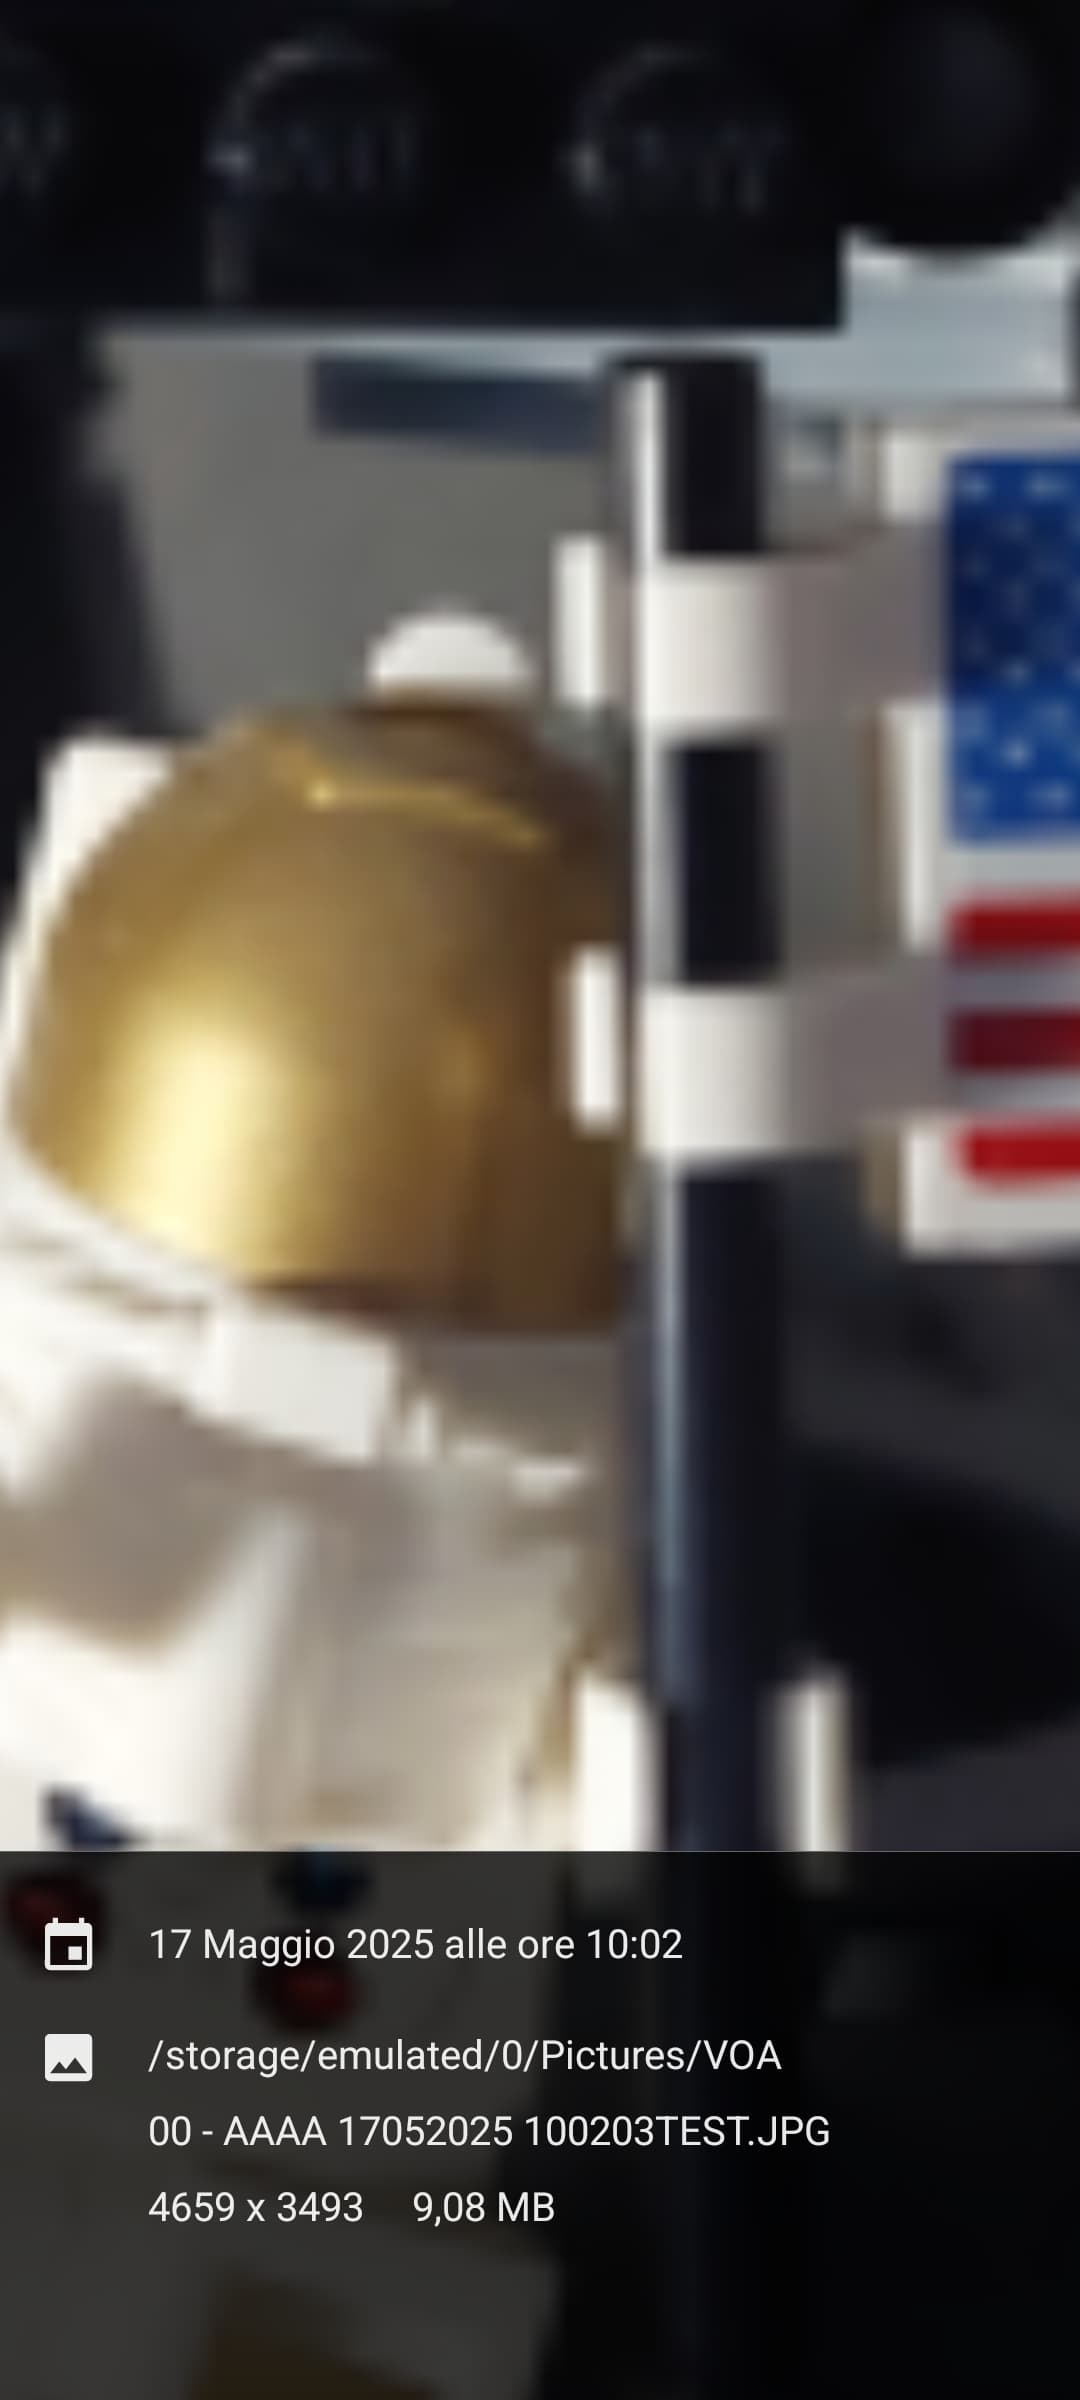
I did several tests to see what happens when I increase the size of the image component. I found out that if I set the width to 1775 and the height to 1331, the exported image ends up being approximately the same size as the original photo (4624x3468), (I have no idea why).
As you can clearly see, in the edited photo (which has pixel dimensions roughly equal to the original), the file size in MB is more than twice as large, and the image quality is lower. So in my opinion, it's not about the size of the Image component, but rather App Inventor itself, which compresses the image and causes quality loss when processing it through this component. Is there any solution?