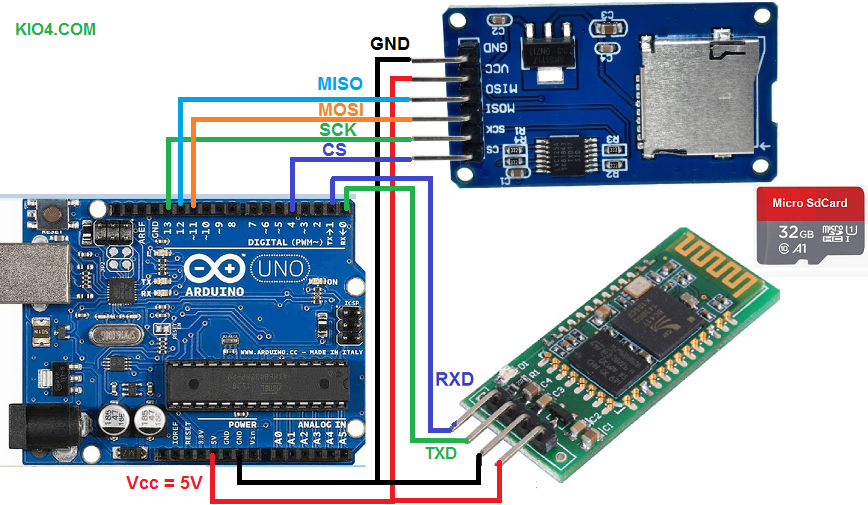
6A.- Arduino with SdCard sends a file to the App.
- In the Arduino SdCard we have the following file:
servo.txt
1,2,3,4,5,6,7,8
-1,-2,-3,-4,-5,-6,-7,-8
10,20,30,40,50,60,70,80
-10,-20,-30,-40,-50,-60,-70,-80
100,200,300,400,500,600,700,800
-100,-200,-300,-400,-500,-600,-700,-800
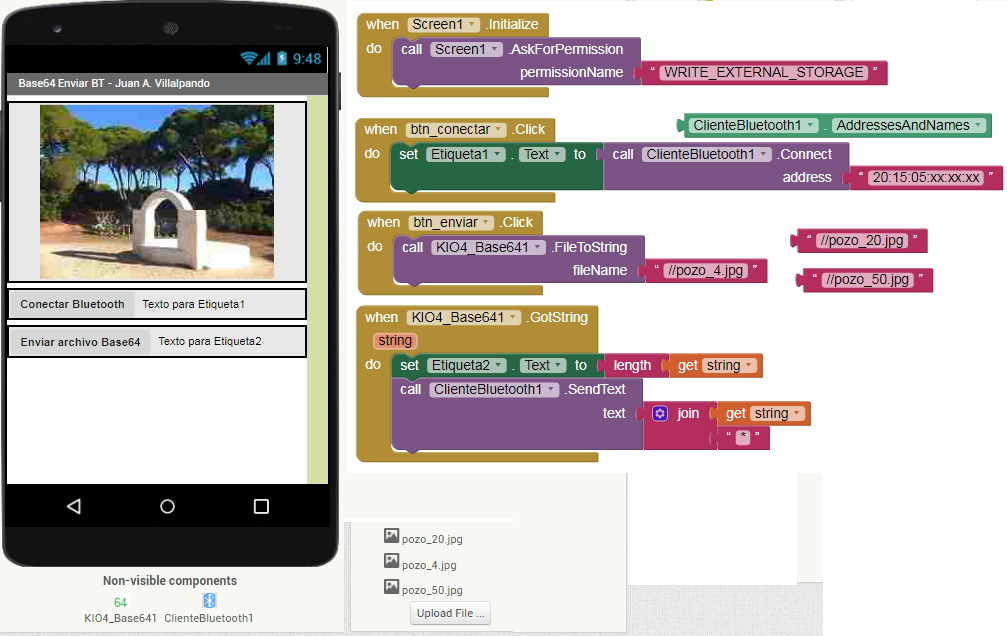
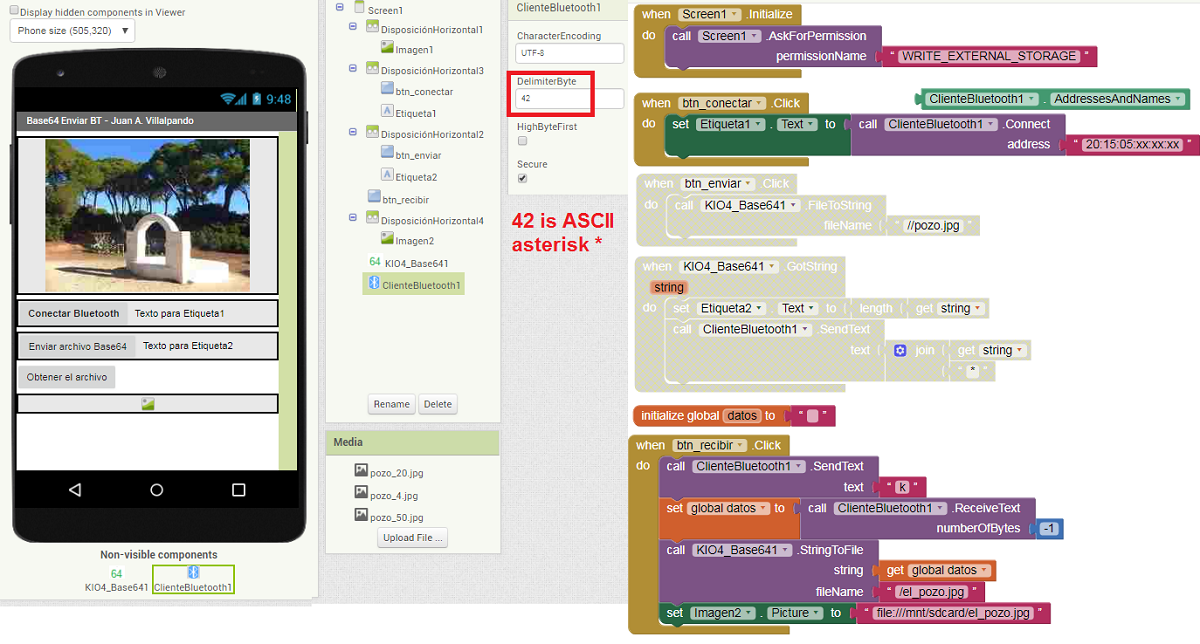
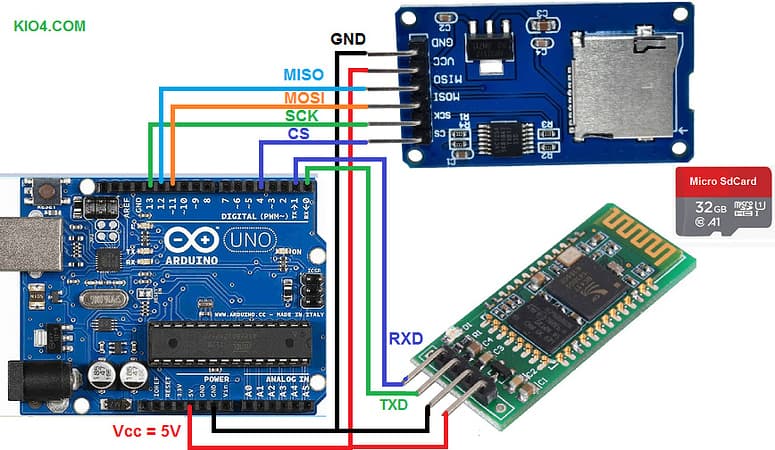
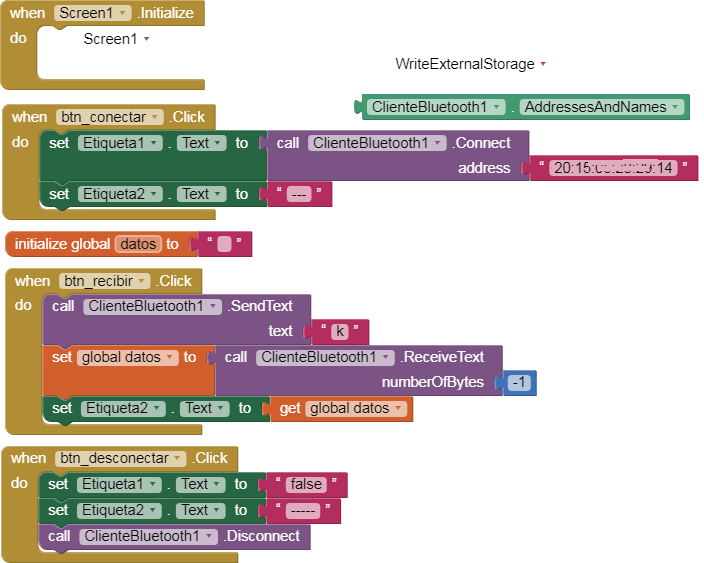
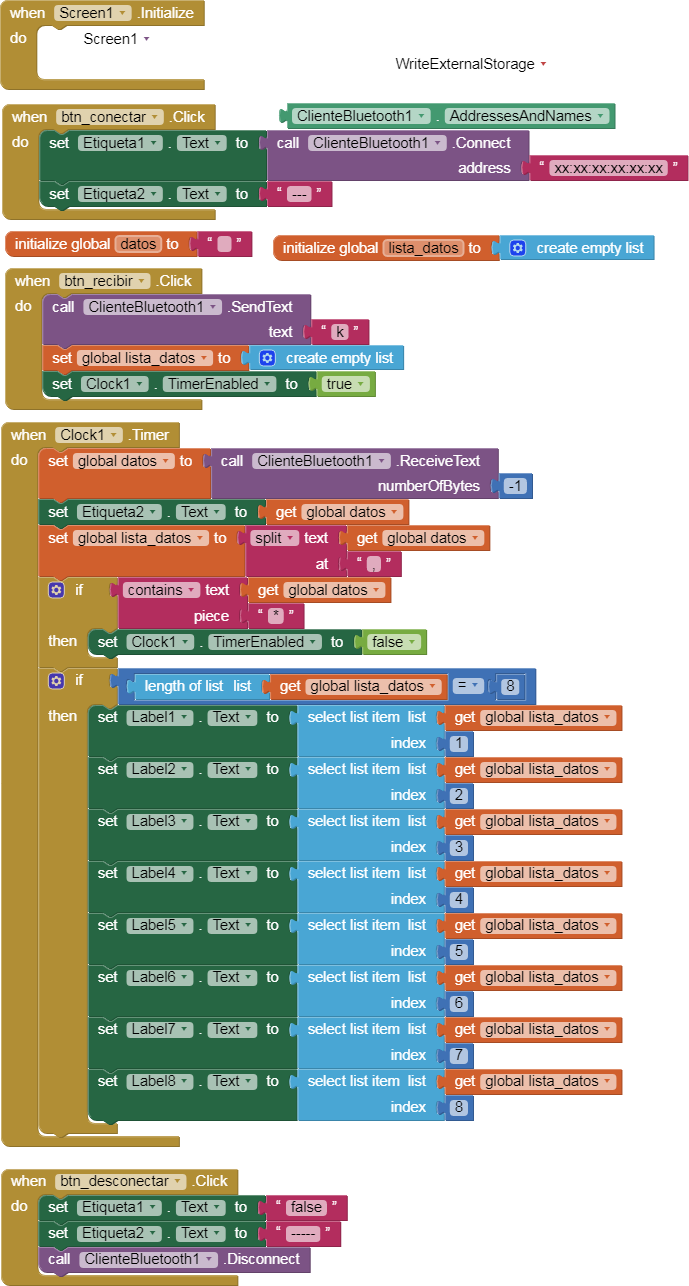
- We send the character "k" from the App to the Arduino via Bluetooth.
- When Arduino receives the character "k", it sends via Bluetooth all the information contained in the servo.txt file of the SdCard to the App.
#include <SD.h>
// const int CS = D8; // Para el NodeMcu
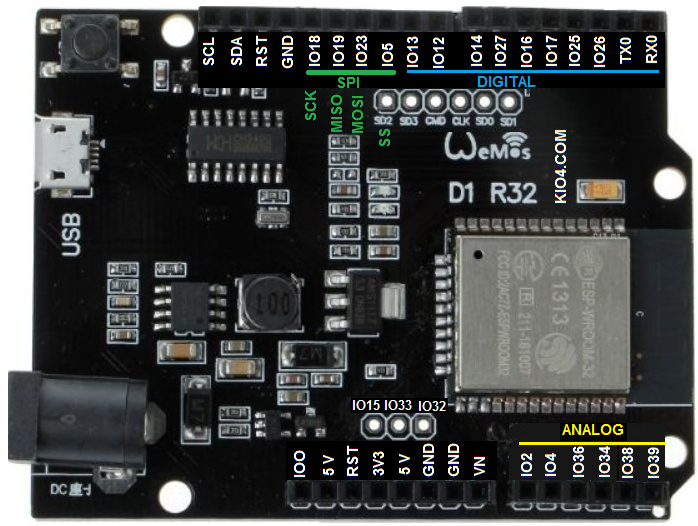
const int CS = 4; // Para el Arduino y Wemos ESP32
File miarchivo;
char caracter;
void setup() {
Serial.begin(9600);
Serial.println("Iniciando SdCard...");
if (!SD.begin(CS)) {
Serial.println("Error al iniciar.");
return;
}
Serial.println("SdCard iniciada.");
}
void loop() {
if(Serial.available()) {
caracter = Serial.read();
if(caracter == 'k'){
miarchivo = SD.open("servo.txt"); // Abre el archivo lectura.
if (miarchivo) {
while (miarchivo.available()) {
Serial.write(miarchivo.read());
// delay(20);
}
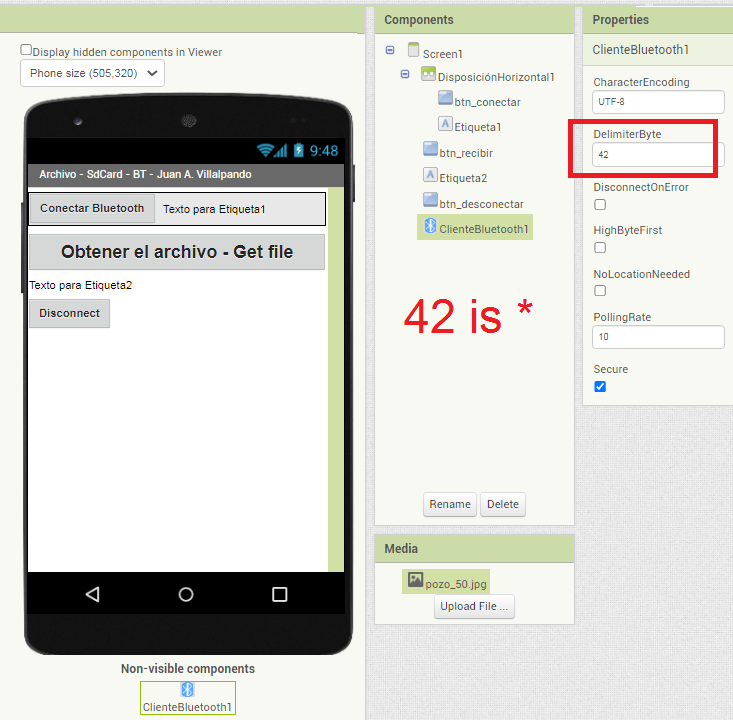
Serial.print("*");
miarchivo.close();
}
else {
Serial.println("Error al abrir el archivo.");
}
}
}
}
p9L2_Bluetooth_Archivoi.aia (44.6 KB)