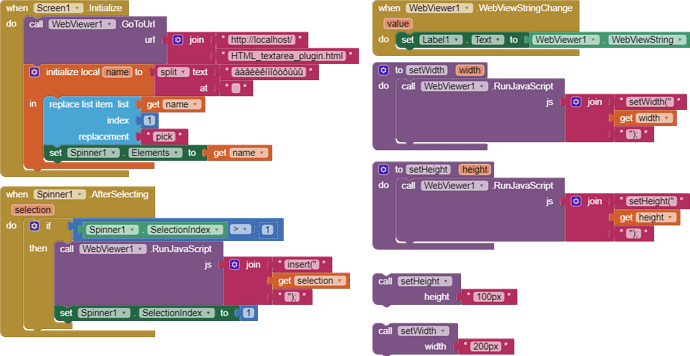
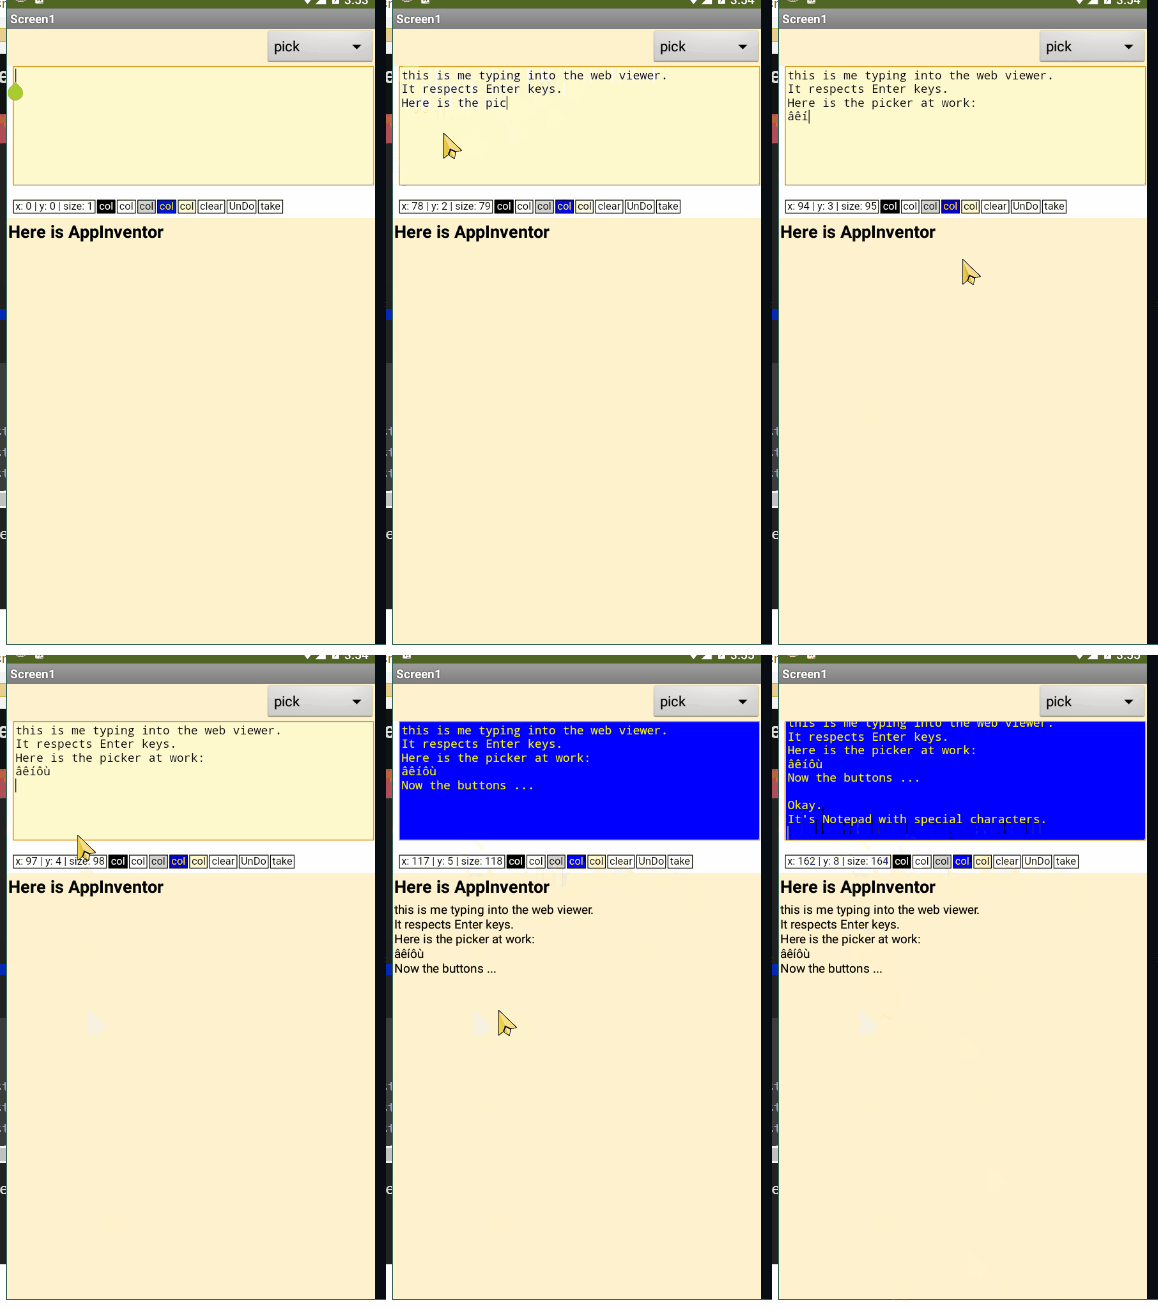
A slightly more comfortable textbox/input. Perhaps this helps, short code, often not more is needed. No extension, simply lean code using a HTML/JS script.
The AppInventor code uses a Webviewer component. Then you can use HTML functions for selection, copy, insert, cut........ For example: Add a textbox and paste selected text from the Webviewer if needed.
"take" sends the content to AppInventor
TEMPLATE_Textarea_2022.aia (3.8 KB)
HTML_Textarea_plugin.txt (1.8 KB)
3 Likes
ABG
February 20, 2022, 9:03pm
2
If you don't mind, I will extract parts of your sample and post them here for easy reading.
It will help me and others understand the JavaScript flow.
The html file:
<!DOCTYPE html>
<html>

<head>
<style>

p{	float:left;
    margin-right:2px;padding-left:2px;padding-right:2px;
    border-color:black;border-style:solid;border-width:1px;
    font-size:12px;font-family:arial;text-align:center}

</style>
</head>

<body>

<textarea id="ta" style="width:100%;height:150px;" onclick="textInfo()" oninput="textInfo()">
</textarea>

<p id="x">x: | y: | size:</p>
<p id="c1" style="background-color:black;color:white" onclick="changeColor(this)">col</p>
<p id="c2" style="background-color:white;color:black" onclick="changeColor(this)">col</p>
<p id="c3" style="background-color:lightgray;color:black" onclick="changeColor(this)">col</p>
<p id="c4" style="background-color:blue;color:yellow" onclick="changeColor(this)">col</p>
<p id="c5" style="background-color:lemonchiffon;color:black" onclick="changeColor(this)">col</p>
<p id="b1" onclick="undo=ta.value;ta.value=''">clear</p>
<p id="b2" onclick="UnDo()">UnDo</p>
<p id="b3" onclick="window.AppInventor.setWebViewString(ta.value)">take</p>
<script>

let ta=document.getElementById("ta");
let undo="";

function UnDo(){if(undo!=""){ta.value=undo;undo=""}ta.focus()}

function setWidth(w){ta.style.width=w}
function setHeight(h){ta.style.height=h}

function changeColor(this_){
	ta.style.backgroundColor=this_.style.backgroundColor;
    ta.style.color=this_.style.color}

function elem(id){return document.getElementById(id)}

function textInfo(){
    let pos=ta.value.substring(0,ta.selectionStart).split("\n").length;
    let x="x: "+ta.selectionStart+" | ";
    let y="y: "+(pos-1)+" | ";
	elem("x").innerHTML=x+y+"size: "+ta.value.length}

function insert(insertText){
	let pos=ta.selectionStart;
    ta.focus()
    ta.setRangeText(insertText,pos,pos,"end");
    textInfo()}

textInfo();

</script>

</body>
</html>
Here is a sample run ...
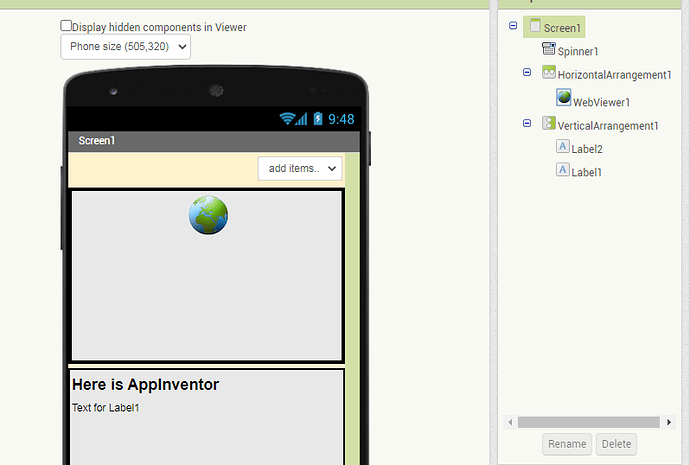
Designer:
Thanks for the JavaScript lesson!
2 Likes
TIMAI2
February 20, 2022, 10:14pm
3
See also
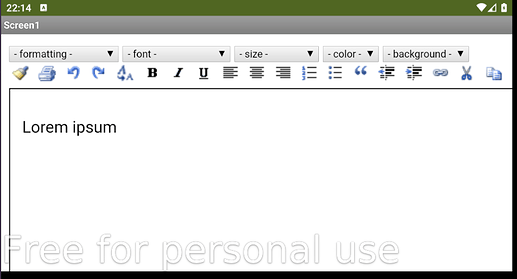
In HTML, any element can be editable. By using some JavaScript event handlers, you can transform your web page into a full and fast rich text editor. This article provides some information about this functionality.
textedit.html.txt (12.3 KB)
1 Like
Hello ABG,
Very interesting, thanks for posting.
1 Like
i modified the html code, the problem is all buttons working fine but the undo button is not working
body {
font-family: Arial, sans-serif;
}
    #container {
        display: flex;
        flex-wrap: wrap;
        justify-content: center;
        gap: 5px;
    }

    textarea {
        width: 100%;
        height: 150px;
        resize: none;
        padding: 5px;
        border: 1px solid black;
        font-size: 15px;
        font-family: Arial, sans-serif;
        text-align: left;
        opacity: 0;
        transform: translateY(-20px);
        transition: opacity 1s, transform 1s;
        animation: slideInTop 1s forwards;
    }

    .button {
        padding: 8px 15px;
        border: 1px solid black;
        border-radius: 5px;
        font-size: 14px;
        font-family: Arial, sans-serif;
        cursor: pointer;
        transition: background-color 1s, color 1s;
        opacity: 0;
        transform: translateY(20px);
    }

    #c1 {
        background-color: black;
        color: white;
        animation: slideInTopLeft 1s forwards;
    }

    #c2 {
        background-color: white;
        color: black;
        animation: slideInTopRight 1s forwards;
    }

    #c3 {
        background-color: lightgray;
        color: black;
        animation: slideInBottomLeft 1s forwards;
    }

    #c4 {
        background-color: blue;
        color: yellow;
        animation: slideInBottomRight 1s forwards;
    }

    #b1 {
        background-color: #ff3333;
        color: white;
        animation: slideInBottom 1s forwards;
    }

    #b2 {
        background-color: #3f51b5;
        color: white;
        animation: slideInBottom 1s forwards;
    }

    #b3 {
        background-color: #3f51b5;
        color: white;
        animation: slideInBottom 1s forwards;
    }

    q {
        display: block;
        text-align: center;
        font-size: 30px;
        margin-top: 20px;
        padding: 10px;
        border: 1px solid black;
        border-radius: 5px;
        transition: background-color 1s, color 1s;
        cursor: pointer;
        opacity: 0;
        transform: translateY(20px);
        animation: slideInBottom 1s forwards;
    }

    q:hover {
        background-color: #333;
        color: white;
    }

    .label {
        text-align: center;
        font-size: 14px;
        margin-top: 10px;
        font-style: italic;
        opacity: 0;
        transform: scale(0.2);
        animation: zoomIn 2s forwards;
    }

    .title {
        text-align: center;
        font-size: 30px;
        font-weight: bold;
        color: black;
        opacity: 0;
        animation: flipIn 2s forwards;
    }

    .code-label {
        text-align: center;
        font-size: 18px;
        font-weight: bold;
        color: black;
        opacity: 0;
        animation: flipIn 2s forwards;
    }

    @keyframes slideInTop {
        from {
            opacity: 0;
            transform: translateY(-20px);
        }
        to {
            opacity: 1;
            transform: translateY(0);
        }
    }

    @keyframes slideInTopLeft {
        from {
            opacity: 0;
            transform: translate(-20px, -20px);
        }
        to {
            opacity: 1;
            transform: translate(0, 0);
        }
    }

    @keyframes slideInTopRight {
        from {
            opacity: 0;
            transform: translate(20px, -20px);
        }
        to {
            opacity: 1;
            transform: translate(0, 0);
        }
    }

    @keyframes slideInBottomLeft {
        from {
            opacity: 0;
            transform: translate(-20px, 20px);
        }
        to {
            opacity: 1;
            transform: translate(0, 0);
        }
    }

    @keyframes slideInBottomRight {
        from {
            opacity: 0;
            transform: translate(20px, 20px);
        }
        to {
            opacity: 1;
            transform: translate(0, 0);
        }
    }

    @keyframes slideInBottom {
        from {
            opacity: 0;
            transform: translateY(20px);
        }
        to {
            opacity: 1;
            transform: translateY(0);
        }
    }

    @keyframes zoomIn {
        from {
            opacity: 0;
            transform: scale(0.2);
        }
        to {
            opacity: 1;
            transform: scale(1);
        }
    }

    @keyframes flipIn {
        from {
            transform: perspective(400px) rotateX(90deg);
            opacity: 0;
        }
        to {
            transform: perspective(400px) rotateX(0deg);
            opacity: 1;
        }
    }
</style>
Code Explainer
The code you want explained:
Explain the code!
Made by Pralaya
let ta = document.getElementById("ta");
let undoCodeValue = "";
    function undoCode() {
        if (undoCodeValue !== "") {
            ta.value = undoCodeValue;
            undoCodeValue = "";
        }
        ta.focus();
    }

    function changeColor(element) {
        ta.style.backgroundColor = element.style.backgroundColor;
        ta.style.color = element.style.color;
    }

    function textInfo() {
        let pos = ta.value.substring(0, ta.selectionStart).split("\n").length;
        let x = "x: " + ta.selectionStart + " | ";
        let y = "y: " + (pos - 1) + " | ";
        elem("x").innerHTML = x + y + "size: " + ta.value.length;
    }

    function clearCode() {
        ta.value = "";
        undoCodeValue = "";
        ta.focus();
    }

    function elem(id) {
        return document.getElementById(id);
    }

    textInfo();
</script>


