Hi
Hello Chris
I am sorry about my bad english.
Really I want to send a character.
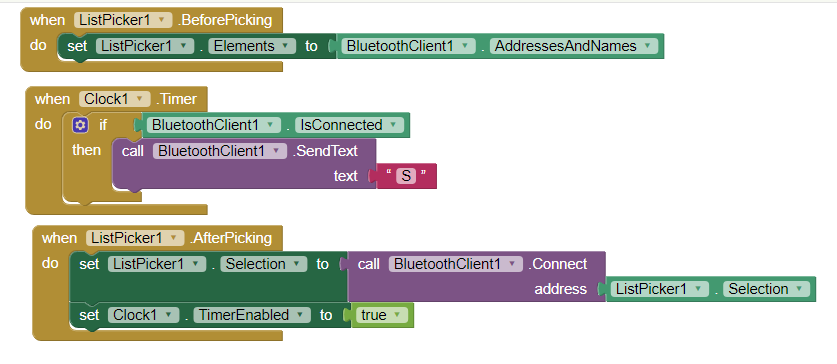
My app have few buttons. Once the button
is pressed.the character that assigned to the block of the button to be sent out via Bluetooth. But during the button unprepared need to send a character until next button is pressed and so on
Hope your solution will be working. So I will let you know once I done it
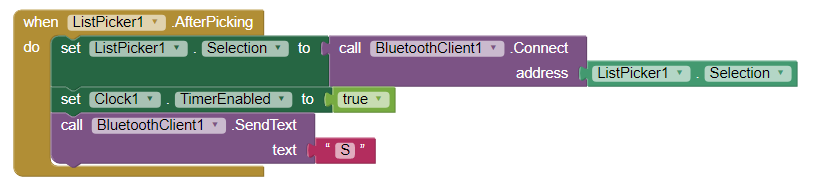
Above is the blocs that still I am using . Now my main issue is solved , The sub issue is When I press and hold the button ,Only single time a character sent out
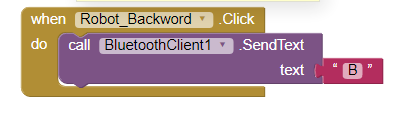
But I would need help The character to sent out continuously until,the button is released
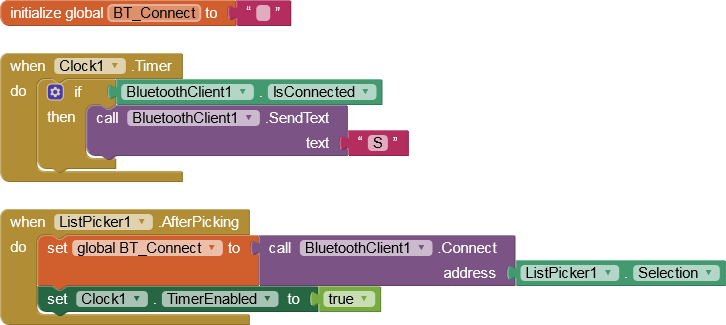
You need a global variable, call it COMMAND, to hold the B or whatever you want to send.
Send the value of the COMMAND variable.
Change the value of the COMMAND value in your button Click events, depending on the button.
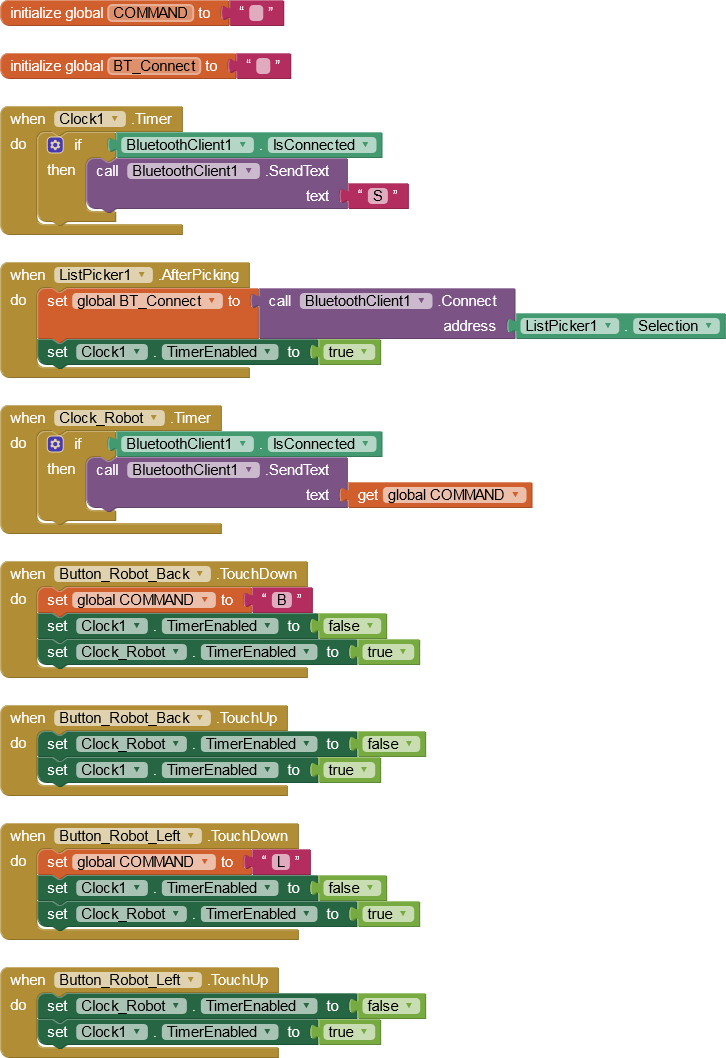
... you can use the same method with a Clock Timer. Press and hold the button, enabling the Clock Timer, stop on button release, disabling the Clock Timer, like this:
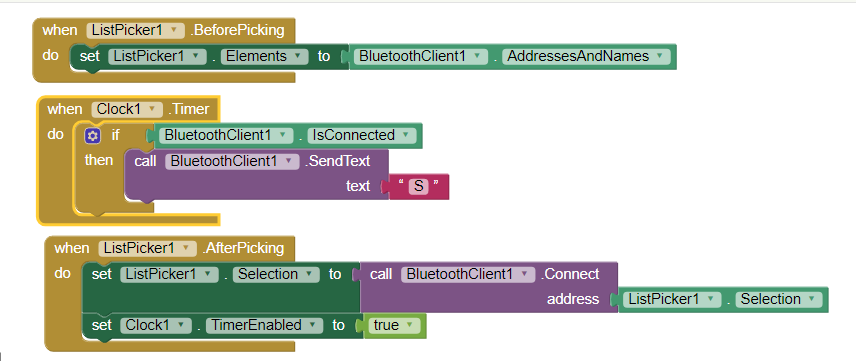
Still slim issue is there, When I working with app withing two minutes it struck , and some time app closed. I am using apk, Both timers time interval is 10
Dayan - is this Robot an off-the-shelf ready made kit thing? I assume there is a Script to drive the Robot's microprocessor and motors (stepper motors?). It is important that the hardware has everything correct too. For example, the right amount of consistent power, an efficient way to dissipate heat. In the case of stepper motors, the right type of electronic signal (PWM - Pulse Width Modulation).
Another potential cause of "lock up" is buffer overflow on the hardware side. Sending every 10 milliseconds is quite fast. You could experiment with a higher (longer interval) value, say 50 milliseconds, and see how that goes.
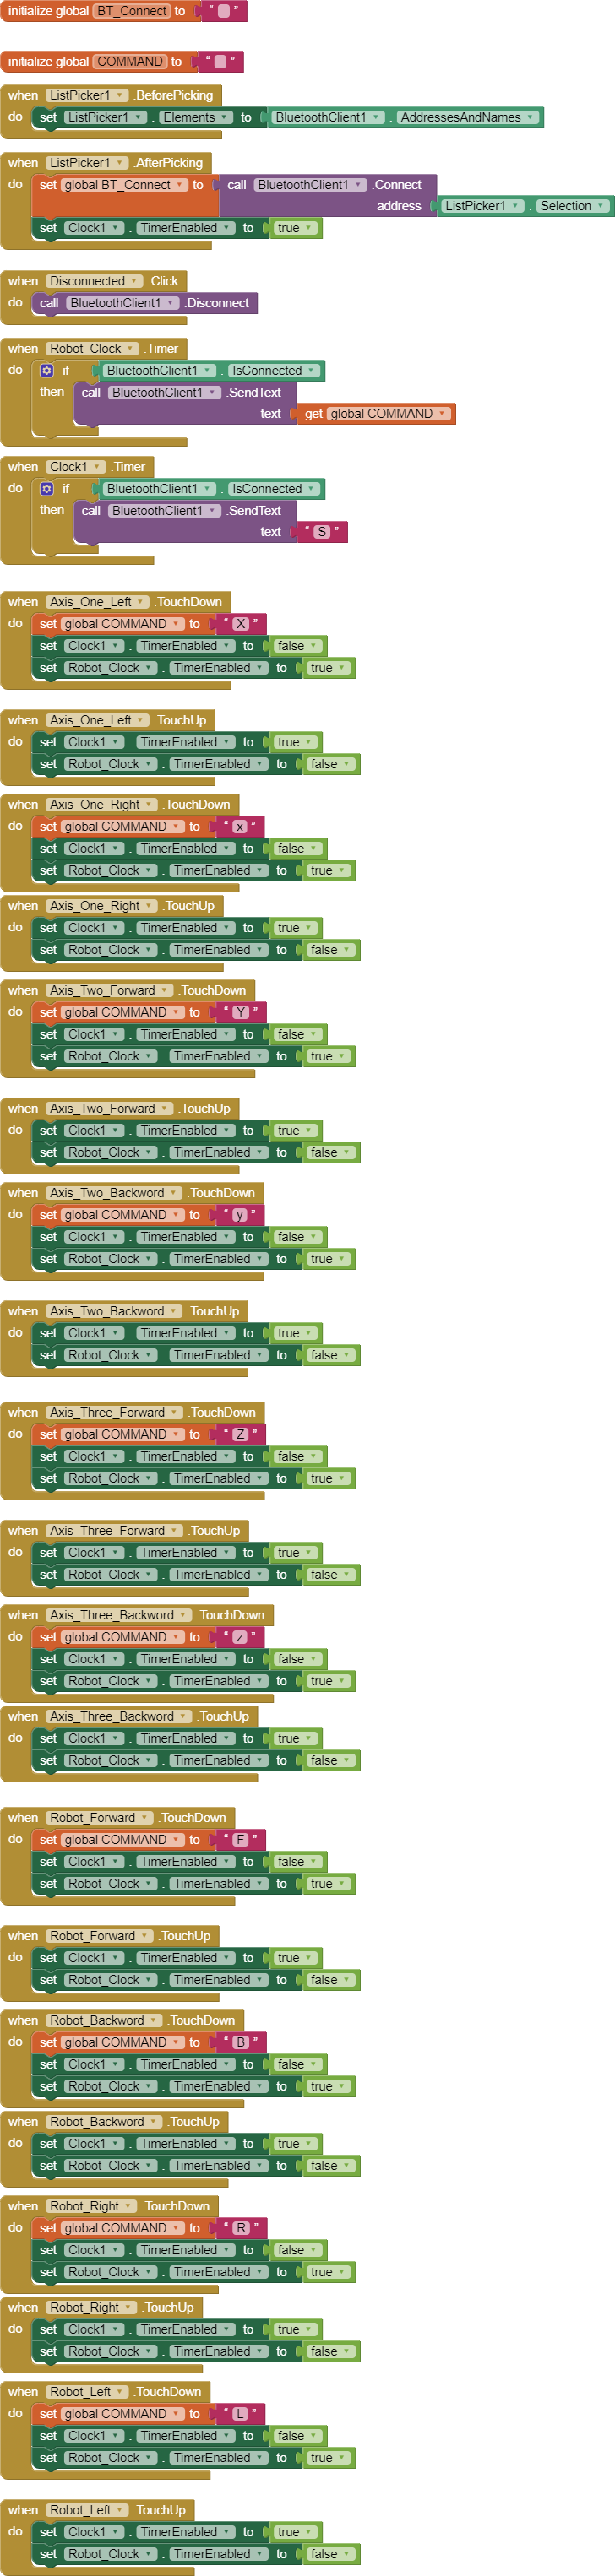
Maybe you could show the code on your robot side. As far as I can see, your blocks are overly complicated. The robots I programmed, I only sent a character to the robot when the user pressed a button. The robot would just continue to go in that direction, until the user pressed a button again.
Much easier, and much less chance to choke your robot.
Base on your advise I change all the image to 96 x96 pix and background picture set to 512 x 512 pix ( Please advice best pixel size for background image )
I increased the timer interval to 50
Now it has big improvement . Very rarely it getting stuck .
Since we are using Arduino Uno ,So now we need to improve program side to overcome buffer overflow with Atmega328p microcontroller
I will update once I complete your all advise
It's not necessary to make all the images so small (96 x 96 is for the App Icon), but to make them just the right size or very slightly oversize. Since your images are not photographs, they can be reduced to 16 bit Colour. It is important not to apply compression. With such a busy GUI, my view is that a background image is not necessary - a plain colour background (via the Properties palette) would be best.
I'm happy to take a look at your .ino Arduino file if you wish. To post it here, change the extension from .ini to .txt.
The dcube robot arm looks fantastic! Quite a challenging assembly. I notice there is no active cooling for the processor and motors, you may need to add a small computer fan..... Also, the wires from the motors could be shielded with braided sleeving to prevent interference of the signal wires and Bluetooth radio.