Hello Friends, I have saw many topics about 'How to publish app on Google Play' in this community. Even though there are solutions in some of these topics, but many are creating duplicate topics. So I decided to create a tuotorial about how to publish app on Google Play.
![]() Publish App on Google Play
Publish App on Google Play ![]()
Recommended
Use this folder Path-
Note: These files and size are important
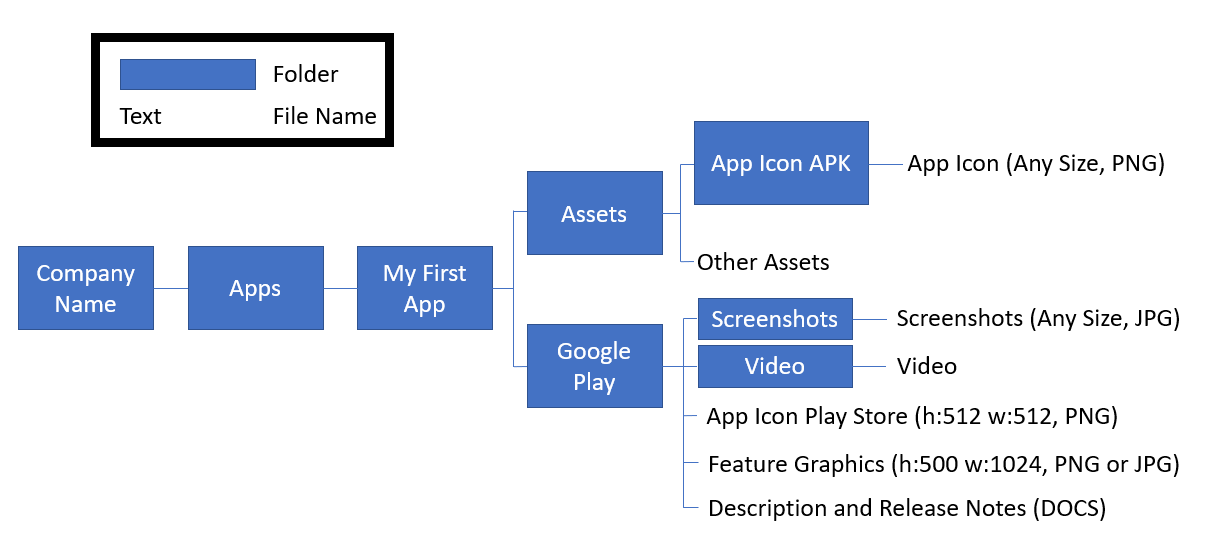
The
Description and Release notes is a Word file in which there needs to be:
- Short Description (80 Charecters)
- Long Description (4000 Charecters)
- Release Notes
For more information visit - Google Support
Go to Google Play Console
First we need to go to the Google Play Console. If you are new to it, you need to pay some amount of money to use it. After paying, We will start our wonderful process ![]()
![]() .
.
Lets start
Step 1. Click on the "Create app" Button on top-right.

Step 2. Complete the given details.
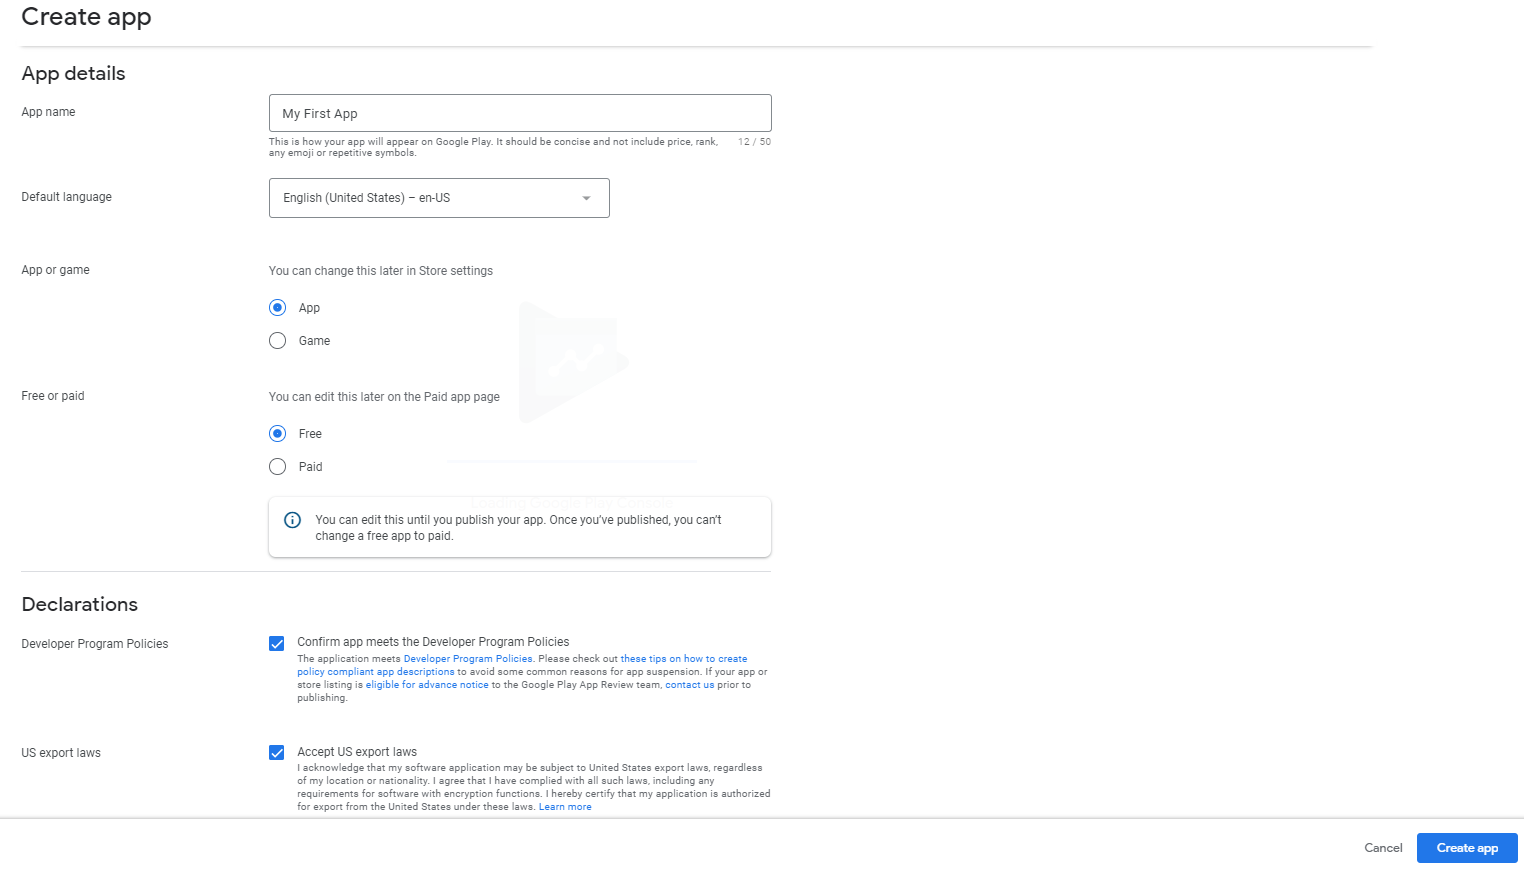
Step 3. Click "Create app"
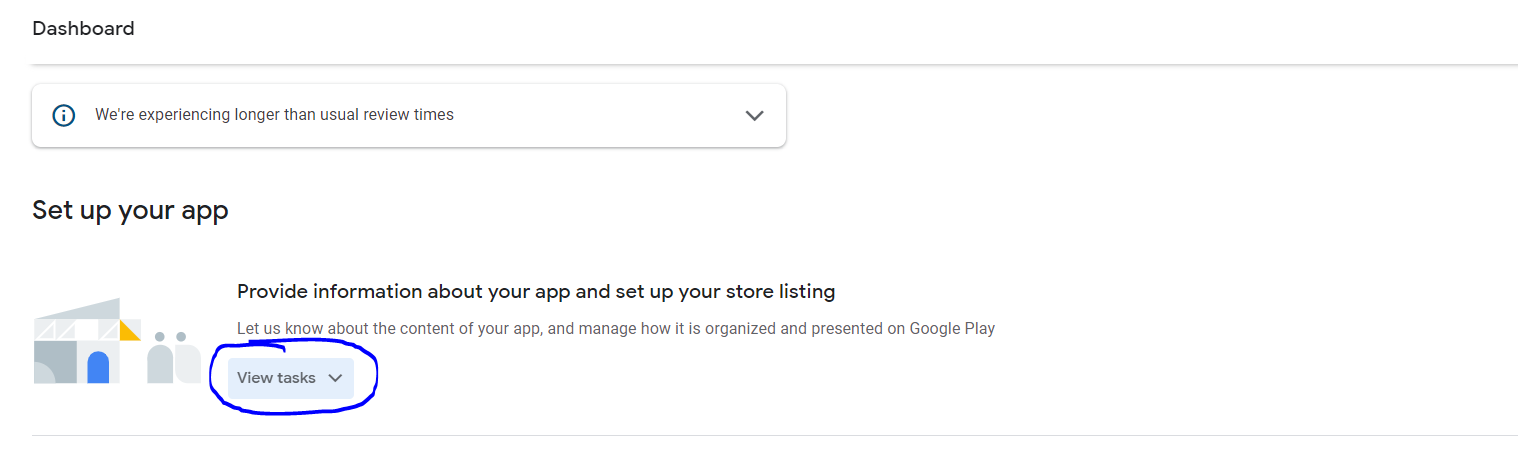
Step 4. Click on "View tasks" in dashboard.
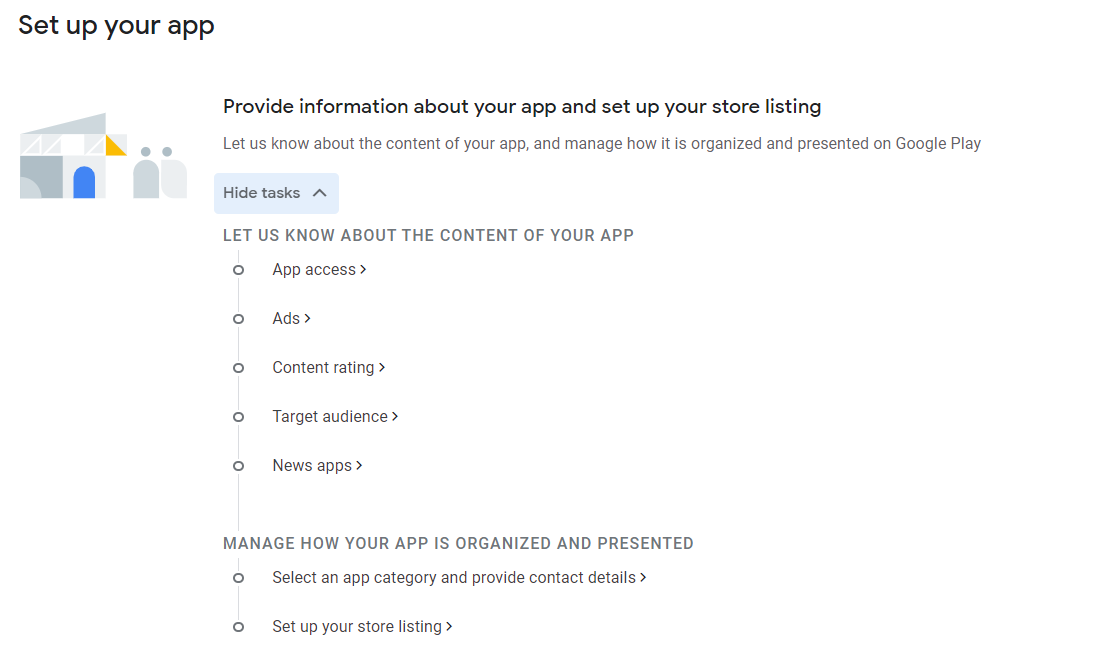
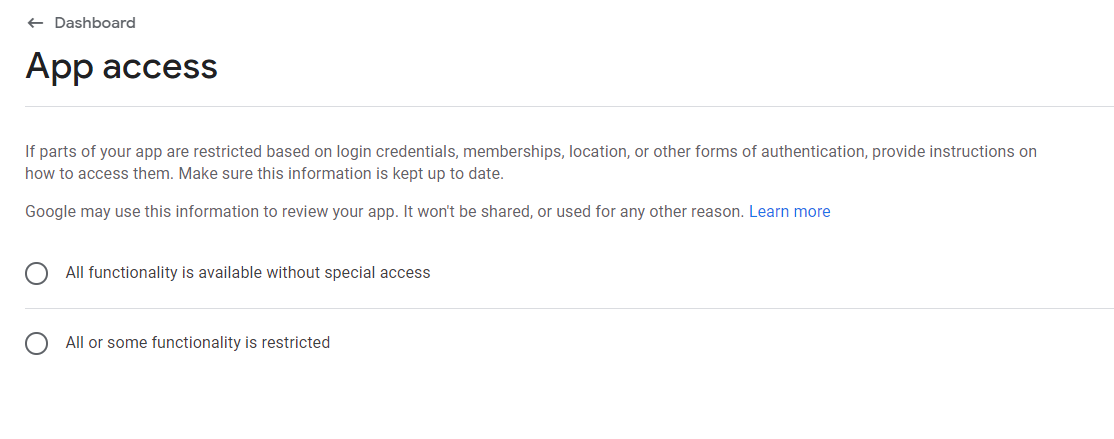
Step 5. Go to App Access.
Check the corresponding checkbox.
Click "Save". Then click on "Dashboard".
Step 6. Go to Ads.
Check the correspnding checkbox.
Click "Save". Then click on "Dashboard".

Step 7. Go to Content Rating. This section is important.
Click "Start Questionnaire"
Give the details inCategoryand click "Next".
Give answers for the questions inQuestionnairethen click "Save" followed by "Next".
Now you will get the age restrictions of your app, if all are correct then click "Sumbit".
Now click on "Dashboard"


Step 8. Go to Target Audiance.
Give your details and click "Next".
After completing, click "Save" followed by "Dashboard".
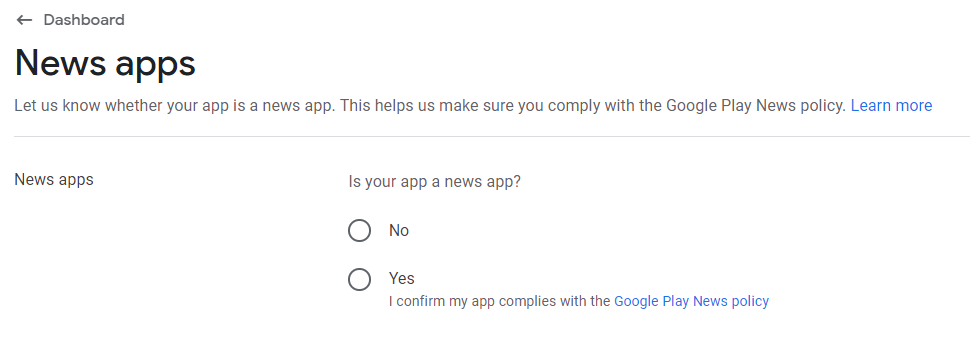
Step 9. Go to News App. If the app is a news app click on Yes othervise No.
Click "Dasboard".
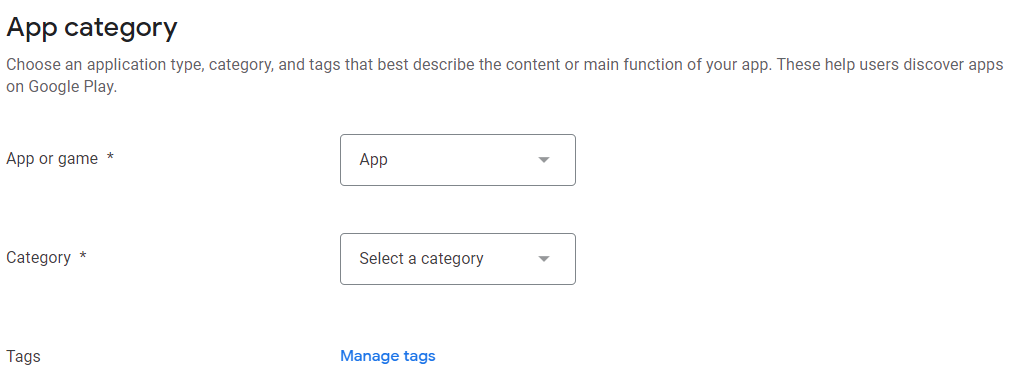
Step 10. Go to
Select an app category and provide contact details.
In App Cateogory, Select the Cateogory and you can select the Tags.
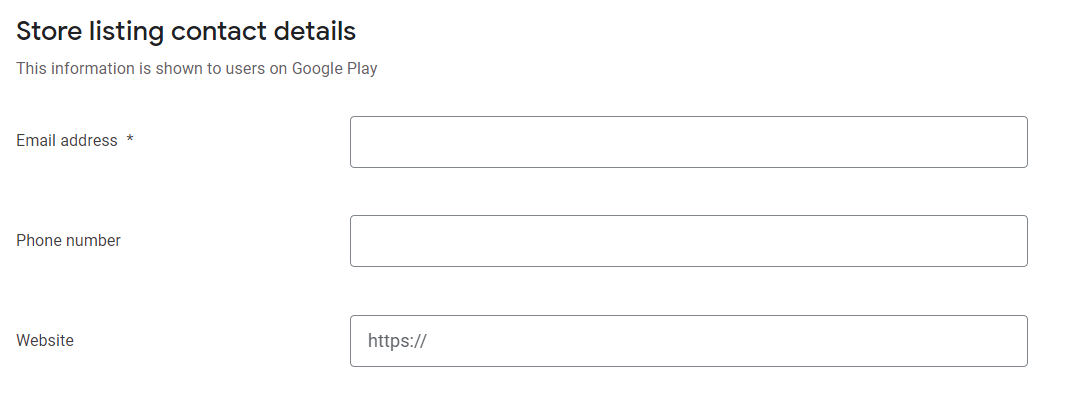
Now give your email address, phone number(optional), and website(optional).
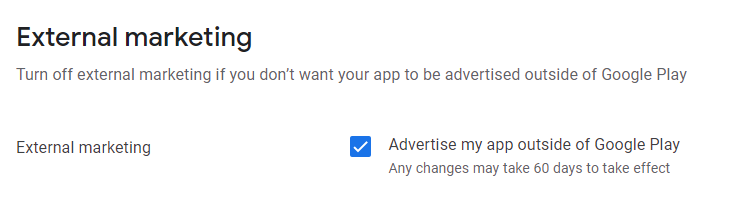
Select the External Marketing cateogory.
After completing click "Save".
Example ScreenshotStep 11. Go to
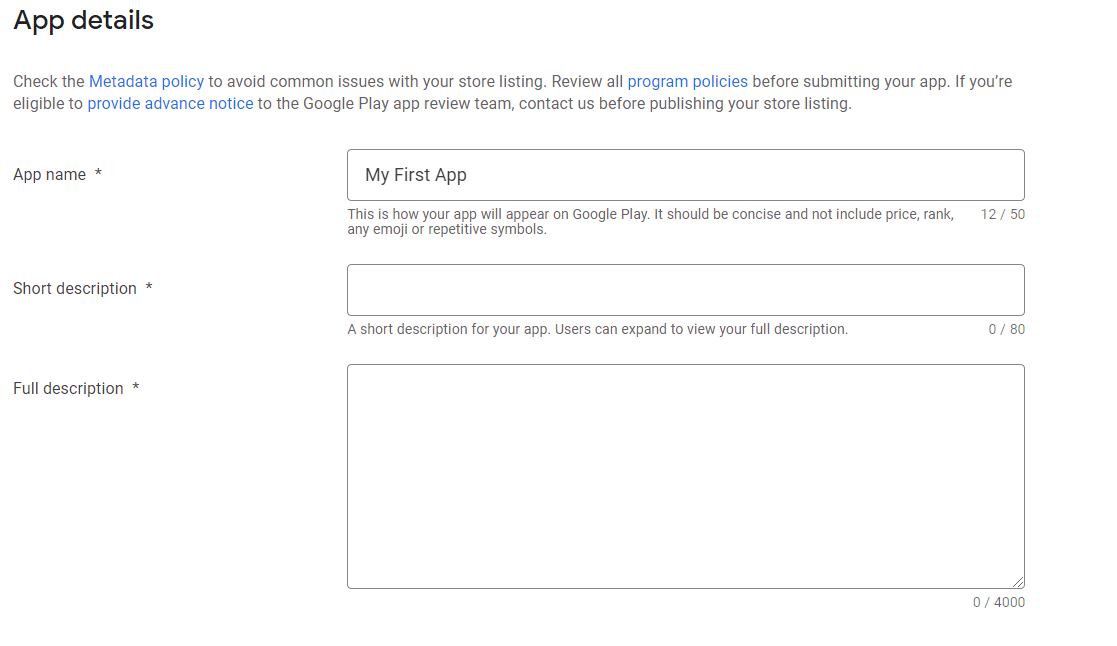
Set up Store Listing. This is the most important part of this process. Do it carefully.
In App Details, The app name will be automatically set becuase we have gave it earlier in Step 2. We have to give the Short and Long decription of our app (Give the descriptions from our word file).
In Graphics, Give the App Icon, Feature Graphics, Screenshots, and Video link (If you have a video, upload that video to Youtube and give the link).
After completing, Click "Save".
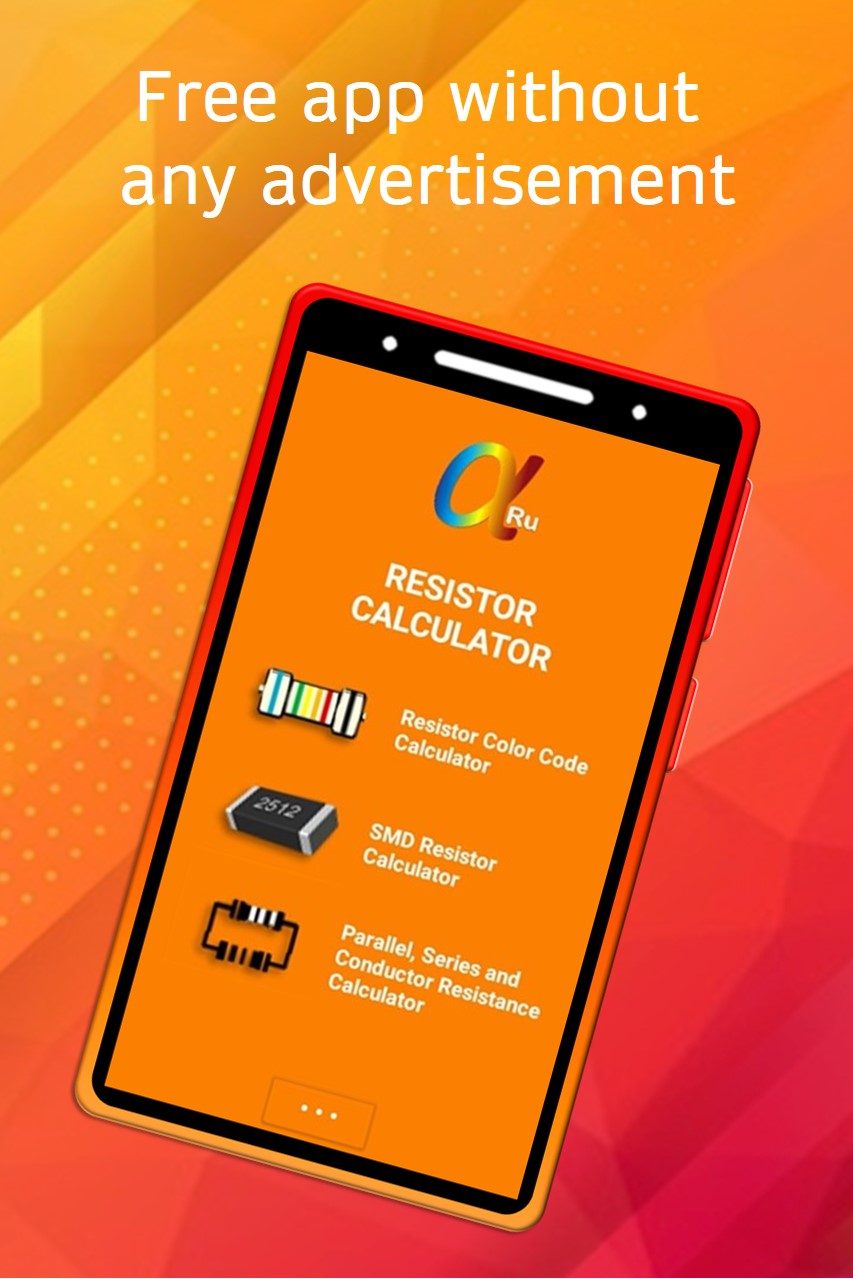
Example Graphic Asset

https://www.youtube.com/watch?v=_ULwGPq0vVc Example Promo Video
Example Short Description
Resistor color code calculator with SMD and resistor combination calculations.
Example Long Description
Easy to use free and zero advertisement application which can do electronic color code calculation for 3, 4, 5 and 6 color bands resistors based on the latest IEC 60062:2016 standard. For every calculation, the nearest E6, E12 and E24 standard resistor values are displayed. To support the color-blind users, the color input buttons have text enabled on long click and the calculated color bands are also displayed in text format. Color code search by giving the numeric value and storage of up to 10 codes is also available. App can do SMD resistor value calculation based on 3- and 4-digit codes and EIA-96 code. App supports resistance calculations of parallel and series resistors. Resistance calculation of a conductor is also supported. Easy share and built-in help enabled.
Resistor value calculation from color code:
- Support 3, 4, 5 and 6 band resistors.
- Calculations based on the latest IEC 60062:2016 standard.
- Dynamic calculations-without any clicks the resistor value is dynamically calculated at the time of giving the band color input.
- Calculated color band picture together with other values can be easily shared with other applications.
- Long click on color selector buttons will display its color name and the IEC 60062:2016 text code for that color-Help for color-blind users.
- A text output of the calculated color bands to support color-blind users.
- Every color code calculated will also display the nearest E6, E12 and E24 standard resistor values.
- Long click on calculated resistor value will show the resistance in other units say kilo ohms, mega ohms, etc.
- User can optionally store 10 color codes for future use and the list can be easily shared with other apps.
- Color code search option by giving the numeric resistor value is supported. - - Result output with color code image and text which can be easily shared.
- Built-in help explaining color code calculation.
- Built-in resistor color code table.
- Built-in input value validation to prevent errors.
SMD Resistor code to numeric resistance value calculator:
- Code supported:
o Standard 3 digit code that can include R to indicate a decimal point, M to indicate a decimal point for milliohms (for current sensing SMDs).
o Standard 4 digit code that can include R to indicate decimal point.
o EIA-96 1% code with a number in the range 01 to 96 followed by a letter.
o 2, 5, and 10% code with a letter, followed by a numbers in the range 01 to 60. - Letters supported: A, B, C, D, E, F, H, M, R, S, X, Y, Z and the underline.
- Auto validation of input values to prevent errors.
- Share the SMD code with numeric resistance value.
Other resistance calculations:
- Option to calculate the equivalent resistance of given resisters in parallel.
- Option to calculate the equivalent resistance of given resisters in series.
- Option to calculate the resistance of a conductor with given length (support inch, feet, yard, mile, centimetre, meter, kilometre), diameter and conductivity in S/m.
- For the conductor resistance calculator, 20 built-in material conductivity is available: Silver, Copper, Annealed Copper, Gold, Aluminium, Tungsten, Zinc, Cobalt, Nickel, Ruthenium, Lithium, Iron, Platinum, Tin, Carbon Steel, Lead, Stainless Steel, Titanium, Mercury and Nichrome.
- Can easily share results with other apps.
Generic:
- Easy to use interface optimised for multiple devices.
- No disturbing ads while using the app.
- Free application.
- Light weight.
Special Permission:
App will ask for internal storage write permission. This is to store up to 10 resistor values for future use in a database.
Step 12. It is recommended to create a Pre-Launch Report before main publish.
Ok, now we have completed the main part. Now go to Production in side bar.
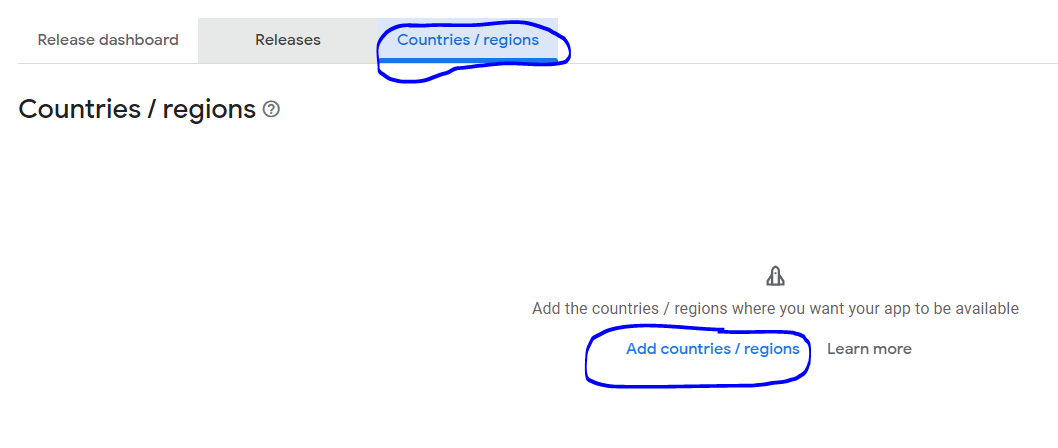
In production, go toCountries/Regionsand click "Add countries/ Regions"
Now a dropdown will appear and you have to select the countries where the app should appear.

Now we are going to the last step of our process. ![]()
![]()
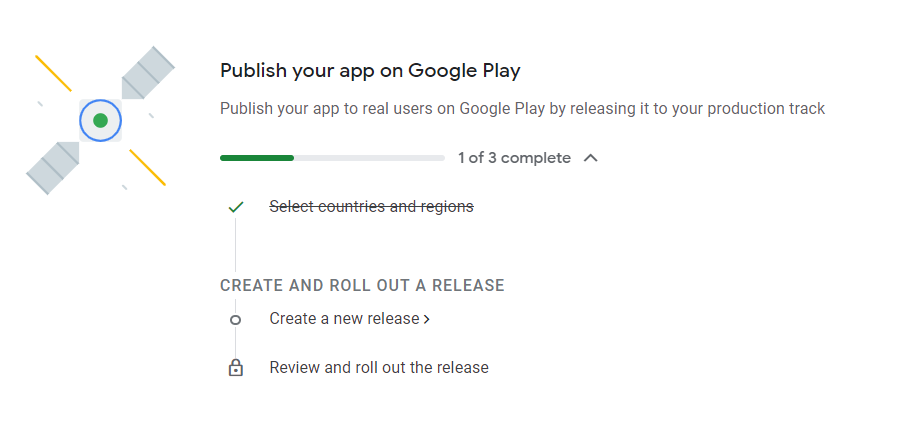
Step 13. Go to Dashboard, and scroll down until you see -
In this image you can see a progress barr which shows 1 of 3 completed. You can also see that the next step is to to create a new release, so click on that, it will redirect you to Releases in Production.
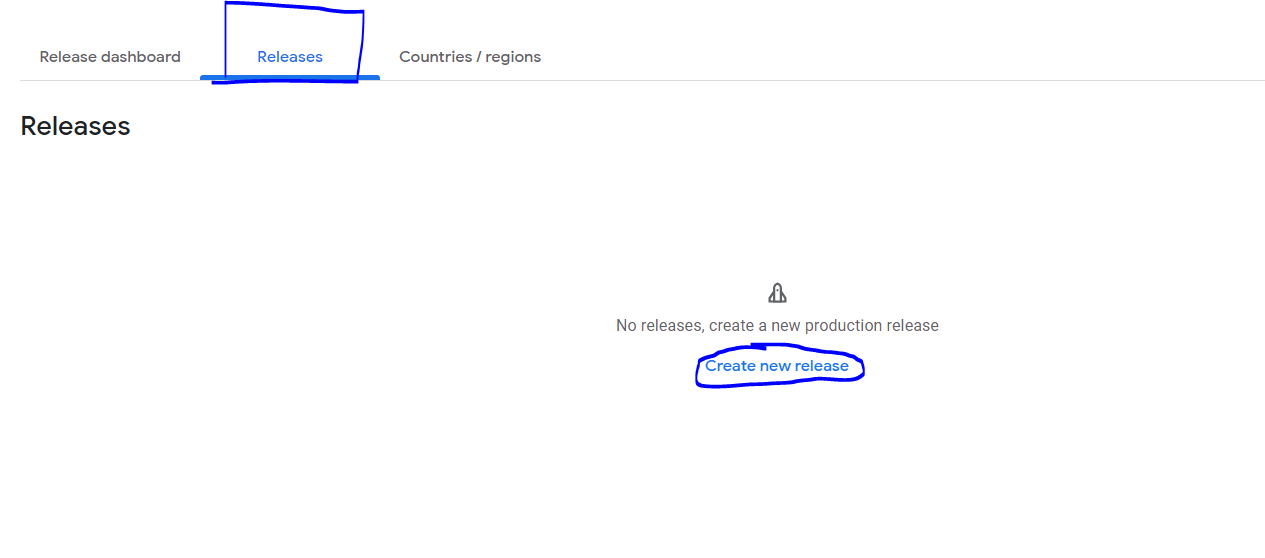
Click onCreate New Release.
This is the final step

Step 14. If you are new create a App Signing key in Play App Signing. Then upload an APK or AAB in App bundles and APK's. If you completed uploading you can see the details of the APK or AAB.
I have uploaded APK so the File type is APK.
Sometimes it will give you an warning about using AAB instead of APK, just ignore it
Now scroll to Release Details, there you have to give the Release name like1.0.0or1.0etc.
On the Release Notes you have to give the Notes from the Word file we have created.(See it in Recommended)
Now click "Save". after saving click on "Review Release".
Your app is going to take off
Now you will be redirected to Review and Release. You can check the errors and warning messages and Release notes. After checking, If you are willing to publish your app click on "Start Rollout to Production".
Yes, your app has been successfully sent to review from google developers all around the world. It will take some days (~3 to 7 days) to become live in Google Play. ![]()
![]()
![]()
If you like the tuotorial please vote it.
- 5
- 4
- 3
- 2
- 1
Thank you. ![]()


