Hello friends, here I share my experience with Node.js in Windows 7.
Node.js is mainly used to create a Web Server on a PC.
Node.js is open-source, cross-platform, JavaScript, Web server, dynamic web page, real-time Web applications,...
In this topic I will write about creating a Web Server in Windows. Communicate ESP32/ESP8266 client with that Server. Send/receive information from Android to ESP32/ESP8266,.... Run batch files from Android to Windows ...
oooooooooooooooooooooooooooooooooooooooooooooooooooooooooooo
1.- Install in Windows. "Portable".
I tried to install the latest version of Node.js on my Windows 7...
Node.js® is a free, open-source, cross-platform JavaScript runtime environment that lets developers create servers, web apps, command line tools and scripts.
...but it did not allow it.
So I downloaded an older version of: Index of /dist/latest-v8.x/
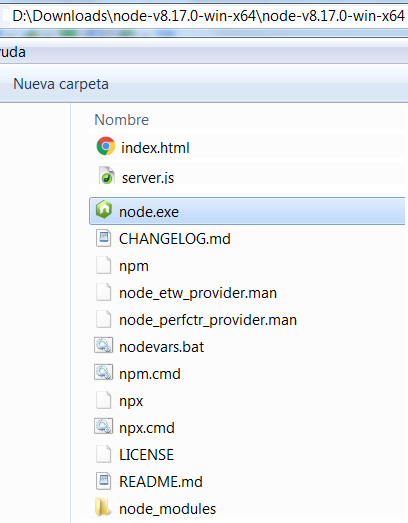
This version: node-v8.17.0-win-x64.zip
I unzipped it and used it as "Portable" . (about 55 MB)
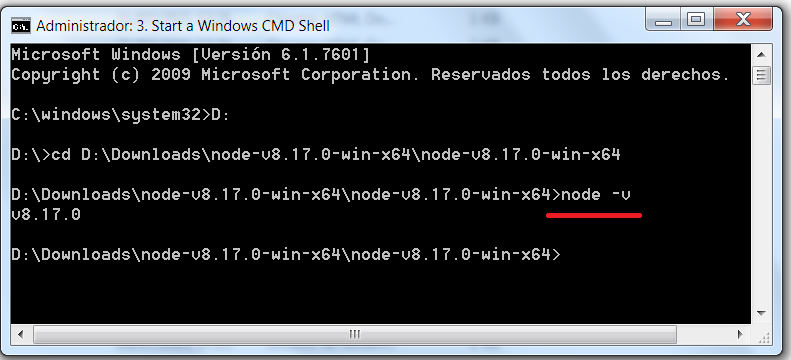
Windows CMD Shell,
Write node -v
1 Like
2.- Create a Web Server in PC with Node.js
Create a file called server.js i n the node folder with this content:
var http = require("http");
function onRequest(request, response) {
console.log("Received client.");
response.writeHead(200, {"Content-Type": "text/html"});
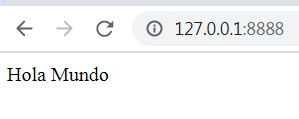
response.write("Hola Mundo.");
response.end();
}
http.createServer(onRequest).listen(8888);
console.log("Server started.");
./node.exe server.js
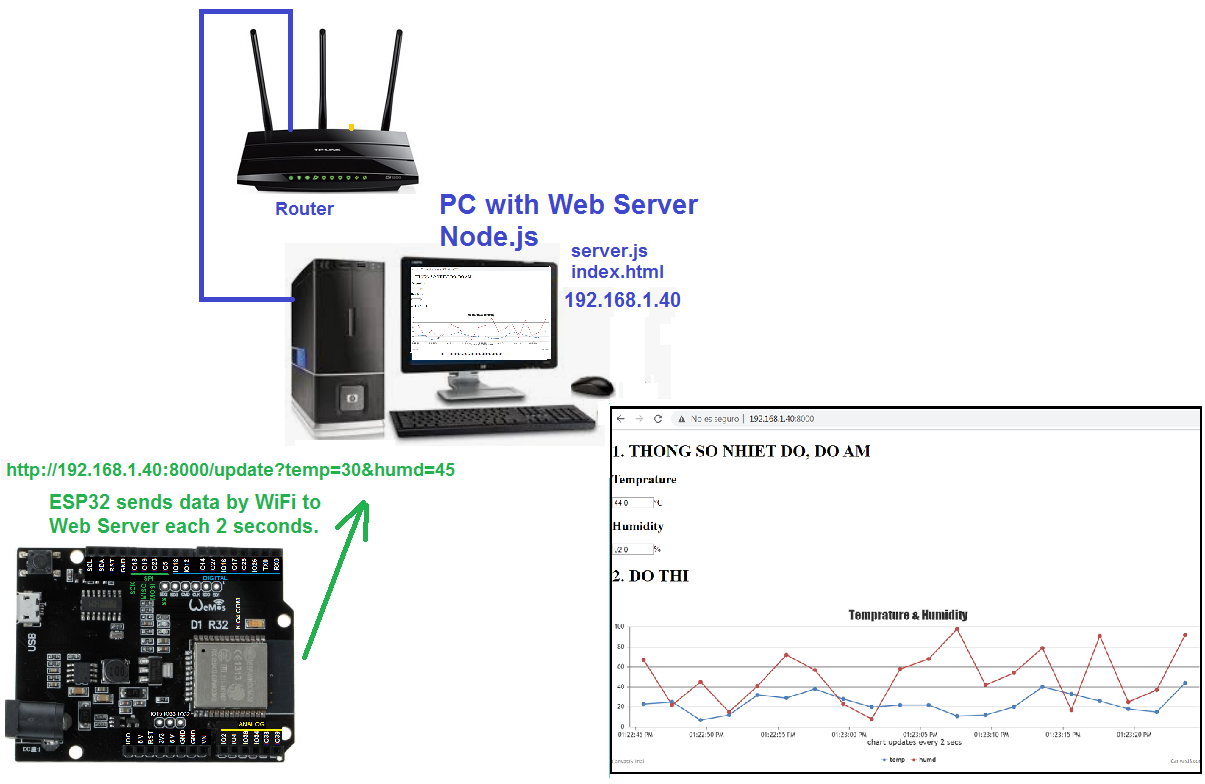
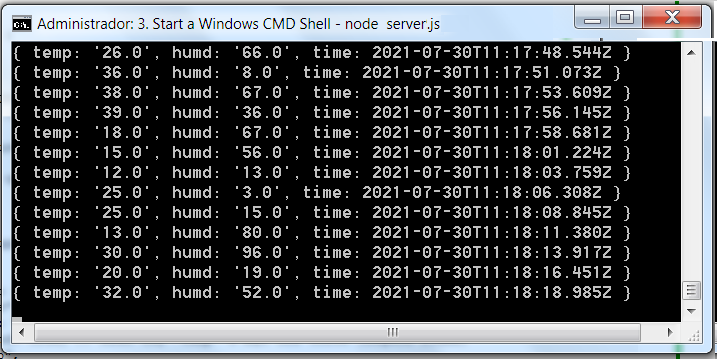
3.- ESP32 client sends temp,humd each 2 seconds to Web Server Node.js. Show graphic in a web page in real-time.
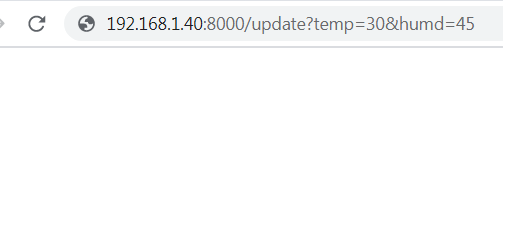
ESP32 working as a client, will send temperature and humidity values to the Node.js Server every 2 seconds, in my case with IP 192.168.1.40
http ://192.168.1.40:8000/update?temp=30&humd=45
The server will display the information in real time in a graph using the page index.html
In the tutorial, copy the server.js and index.html files to the node folder.
Load the code into the ESP8266 or ESP32.
My changes:
In ESP code I have changed this line to work in ESP32:
// #include <ESP8266WiFi.h>   //  ESP8266
#include <WiFi.h>  //  ESP32
In the ESP code I have changed these lines so that the temperature and humidity values are created randomly, for testing.
  float temp = dht.readTemperature();
  float humi = dht.readHumidity();
  temp = random(0,50); // RANDOM
  humi = random(0,100); // RANDOM
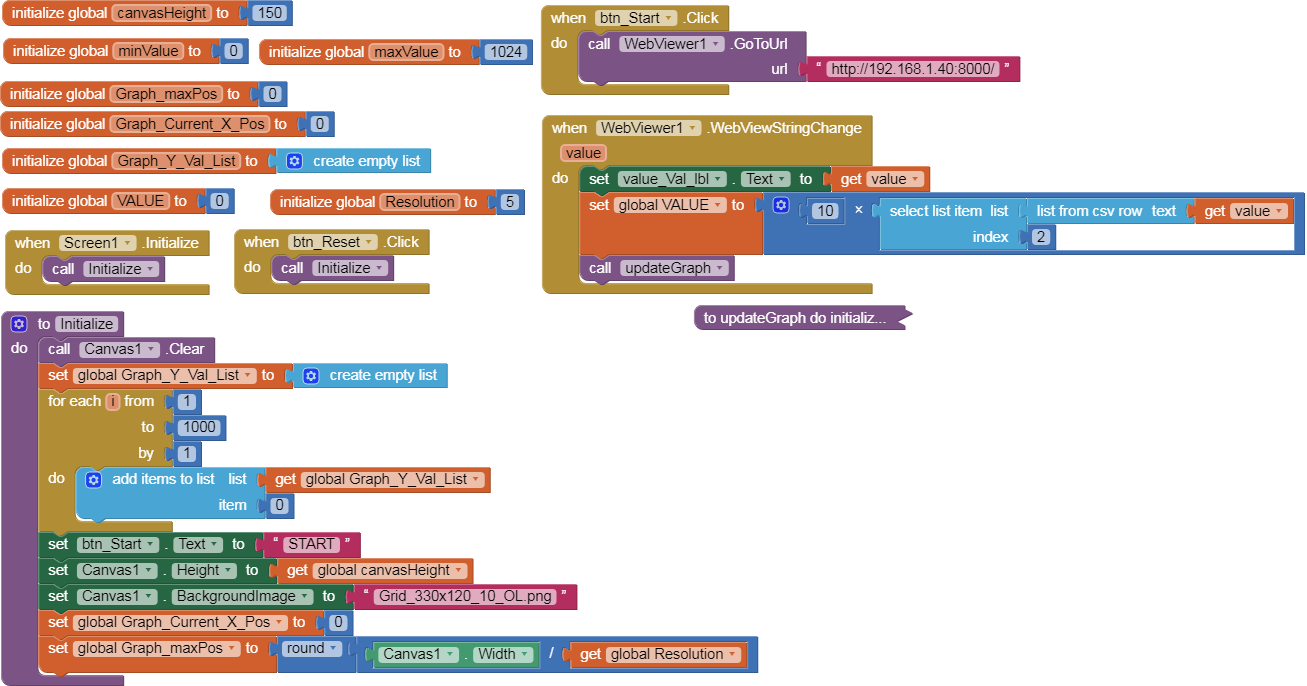
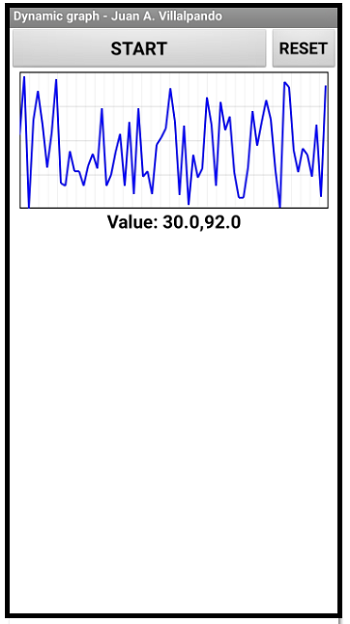
4.- ESP32 client sends data each 2 seconds to Web server, Android receives data by WebView component. Show in dynamic graphic.
This will be a new index.html file:
Look: window.AppInventor.setWebViewString("" + temp_humi);
<!DOCTYPE html>
<html><head> <meta charset="UTF-8"><title>DHT11</title></head>
<body>
        <script type="text/javascript">
            function httpGetAsync(theUrl, callback) {
                        var xmlHttp = new XMLHttpRequest();
                        xmlHttp.onreadystatechange = function() {
                    if (xmlHttp.readyState == 4 && xmlHttp.status == 200)
                        callback(JSON.parse(xmlHttp.responseText));
                }
                xmlHttp.open("GET", theUrl, true); // true for asynchronous
                xmlHttp.send(null);
            }

            window.onload = function() {
                var updateInterval = 2000;
                var time = new Date();
                var update = function() {
                    httpGetAsync('/get', function(data) {
					 var temp_humi =  data[0].temp + "," + data[0].humd;
					 window.AppInventor.setWebViewString("" + temp_humi);
                    time.setTime(time.getTime() + updateInterval);
                    });
                };
                update();
                setInterval(function() {
                    update()
                }, updateInterval);
            }
        </script>
</body>
</html>
- App Inventor.
p9A0i_esp32_nodejs.aia (7.4 KB)
Note that it does not use a Clock, the values are received automatically.
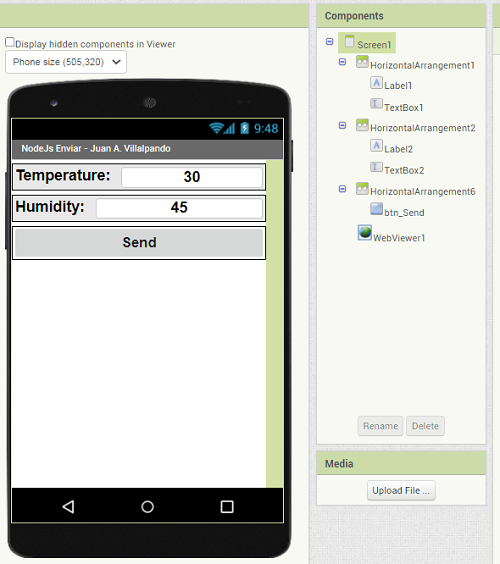
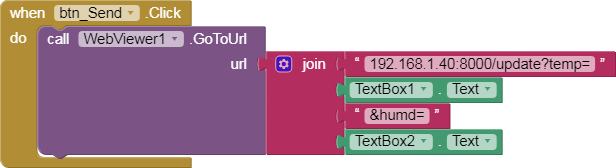
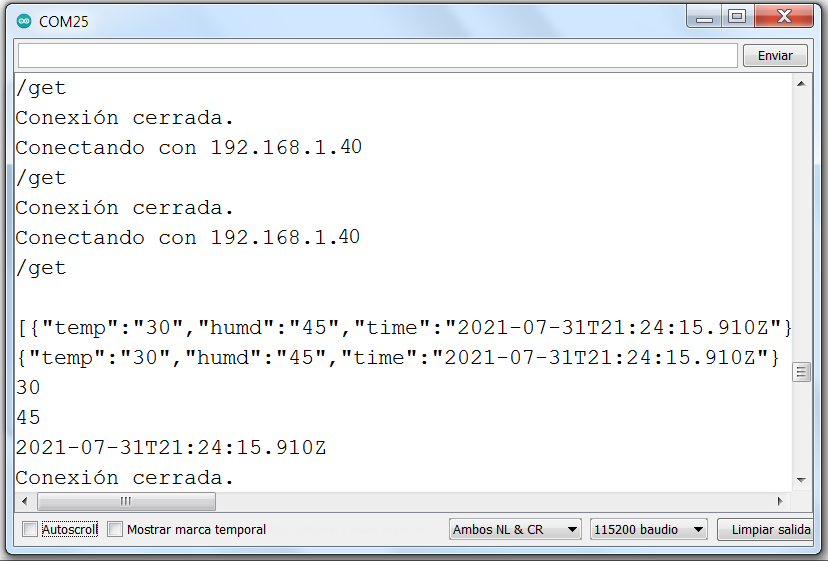
5.- Android with WebView component sends data to Server Node.js, ESP32 receives those values and shows in Serial Monitor.
p9A0i_esp32_nodejs_Envia.aia (2.1 KB)
We write temperature and humidity, and Click the button.
WebViewer sends values to server:
// Juan A. Villalpando
// http://kio4.com/arduino/117_Wemos_NodeJs.htm

// #include <ESP8266WiFi.h>
#include <WiFi.h>
#include <ArduinoJson.h>

const char* ssid     = "Nombre_Red_Wifi";
const char* password = "Clave_Wifi";
const char* host = "192.168.1.40";

void setup(){
    Serial.begin(115200);
    delay(10);

  // Conecta a la red wifi.
  Serial.print("Conectando con ");
  Serial.println(ssid);

  WiFi.begin(ssid, password);

  while (WiFi.status() != WL_CONNECTED) {
    delay(500);
    Serial.print(".");
  }
  Serial.println("Conectado con WiFi.");

  // Esta es tu IP
  Serial.print("Tu IP: ");
  Serial.print(WiFi.localIP());
}

void loop(){
    Serial.print("Conectando con ");
    Serial.println(host);

    // Cliente
    WiFiClient client;
    const int httpPort = 8000;
    if (!client.connect(host, httpPort)) {
        Serial.println("Fallo en la conexión.");
        return;
    }

    // Linea de petición
    String url = "/get";

    Serial.println(url);

    // Esto es lo que se enviará al servidor.
    client.print(String("GET ") + url + " HTTP/1.1\r\n" +
                 "Host: " + host + "\r\n" +
                 "Connection: close\r\n\r\n");
    unsigned long timeout = millis();
    while (client.available() == 0) {
        if (millis() - timeout > 5000) {
            Serial.println(">>> Rebasado 5 segundos.");
            client.stop();
            return;
        }
    }

    // Lee todas las líneas que ha enviado el servidor.
    while(client.available()) {
        String lineas = client.readStringUntil('\r');
        if (lineas.indexOf("[{") != -1) { // Linea que contiene [{.
           Serial.println(lineas);
           String json = lineas.substring(2,lineas.length()-1); // Elimina [ ]
           Serial.println(json);
           StaticJsonBuffer<200> jsonBuffer;
           JsonObject& deco = jsonBuffer.parseObject(json);
        if(!deco.success()) {Serial.println("parseObject() failed");}
        else { String temp = deco["temp"];
               String humd = deco["humd"];
               String tempo = deco["time"];
               Serial.println(temp);
               Serial.println(humd);
               Serial.println(tempo);
             }
        }
    }
    Serial.println("Conexión cerrada.");
}
6.- Save data in a file.
We modify the code of the server.js file.
//-----------------------------------------------------------------------------------------
    if (pathname == '/update') {
        var newData = {
            temp: queryData.temp,
            humd: queryData.humd,
            time: new Date()
        };
        db.push(newData);
        console.log(newData);
        response.end();
        fs.appendFile('datos.txt', JSON.stringify(newData) + '\n', function (err) {
		 if (err) return console.log(err);
		  console.log('Save in datos.txt');
		});
    //-----------------------------------------------------------------------------------------
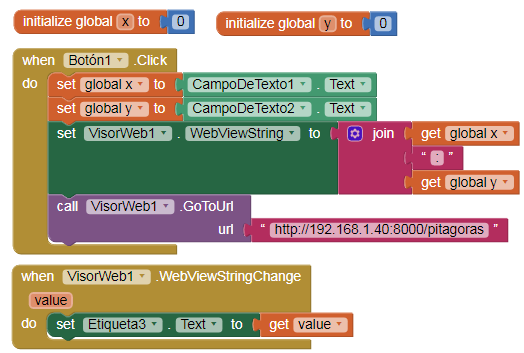
7.- Android sends data to Server. Server performs a calculation and returns the result to Android. Pythagoras theorem.
p9A0i_esp32_nodejs_pitagoras.aia (2.8 KB)
datos = window.AppInventor.getWebViewString(); // INPUT
Calculate.
window.AppInventor.setWebViewString("" + hipotenusa); // OUTPUT
Now copy this file: pitagoras.htm in Web server , in node folder:
<!DOCTYPE html>
<html>
<head><meta charset="utf-8"></head><body>
<script>

    datos =  window.AppInventor.getWebViewString(); // Entrada de datos.
    datos = datos + ":";

    catetos = datos.split(":");
    cateto1 = catetos[0];
    cateto2 = catetos[1];

    hipotenusa = Math.sqrt(Math.pow(cateto1, 2) + Math.pow(cateto2, 2)) ;

   window.AppInventor.setWebViewString("" + hipotenusa);  // Respuesta a CadenaDeWebView

</script>
</body></html>
//-----------------------------------------------------------------------------------------
	 } else if (pathname == '/pitagoras') {
        fs.readFile('./pitagoras.htm', function(error, content) {
            response.writeHead(200, {
                'Content-Type': 'text/html'
            });
            response.end(content);
        });
  //-----------------------------------------------------------------------------------------
8.- Android sends an order to Node.js to run a batch file, this batch file shutdown PC.
This batch file apagar.bat shutdown PC.
apagar.bat
shutdown /s /f /t 30
Change in server.js file:
//-----------------------------------------------------------------------------------------
	 } else if (pathname == '/apaga') {
				const { exec, spawn } = require('child_process');
				exec('apagar.bat, (err, stdout, stderr) => {
				  if (err) {
					console.error(err);
					return;
				  }
				  console.log(stdout);
				});
    //-----------------------------------------------------------------------------------------
When receives pathname == '/apaga', exec apagar.bat
- App Inventor.
To cancel shutdown, write in CMD Shell
shutdown -a
OOOOOOOOOOOOOOOOOOOOOOOOOOOOOOOOOOOOOOOO
You can create other batch files, for example a batch file with notepad.exe, it will run the Notepad.
9.- Install Node.js in Android with Termux.
Termux is a shell.
Install app Termux in your Android (Termux is in Play Store).
pkg install nodejs-lts
home: /data/data/com.termux/files/home
node command in: /data/data/com.termux/files/usr/bin
I have only installed it but have not used it.