![]()
Unimpressed with or cannot use the NoSql offerings from others on the internet?
Then: DIY a NoSql database using the Infernus framework
Over the past few months I have been "de-googling" my online/offline life. One of the gaps generated by this was a need for a replacement for Firebase. This replacement became available when looking at what mariaDB (and mySql) have on offer in terms of using and working with json in the database. My hosting provider offers mariaDB as the relational database, therefore I am using this (mariaDB) for my guide. The focus for this guide is on interacting between Infernus and AppInventor.
Why Infernus, well this is latin for the fire below which I thought was quite apt. I also use a table called ignis (fire), and another table called cella (storeroom or warehouse) used to replicate firebase storage.
In essence what you do is, create a database, then create a table with an id, a name, and a json_data field. You only need one record in your database, because all your nosql data will be built up in the json you set in the json_data field. Consider this to be your "firebase project". If you create another record, then this could be another firebase project. I have accessed the database with php, creating several files to help me view the data, and carry out CRUD functions on it (Create, Read, Update & Delete). You then create another table (cella) to store the filename and url of any files uploaded. With all this under my belt, I can then start to build applications with AppInventor.
Requirements
I am going to assume that you have a good understanding of AppInventor and its workings, and a reasonable understanding of working with php and mariadb. I am not going to spend too much time on the setup, in order to focus on the nosql activities. You should look at the Resources section for further background information.
An online http server running php and providing mariadb (or mySql) as a database. File storage on the same server is also required. I created a database called infernus and added a table called ignis. I then added a record with name Products and a json containing...products. I will work with these throughout this guide.
You can, of course, set up your own server locally on your computer.
All software used is open source, and non-google.
The database table ignis, is set with three fields: id, name, and json_data. name is not strictly required, but serves as a useful marker if you have multiple 'projects' in the database. (you could actually run without id as well (using the hidden _rowid instead). Each of your json_data rows would need to be unique.)


On the server, I have all the php files in a top line folder called infernus.
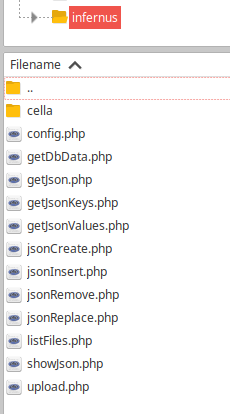
Every php file uses the config.php file, which contains the connection data:
<?php
//config.php

define('servername', 'localhost');
define('username',   'your user name');
define('password',   'your password');
define('dbname',     'your database name');
?>
In the blocks, we begin with setting variables that are used with each php file:
![]()
![]()
![]()
![]()
![]()
Working with the data
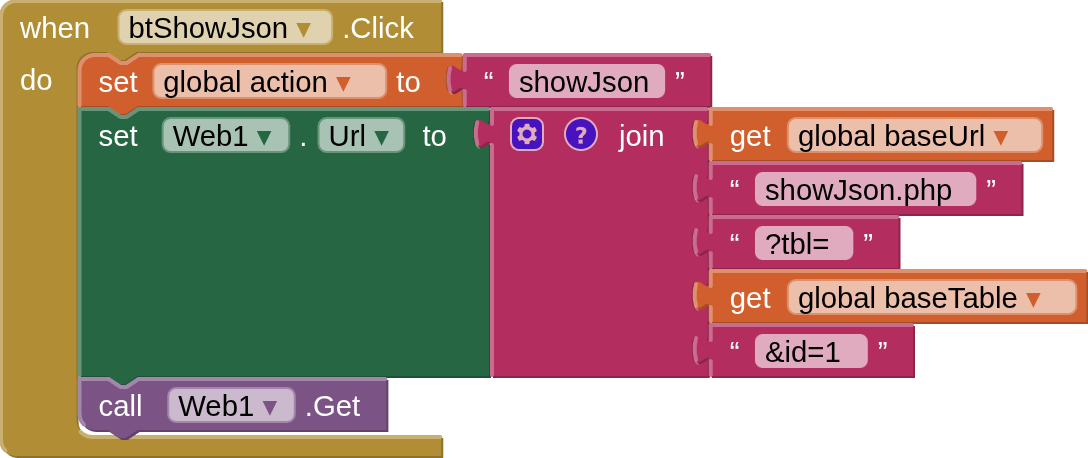
showJson, will display the json_data in the app, in a "pretty" layout for readability. This works as a visual reminder of what is stored and available in the database. Should be used for viewing only.
showJson.php
<?php
//showJson.php

require_once 'config.php';
$conn = new mysqli(servername, username, password, dbname);
if ($conn->connect_error) {
  die("Connection failed: " . $conn->connect_error);
}

$id = $_REQUEST['id'];
$tbl = $_REQUEST['tbl'];
$sql = "SELECT json_data FROM $tbl WHERE id = $id;";
$result = $conn->query($sql);
$rows = array();
if ($result->num_rows > 0) {
while($row = $result->fetch_assoc()) {
  $rows[] = [$row["json_data"]];
}
header('Content-Type: application/json');
echo json_encode(json_decode($rows[0][0]),JSON_PRETTY_PRINT | JSON_UNESCAPED_SLASHES | JSON_UNESCAPED_UNICODE);
} else {
echo "0 results";
}
$conn->close();
?>
In the app we call showJson.php with these blocks
and they will return the json_data to the app like so:

getJson Much the same as showJson, but this brings back the json to the app in a non pretty format, as a json Array, intended for working with within the app.
getJson
<?php
//getJson.php

require_once 'config.php';
$conn = new mysqli(servername, username, password, dbname);
if ($conn->connect_error) {
  die("Connection failed: " . $conn->connect_error);
}

$id = $_REQUEST['id'];
$tbl = $_REQUEST['tbl'];
$sql = "SELECT json_data FROM $tbl WHERE id = $id;";
$result = $conn->query($sql);
$rows = array();
if ($result->num_rows > 0) {
 while($row = $result->fetch_assoc()) {
  $rows[] = [$row["json_data"]];
 }
 echo json_encode($rows,JSON_UNESCAPED_SLASHES | JSON_UNESCAPED_UNICODE);
 } else {
 echo "0 results";
}
$conn->close();
?>
In the app we call getJson.php with these blocks:

and they will return the json_data to the app like so:

getDbData This is not one of the direct json functions, but will return all the "project" ids and names. Is a starting point for queries if you do not know the name / id of the project you want to work with.
getDbData.php
<?php
//getDbdata.php

require_once 'config.php';
$conn = new mysqli(servername, username, password, dbname);
if ($conn->connect_error) {
  die("Connection failed: " . $conn->connect_error);
}

$id = $_REQUEST['id'];
$tbl = $_REQUEST['tbl'];
$sql = "SELECT id,name FROM $tbl WHERE id = $id;";
$result = $conn->query($sql);
$rows = array();
if ($result->num_rows > 0) {
 while($row = $result->fetch_assoc()) {
     $rows[] = [$row["id"],$row["name"]];
 }
 echo json_encode($rows);
} else {
 echo "0 results";
}
$conn->close();
?>
In the app we call getDbData.php with these blocks:

and they will return the json_data to the app like so, as a stringified json Array:

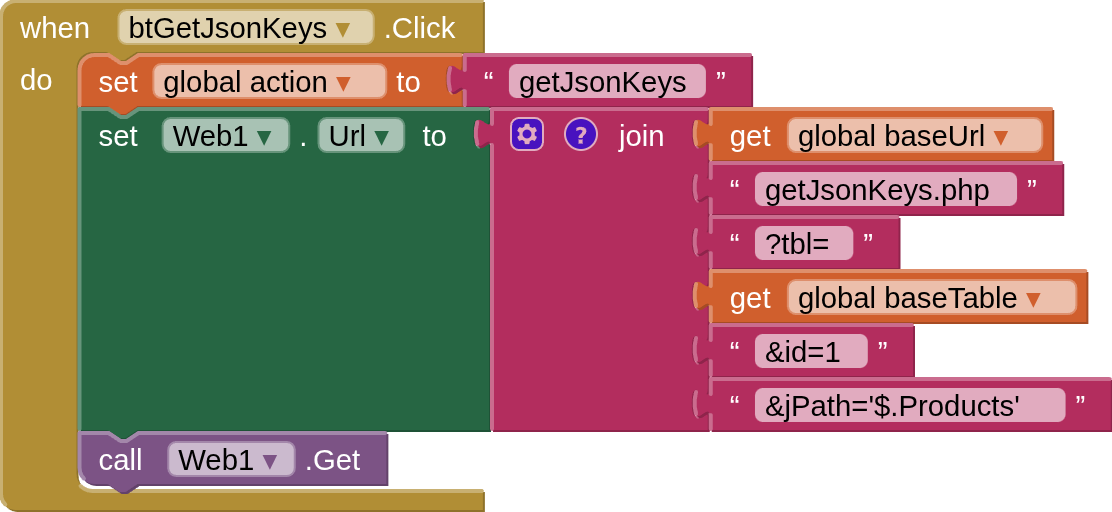
getJsonKeys will return all the keys from the key:value pairs at the top line position (root = '$'), or wherever you set the jPath (e.g. '$.Products.Samsung')
getJsonKeys.php
<?php
//getJsonKeys.php

require_once 'config.php';
$conn = new mysqli(servername, username, password, dbname);
if ($conn->connect_error) {
  die("Connection failed: " . $conn->connect_error);
}

$id = $_REQUEST['id'];
$tbl = $_REQUEST['tbl'];
$jPath = $_REQUEST["jPath"];
$sql = "SELECT JSON_KEYS(json_data,$jPath) AS 'keys' FROM $tbl WHERE id = $id;";
$result = $conn->query($sql);
$rows = array();
if ($result->num_rows > 0) {
 while($row = $result->fetch_assoc()) {
     $rows[] = [$row["keys"]];
 }
 echo json_encode($rows);
} else {
 echo "0 results";
}
$conn->close();
?>
In the app we call getJsonKeys.php with these blocks:
and they will return the json_data to the app like so, as a stringified json Array:

getJsonValues will return the values for keys at the given jPath
getJsonValues.php
<?php
//getJsonValues

require_once 'config.php';
$conn = new mysqli(servername, username, password, dbname);
if ($conn->connect_error) {
  die("Connection failed: " . $conn->connect_error);
}

$id = $_REQUEST['id'];
$tbl = $_REQUEST['tbl'];
$jPath = $_REQUEST["jPath"];
$sql = "SELECT JSON_EXTRACT(json_data,$jPath) AS 'values' FROM $tbl WHERE id = $id;";
$result = $conn->query($sql);
$rows = array();
if ($result->num_rows > 0) {
 while($row = $result->fetch_assoc()) {
    $rows[] = [$row["values"]];
 }
 echo json_encode($rows);
} else {
 echo "0 results";
}
$conn->close();
?>
In the app we call getJsonValues.php with these blocks (you will see that I was able to use a wildcard '*' for the brand name, thus returning the model for all products in the json):

and they will return the json_data to the app like so, as a stringified json Array:

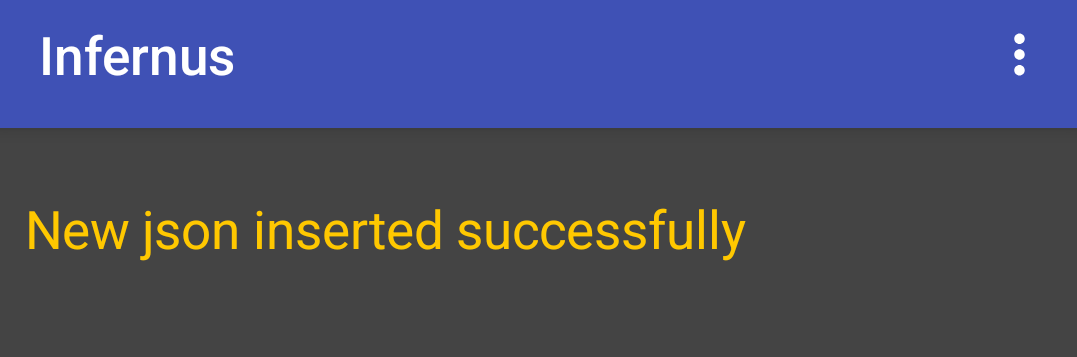
insertJson will insert a key:value pair at the jPath you specify. You set the key in the path and the value as a ... value. If the key:value pair already exists at that location, nothing will happen, but the php will still return "success".
insertJson.php
<?php
//insertJson.php

require_once 'config.php';
$conn = new mysqli(servername, username, password, dbname);
if ($conn->connect_error) {
  die("Connection failed: " . $conn->connect_error);
}

$id = $_REQUEST['id'];
$tbl = $_REQUEST['tbl'];
$value = $_REQUEST['value'];
$jPath = $_REQUEST['jPath'];
$sql = "UPDATE $tbl SET json_data = JSON_INSERT(json_data, $jPath, $value) WHERE id = $id;";
if ($conn->query($sql) === TRUE) {
  echo "New json inserted successfully";
} else {
  echo "Error: " . $sql . "<br>" . $conn->error;
}
$conn->close();
?>
In the app we call insertJson with these blocks:

and return a success message on completion:
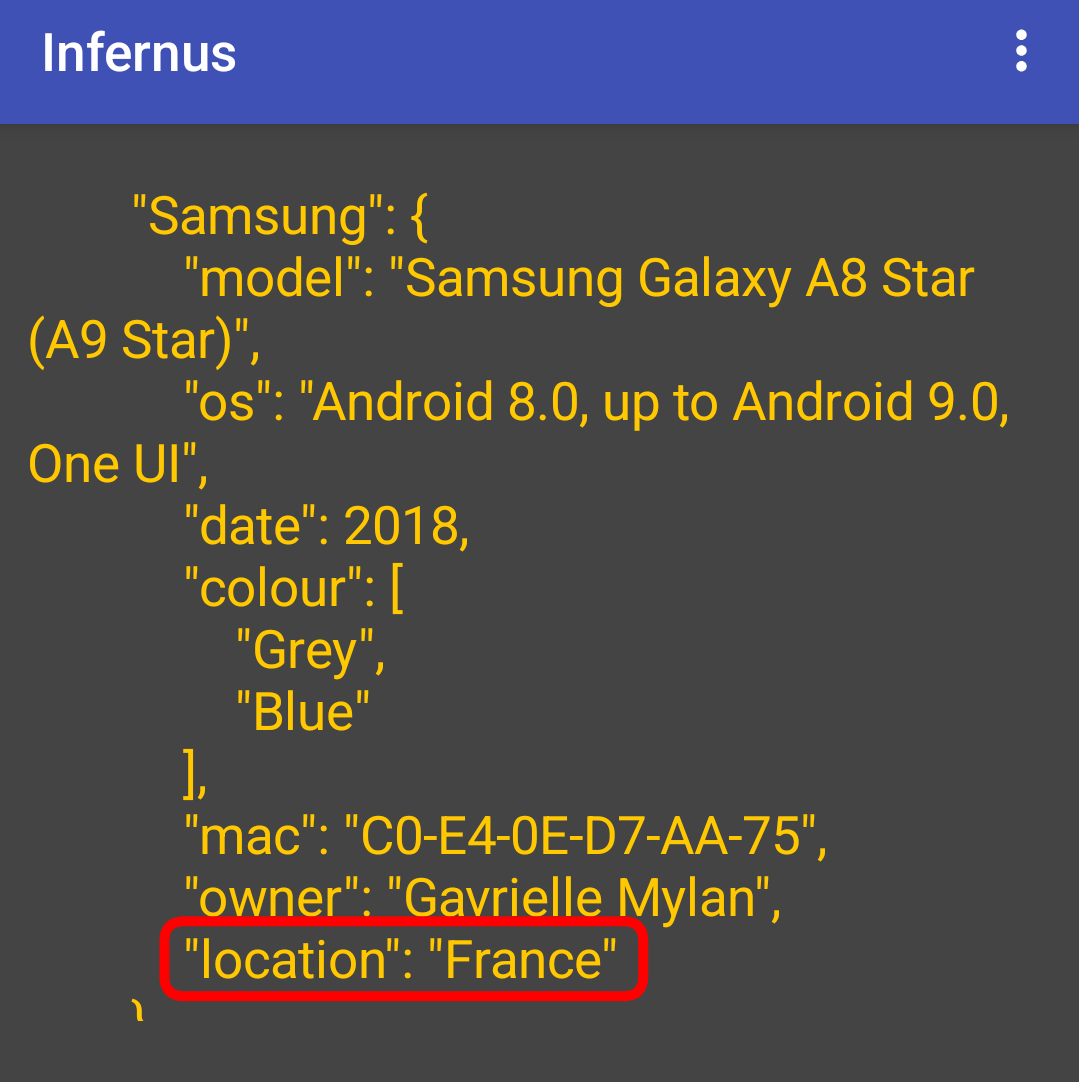
replaceJson will update an existing key:value pair in the json at the path specified
replaceJson.php
<?php
//replaceJson.php

require_once 'config.php';
$conn = new mysqli(servername, username, password, dbname);
if ($conn->connect_error) {
  die("Connection failed: " . $conn->connect_error);
}

$id = $_REQUEST['id'];
$tbl = $_REQUEST['tbl'];
$value = $_REQUEST['value'];
$jPath = $_REQUEST['jPath'];
$sql = "UPDATE $tbl SET json_data = JSON_REPLACE(json_data, $jPath, $value) WHERE id = $id;";
if ($conn->query($sql) === TRUE) {
  echo "json replaced successfully";
} else {
  echo "Error: " . $sql . "<br>" . $conn->error;
}
$conn->close();
?>
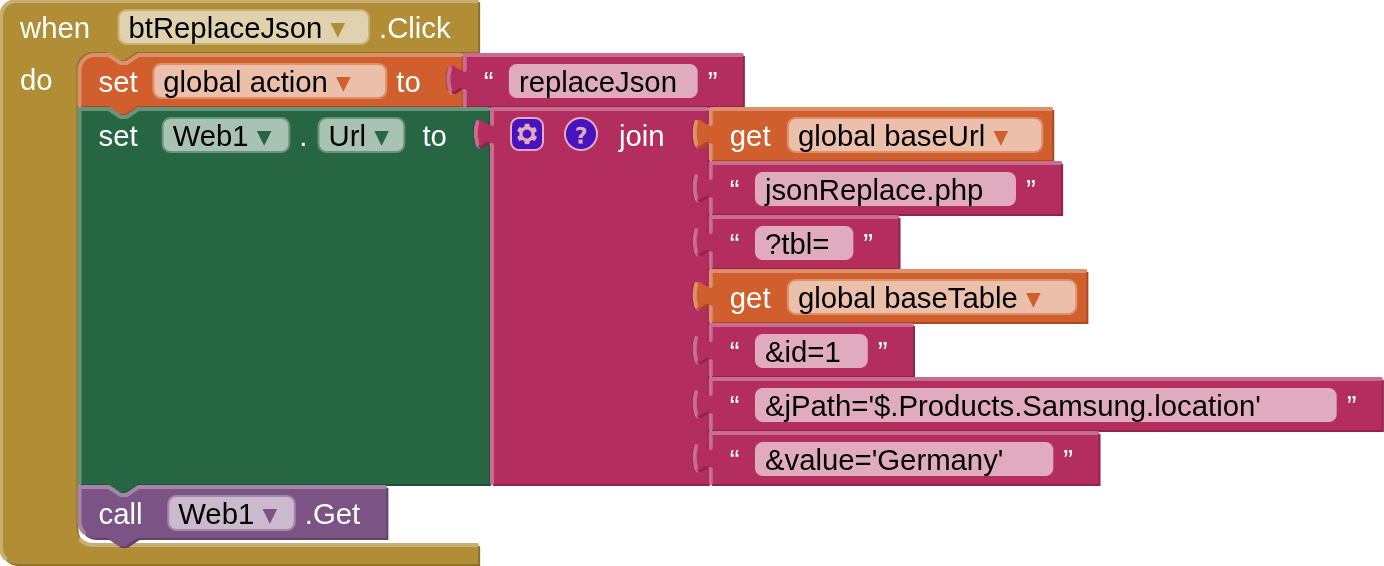
In the app we call replaceJson.php with these blocks:
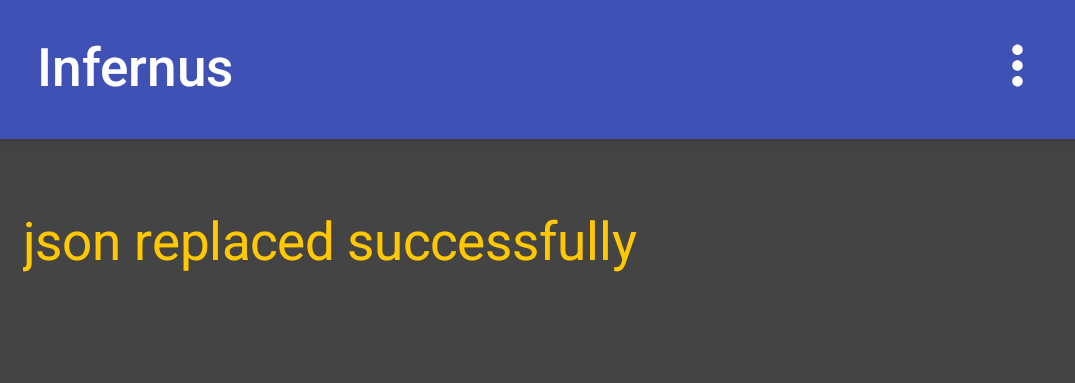
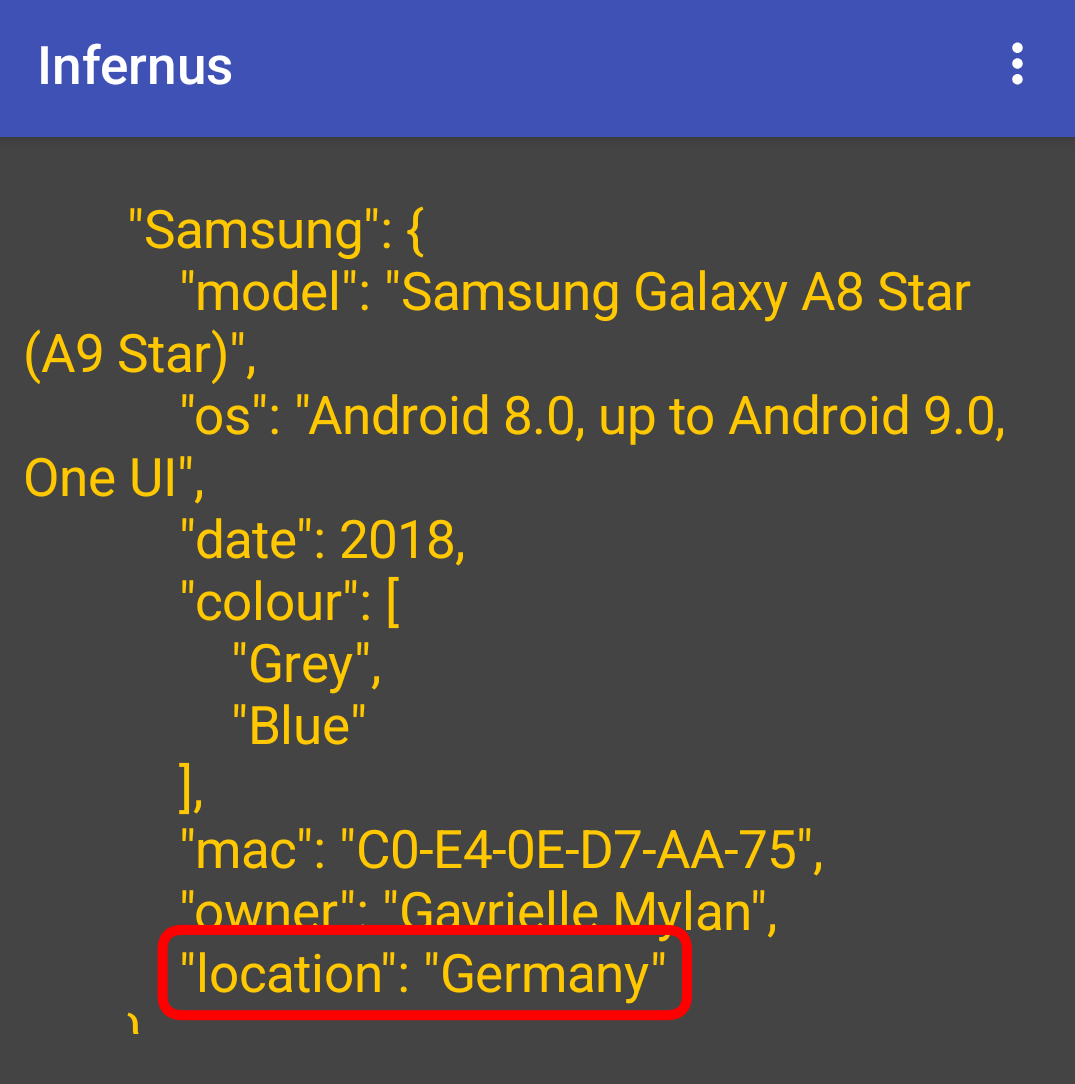
and return a success message on completion:
removeJson will remove an existing key:pair value in the json at the path specified
removeJson.php
<?php
//removeJson.php

require_once 'config.php';
$conn = new mysqli(servername, username, password, dbname);
if ($conn->connect_error) {
  die("Connection failed: " . $conn->connect_error);
}

$id = $_REQUEST['id'];
$tbl = $_REQUEST['tbl'];
$jPath = $_REQUEST['jPath'];
$sql = "UPDATE $tbl SET json_data = JSON_REMOVE(json_data, $jPath) WHERE id = $id;";
if ($conn->query($sql) === TRUE) {
  echo "json removed successfully";
} else {
  echo "Error: " . $sql . "<br>" . $conn->error;
}
$conn->close();
?>
In the app we call removeJson.php with these blocks:

and return a success message on completion:

File Storage
upload will upload a file from the device to the online storage
upload.php
<?php
//upload.php

require_once 'config.php';
$conn = new mysqli(servername, username, password, dbname);
if ($conn->connect_error) {
  die("Connection failed: " . $conn->connect_error);
}

$tbl = $_REQUEST['tbl'];
$url = $_REQUEST['url'];
$fileName = $_REQUEST['fname'];
$imgDir = "cella/";
$data = file_get_contents('php://input');
$store = file_put_contents($imgDir.$fileName, $data);
if  ($store !== false ) {
$sql = "INSERT INTO cella(filename,url) VALUES('" . $fileName . "','" . $url.$fileName . "')";
if ($conn->query($sql) === TRUE) {
  echo "File $fileName saved to server, with url $url.$fileName, and new record created successfully for uploaded file";
} else {
  echo "Error: " . $sql . "<br>" . $conn->error;
}
} else {
echo "File $fileName not saved\n";
}
$conn->close();
?>
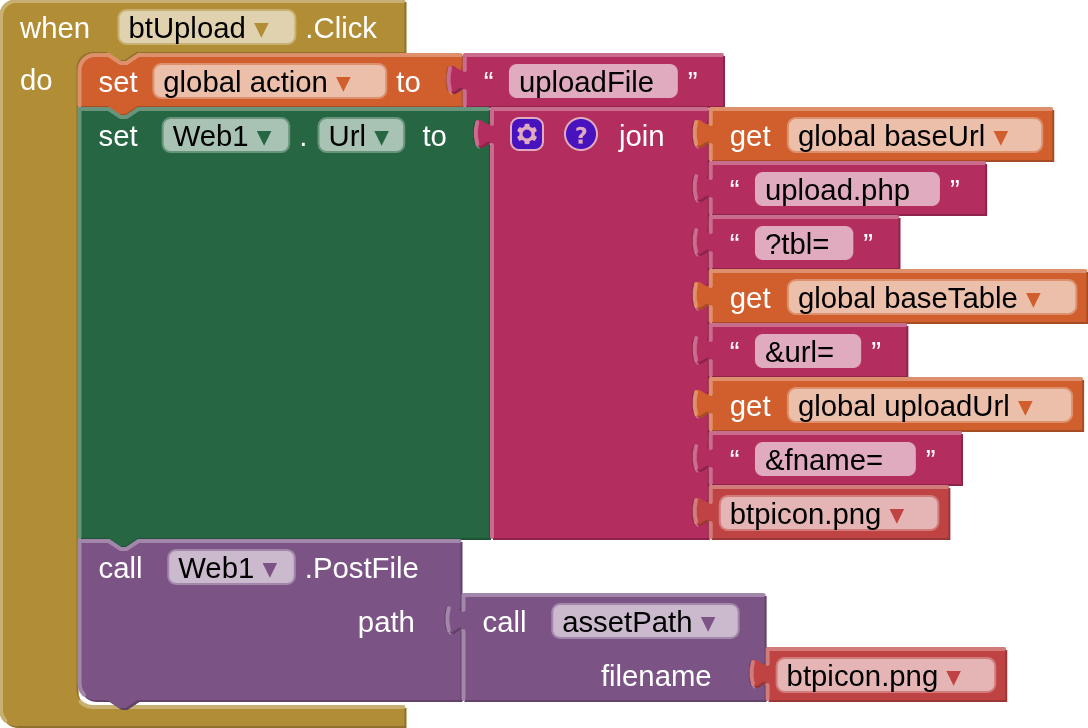
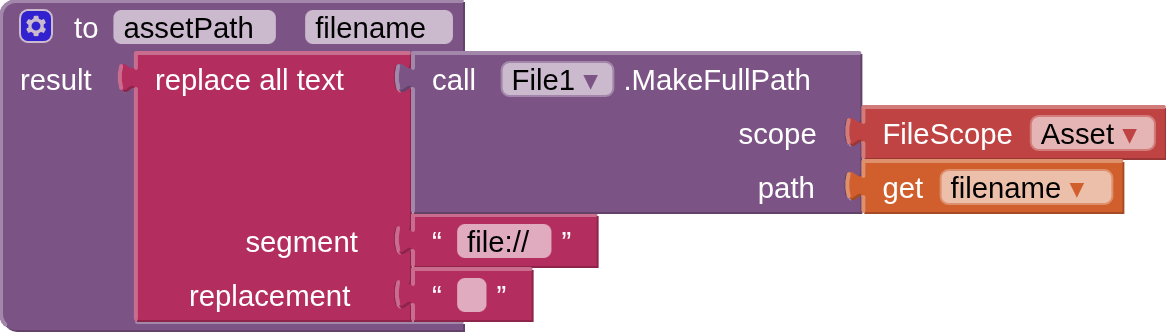
In the app we call upload.php with these blocks:
and if the upload is successful it will return the filename and the url for the file in a json Array:

listFiles returns a listing of all the files in the online file storage
listFiles.php
<?php
//listFiles.php

require_once 'config.php';
$conn = new mysqli(servername, username, password, dbname);
if ($conn->connect_error) {
  die("Connection failed: " . $conn->connect_error);
}

$id = $_REQUEST['id'];
$tbl = $_REQUEST['tbl'];
$sql = "SELECT * FROM $tbl WHERE id = $id;";
$result = $conn->query($sql);
$rows = array();
if ($result->num_rows > 0) {
    while($row = $result->fetch_assoc()) {
        $rows[] = [$row["id"],$row["filename"],$row["url"]];
    }
    echo json_encode($rows,JSON_UNESCAPED_SLASHES | JSON_UNESCAPED_UNICODE);
} else {
 echo "0 results";
}
$conn->close();
?>
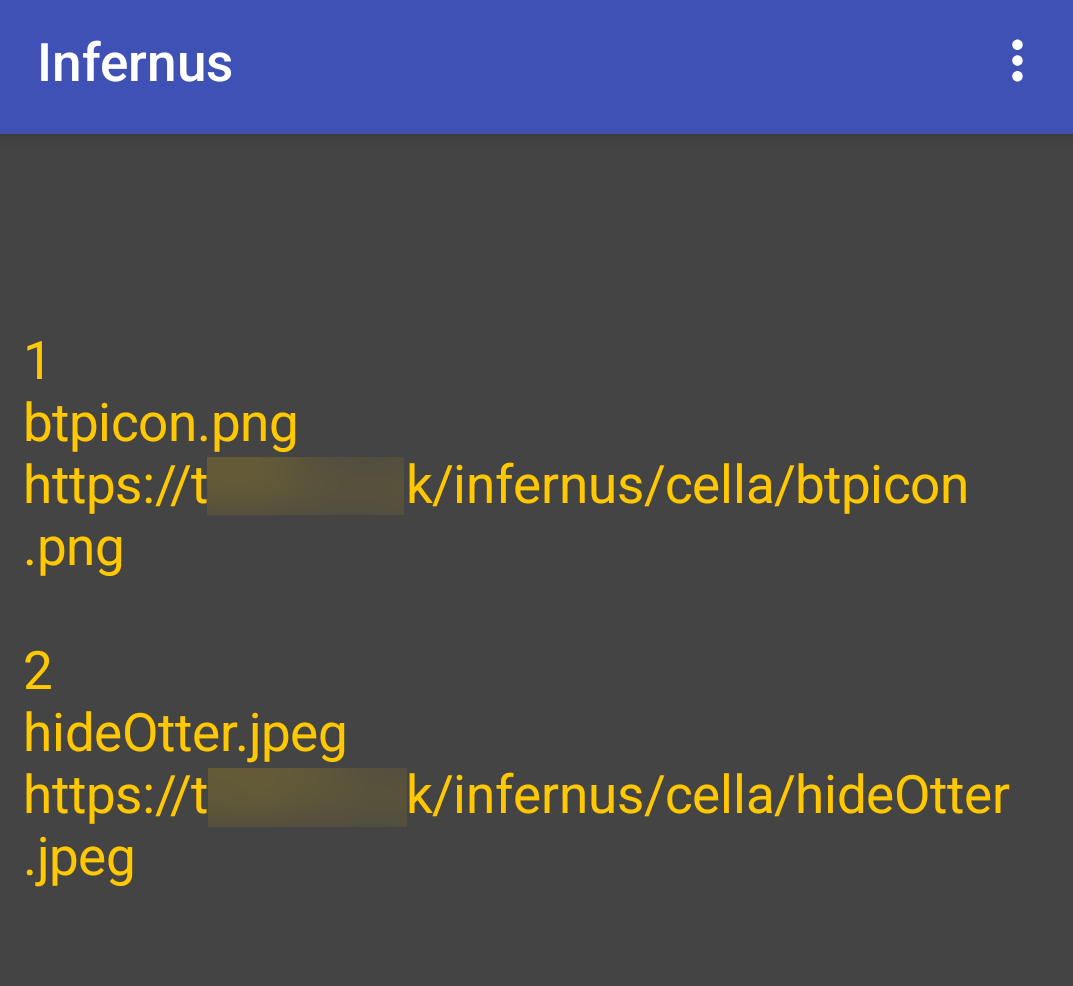
In the app we call listFiles.php with these blocks:

and it returns a listing of all the files and their urls in a json Array:
.
.
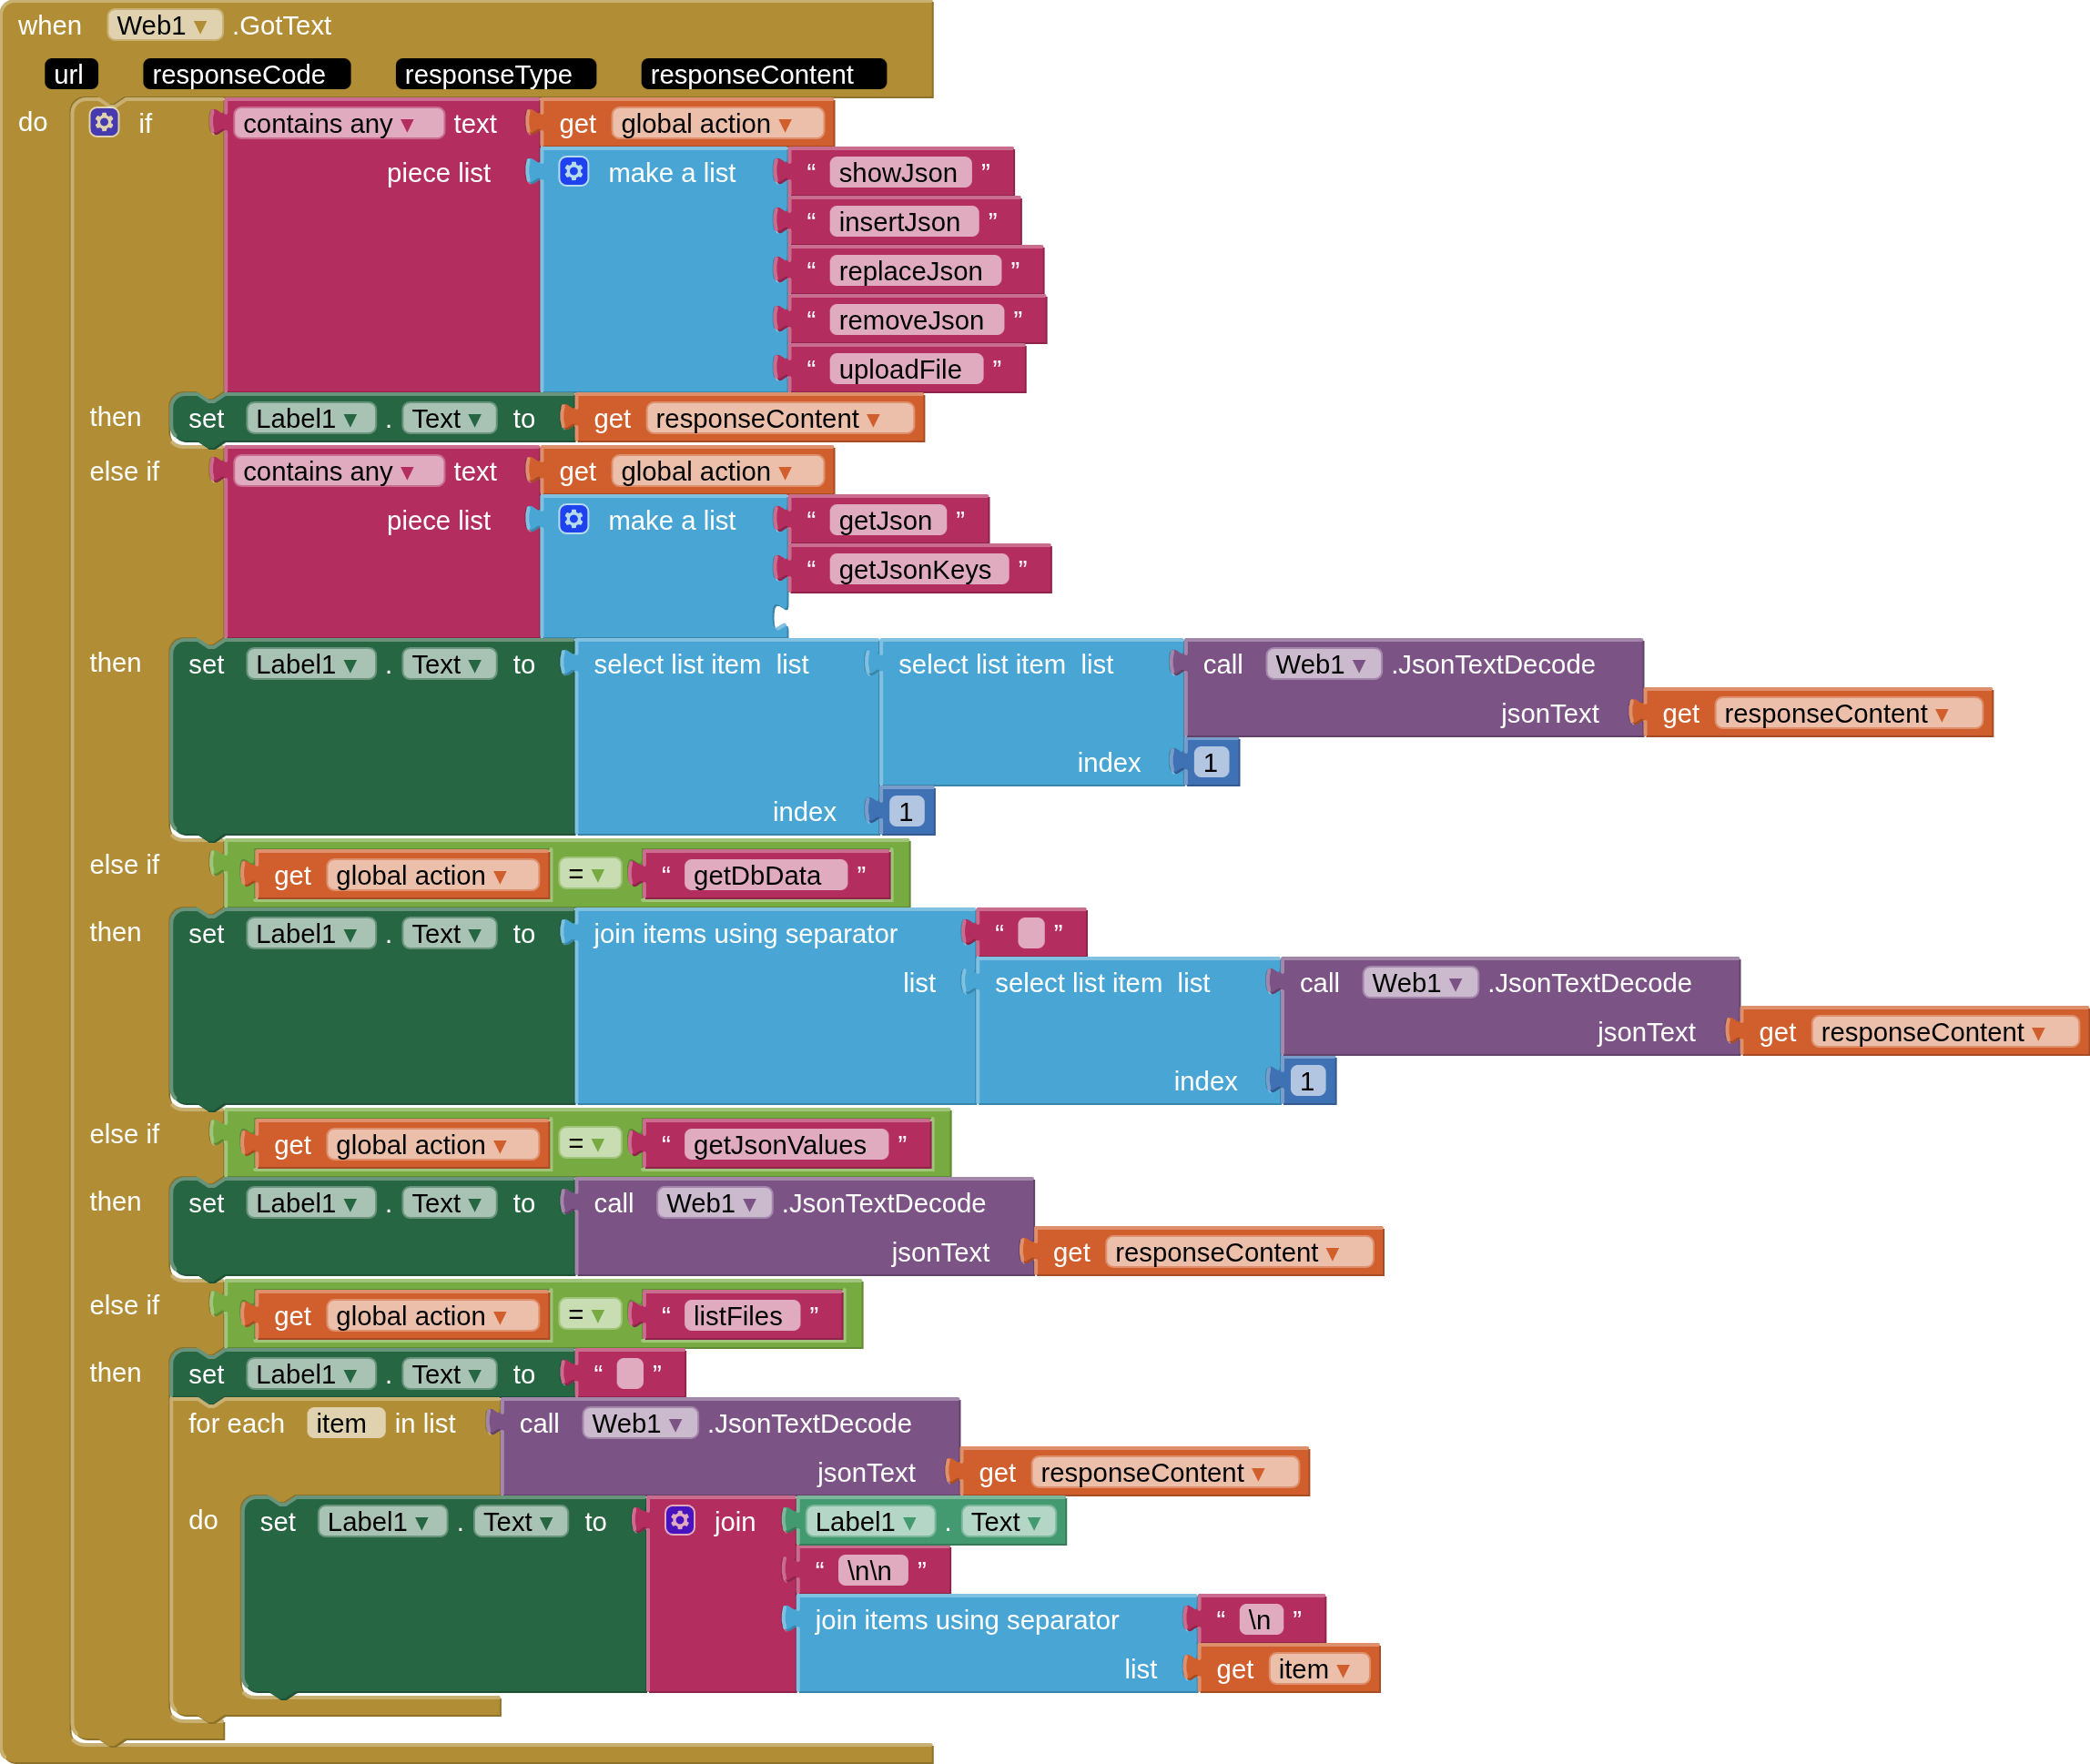
Here is the Web1.GotText block that handles all the returns from the database. If a jsonArray then it is encoded to an AI2 list, if a string then it is kept as such. I am displaying all returns in a label for convenience and demonstration purposes.
Caveats
-
I have chosen to use separate php files for each function, for demonstration purposes. My php method is not the only way to do this, one could build queries in the app, for example, or everything could be in one php file. (update - see 2nd post)
-
there is much that can be done to beef up security; on the server, with php, and with interaction between AppInventor and the infernus framework. I will look at this later, but have kept things simple for now. (update - see 2nd post)
-
you might want user signups, user rules etc. These are all possible, in one way or another, and I will cover some of the approaches in the future.
Resources - well worth watching / looking at!
https://www.youtube.com/watch?v=sLE7jPETp8g
(just about everything you need to understand CRUD with json on mariadb)
https://www.youtube.com/watch?v=mL7xnMZNYXM
(note the -> and ->> shortcuts shown don't work [for me] with mariadb, so you may have to use the longhand methods)
https://database.guide/?s=mariadb+json
(examples on most json functions)
https://mariadb.com/docs/server/reference/sql-functions/special-functions/json-functions
(the descriptions and examples can be a bit terse)
https://www.w3schools.com/php/php_mysql_intro.asp
(a general background to php with mySql)
Files (for the lazy...)
All the php files, and the products.json. Rename with zip extension once downloaded
infernusFiles.aia (7.1 KB)
A "blank" aia project as used here
infernus_blank.aia (201.5 KB)


