I am working on a halloween project and am using arduino, nodemcu, and bluetooth to remotely activate several props. I am a novice at this and I have copied and pasted other users arduino scripts and app inventor designs. I have gotten the single click on/off, and momentary on/off to work. What I cant figure out is how to make a button press stay on for a specific amount of time and then turn itself of. E.G: I want to make a fog machine stay on for 5-10 seconds after a single button press.
Thanks in advanced,
Kyle
You might be able to use a Clock. Turn it on in the Button.Click; Turn it off using the TImerEnable = false. Set the TimerInterval to 5000 (5 seconds) or 10000 (10 seconds) and then experiment.
Hello,
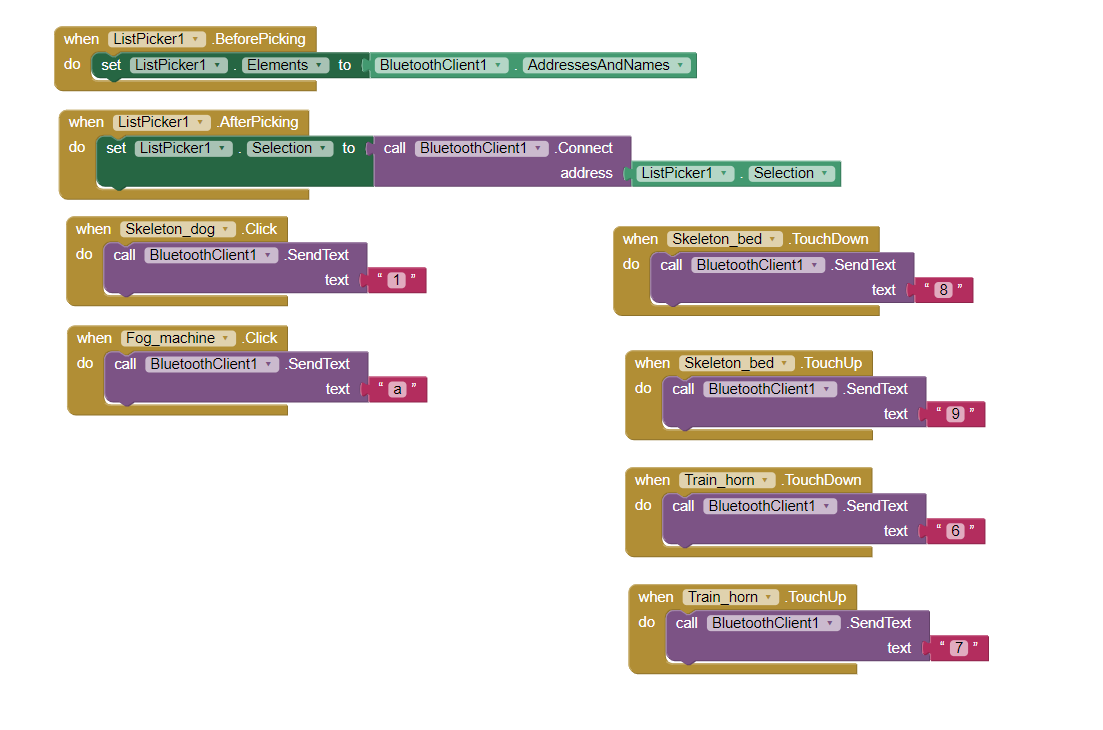
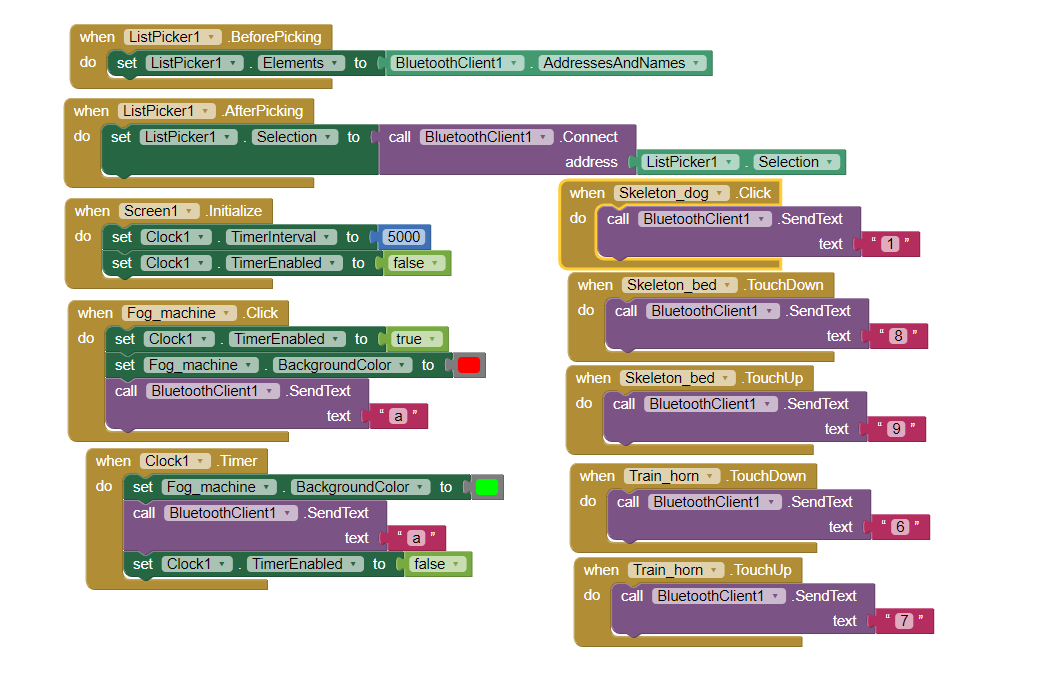
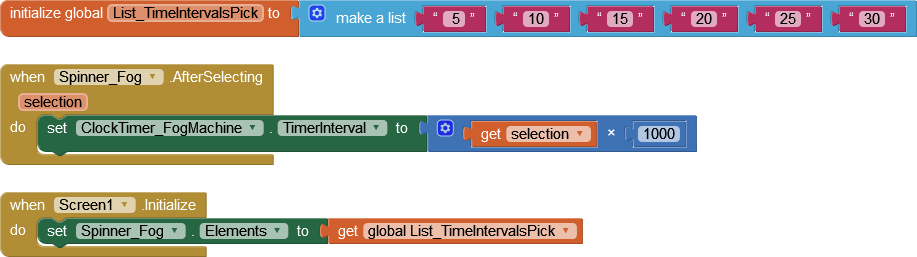
I am working on a small project and am trying to set a button click to stay on for a specified amount of time after a single press. The output is a fog machine for halloween and I am trying to remotely activate it using app inventor, arduino, and nodemcu with bluetooth. I have gotten the momentary and toggle button functions to work, but I cant figure out how to set a button to stay on for a while and then shut itself off. Here is a screen shot of my blocks:
Click on Button5; wait 5 seconds; button5 displays a message. You might be able to do something similar with your code to turn off your Halloween gadget after a few seconds.
While this certainly works to change the background of a button, it would simply send 'a' via bluetooth upon click, then another 'a' 5 seconds later.
Much of what happens with the actual fog machine will depend on the arduino code:
If that arduino code is set to 'toggle' the fog machine state (first 'a' turns it on, second 'a' turns it off, third 'a' turns it on again, etc), then the code you have shared is good.
On the other hand, if 'a' only turns on the fog machine, then you need additional arduino code that would require a DIFFERENT code ('b' maybe?) that turns the fog machine off, and send 'b' in the Clock1.Timer block.
Does that make sense?
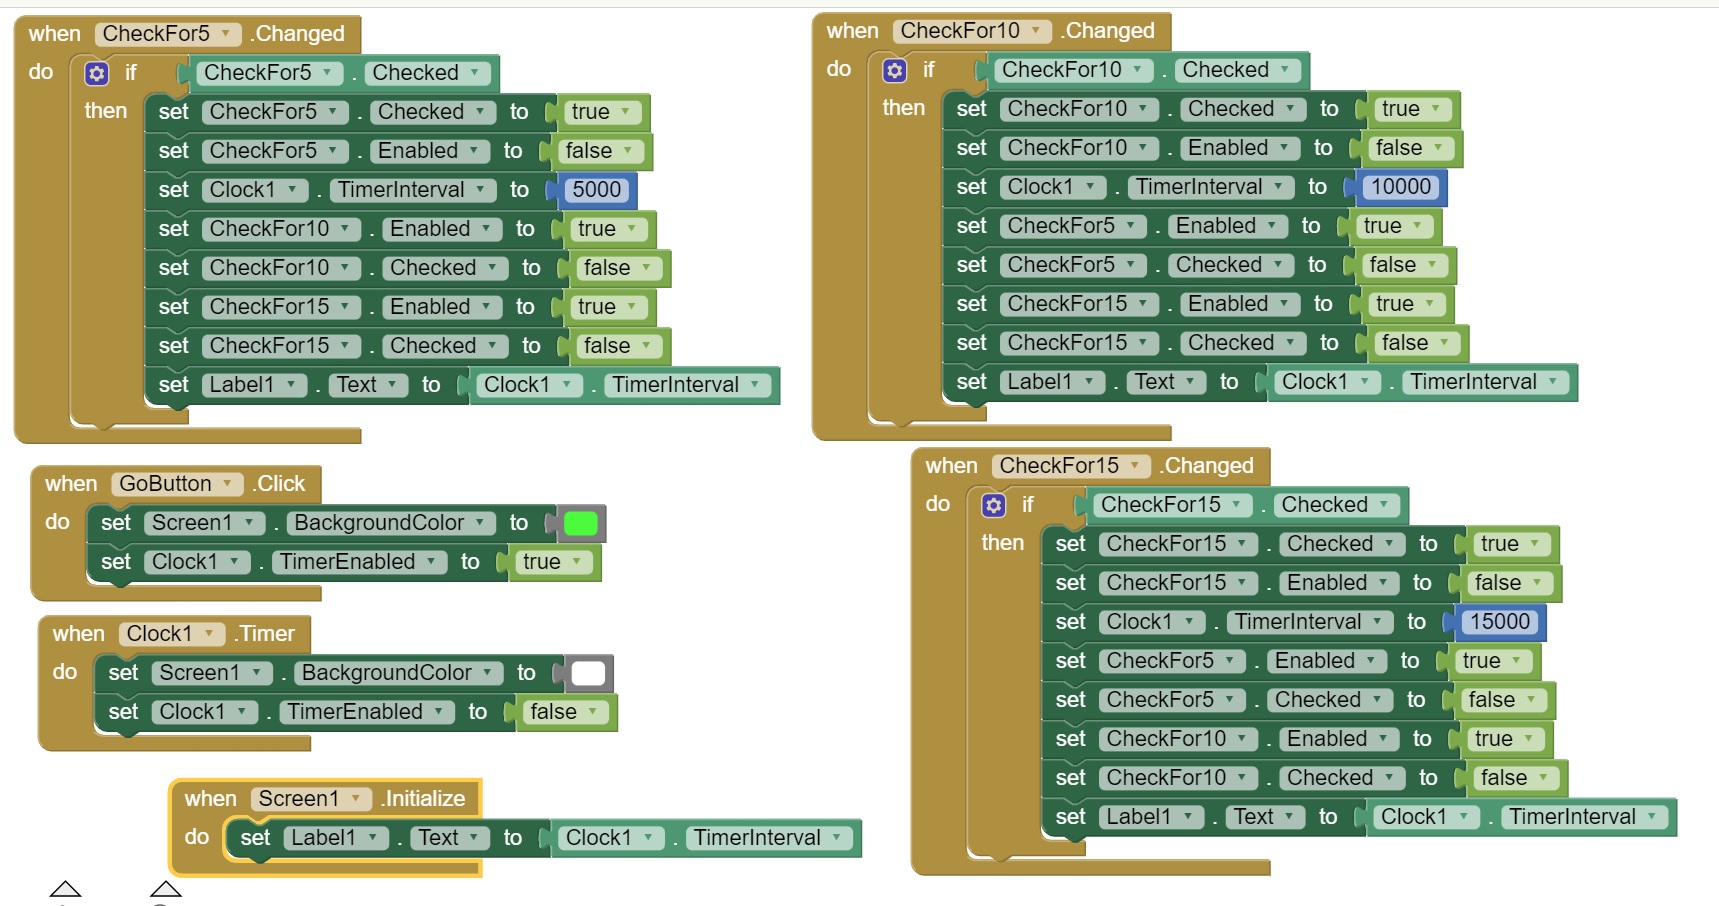
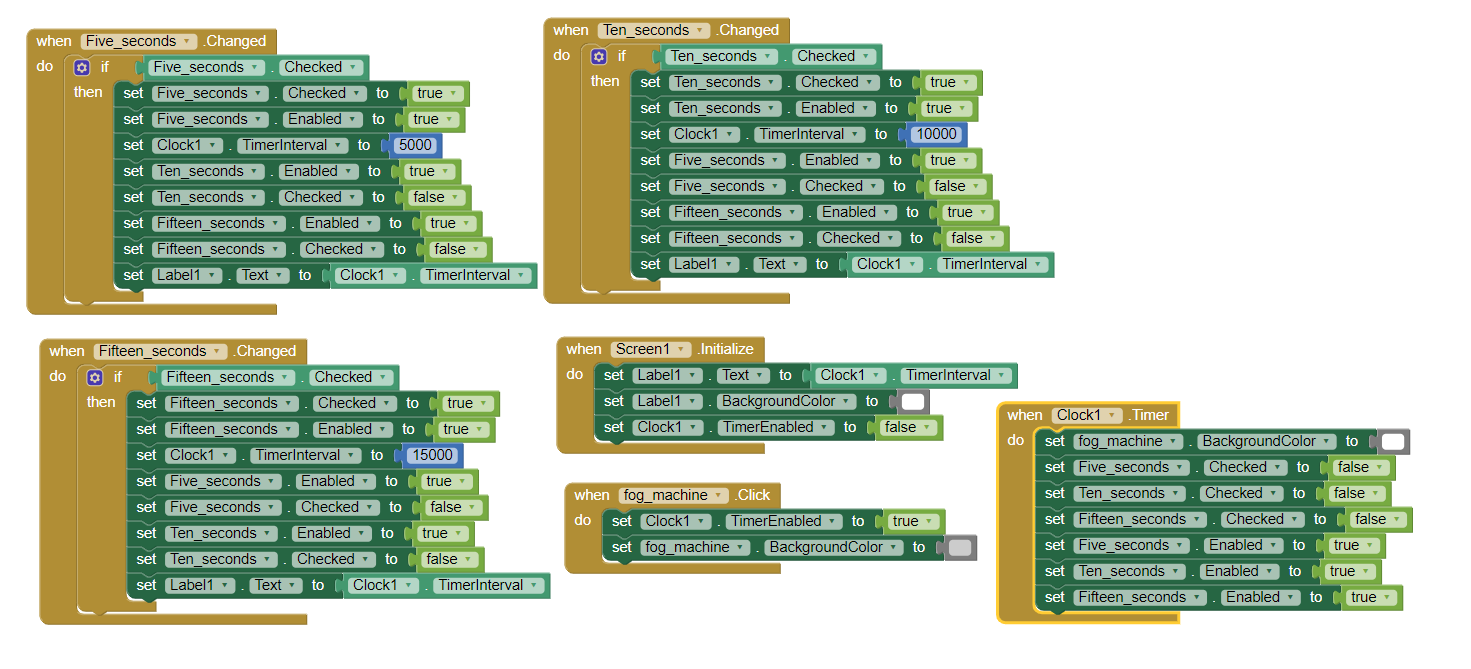
thank you for your reply. yes it does make sense and I have tested this with nodemcu/bluetooth/breadboard/leds and I got the led to turn on for 5 seconds then turn off. The arduino code was copied from the youtuber "rocket berry" and I changed some lines up to suit my needs. I think the code for the fog machine was set to receive the "a" for a state change. I'm at work right now so I dont have access to it. now I'm tinkering with check boxes to try to select different time intervals for the fog machine button.
Also, the way checkboxes work makes it hard to select one and simultaneously deselect the alternatives. (Especially if you want one to always be selected) I mean, it can be done, but the only way I can think to do it involves a good bit of coding:
I got it working with your blocks as a starting point but it was not working correctly. I changed things and now it works. I'm sure there is an easier less cluttered way of doing this like Chris Ward mentioned with a spinner but I havent figured that out yet. This is fun BTW.
Thanks again,
Kyle
Thank you for that. Sorry it took so long to respond. I haven't tinkered with the app inventor in almost a month and haven't kept up with my email. So I have gotten this app to work with arduino ide, nodemcu-12e, and HC-05 bluetooth, but I have been wanting to try it with an esp32 that has integrated bluetooth. I recently received one and got it up and running with the generic blink code and serial monitor. So then I tried the generic bluetooth hello world code and it connects but I cant get the app inventor to activate the gpios that I assign. Do you Chris, or anyone else reading this have suggestions/pointers that could possibly help? Coding is a foreign language to me so I just copy/paste and move things around until I get the result I want, but I cant seem to get this latest one to work.
I think my fellow Power User Juan Antonio would know. What is the version of Bluetooth on your esp32? It could be BLE, in which case you would need to use the MIT BLE extension.