![]() How to create a TinyDB Vaccination Record for young children with a TinyDB.
How to create a TinyDB Vaccination Record for young children with a TinyDB.
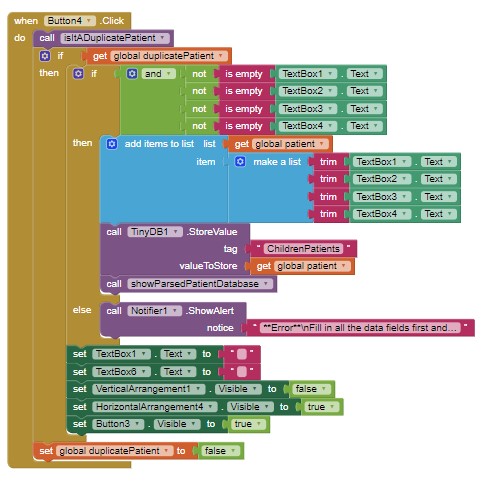
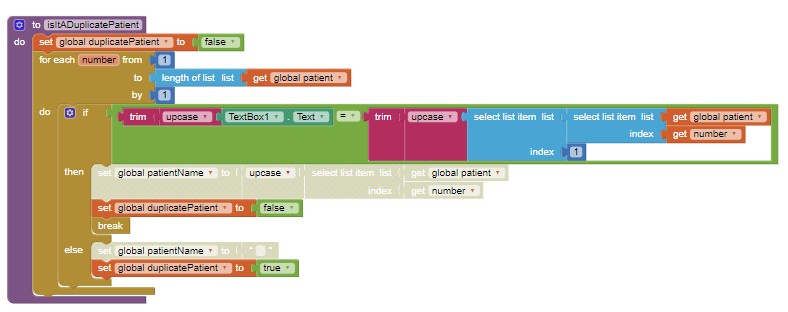
The data manipulation work in the database is done using Lists and csv files. A single List makes this app relatively easy to build. The example app stores a master List (patient) of patient information under a single TinyDB Tag ChildrenPatients. The patient List is a List of Lists.
The Vaccine Record example uses a TinyDB to store data; you might adapt the code to use a CloudDB or FirebaseDB without a lot of additional work.
Example screen shots.
The data for each patient is in the form:
Name
DOB
S** (male or female)
Vaccinations
Of course more data fields can be added, but then again this example is intended to be simple to understand. It is complex enough it does require a basic understanding of how Lists and the TinyDB components work.

What the example app shows and does
The example allows a User to
- add a patient to the database and his or her basic information
- modify an existing patient's data
- delete a patient from the database
- save the database automatically as data is changed to the TinyDB
The purpose of the Vaccine app is to sort the patients into two categories; children less than two years old and children who are older and displays their received vaccinations. It provides a very simplified record of children' vaccinations by displaying whatever you type in the Vaccination field. The data base is not a sql database, so data fields need to categorized and filtered to find specific information.
The database has simple error control. When you delete, the app does ask you if you are sure. When you Modify, it doesn't ask, it just modifies per your changes to the record. Other data checks are also made but no guarantee all possible issues are trapped in the example. So, beware.
The app is built on Screen1 entirely. Virtual screens provide pop-ups for the data entry fields and avoids clutter. You may wish to review Building Apps with Many Screens .
The master List (called patient) is provided with example data in the Screen1.Initialize. When you build your compiled app version, delete the example data Blocks from Screen1 and/or delete the example patient name1, name2, name3 and name4 records; one at a time using the database controls. You do not want the example data after you test the app for suitability.
How the Vaccine Database works
The database can add, modify and delete patient data. The main tools need to manipulate your master List are:
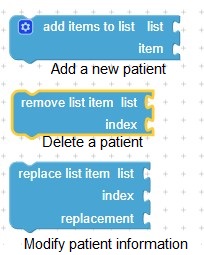
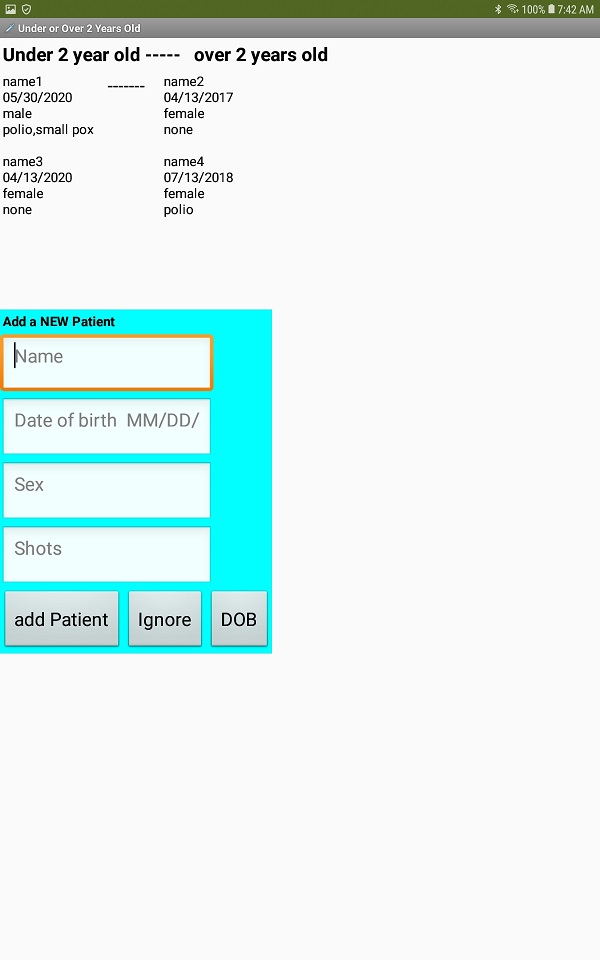
Add a Patient to the Database
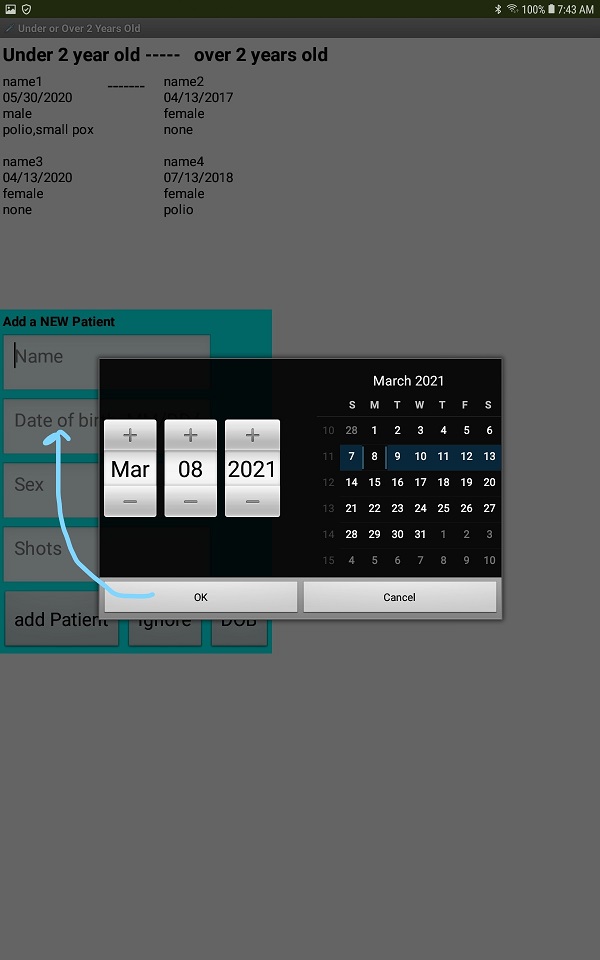
Start by touching the Add New Patient button, then fill in the blanks when the Add a NEW Patient pop-up displays. DOB (the date field) can be 'filled' using the DatePicker DOB button.
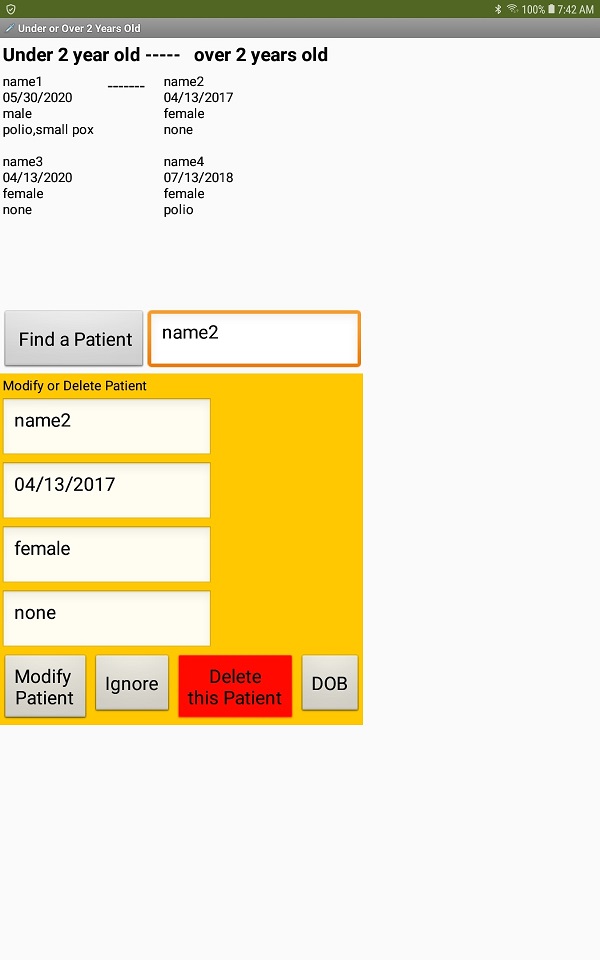
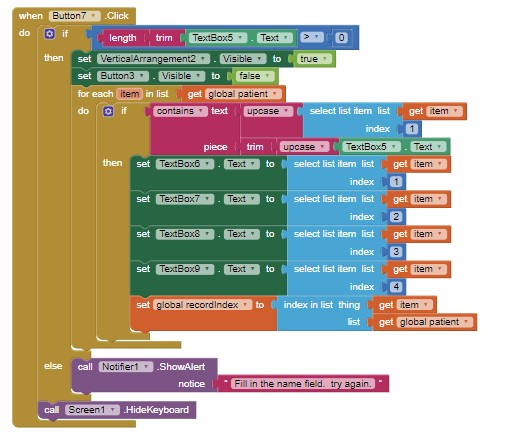
View a Patient Record
Type a patients name adjacent to the Find a Patient button, then press the Button. Use the Ignore button to dismiss. If there is no patient by that name, the popup fields will display empty with empty data fields. In that case use Ignore.
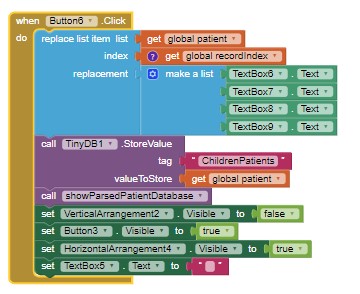
Modify a Patient Record
Type a patients name adjacent to the Find a Patient button. Type over the patient's data you want to change. Press Modify Patient. Beware, the modification occurs without warning; I didn't code this using a Notifier Dialog (see Delete a Patient Record).
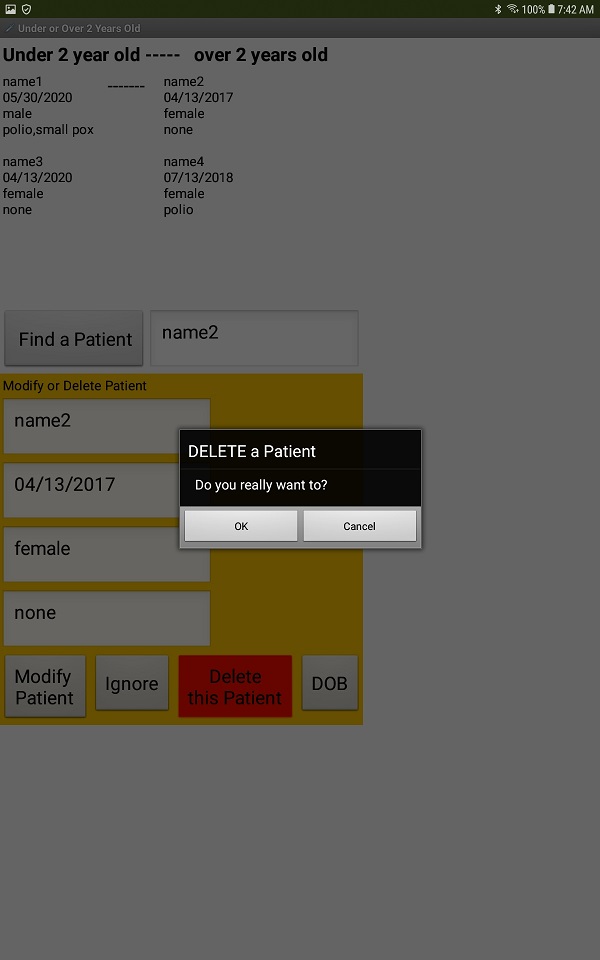
Delete a Patient Record
Type a patients name adjacent to the Find a Patient button. Type over the data you want to change. Press Delete this Patient. Answer the question (Do you really want to?) with OK or select Cancel if you change your mind.
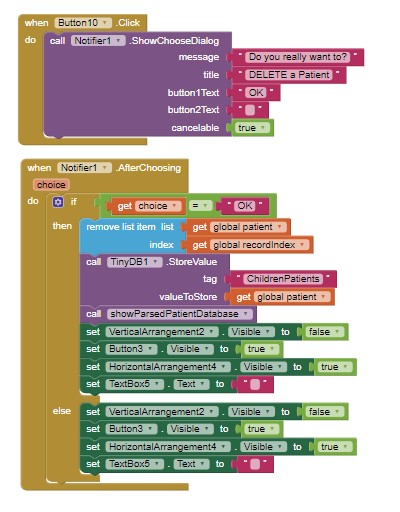
The Notifier.ShowChooseDialog allows a User to change his/her mind but requires the additional code in Button10Click and Notifier.AfterChoosing.
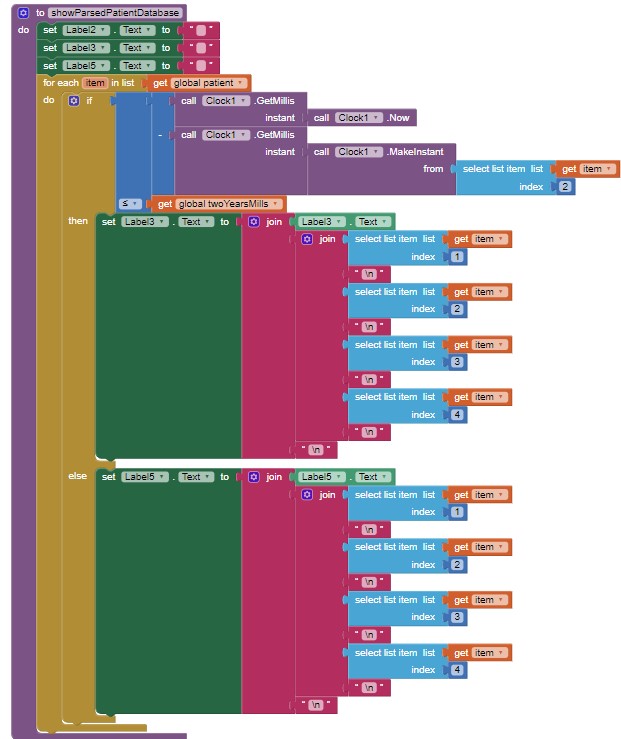
Sort/filter some of the patient data based on DOB
Sort the data into two columns; patients younger than two years old and those over age two.
A Clock converts today's date to millis ; subtract millis from the patient DateOfBirth (the DOB must be in the format MM/DD/YYYY to use this method). The the difference in millis is compared to two years equivalent of millis (63070000000) using the variable twoYearsMills. (Two years converted to millis is 63,070,000,000 millis.) If the answer is less than or equal to two years of milis, the difference is less than two years and the patient information displays in Label3; otherwise the patient information displays in Label5. The data is segregated into two 'columns' based on a whether the DOB is less than or more than two years ago.
Modify this example to suit your requirements. The example is a vaccine database but the model can easily be a database for other purposes.
Things for you to do:
- Sort the patient List. The sort method shown in Sajal's excellent tutorial List Sorting On App Inventor should be able to sort the master list according to patient name.
- Use ListViews to display the patients instead of Label3 and Label5.
- Enable the ModifiyPatient Button to allow the user to make a choice before modifying; similar to using the Notifier with the Delete this Patient Button
- Provide a log-in/password option to access the database
- Make a prettier Designer
This is an advanced tutorial so depending on your experience, you might try a similar, but simplified TinyDB tutorial by Tim Working with Lists and TinyDB
The app was tested on an Android 8.1 tablet and the default App Inventor emulator. Hopefully you will have similar good results on your device. Explore, learn new techniques and possibly have some fun learning how to use the app and the techniques involved.
If you have specific questions, please start a new discussion with a heading something like: RE: Vaccine Record Tutorial
Here is what many of you are looking for vaccinationsListTinyDB.aia (15.0 KB)
Best regards,
Steve ![]()
