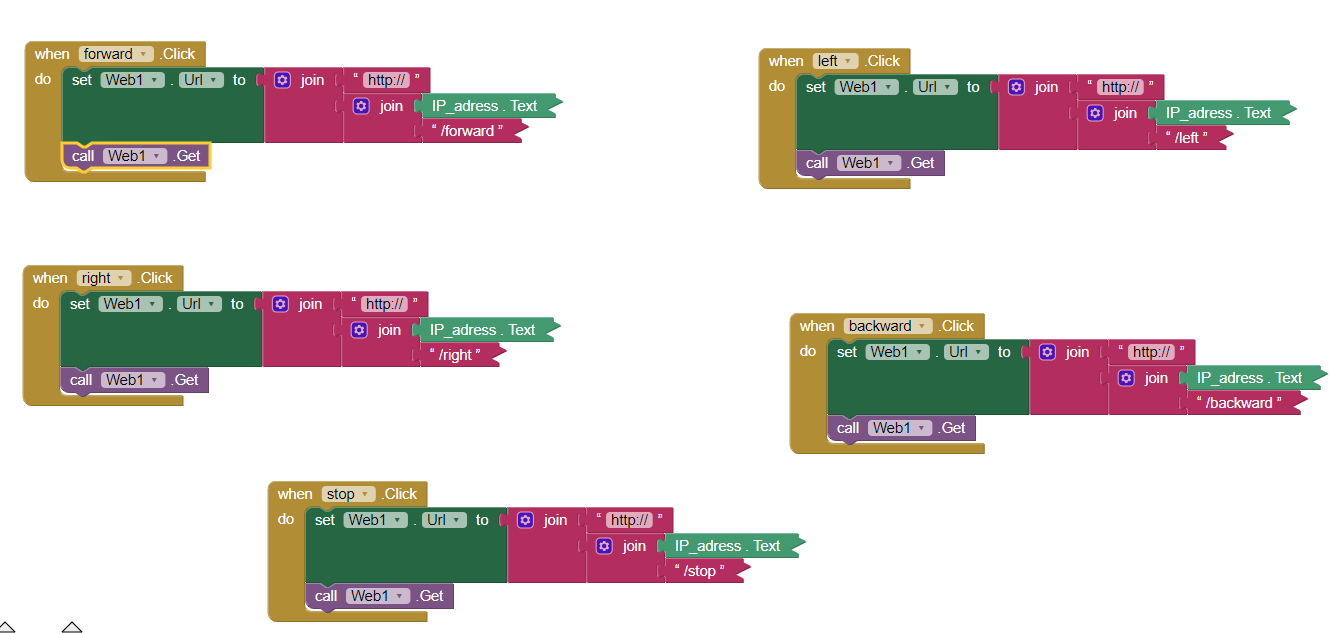
Hello Salvinorin, here below you can find a NODEMCU code (written with Arduino IDE), which implements a web server in order to receive commands form a phone running the annexed .aia.
It is capable to receive commands sent on the internet. To this purpose I have added a port to the internet IP address of my router (not the LAN address 192.168.x.y, but the WAN one: see comments inside the .ino, here below on how to retrieve this address).
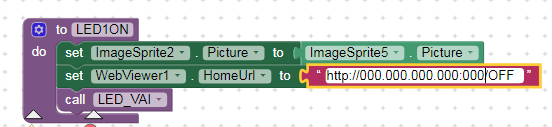
The app is sending commands to that address (and port) so to switch on and off the blue LED on the NODEMCU (GPIO16 = D0).
The format of the commands is explained in the code. Of course it can be modified to better suit your needs. The % character is used as a command terminator but you can use whichever you want.
As you can see everything is very basic, without sofisticated pieces of code, but it works. 
It can be improved, by making a true password (the current one is fake) but for the time being I believe that no-one will be interested in attacking my IP:port to switch on and off a LED (at least, I hope  )
)
I think that the comments inside the C code are clear enough, otherwise do not hesitate to ask more details..
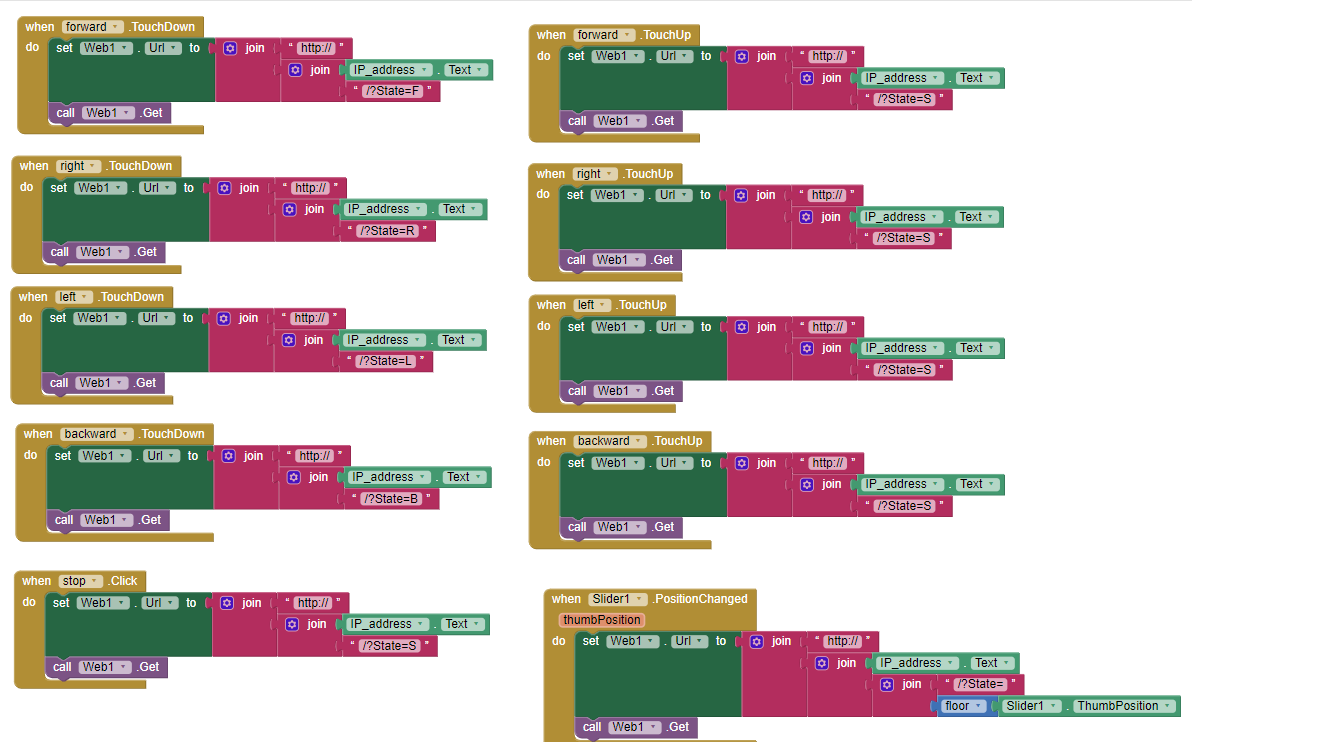
The .aia contains the client App. Button 1 and 2 can switch on and off the blue LED, while buttons 3 and 4 send the command to drive the analogue output (not implemented yet, honestly I have to dig the NODEMCU datasheet because I know just a little of that board).
Anyway, it works: So I guess it could help you, or other guys who want to play with the IoT.
I'm pretty sure that there are already tons of papers and posts about this matter, but I think that my version is very (read: extremely) simple and can be a good basis for those who want to start from scratch and build a more powerful APP on it.
Stay tuned.
Ugo.
BTW: EWPatton is right, a response must be sent to the client... 
Web_Home_Adv_copy.aia (84.0 KB)
//=====================================================================================================
// WEB Server using an Arduino NODEMCU ESP-12E
// It receives the commands from the Internet and decodes them
// Sets/clears Digital outputs and (will) read and write Analogue Outputs (not Rev. 1)
// Each command is received in the form 01/D000/MD5PWD%
// channel/command/Password%(% => terminator)
// Channel: on two digits
// Command: D = digital channel: 001 = set; 000 = clear; A = analogue channel, setting-range : 000 - 255
// Password: is fake in Rev.1
// Terminator: is the "%" character
// Author: Ugo Schiara
// Date: 08/12/2020
// Rev: 1.0
//=====================================================================================================
#include <ESP8266WiFi.h>
#define PH1 1 // position of first / separator
#define PH2 4 // position of second / separator
#define PH3 9 // position of third / separator
#define BLOCCA "MD5PWD%" // password to enable action
const char* ssid = "YOUR_SSID"; // SSID of the home network (name of router SSID)
const char* password = "password"; // Password to access the internet
const char* host = "192.168.x.y"; // This is the address of the home router as seen from the LAN (not the WAN IP, to discover it use an IP finder like www.whatsmyip.org
int ledPin = D0; // to drive the led on the board
int fh = PH1+1; // position of first data field
int sh = PH2+1; // position of second data field
int th = PH3+1; // position of third data field
int Pin_to_Drive = 0; // digital Output channel. Buffer used when a set output commend is received
String Channel= ""; // channel to be driven
String Command= ""; // command type and value
String Crypto= ""; // encryption key
String req= ""; // buffer received
WiFiServer server(321); // assign a port number you like: to acces the nodeMCU from the external web, the client (i.e. the app made by MIT AI2)
// shall address the IP address of the router as seen from outside plus ":port". For example 102.192.033.118:321
void setup()
{
Serial.begin(115200);
delay(10);
pinMode(ledPin, OUTPUT);
digitalWrite(ledPin, LOW); // the output is reversed => 0 means LED on; 1 means LED off
// Connect to WiFi network
Serial.println();
Serial.println();
Serial.print("Connecting to ");
Serial.println(ssid);
WiFi.begin(ssid, password);
while (WiFi.status() != WL_CONNECTED)
{
delay(500);
Serial.print("."); // prints a dot until it hooks the router
}
Serial.println("");
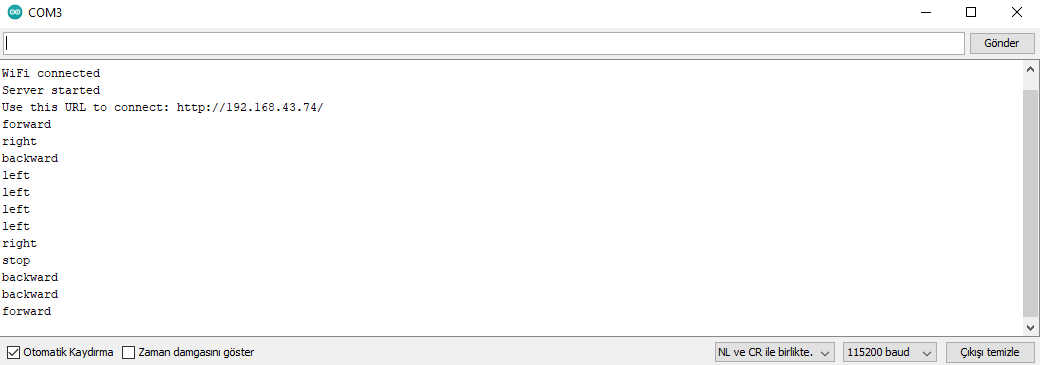
Serial.println("WiFi connected");
// Start the server
server.begin();
Serial.println("Server started");
// Print the IP address
Serial.println(WiFi.localIP()); // this is IP of the Node MCU assigned by the router.
}
//==================================================================================================================================================
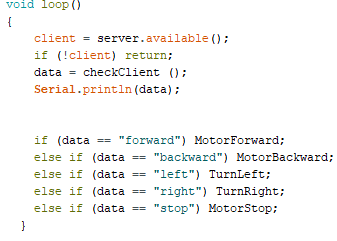
void loop()
{
int i = 0; // initializes timeout
WiFiClient client = server.available(); // Check if a client has connected: something from the internet ?
if (!client)
{
return; // Nothing from the web, retries (to be improved to avoid the return instruction not stylish nor MISRA)
}
// Wait until the client sends some data
while (!client.available())
{
delay(1); // something has arrived, give it time to stabilize
i++; // but no more than 250 milliseconds
if(i == 250) return; // data not arrived within the timeout, discards and retries (to be improved to avoid the return instruction not stylish nor MISRA)
}
// Read the first line of the request
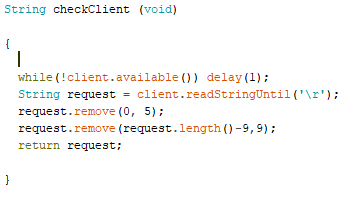
req = client.readStringUntil('\r'); // buffer received correctly, do the job
if (req.indexOf("") != -10) // request to discard for favicon
{
//========================================= only for debug purposes
// Serial.print("Ricevuto : ");
// Serial.println(req);
//========================================= only for debug purposes
if (req.indexOf("%") != -1) //checks if a message has been received correctly the % character is the ending one
{
i = req.indexOf("/"); // finds the first separator
req = req.substring(i-1); // backward one character
Channel = req.substring(fh,PH2); // extracts the channel to be driven
Command = req.substring(sh,PH3); // extracts the type of command
Crypto = req.substring(th); // extracts the password (at this moment only fake)
//======================================= for debug purposes only
/*
Serial.println(req);
Serial.print("canale : ");
Serial.println(Channel);
Serial.print("comando : ");
Serial.println(Command);
Serial.print("cripto : ");
Serial.println(Crypto);
*/
//======================================= for debug purposes only
if(Crypto != BLOCCA) // if the password is recognized, do the job
{
if (req.charAt(sh)== 'D') // Digital channel to be driven
{
DigitalCommand(); // In or Out will be analyzed
}
if (req.charAt(sh)== 'A') // Analogue channel to be driven
{
AnalogCommand(); // In or Out will be analyzed
}
}
else // password not valid
{
Serial.print("Invalid Password");
}
} // message is a valid command or at least ends with a "%"
} // request for favicon
else
{
Serial.println("invalid request"); // buffer was not as expected
client.stop();
return;
}
// Prepare the response
String s = "HTTP/1.1 200 OK\r\n";
client.print(s); // Send the response to the client
delay(1); // give a breath
}
//=============================================================
void DigitalCommand()
{
if (req.charAt(PH3-1)== '1') // if the last digit of the command field is a 1 then the output shall be set
{
SetOnCommand();
}
if (req.charAt(PH3-1)== '0') // if the last digit of the command field is a 0 then the output shall be cleared
{
SetOffCommand();
}
}
//--------------------------------------------------------------
void SetOnCommand()
{
Pin_to_Drive = Channel.toInt();
digitalWrite(Pin_to_Drive,HIGH);
}
//--------------------------------------------------------------
void SetOffCommand()
{
Pin_to_Drive = Channel.toInt();
digitalWrite(Pin_to_Drive,LOW);
}
//=============================================================
void AnalogCommand()
{
Serial.println("Analogue command received");
}