Dog Gone! … an AI2 Tile matching game and tutorial

Tile-matching games are a type of puzzle where the player manipulates tiles to make them display according to a matching criterion. Find the identical dog images on two successive screen touches of the question mark buttons in Dog Gone! Make the dogs disappear (dogs gone) whenever you find a tile match. When all the dogs and other images are hidden, the app provides a reward and a score. Lowest score wins. How fast can you hide all the dogs and symbols? Without peeking?
This tutorial uses the Advanced AI2 Any Component blocks, Procedures, Clocks, Lists, Sound, Notifier and Layouts. The app uses a single screen. An aia template is provided containing the required resources (as well as a finished app aia source to use to compare your results).
The game does not start with App Inventor; it starts with an idea. Most of the work building Dog Gone! involves gathering and making the required resources which include the images for the “tiles,” the button icons and making the images the right “size.” It took longer to make the tile images and write the tutorial than to code the app.
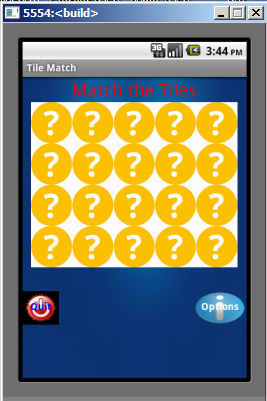
Start Screen and Options Screen
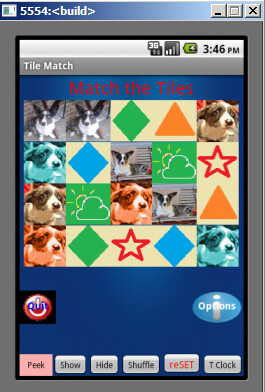
Shuffled Tiles to Match and Game in Progress

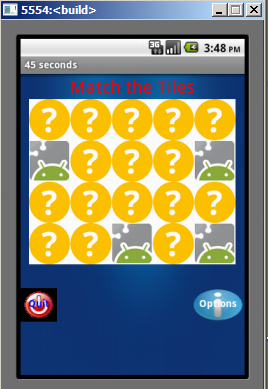
Completed Matched Tiles
The Parts
Some of the parts needed for the app require you to design image icons with a program like Paint on Windows. The game uses 20 table tiles. You need ten png or jpg images of the correct dimensions to fill the table. The example app tiles are 59 pixels wide x 59 pixels high. Why? The Table Layout the app is designed around will occupy a width of 300 pixels by design (most Android phones have screens that are about 3 inches and are 320 x 480 pixels). 5 x 59 equals 295 pixels, enough to fill the Table layout. The icon images you design (or get from the Internet) might have other dimensions; you might need a different way to lay out the matching tiles.
A 5 x 4 grid of tiles is “just about right” for this game ( five columns; four rows). Use the Table Layout with four rows and five columns. Place a button in each Table Layout; an image goes in each button. Populating the Table Layout buttons requires only ten images since each image is repeated in the tile grouping.
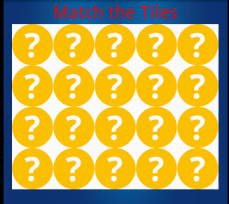
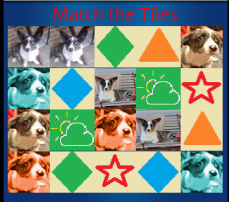
All 20 tiles hidden and All 20 tiles shuffled and shown
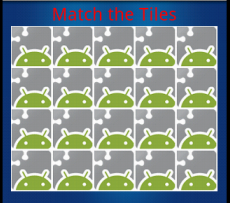
All 20 tiles ‘found’ and “hidden”
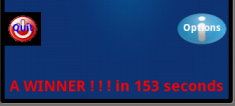
The game option buttons are placed in a Horizontal Layout and hidden (Visibility of the layout control is set to false). When the app is running, the screen appears as shown here..
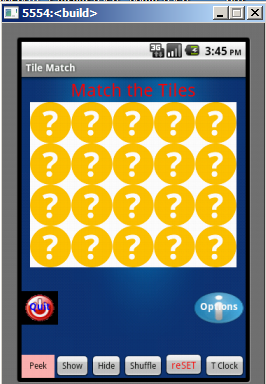
When the Options button is pressed, the users has choices to:
- Peek momentarily at all the images (about ½ second (500 ms) as coded).
- Show the tiles
- Hide the tiles
- Shuffle the tiles
- reSet the game
- Toggle the game clock on/off

Press the Option button a second time to hide the options.
Make Some Tile Images
The tutorial provides a set of ALL the images required. Personalizing the app tiles, is not hard to do. Replace ten of the existing tiles currently named dog1.png, doggreen1.png, dog1.png, dogorange1.png, Nickel.jpg, Magic3.jpg, weather2.png, aDiamondGreenSolid.png, aOrangeTriangleSolid.png, aStarRed.png, aDiamondBlueSolid.png . These replacement images could be named image1, image2, etc. to be be generic.
I used Windows Paint to create the tile images. Here is a way to produce some simple, easily recognizable shapes to use as the game’s matching tiles with Paint. Open Paint. Using the icon in the upper left corner of the app’s window, select New. Then resize the white default drawing surface. Click Resize (or drag the small boxes) to resize the drawing surface. Using the following method allows you to specify the width and height pixels. When the window opens, check Pixels. See step #1 above to see how. The tutorial example image above demonstrates how you change the 64 to 59 and the 59 to 59. WAIT. Before you do that, un-check the Maintain aspect ratio box to allow both dimensions to set to 59 pixels. When both Horizontal and Vertical are set to 59 (step #2) go to step #3 and click OK. Your drawing surface now is 59 x 59 pixels in size. Select a color to draw with a right click (step #4), this places the selected color in the box at step #5. This is your drawing color. Select a drawing object from the numerous shapes at #6 and drag the object (in this case a star) and drop it at the white drawing surface at the location marked step #7. Resize the object to fill the entire drawing surface or only part by using the small expansion blocks or move it to the center of the drawing surface (step #8). This procedure produces a nice colorful star on a white background. The tile can be more colorful. Select a different color (step #9), now find the color-fill tool (step #10). Drag the tool to the drawing surface. Left click when the pouring spout is on the white area and the white area will be filled with the new color - step #11 (or click on the star object and change its color). Constructing simples tiles shown here is as simple as it gets with Paint. If you have graphics skills you can use more features to create some exciting images or change to a more sophisticated drawing application to provide shading, more colors, transparency etc. Now, return to the Paint menu button (the upper left corner of the screen) and select Save as and save the image to your desktop.
Shrink an existing photo to 59 x 59 pixels (yes, you can use Paint to do that) and the photo png or jpg image can be used as a tile image too in your app. Ten images are required. The question mark image and the Android image (used to hide the dogs and things) are provided in the resources on the template aia.
Build the Tile Game
The tutorial uses some advanced techniques. If you are a beginner, proceed slowly, save your work periodically after testing as an aia source file or save using Projects>Save project as.. . Experts should save too. This is an Expert tutorial, not because it is difficult, but because limited instructions are provided.
The design screen uses Vertical, Horizontal and Table layouts. Your game does not have to look like the example. The template does provide the basic buttons. You can use your own layout instead as long a you use a five x four Table Layout for the tile buttons.
Where to start coding? This tutorial does not lead you by the hand. I would start coding all the required buttons, then the procedures and clocks. The template has the buttons but if you are adventurous, delete all but the table layout and just use the resources provided instead. Sometimes you will need to code a procedure prior to placing all the required blocks in a button event handler. This is a bit haphazard but necessary to avoid a LOT of instructions and text in the tutorial. After all, you get a fully fleshed-out aia if you need further explanation.
Programing style
Some programmers relabel components as to function; for example, Button1 to btnSTART. I do not do that. Buttons, labels etc. are labeled sequentially. Some programming classes insist that objects be renamed; I see renaming as an unnecessary activity and an added complication. Is it easier to remember Button1 or btnSTART and follow someone else's programming style with all the associated typing errors someone is apt to make while recoding from block images? Writing this tutorial took three times as long as developing the code.
Designer Screen
Here is an image of the Dog Gone! Designer screen:
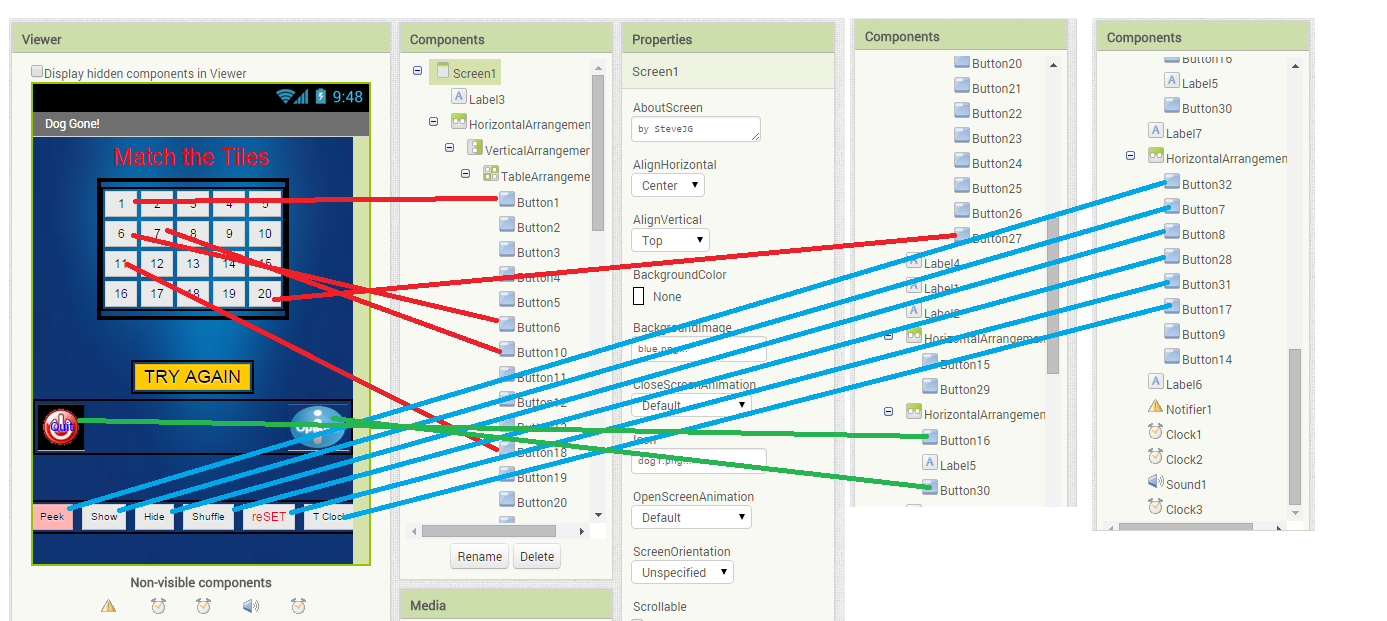
Confused? Refer to the completed aia. Some Object settings are assigned in the Designer and not in the blocks so the template is handy. If things are not working as expected as you code, please check the settings in the Designer. All the buttons and labels in the app are not cross referenced in the above diagram.
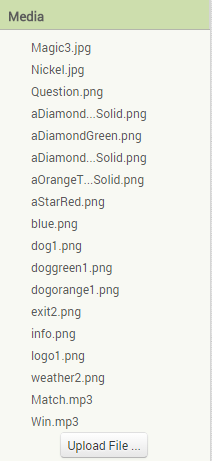
Resources (Media)
The following resources are included in both aia files available with this tutorial; the resources include two sound files and all the button images. Replace these examples with your own tile blocks and sounds.
The Blocks
Lots of Blocks. Lots of Blocks so to learn from the tutorial and try to follow the programming logic. I show and explain why several procedures and some of the critical blocks are used but assume you understand the programming logic.
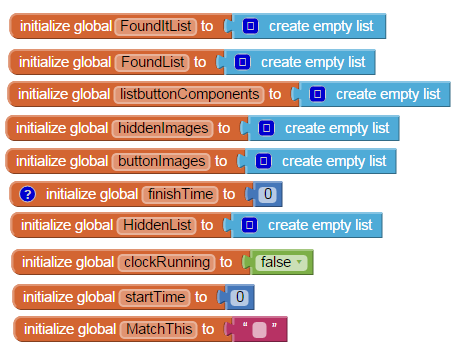
Global Variables
Buttons
The game tiles are buttons with images placed in a Table Layout. Are the buttons labeled in logical order? No. The game tile buttons are: Buttons 1 through 6 AND Buttons 10 through 13 AND Buttons 18 through 27 (which, in a way shows how the app was developed..in parts). I could have relabeled all the buttons: disappointed?, then relabel them.
ALL twenty of the Table Layout buttons have the same structure shown here:

You need 20 buttons as indicated above; Buttons 1 through 6 AND Buttons 10 through 13 AND Buttons 18 through 27. Notice, the Button referenced in the call buttonSelected1 procedure changes for each button. The Button1 structure is replicated twenty times. Hint: Create all the buttons in the Designer, then in the Blocks editor duplicate Button1 twenty times changing its caption to the required buttons using the caret to the right of “Button1.” Also change the green button to the same name as the Button.
Here are more Buttons:
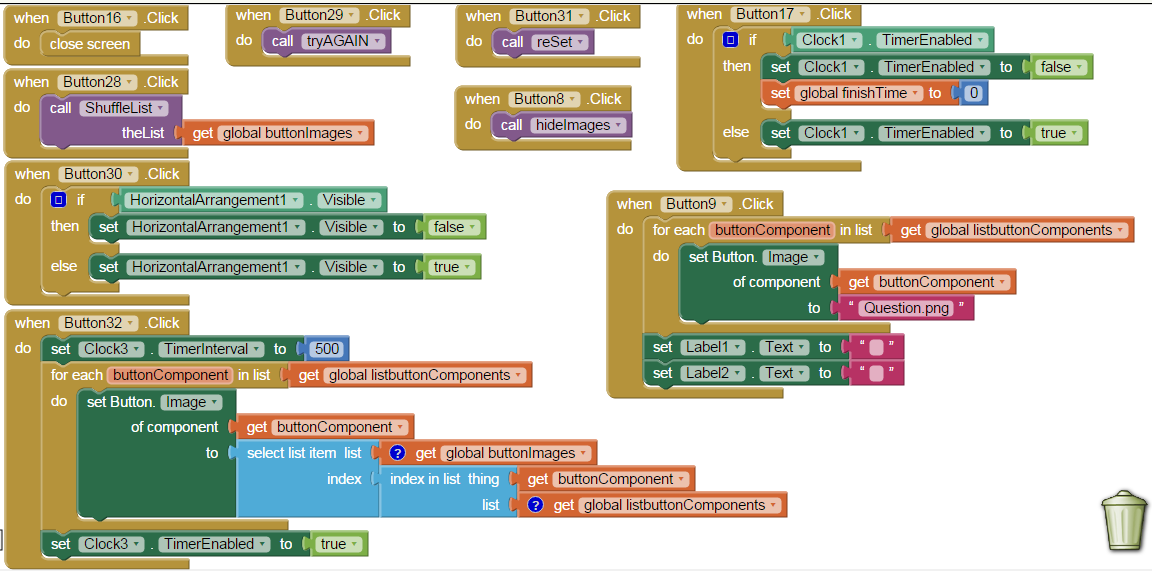
Button8 is the “Hide” button; it “hides” all the tiles behind question marks.
Button13 is the “Show” button; it displays all the tiles.
Button16 is the “Quit” button. It is used to terminate the app gracefully.
Button17 is the “T.Clock” button; it toggles the game timer clock off and on.
Button28 is the “Shuffle” button (to force a shuffle).
Button30 is the “Options” button.
Button31 is the “reSet” button used to restart the game.
Button32 is the “Peek” button.
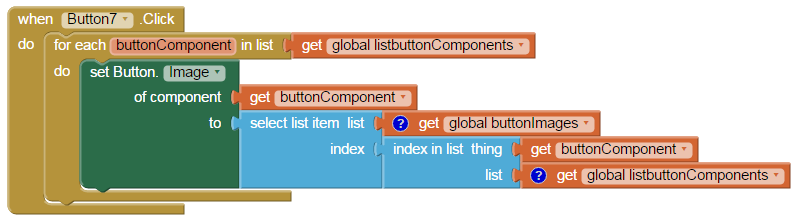
Button7 is the “Show” button (in the Options). It will show all the tile images.

Miscellaneous Controls
BackPressed, when empty of a “puzzle piece”, the Block prevents the user from accidentally pressing the Android device’s back button which would ordinarily prematurely shut down the game. The BackPressed block could be used for other functions should you chose to modify the app.
Screen1.Initialize contains the reSet procedure (which is the game starting condition). The reSet (discussed below) shuffles the tiles and starts (or restarts) the game.
The ErrorOccurred block is dormant at the moment and can be use to debug the app if necessary.
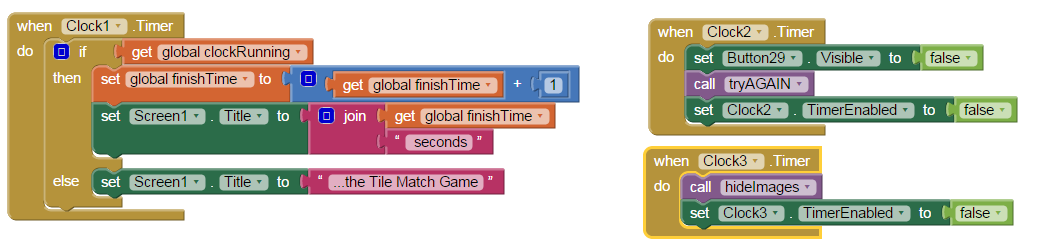
Clocks:
Three Clock objects are used. All three Clock.Timers are used only occasionally (none of the timers run contantly). Clock1 is the game timer elapsed time. Clock2 resets after an unsuccessful tile match attempt (or the user can use the button to elicit the change more rapidly). Clock3 is set off within the Peek button event handler; the procedure hides the images and turns itself off.
Procedures:
The buttonSelected1 procedure
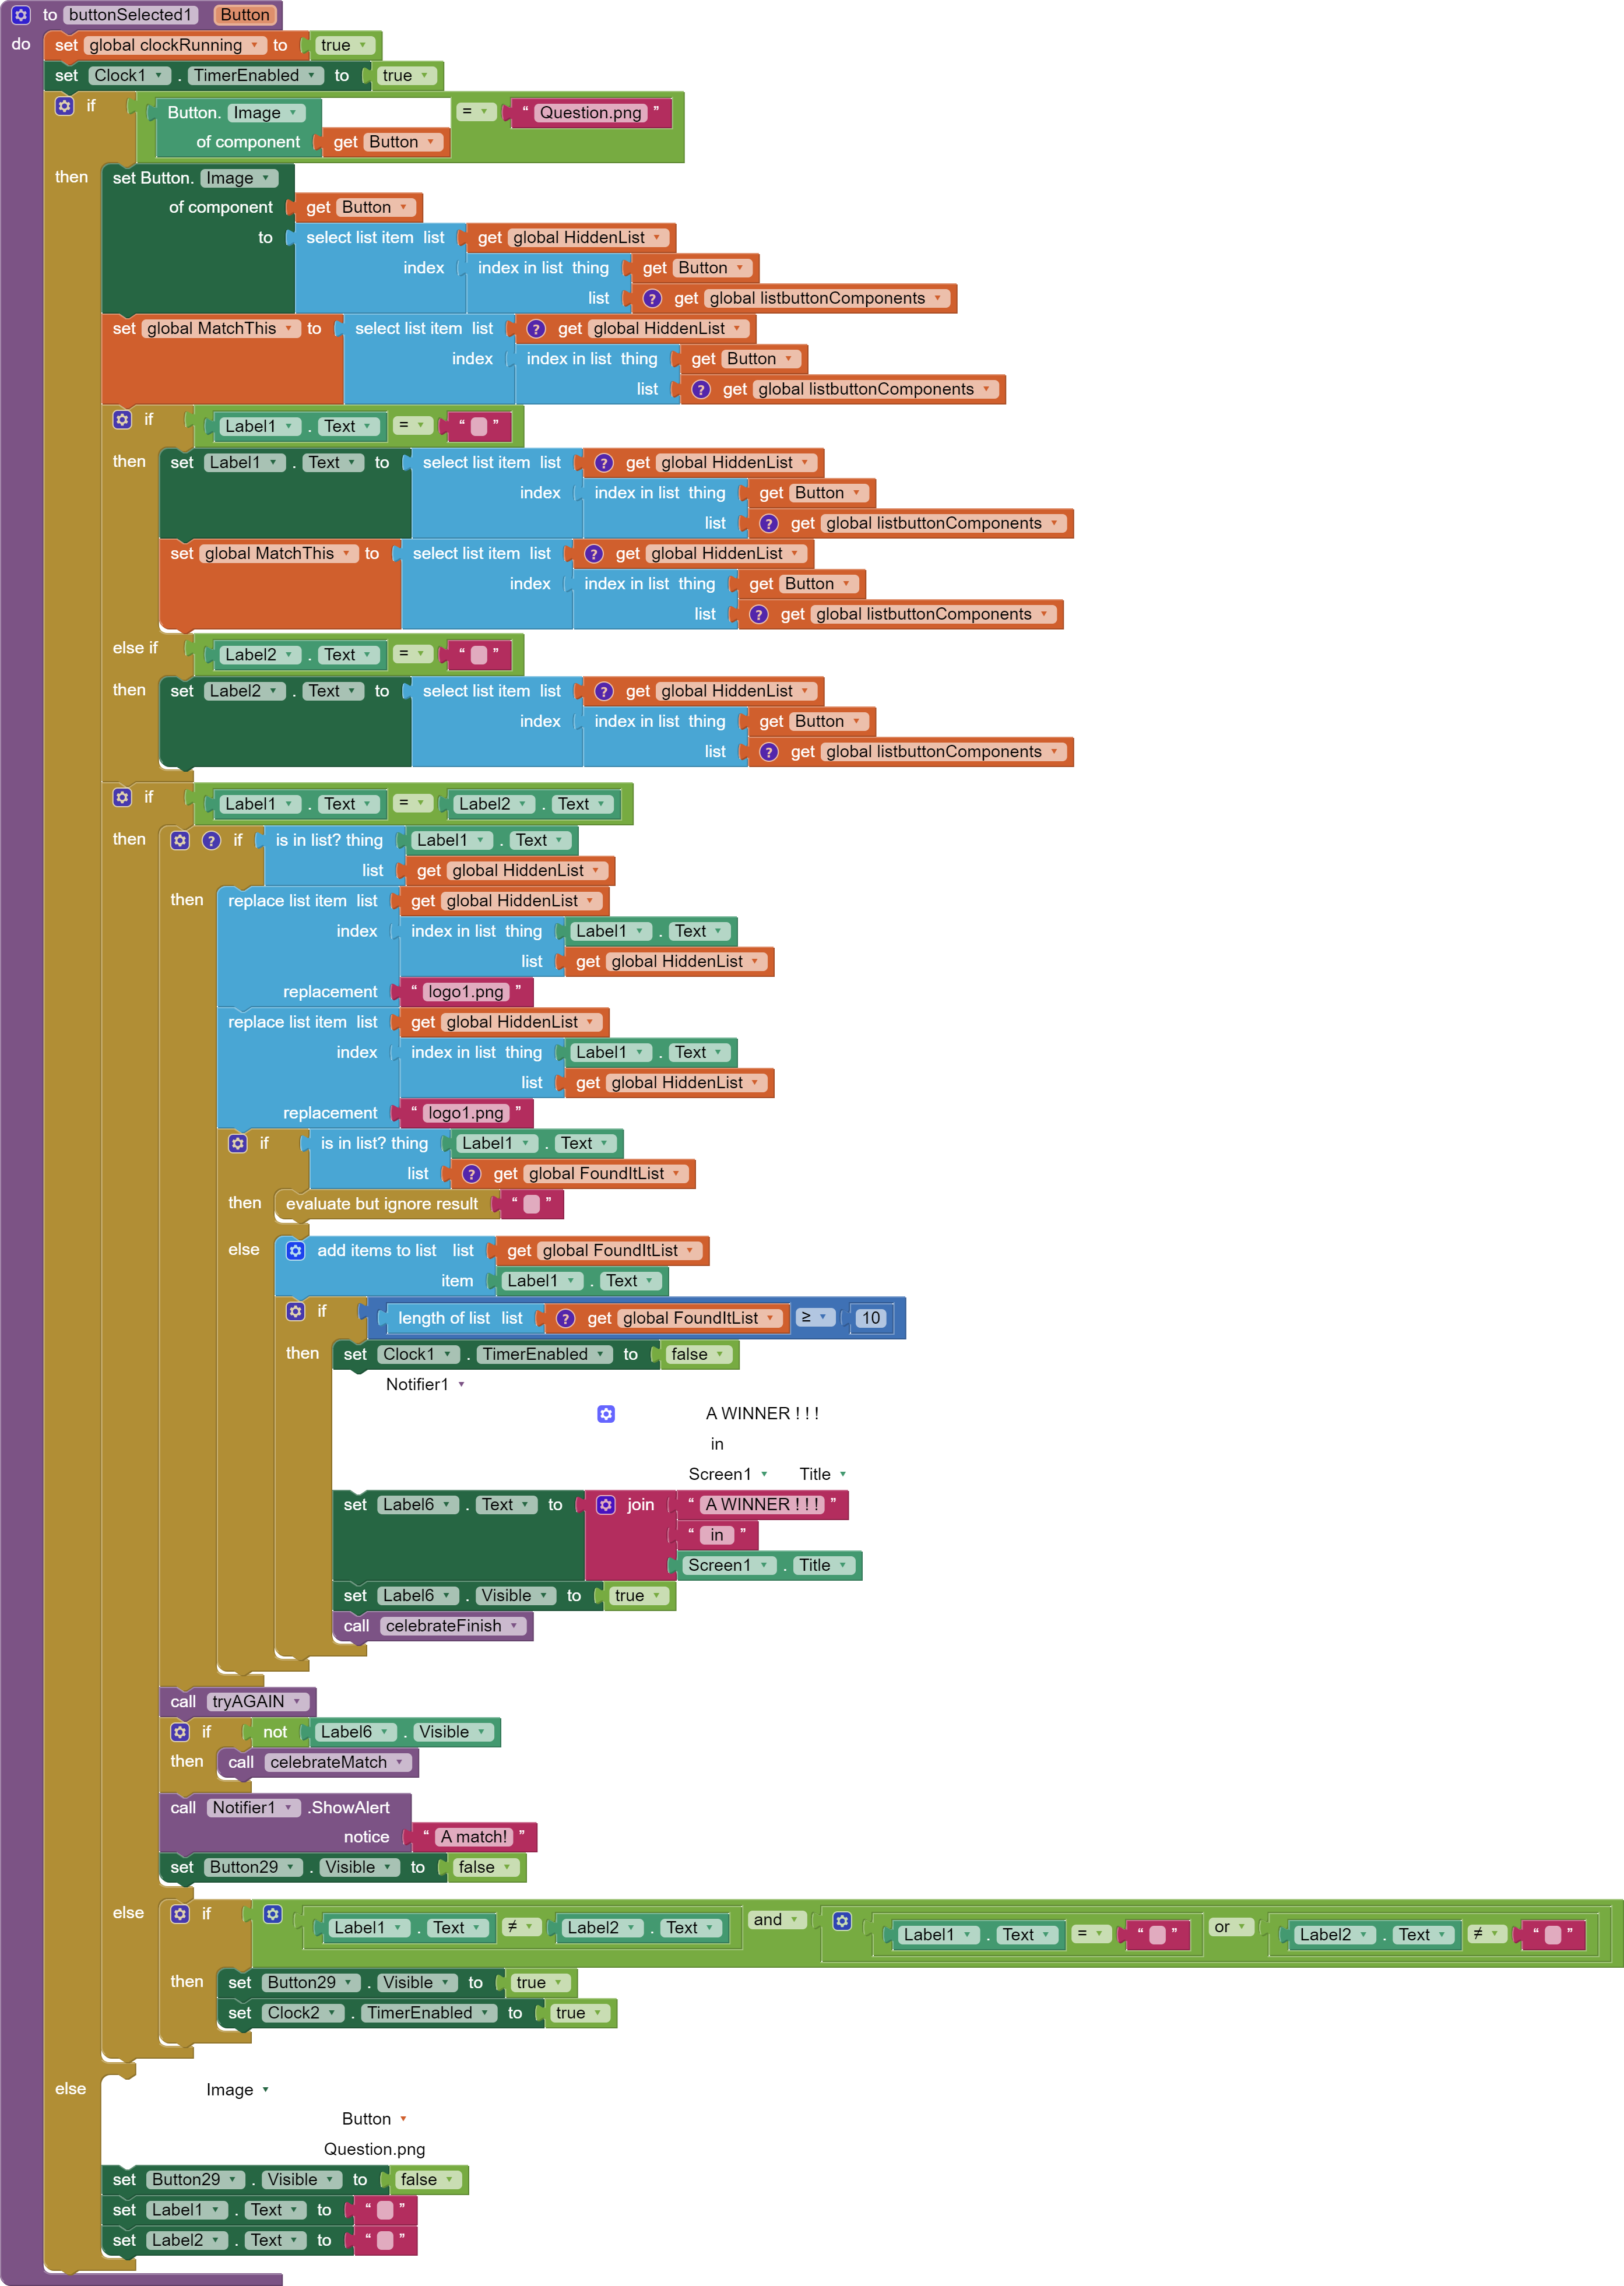
This procedure might be termed the MASTER procedure for the game. Most of the logic decisions are made in the event handler using the Logic controls and IF..then blocks.
There are 131 blocks in this procedure. It is called by the buttons in the Table Layout and executes when a users touches a game tile (any of the tiles labeled 1-20 on the Designer screen). The procedure checks for the status of many of the app’s components and allows the app to determine what to do after a button touch.
The reSet procedure. The procedure has 51 blocks.
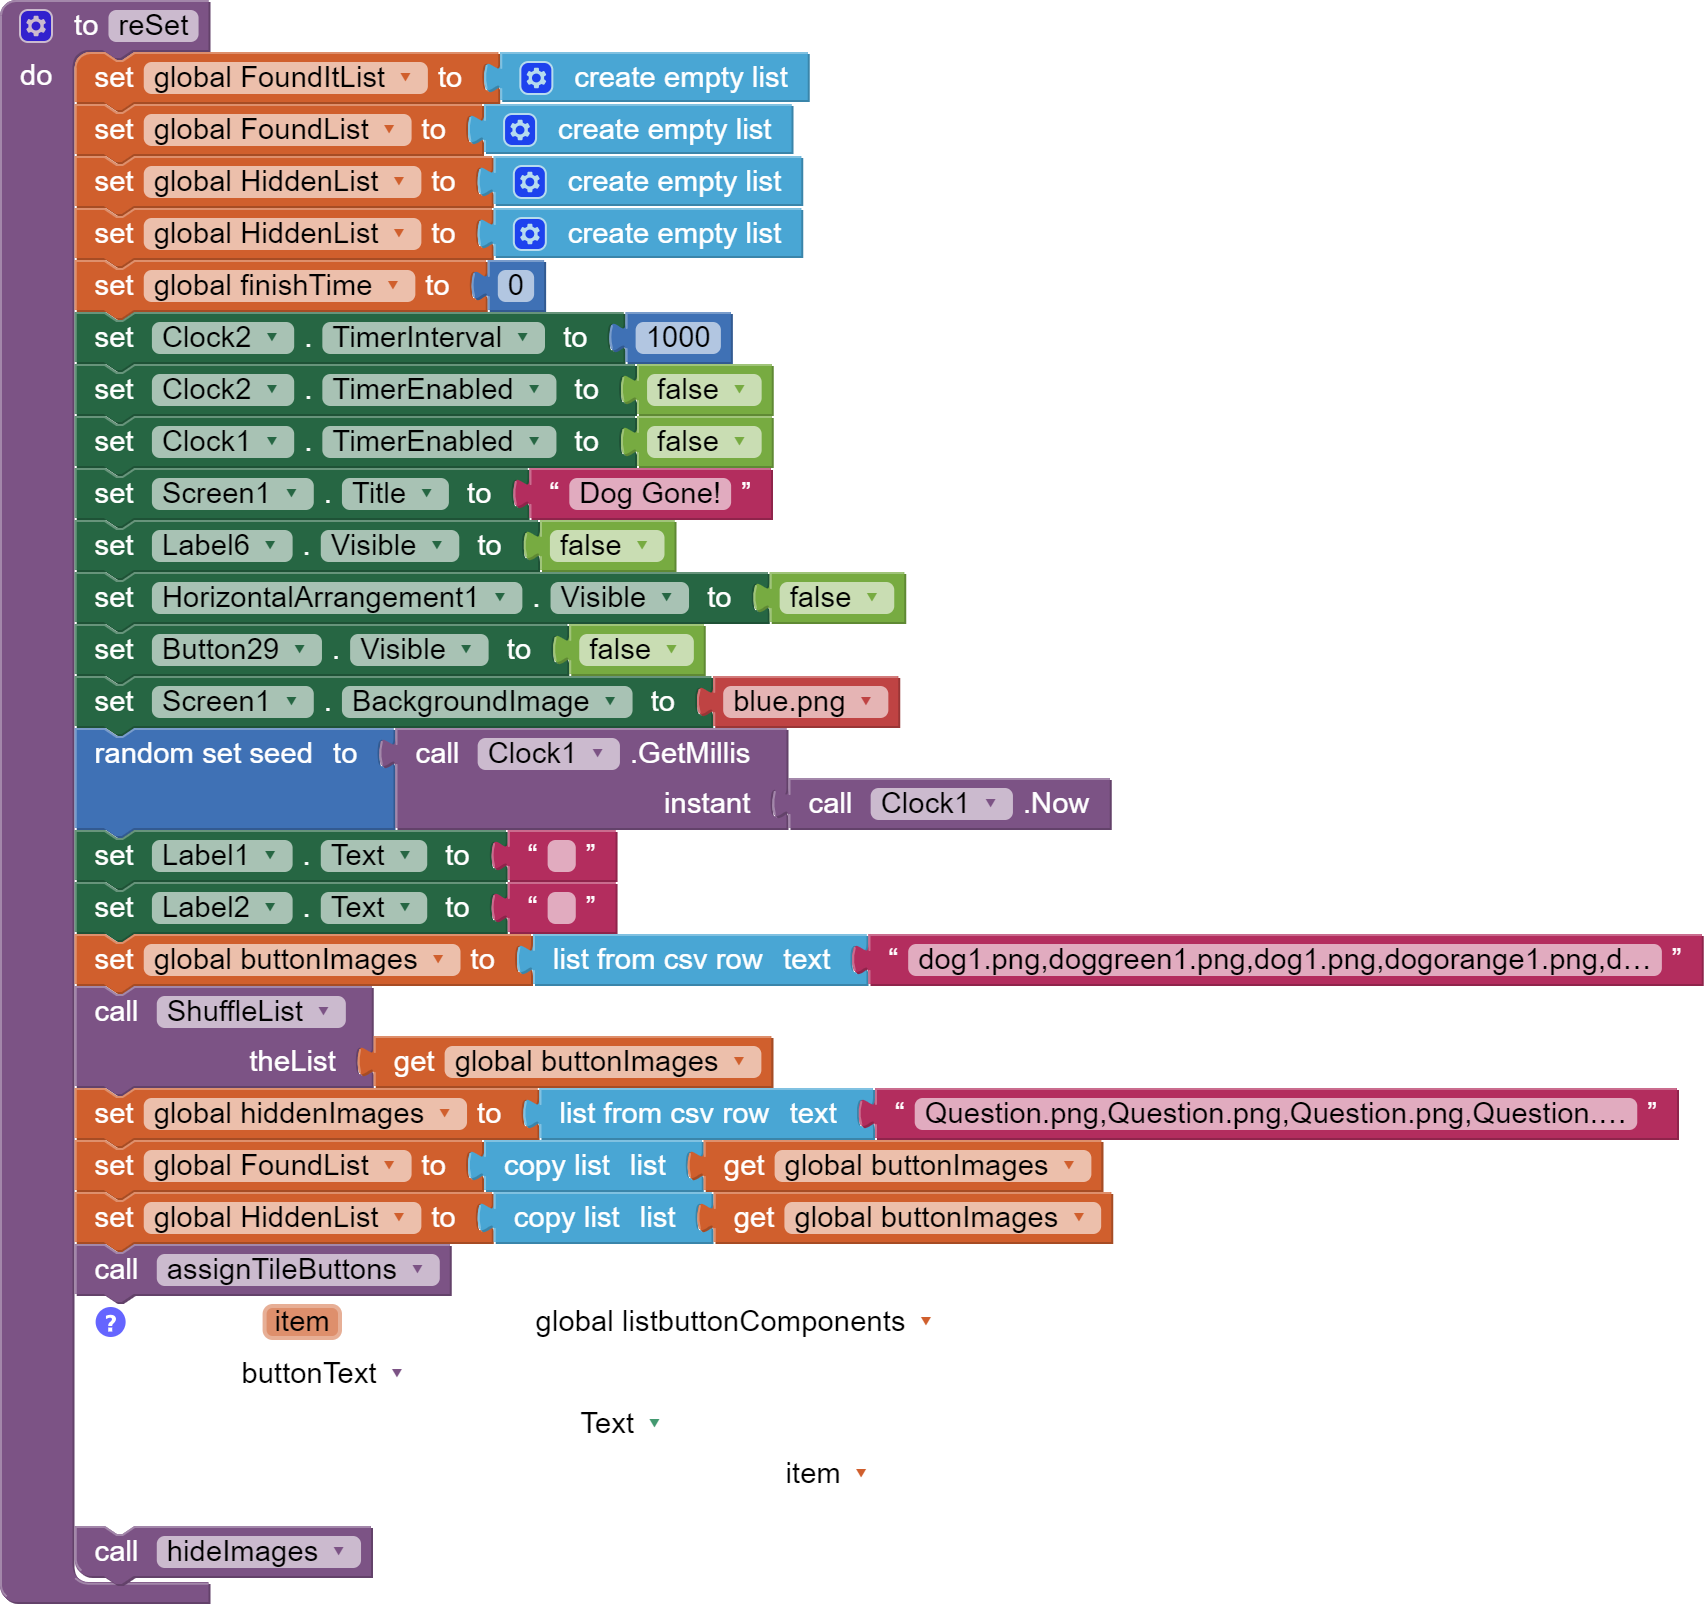
The reSet procedure is used when Screen1 is initialized and to start a new game following completion of each tile matching. Use the Options button in the game to find the reSet button during gameplay.
The text in the two cut-off Text blocks shown in the image is as follows:
dog1.png,doggreen1.png,dog1.png,dogorange1.png,doggreen1.png,dogorange1.png,Nickel.jpg,Magic3.jpg,Nickel.jpg,Magic3.jpg,weather2.png,aDiamondGreenSolid.png,weather2.png,aDiamondGreenSolid.png,aOrangeTriangleSolid.png,aStarRed.png,aOrangeTriangleSolid.png,aStarRed.png,aDiamondBlueSolid.png,aDiamondBlueSolid.png
and
Question.png,Question.png,Question.png,Question.png,Question.png,Question.png,Question.png,Question.png,Question.png,Question.png,Question.png,Question.png,Question.png,Question.png,Question.png,Question.png,Question.png,Question.png,Question.png,Question.png
Yes, there are 10 instances of Question.png in the Text control; these "instances" are all the same image. Copy and paste both of these “strings” into the Text box shown on the Block image.
What some of the blocks do in this procedure:
- random set seed ensures that each puzzle is unique.
- set Clock2.TimerInterval to 10000 is the interval the screen refreshes after a user selects two un-matching tiles.
- The Screen1 background image is the blue.jpg image (included in resources).
- ShuffleList is a procedure described here by Sajal Shuffle Lists & Unique Random Numbers . Described is a Fisher - Yates shuffle algorithm ( Fisher–Yates shuffle - Wikipedia ) converted to AI2 blocks by Sajal as is the Swap procedure. You need both these procedures described below.
- The ‘hidden’ blocks provide the developer to display the button text on the Table Layout buttons.
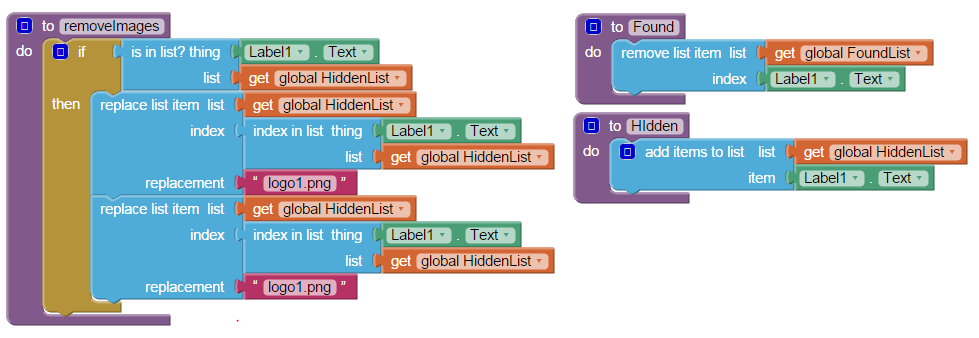
The hideImages and buttonText Procedures
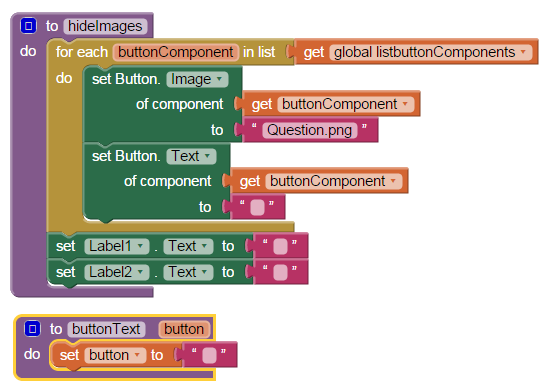
The hideImages procedure “hides” all the images “behind” a series of question mark images.
The buttonText Procedure clears the text when executed.
The Shuffle Procedures
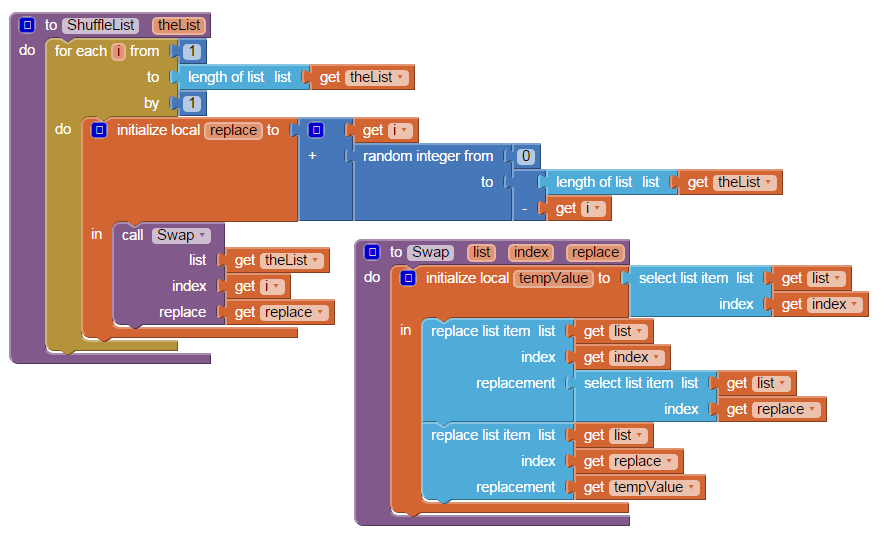
These two procedures are needed to implement the Fisher-Yates shuffle algorithm converted to AI2 blocks by Sajal ( Shuffle Lists & Unique Random Numbers ). Thee blocks here are slightly modified from the blocks he introduced.
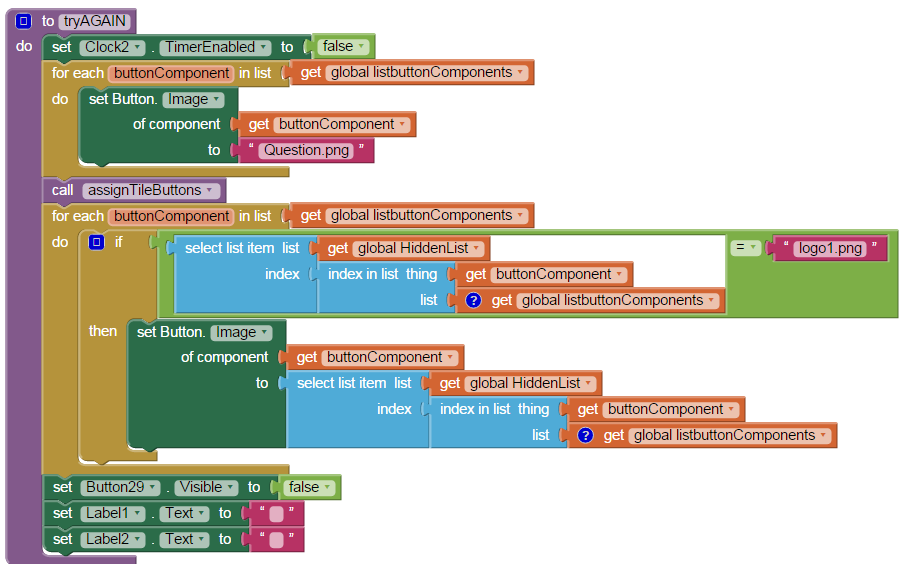
The tryAGAIN procedure:
The celebrateMatch and celebrateFinish Procedures:
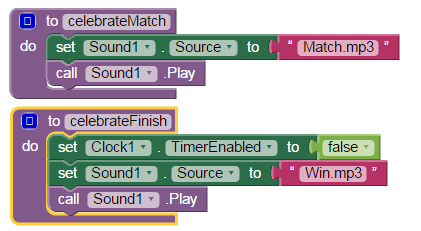
The “celebrate” procedures play the two included sound files as they are needed.
The showImages Procedure:
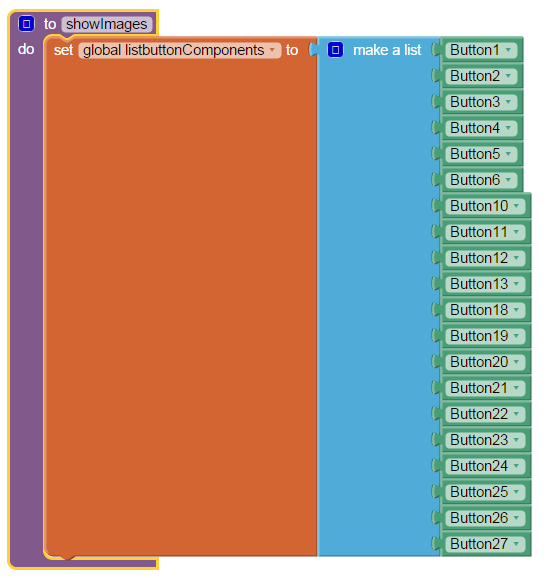
This list creation procedure is used several times within the app. The green button blocks are the names of all the buttons in the Table Layout used to display the matching tiles. Find each block are in the Blocks pop-up for a Button and are the last block displayed.
Other Procedures:
These procedures are not used at the moment are included because they might be useful when a developer makes modifications.
How to play Dog Gone!
- Select a question marked tile at random.
- Select a second; hope for a match.
- If a match of two identical tiles, the tiles are hidden.
- Match another pair of tiles if you can, then another.
- When all the tiles are matched, you win!
- All done? Either quit or from Options, select reSet and the app will reset and allow you to play again. The next time you play, the tiles will be shuffled and you have a fresh playing screen. You play against the clock; try to better your time.
- Tired of guessing? Before the game starts, go to Options, then select Peek and you get to see the screen for a brief moment. Does knowing the location of the tiles improve your score?
Variations of the app you can code
While Dog Gone! is a complete app, there are certainly many enhancements, you as a developer can add:
- Build the game with more than with 10 images available, but keep the number of tile “buttons” constant. Randomly select the images that will be shown for each game from your image list (but always limit the number to ten that will be used in any one game play) when you load the image list. To do this, you will have to name the images something like image1, image2 etc. in a generic way and provide the appropriate names in the image list.
- Automatically display the Peek feature at the beginning of the game start. Users “know” where the images are as opposed to the default of not knowing anything about the tiles. Perhaps allow both options?
- Add a “Leader Board” with scores. You will need a TinyDB and additional code blocks to make the score board persistent and to add new records. There are some suggestions about how to do this in this link: Redirecting to Google Groups .
- Increase the size of the matching tile Table Layout. You need one tile image for each matched pair (each image is used twice) and enough images to fill the Layout with buttons/images and fill each row/column fully.
- Use a sound file and write code to respond with a “raspberry” when selected tiles are mis-matched.
- Keep a count of the tile match tries and total the successful and unsuccessful matches and make them part of the high score.
- add background music.
- if your user is very fast at selecting tiles, you may have to adjust the Clock timing. Experiment. (see the section on Clocks).
- Certainly you have more ideas for improvement?
If you make interesting changes to the example app, you might publish your pertinent code blocks on the AI2 Forum ( Redirecting to Google Groups ) with a title like Dog Gone! Modifications - Tips and Tricks.
Testing
Dog Gone! was tested on an Android 13 cell phone. I expect the app will also run on Android versions 4.2 and higher.
Is there a source file? Download Source Code
Download the source code to your computer, then open App Inventor 2, click Projects, choose Import project (.aia) from my computer..., and select the source code you just downloaded. There are two aia files: DogGone_II.aia (the complete project) and DogGone_Template2.aia (loads all the resources; you do all the coding).
DogGone_II.aia (124.5 KB)
DogGone_template.aia (122.4 KB)
Coding Advice
- Android and App Inventor are often text case sensitive. When coding names of objects, images and things, remember blue.png is NOT Blue.png or blue.jpg for example.
- Save your work frequently. Either create a new aia or (very easily) Projects>Save project as saves a copy to the MIT server.
- Stop coding when you are tired. OK, don’t take a break and see what happens.
- You do not have to replicate the Designer screen. You do need to reproduce the Table Layout and buttons with images.
- Please do not copy this app and attempt to sell it on Google Play, THIS tutorial is copyrighted, if you want something for Google Play use the principles you learned and code your own app.
- For your own personal use, have fun with Dog Gone! It is free for personal use.
- Have fun.
Credits
The Question.png is courtesy Wikipedia. The dogs images are courtesy of the corgis Magic and Nickle and their owners. The logo1.png (the lurking Android) is courtesy of Google. App Inventor 2 is courtesy MIT. This tutorial is written by SJG, January 2015; Copyright 2015 - 2024 by SteveJG
Tutorial Version:
App Inventor 2
Tutorial Difficulty:
Intermediate-Advanced-Expert
Tutorial Type: Game