Author: Mr.Koder
Extension: HTML Injector
Target Audience: Intermediate to Advanced App Inventor Developers
 Introduction
This guide will take your App Inventor apps to the next level! It's a brilliant, first-of-its-kind resource, and you'll lose out if you ignore it. Created by an expert with over 7 years of App Inventor experience, this guide delivers unmatched insights and practical techniques.
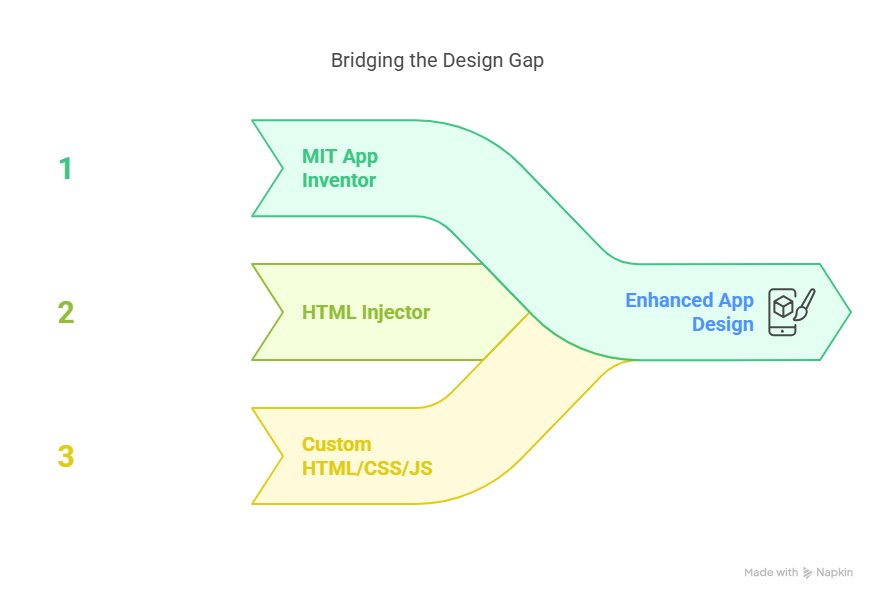
In the evolving landscape of mobile app development, user interface (UI) and user experience (UX) play pivotal roles. While App Inventor offers a robust platform for building functional apps, its native components can sometimes limit design flexibility. Enter HTML Injector—a powerful extension that bridges this gap by allowing developers to embed and interact with custom HTML, CSS, and JavaScript within their apps.
This guide delves into leveraging HTML Injector to craft dynamic UIs, handle user interactions, and accelerate the app development process.
 What is HTML Injector?
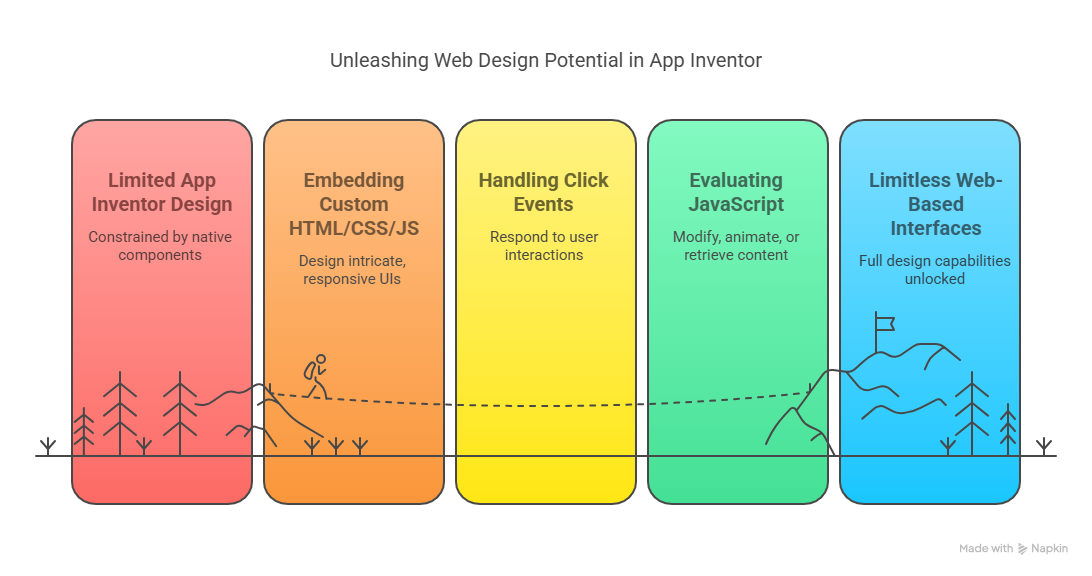
HTML Injector is an extension designed to break through the design limitations of the standard App Inventor components. By enhancing the WebViewer, this tool expands your design capabilities from constrained native components to virtually limitless web-based interfaces—achievable in just seconds. It enables:
- Embedding Custom HTML/CSS/JS: Design intricate, responsive, and stunning UIs using modern web technologies.
- Handling Click Events: Detect and respond to user interactions with full control inside the embedded web content.
- Evaluating JavaScript: Dynamically execute JavaScript code to modify, animate, or retrieve content from the web page in real time.
 Key Features
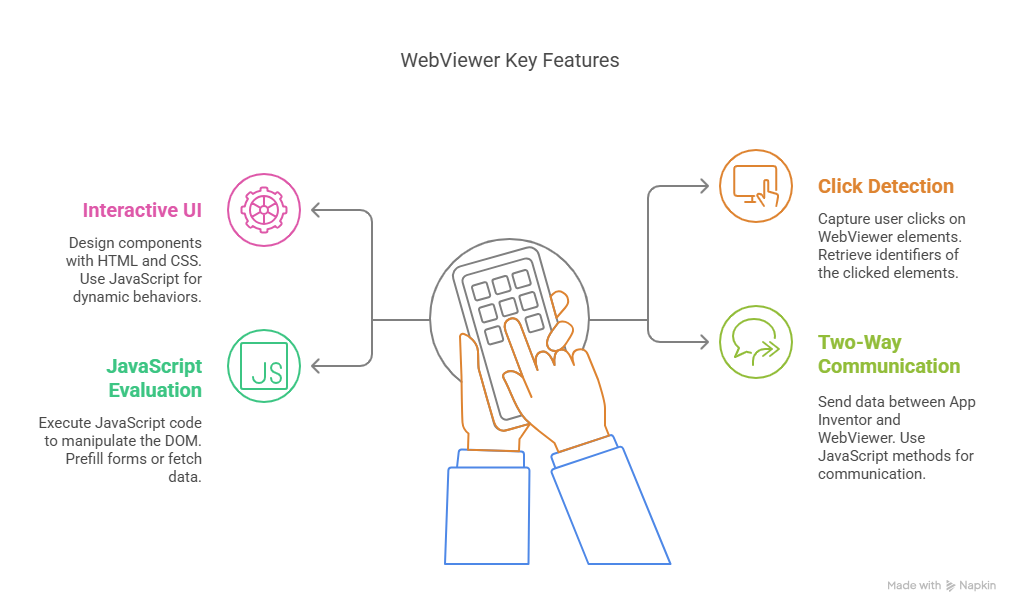
- Interactive UI Components:
- Design forms, badges, cards, and more using HTML and CSS.
- Utilize JavaScript for dynamic behaviors like animations or form validations.
- Click Event Detection:
- Capture user interactions by detecting clicks on elements within the WebViewer.
- Retrieve identifiers such as
id,class,tag, orindexof the clicked elements.
- JavaScript Evaluation:
- Execute JavaScript code from the App Inventor blocks to manipulate the DOM.
- Example: Prefill form fields, change styles, or fetch data dynamically.
- Two-Way Communication:
- Send data from App Inventor to the WebViewer and vice versa by evaluating JavaScript using
setorgetmethods, alongsideWebViewStringfor two-way communication.
 FAQ: How will this guide and HTML Injector extension accelerate my app design and break App Inventor limitations?
By following this guide and leveraging HTML Injector, you will:
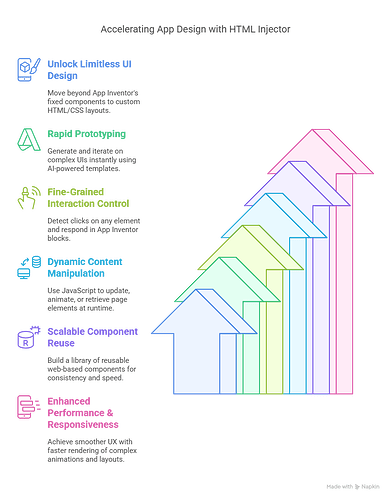
- Unlock Limitless UI Design: Move beyond App Inventor’s fixed component set to fully custom HTML/CSS layouts—create any badge, card, or dashboard in seconds.
- Rapid Prototyping: Generate and iterate on complex UIs instantly using AI-powered HTML/JS templates, shaving hours off manual design work.
- Fine‑Grained Interaction Control: Detect clicks on any element (by
id,class,tag, or index) and respond in App Inventor blocks, enabling behaviors previously impossible without deep coding. - Dynamic Content Manipulation: Use
EvaluateJavaScript(set/get) to update, animate, or retrieve page elements at runtime, seamlessly bridging App Inventor and web logic. - Scalable Component Reuse: Build a library of reusable web-based components (forms, cards, charts) that plug into any project—maintain consistency and speed across multiple apps.
- Enhanced Performance & Responsiveness: WebViews often render complex animations and layouts faster than native blocks, resulting in smoother UX.
Together, this guide and extension shatter App Inventor’s design ceiling—empowering you to deliver professional‑grade interfaces and interactions in a fraction of the time.
 Simple Examples
Example 1: Responsive Badge UI
Create a custom HTML badge and render it inside the WebViewer using HTML Injector.
HTML Snippet:
<!DOCTYPE html>
<html lang="en">
<head>
    <meta charset="UTF-8">
    <meta name="viewport" content="width=device-width, initial-scale=1.0">
    <title>Centered Badge</title>
    <style>
        html, body {
            height: 100%;
            margin: 0;
        }

        body {
            display: flex;
            justify-content: center;
            align-items: center;
            background-color: #f0f0f0;
        }

        .badge {
            background-color: #4CAF50;
            color: white;
            padding: 15px 30px;
            border-radius: 8px;
            font-family: sans-serif;
            font-size: 1.1em;
            text-align: center;
            display: inline-block;
        }
    </style>
</head>
<body>
    <div class="badge">
        Verified User
    </div>
</body>
</html>
Block:


Example 2: Dynamic Text Update
Change the content of a label inside the HTML from App Inventor.
HTML Code in WebViewer:
<!DOCTYPE html>
<html lang="en">
<head>
    <meta charset="UTF-8">
    <meta name="viewport" content="width=device-width, initial-scale=1.0">
    <title>Centered Badge</title>
    <style>
        html, body {
            height: 100%;
            margin: 0;
        }

        body {
            display: flex;
            justify-content: center;
            align-items: center;
            background-color: #f0f0f0;
        }

        .badge {
            background-color: #4CAF50;
            color: white;
            padding: 15px 30px;
            border-radius: 8px;
            font-family: sans-serif;
            font-size: 1.1em;
            text-align: center;
            display: inline-block;
        }
    </style>
</head>
<body>
  <p id="status">Waiting...</p>
</body>
</html>
Block:

Call HTMLInjector1.EvaluateJavaScript("document.getElementById('status').innerText = 'Loaded Successfully';")


Example 3: Click Event from Custom Button
Detect a click on an HTML button and react in App Inventor using the ElementClicked event provided by HTML Injector.
HTML Button:
<!DOCTYPE html>
<html lang="en">
<head>
    <meta charset="UTF-8">
    <meta name="viewport" content="width=device-width, initial-scale=1.0">
    <title>Centered Badge</title>
    <style>
        html, body {
            height: 100%;
            margin: 0;
        }

        body {
            display: flex;
            justify-content: center;
            align-items: center;
            background-color: #f0f0f0;
        }

        .badge {
            background-color: #4CAF50;
            color: white;
            padding: 15px 30px;
            border-radius: 8px;
            font-family: sans-serif;
            font-size: 1.1em;
            text-align: center;
            display: inline-block;
        }
    </style>
</head>
<body>
    <div id="Button" class="badge">
        Verified User
    </div>
</body>
</html>
Block:
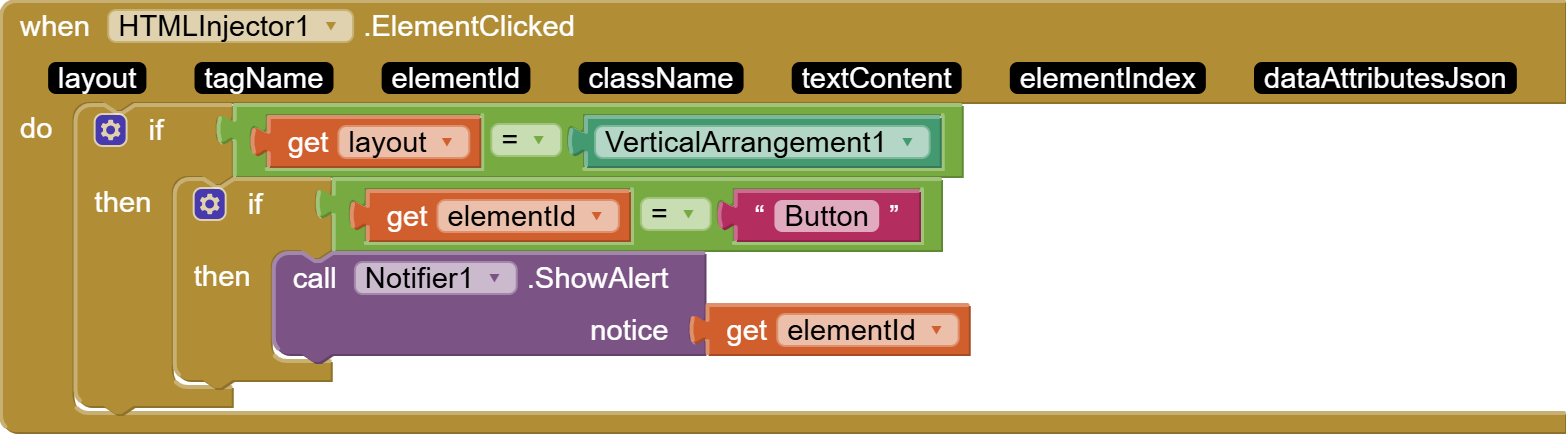
App Inventor Logic (ElementClicked Event):
When HTMLInjector1.ElementClicked
  do
    if elementId = "Button" then
      // Execute desired action, e.g., show alert
    end if
 Advanced Examples
Advanced Example: Air Conditioner Dashboard
Showcase a sophisticated dashboard design—complete with cards, dynamic gauges, and toggle controls—rendered within App Inventor via HTML Injector.
HTML/CSS/JS Overview:
HTML.txt (11.5 KB)
Blocks:
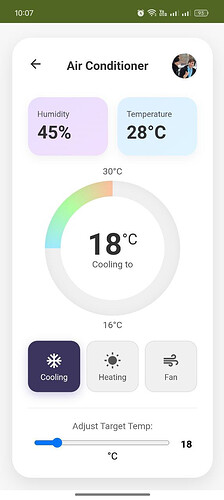
Tip: Use CSS gradients and JS gauge libraries (e.g., JustGage) to replicate the circular gauge shown.
Advanced Example: Headphones Product Card
Showcase a sleek product preview card for headphones with image, title, price, and "Buy Now" button, fully interactive via HTML Injector.
HTML/CSS/JS Overview:
HTML.txt (11.0 KB)

Accelerating Development with AI
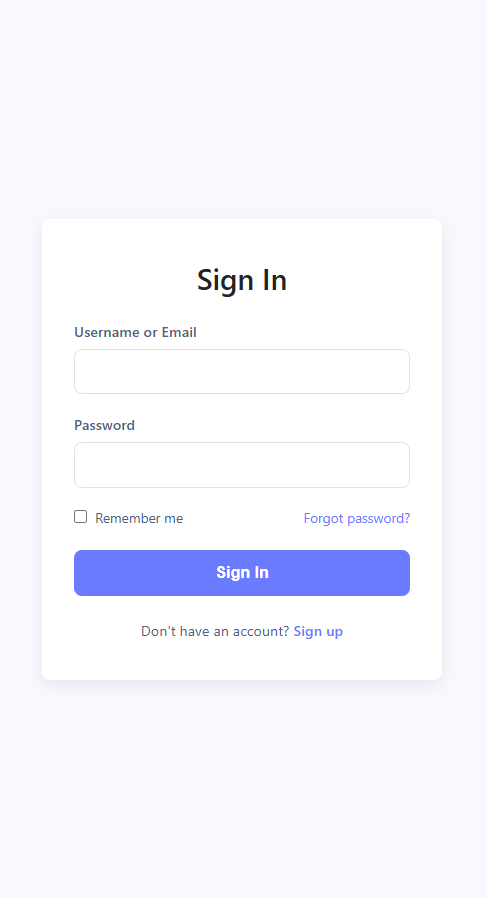
Leverage AI tools like ChatGPT to generate HTML, CSS, and JavaScript snippets tailored to your design requirements.
Prompt Example:
"Generate a responsive sign-in form with username and password fields, styled with modern CSS."
code :
<html lang="en">
<head>
    <meta charset="UTF-8">
    <meta name="viewport" content="width=device-width, initial-scale=1.0">
    <title>Sign In</title>
    <style>
        /* Basic Reset */
        *,
        *::before,
        *::after {
            box-sizing: border-box;
            margin: 0;
            padding: 0;
        }

        /* Variables for easier theming */
        :root {
            --primary-color: #6a7bff; /* Example blue */
            --primary-color-dark: #5a67d8;
            --background-color: #f8f9fe; /* Light slightly blueish background */
            --form-background: #ffffff;
            --text-primary: #212529;
            --text-secondary: #525f7f;
            --border-color: #dee2e6;
            --input-focus-border: var(--primary-color);
            --input-focus-shadow: 0 0 0 3px rgba(106, 123, 255, 0.25);
            --card-shadow: 0 5px 15px rgba(0, 0, 0, 0.08);
            --border-radius: 8px;
        }

        body {
            font-family: system-ui, -apple-system, BlinkMacSystemFont, 'Segoe UI', Roboto, Oxygen, Ubuntu, Cantarell, 'Open Sans', 'Helvetica Neue', sans-serif;
            background-color: var(--background-color);
            color: var(--text-secondary);
            display: flex;
            justify-content: center;
            align-items: center;
            min-height: 100vh;
            padding: 1rem; /* Add padding for small screens */
        }

        .login-container {
            background-color: var(--form-background);
            padding: 2.5rem 2rem; /* More padding */
            border-radius: var(--border-radius);
            box-shadow: var(--card-shadow);
            width: 100%;
            max-width: 400px; /* Max width for the form */
            text-align: center;
        }

        .login-title {
            color: var(--text-primary);
            margin-bottom: 1.5rem;
            font-size: 1.8rem;
            font-weight: 600;
        }

        .input-group {
            margin-bottom: 1.25rem;
            text-align: left; /* Align labels left */
        }

        .input-group label {
            display: block;
            margin-bottom: 0.5rem;
            font-weight: 500;
            font-size: 0.9rem;
            color: var(--text-secondary);
        }

        .input-group input {
            width: 100%;
            padding: 0.8rem 1rem;
            border: 1px solid var(--border-color);
            border-radius: var(--border-radius);
            font-size: 1rem;
            transition: border-color 0.2s ease, box-shadow 0.2s ease;
        }

        .input-group input:focus {
            outline: none;
            border-color: var(--input-focus-border);
            box-shadow: var(--input-focus-shadow);
        }

        /* Optional: Styling for form options */
        .form-options {
            display: flex;
            justify-content: space-between;
            align-items: center;
            margin-bottom: 1.5rem;
            font-size: 0.85rem;
        }

        .remember-me {
            display: flex;
            align-items: center;
        }

        .remember-me input[type="checkbox"] {
            margin-right: 0.5rem;
            width: auto; /* Override default width */
        }

        .forgot-password a {
            color: var(--primary-color);
            text-decoration: none;
            transition: color 0.2s ease;
        }

        .forgot-password a:hover {
            color: var(--primary-color-dark);
            text-decoration: underline;
        }

        .signin-button {
            display: block;
            width: 100%;
            padding: 0.9rem;
            background-color: var(--primary-color);
            color: white;
            border: none;
            border-radius: var(--border-radius);
            font-size: 1rem;
            font-weight: 600;
            cursor: pointer;
            transition: background-color 0.2s ease;
            margin-top: 1rem; /* Add space above button */
        }

        .signin-button:hover {
            background-color: var(--primary-color-dark);
        }

        .signup-link {
            margin-top: 1.5rem;
            font-size: 0.9rem;
        }

        .signup-link a {
            color: var(--primary-color);
            font-weight: 500;
            text-decoration: none;
            transition: color 0.2s ease;
        }

        .signup-link a:hover {
            color: var(--primary-color-dark);
            text-decoration: underline;
        }

    </style>
</head>
<body>

    <div class="login-container">
        <h2 class="login-title">Sign In</h2>
        <form action="#" method="post"> <!-- Add your form action URL -->
            <div class="input-group">
                <label for="username">Username or Email</label>
                <input type="text" id="username" name="username" required>
            </div>
            <div class="input-group">
                <label for="password">Password</label>
                <input type="password" id="password" name="password" required>
            </div>

            <!-- Optional: Remember Me & Forgot Password -->
            <div class="form-options">
                <div class="remember-me">
                    <input type="checkbox" id="remember" name="remember">
                    <label for="remember">Remember me</label>
                </div>
                <div class="forgot-password">
                    <a href="#">Forgot password?</a>
                </div>
            </div>

            <button type="submit" class="signin-button">Sign In</button>
        </form>

        <!-- Optional: Sign Up Link -->
        <div class="signup-link">
            Don't have an account? <a href="#">Sign up</a>
        </div>
    </div>

</body>
</html>
 Benefits for the App Inventor app development
- Enhanced UI/UX: Craft visually appealing and interactive interfaces beyond native components.
- Rapid Prototyping: Quickly design and test UI elements using web technologies.
- Educational Value: Introduce developers to web development concepts within the App Inventor environment.
- Community Growth: Encourage sharing of custom HTML/CSS/JS components and templates.
 Additional Resources
![]() HTML Injector (30.1 KB)
HTML Injector (30.1 KB)
![]() HTML_injector.aia (35.4 KB)
HTML_injector.aia (35.4 KB)
Important Note: Sometimes HTML that loads JSON data via JavaScript doesn’t render correctly if code contains comments. If you face missing data, remove all comments and keep the script clean.
 Conclusion
The HTML Injector extension unlocks a new realm of possibilities within App Inventor, allowing developers to merge the simplicity of block-based programming with the versatility of web technologies. By integrating HTML, CSS, and JavaScript, you can design faster, more dynamic, and user-friendly apps.
Embrace this fusion of technologies to elevate your app development journey!
Author: Mr.Koder, Blocks Based Programming Expert (7+ years)
- What do you think of this guide ?
- very useful
- useful
- not adding anything useful