Finally i want to use this nano with a battery and can connect it to my phone as any more common bluetooth devices like headset or speaker...
Hi
The main issue in the Sketch is all the Serial Print stuff. Since you are only using one Serial Channel, that data can only go to one device. You certainly don't want anything other than the sensor values going to your App, so either add a software Serial to maintain two channels (one to your App, one to the Arduino Serial Monitor) or simply comment out all the Serial lines except the ones sending the sensor value.
I'm not sure about your Service and Characteristic UUIDs - did they arrive as default values for the Nano?
Where abouts on the punch bag is the Nano going to be?
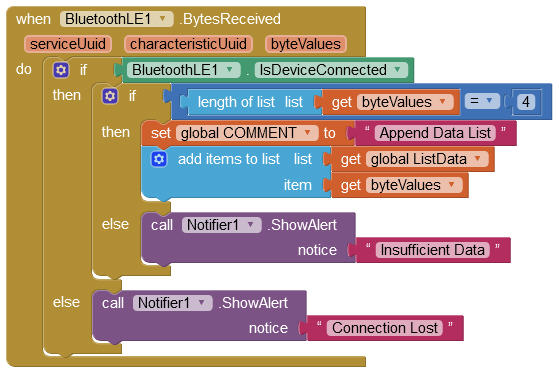
Concerning the Blocks, incorporate the change I have shown in my earlier post, and work out for yourself how to use the scan Clock Timer Blocks of my example Project in your Project.
We are here to help, but not to do your work for you.
I just take it from nRf connect ... I just want to be able of pairing my phone to the nano without connect it to my computer or an app like nRf connect (i want my own app )
at the bottom of the punching bag
yes but i am a beginner on arduino. Can you just say to me where are the mistakes ?
Can you incorporate all of my pointers first?
Actually - just realised this punch bag Project has been done before. One of the issues was data streaming. Have you measured (timed) how quickly your boxers are hitting the punch bag? Or is it just a single punch to measure?
Edit:
the goal here is to mesurate all of the punchs he give on the punch bag but just know with the acceleration the "power" of each punch (F= weight of the bag x acceleration ) (maybe with a lign in the arduino code) ...
thanks a lot for your help
That's the tricky part because generally, your boxer can punch faster than the system can process the data.

I think trying to display values in boxes on the App will be fruitless since they can change faster than the eye can tolerate watching them. I therefore suggest adding the values to a Blocks List and at the end of the session use the App Gui to display meaningful information. That would be the time to calc things like the power of the punches.
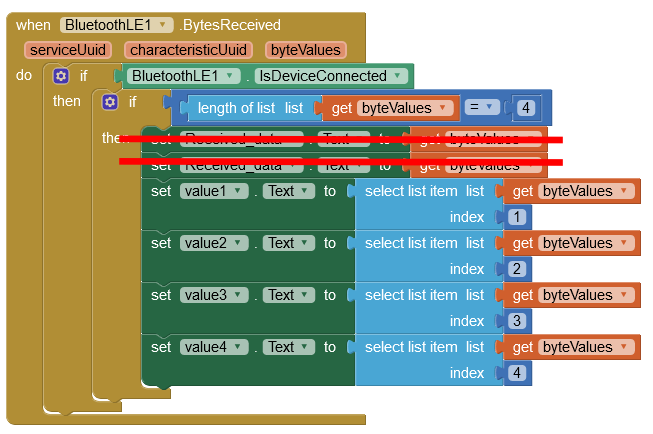
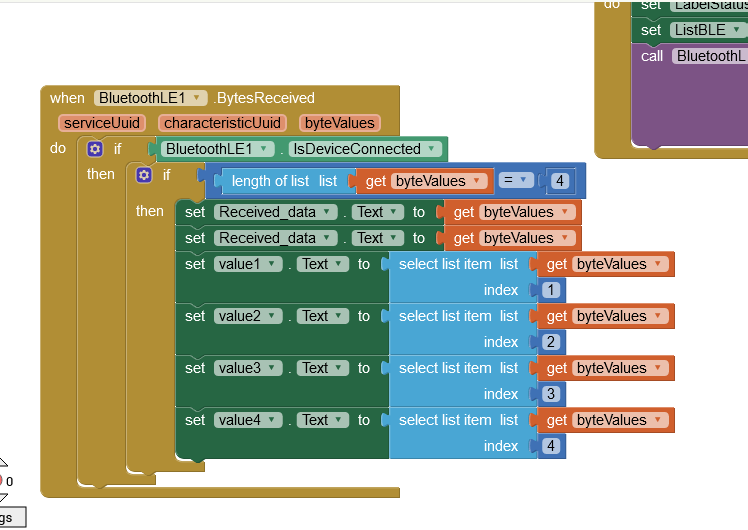
So like this (not sure at the moment if four values should be sent?)

Faiz
You are asking the same questions in other forums. You will get yourself a bad reputation as a time waster. Instead, you could be researching and experimenting with your setup.
One thing I have noticed is that others describe the Nano Sense as relatively new and relatively buggy. So your project is in for a bumpy ride in many ways. 
Ensure you install the latest drivers for the Nano 33 BLE via the Arduino Boards Manager plus the LSM9DS1 sensor driver.
I have been trying to make sense (no pun intended) of your Arduino Sketch. The most convincing guide I found was on okdo.com, but I'm uncertain if the Characteristics UUID will work (it sounds right). On compilation of the Sketch, there are several warnings about Arduino BLE lib dependencies, hence the reputation for being buggy, but the Sketch does compile. 
BleToAppPunchBag.txt (4.7 KB)
//Reference: https://www.okdo.com/getting-started/get-started-with-arduino-nano-33-ble/
//Reference: https://www.arduino.cc/en/Reference/ArduinoLSM9DS1 //IMU Sensor //https://github.com/arduino-libraries/Arduino_LSM9DS1
//NOTE: Arduino NANO 33 BLE Sense runs at 3.3V (Both digital and analog pins)

#include <ArduinoBLE.h>
#include <Arduino_LSM9DS1.h>

float fgOldX = 0.0;  //previous values
float fgOldY = 0.0;
float fgOldZ = 0.0;

bool bgCentralConnected = false; //connection check
unsigned long lgUpdateTime;      //Loop time interval

BLEService dataService("180C"); //User defined service

BLEStringCharacteristic dataCharacteristic("2A56", BLERead, 13); //www.okdo.com: standard 16-bit characteristic UUID
                                                                 //remote clients will only be able to read this

void setup()
{
          Serial.begin(9600); //115200 // initialize serial communication. Virtual serial port to connect with App via BLE
         Serial1.begin(9600); //Second serial port @ the RX0 and TX1 pins to connect with Arduino Serial Monitor //For test phase

          //begin BLE initialization
          if (!BLE.begin())
          {
              Serial1.println("starting BLE failed!");
              while (1);
          }

          BLE.setLocalName("SacDeFrappe");                   //Set name for connection
          BLE.addService(dataService);                       //Add service
          BLE.setAdvertisedService(dataService);             //Advertise service
          dataService.addCharacteristic(dataCharacteristic); //Add characteristic to service
          BLE.advertise();                                   //Start advertising

          Serial1.print("Peripheral device MAC: ");
          Serial1.println(BLE.address());

          if (!IMU.begin()) {
              Serial1.println("Failed to initialize IMU!");
              while (1);
          }

          Serial1.print("Accelerometer sample rate = ");
          Serial1.print(IMU.accelerationSampleRate());
          Serial1.println(" Hz");
          Serial1.println();
          Serial1.println("Acceleration in G's");
          Serial1.println("X\tY\tZ");

         lgUpdateTime = millis();
}

void loop()
{
         //Execute Comms approx every 250 milli seconds - this can be tweaked during physical trials
	     if(millis() - lgUpdateTime > 250)
         {
               lgUpdateTime = millis();

               if (bgCentralConnected == false)
               {
                         //BLE central (App)
                         BLEDevice central = BLE.central();

                         if (central)
                         {
                              Serial1.print("Connected to central: ");

                              //the central's BT address:
                              Serial1.println(central.address());
                              bgCentralConnected = true;
                         }

               }

               if (bgCentralConnected == true)
               {
                         updateValue();
               }
               else
               {
                         bgCentralConnected = false;
                         Serial1.print("Disconnected from central: ");
               }
         }
}

void updateValue()
{
//Sending 3 values to App
float fNewX = 0.0;
float fNewY = 0.0;
float fNewZ = 0.0;

         if (IMU.accelerationAvailable())
         {
               IMU.readAcceleration(fNewX, fNewY, fNewZ); // Read new data

               if ( int(fNewX) != int(fgOldX) || int(fNewY) != int(fgOldY) || int(fNewZ) != int(fgOldZ) ) //compare integers (floats are rarely going to be the same)
               {
                         //Send to App
                         Serial.print(fNewX,2);  //Two decimal places
                         Serial.print('|');      //note, tabs were used but they are not recognised in App Inventor
                         Serial.print(fNewY,2);
                         Serial.print('|');
                         Serial.print(fNewZ,2);
                         Serial.println();        //End of BLE Data

                         //dataCharacteristic.writeValue((String(x))); //Think of a characteristic as a fixed value describing type of data shared
                         //save the values for next comparison
                         fgOldX = fNewX;
                         fgOldY = fNewY;
                         fgOldZ = fNewZ;
               }
         }
         else
         {
               Serial1.println("IMU acceleration not available");
         }
}
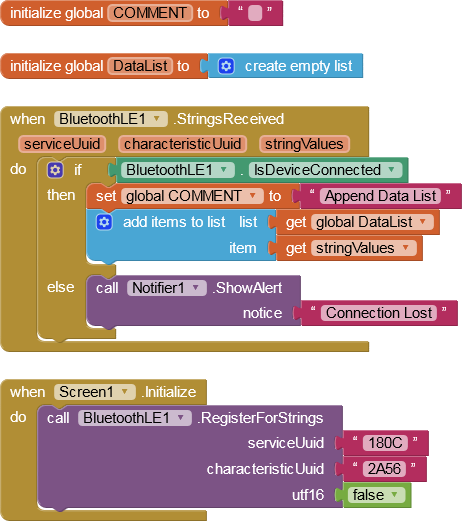
On the Blocks side, it could be easier to register for Strings instead of Bytes. The values received by the App would arrive as a single string, like so: x|y|z - which is convenient to quickly store in a list, for extraction later. However, it depends on the byte size of the string as there is typically only 23 bytes available.
For example: "200.22|300.33|400.44" = 22 bytes [UTF-8] or 44 bytes [UTF-16], including end of data mark.
We can however, if required, increase the MTU (Minimum Transmission Unit) since your Phone is using BLE v5.0
I can't find the blocks " set global COMMENT" ....
sorry but it's a project for school and i have to send it left only 2 weeks...
yes i have installated it
this arduino sketch do not allow me to connect my phone with my arduino even if i use nRf connect ... what have you modified ?
my last program worked with nRf connect
sorry for all my questions i am a beginner
Study the Sketch carefully and read my notes.
So "Less Haste More Speed". The App Inventor Blocks need to be matched with the Sketch. Can you show me what the X, Y, Z values looked like out of nRf connect? It is the size of the numbers that is of interest.
I think we may need to test a very simple Sketch to establish how to connect. I'm surprised that your last program worked with nRF connect - was that the file "bluettoth accelerometer"? That Sketch has a lot of issues that I have tried to take out. The Arduino compiler is not great at picking up syntax errors but also it can't read minds - your code is trying to send data to two different targets but it is only using one Serial, so what goes where is a throw of the dice. This is why I ask you to study everything carefully, you cannot expect to leave stones unturned and get the setup to work. Look at the notes in my Sketch - did you follow those?
find attached an updated Sketch that sends a string. Note, the only BLE Characteristic required should be BLENotify - that should be listened for by the App after Registering For Strings. The Strings Received Block will do just that - receive strings sent to the App. If we can send the data for each punch as a single string, the process should be fast enough. The speed of the process is increased by only storing values until the session has ended. Then the App can use the data collected as required (Graph?)
Other subtle changes:-
- Updated ArduinoBLE lib to version 1.2.0 (should show-up in your Arduino IDE libs list, search for ArduinoBLE). This has removed some of the Lib warnings, but added others!
- Set the Local Name to "PunchBag" - the name must not exceed 8 ASCII characters
BleToAppPunchBag2.txt (4.7 KB)
Jumping ahead - once you have got the hardware running, you can tweak the time interval of the Sketch Loop to be as fast-but-stable as possible. If you set a test that is always 10 punches, in the first test the punches should be thrown in "slow motion", such that each punch takes around 0.5 seconds. If the data recording is successful, tweak the time interval to be faster and test with slightly faster punches - and so on.
You should try to set the full 128-bit UUID in appinventor. I think in the sketch as well. Maybe then it will work.

