Hello friends,
in this tutorial Martyn Currey manages to use a Bluetooth HM-10 (BLE) in stand-alone mode, that is, without Arduino or any other device, to turn on/off an LED.
HM-10 stand-alone: Remote control an LED using MODE2:
http://www.martyncurrey.com/hm-10-bluetooth-4ble-modules/
I have tried it with a Bluetooth HC-05, but I have not succeeded.
For it to work for me I had to accompany the HC-05 with an HC06. Here is my experience.
1 Like
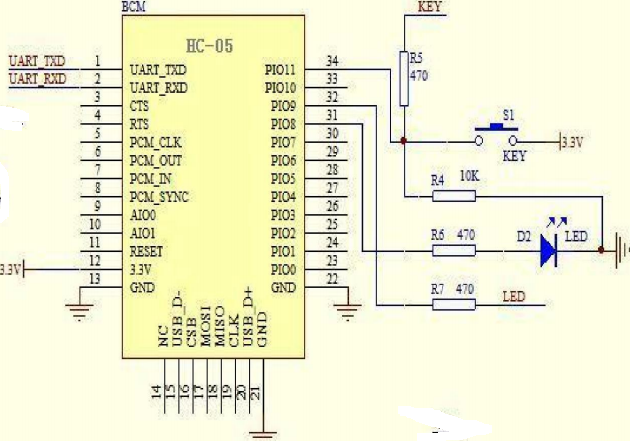
1.- Bluetooth HC-05. AT commands.
HC-05 Bluetooth modules contain an MCU.
It has PIO terminals.
Image from (Datasheet):
http://kio4.com/arduino/imagenes/banggood-hc-05-manual-optimized.pdf
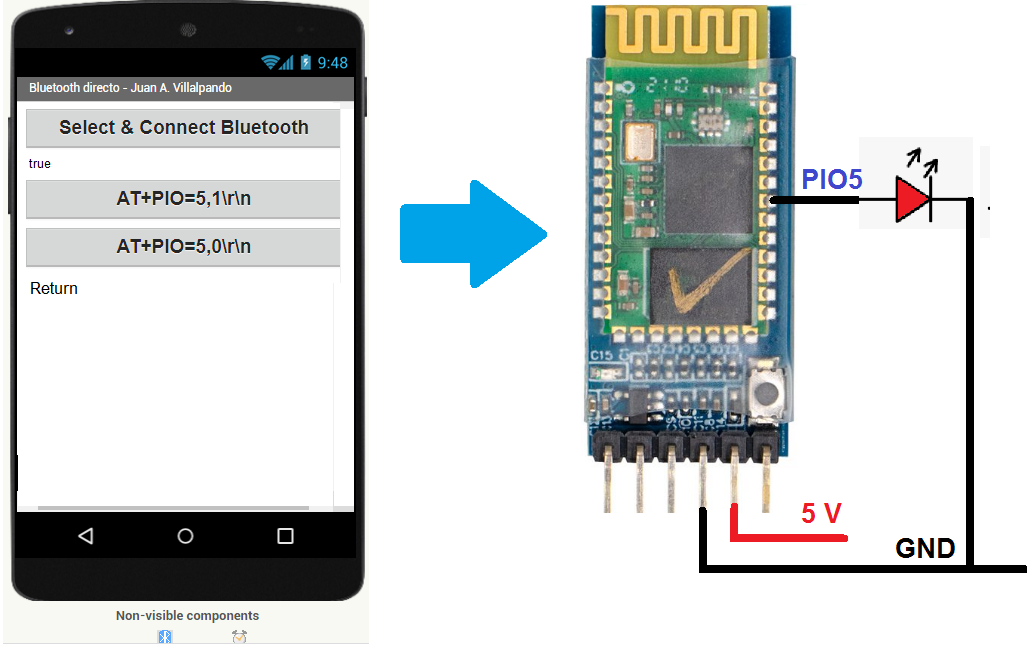
- I wanted to make the following montage. I soldered a wire to the PIO5.
I wanted to turn on the LED from the app using AT commands.
But it didn't work for me.
I tried other methods.
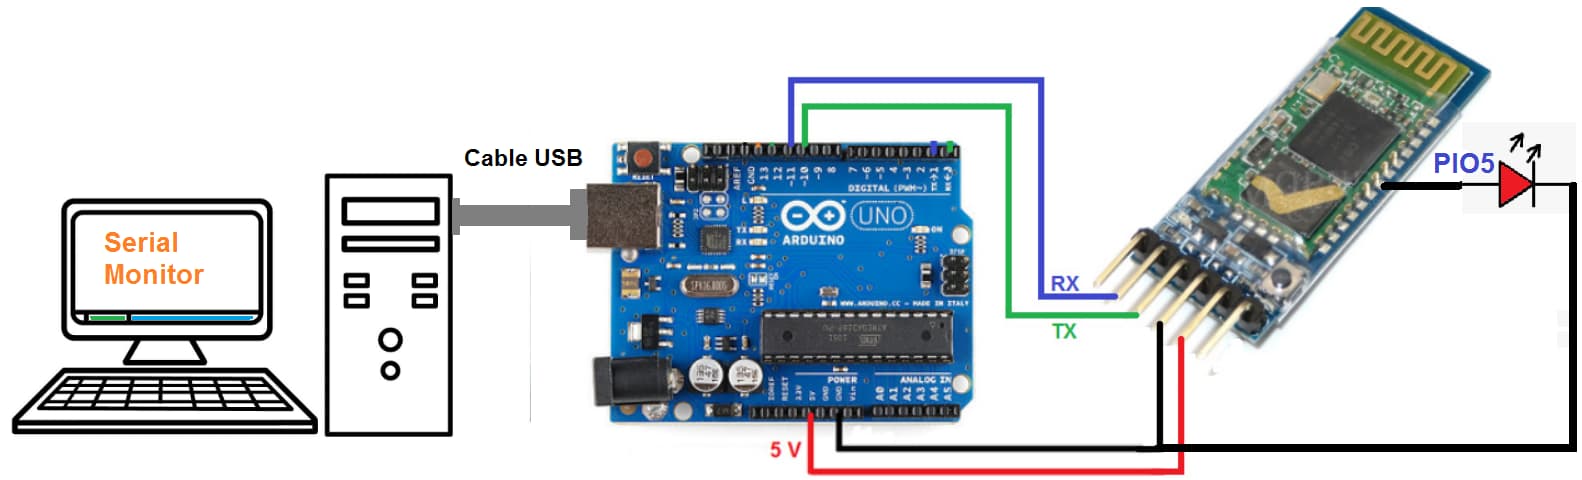
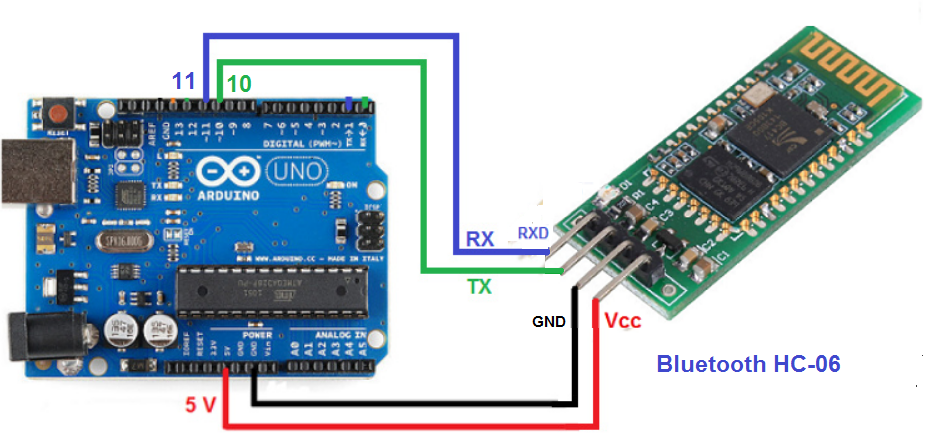
2.- HC-05. Arduino. AT commands. Turn on/off LED PIO5.
Turn on/off LED PIO5 from Serial Monitor.
#include <SoftwareSerial.h>
SoftwareSerial BT(10,11);

void setup()
{
  BT.begin(38400);
  Serial.begin(38400);
}

void loop(){
  if(BT.available()) {Serial.write(BT.read());}

  if(Serial.available()){BT.write(Serial.read());}
}
We must put the module in Mode 2:
To program in Mode 2, we remove the red wire (5 V) from the module's power supply. We press the small button on the module. We connect the red wire to 5 V by holding down the button. When the red wire is connected, we release the button.
The module's LED will blink slowly.
[In Mode 2 the module always receives the AT information at 38400]
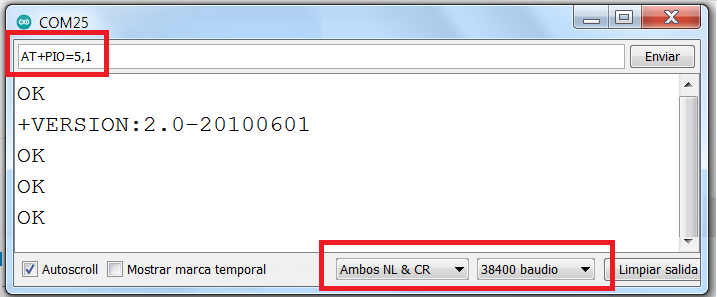
- Serial Monitor. Both NL & CR. 38400 bauds.
- We write the following codes, the LED (PIO5) will turn off and on.
AT
AT+VERSION
AT+PIO=5,1
AT+PIO=5,0
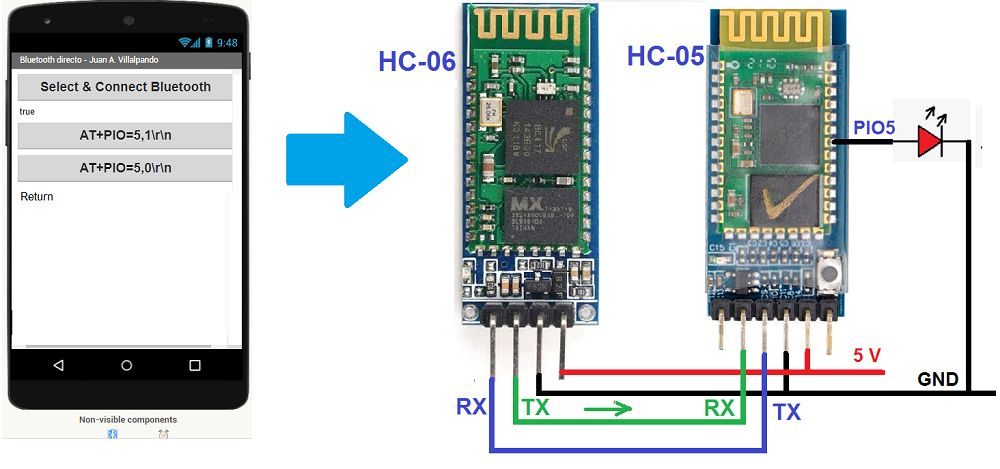
3A.- App to HC-06 to HC-05. AT commands. Turn on/off LED in HC-05. (I)
- HC-05 in Mode 2. [38400 bauds]
- We must set the HC-06 to 38400 so that it can communicate with the HC-05.
- Baud rate change on the HC-06:
#include <SoftwareSerial.h>
SoftwareSerial BT(10,11); // TX to pin_10. RX to pin_11 of Arduino.

void setup() {
  Serial.begin(9600);
  BT.begin(9600);
}

void loop() {
    if(Serial.available()) {
    String command = Serial.readStringUntil('\n');
    Serial.println(command);
    BT.print(command);
    }

   if (BT.available()){
   String retorno = BT.readStringUntil('\n');
   Serial.println(retorno);
   }
}
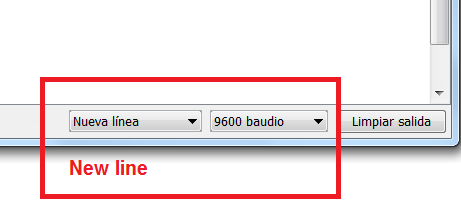
- Serial Monitor with New line.
AT
AT+VERSION
AT+BAUD6
Now HC-06 in 38400 baud.
1 .. 1200
2 .. 2400
3 .. 4800
4 .. 9600
5 .. 19200
6 .. 38400
7 .. 57600
8 .. 115200
All ready, we continue...
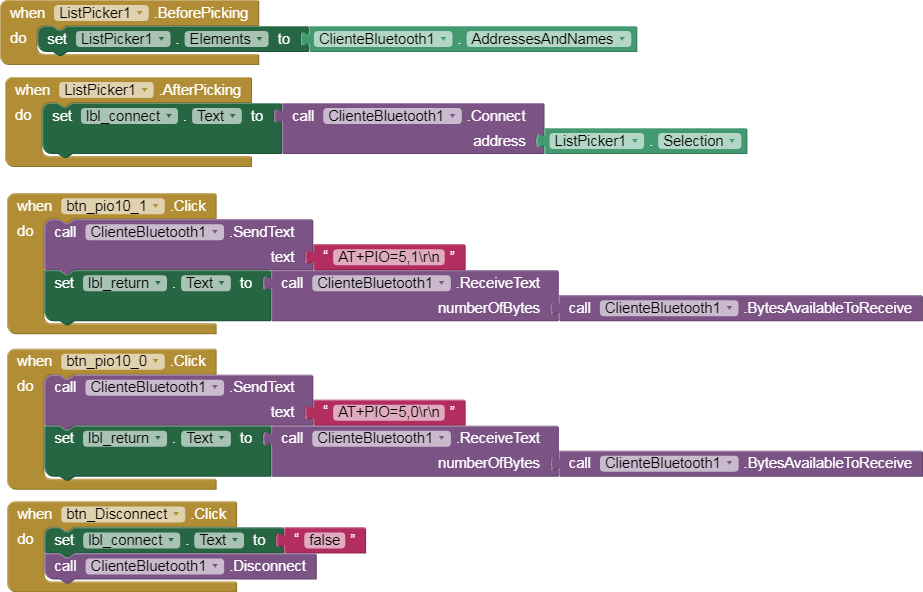
3B.- App to HC-06 to HC-05. AT commands. Turn on/off LED in HC-05. (II)
p9_Bluetooth_HC_05_AT.aia (2.5 KB)
App connects via Bluetooth with the HC-06.
App sends AT commands to the HC-06.
The HC-06 sends those AT commands to the HC-05.
Turns on/off the LED (PIO5).
AT+PIO=5,1\r\n
AT+PIO=5,0\r\n