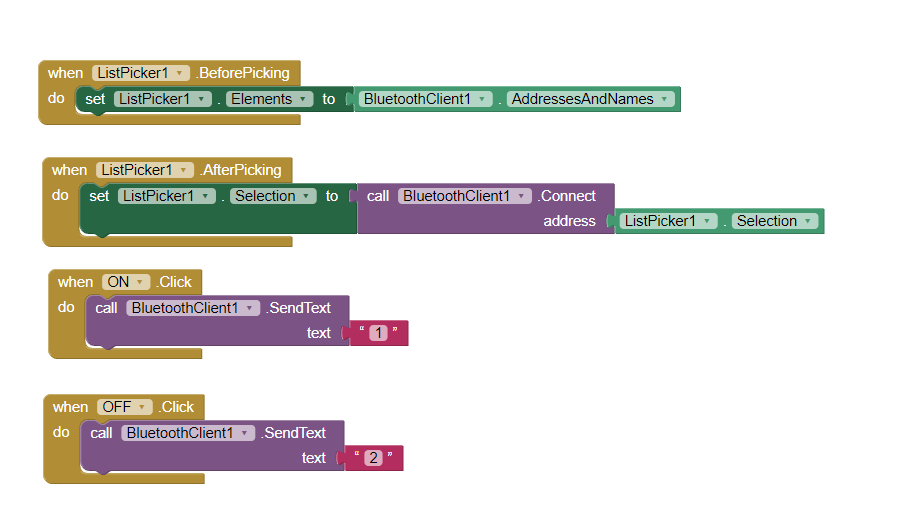
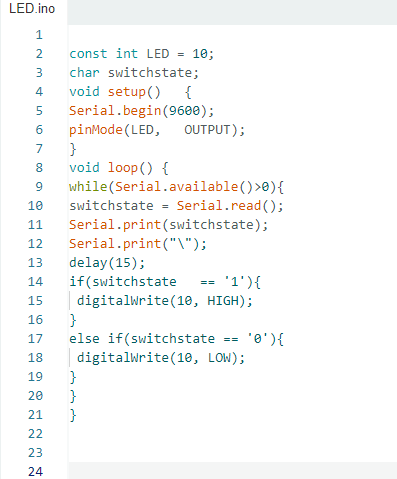
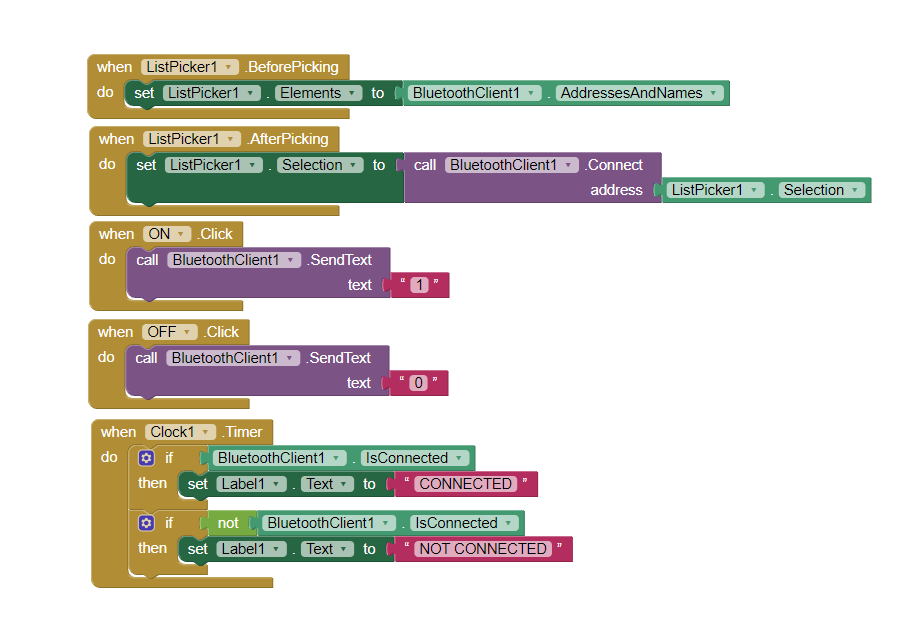
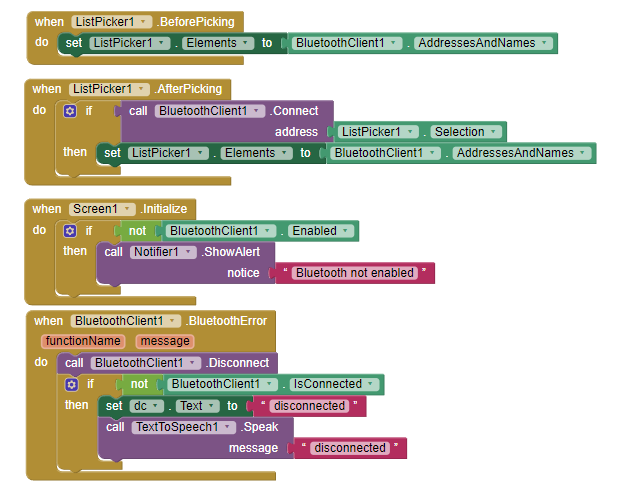
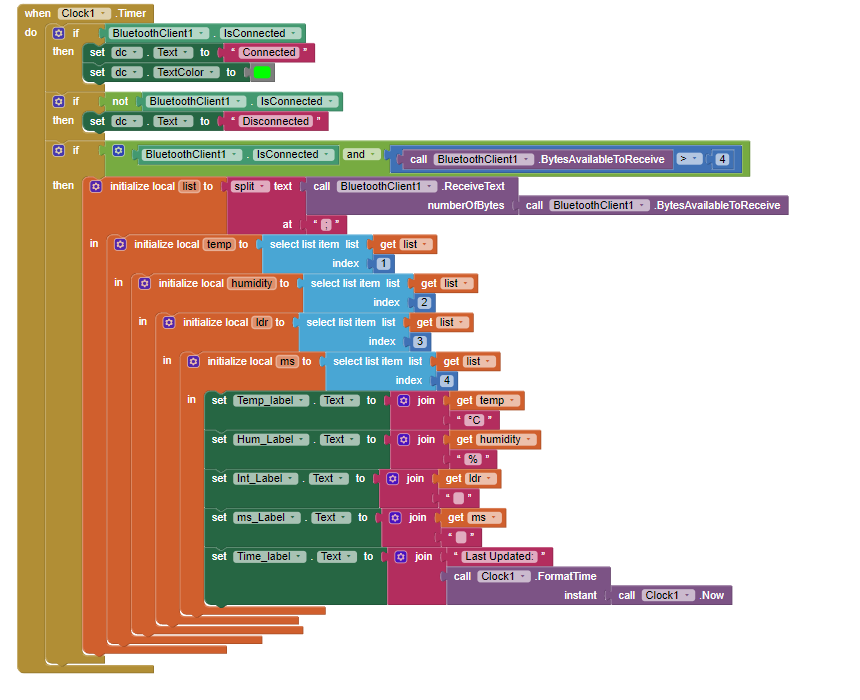
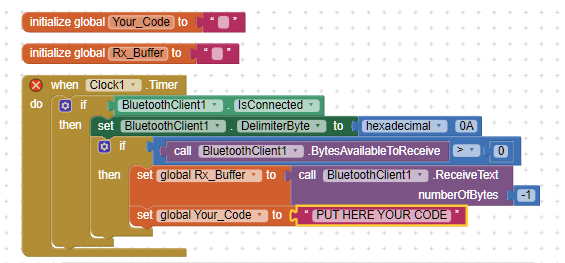
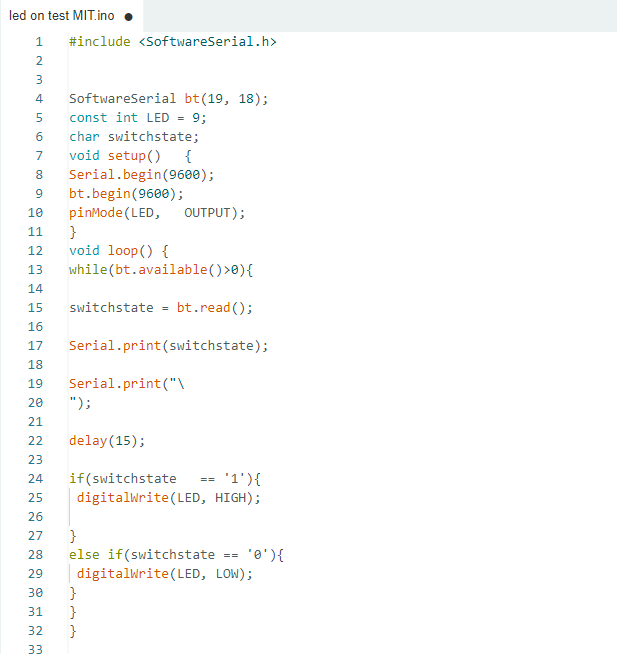
This is my current project's code for both arduino and app. The app is able to recieve data accurately from the arduino.
#include <SoftwareSerial.h>
#include <LiquidCrystal_I2C.h>
#include <Wire.h>
#include <DHT.h>
#define DHTPIN A1
#define DHTTYPE DHT22
#define LEDG_PIN 9
#define LEDR_PIN 10
SoftwareSerial bt(18, 19);
DHT dht(DHTPIN, DHTTYPE);
LiquidCrystal_I2C lcd1 = LiquidCrystal_I2C(0x27, 20, 4);
LiquidCrystal_I2C lcd2 = LiquidCrystal_I2C(0x26, 20, 4);
float humidity;
float temp;
int relayOn = LOW;
int relayOff = HIGH;
int ldr = A0;
int ms = A2; //moisture sensor
int fan = 4;
int led = 5;
int water = 6;
int valueldr = 0;
int valuems = 0;
char Incoming_value = 0;
void setup() {
lcd1.init();
lcd1.backlight();
lcd2.init();
lcd2.backlight();
pinMode(ldr, INPUT);
pinMode(ms, INPUT);
pinMode(fan, OUTPUT);
pinMode(led, OUTPUT);
pinMode(water, OUTPUT);
pinMode(LEDR_PIN, OUTPUT);
pinMode(LEDG_PIN, OUTPUT);
bt.begin(9600);
dht.begin();
Serial.begin(9600);
}
void loop(){
delay (2000);
valueldr = analogRead(ldr);
valuems = analogRead(ms);
humidity = dht.readHumidity();
temp = dht.readTemperature();
lcd1.setCursor(0,0);
lcd1.print("Humidity:");
lcd1.setCursor(0,1);
lcd1.print(humidity);
lcd1.print("%");
lcd1.setCursor(0,2);
lcd1.print("Temperature:");
lcd1.setCursor(0,3);
lcd1.print(temp);
lcd1.print((char)223);
lcd1.print("C");
lcd2.setCursor(0,0);
lcd2.print("Light Intensity:");
lcd2.setCursor(0,1);
lcd2.print(valueldr);
lcd2.setCursor(0,2);
lcd2.print("Soil Moisture:");
lcd2.setCursor(0,3);
lcd2.print(valuems);
if (valueldr > 900)
{
digitalWrite(led, relayOn);
}
else {
digitalWrite(led, relayOff);
}
if (humidity > 70) {
digitalWrite(fan, relayOn);
}
else {
digitalWrite(fan, relayOff);
}
if (valuems < 10) {
digitalWrite(water, relayOn);
}
else {
digitalWrite(water, relayOff);
}
if (temp < 40 && temp > 20) {
digitalWrite(LEDR_PIN, HIGH);
digitalWrite(LEDG_PIN, LOW);
}
else if(temp < 20 && temp > 40) {
digitalWrite(LEDR_PIN, LOW);
digitalWrite(LEDG_PIN, HIGH);
}
bt.print(temp);
bt.print(";");
bt.print(humidity);
bt.println(";");
bt.print(analogRead(ldr));
bt.println(";");
bt.print(analogRead(ms));
bt.println(";");
}
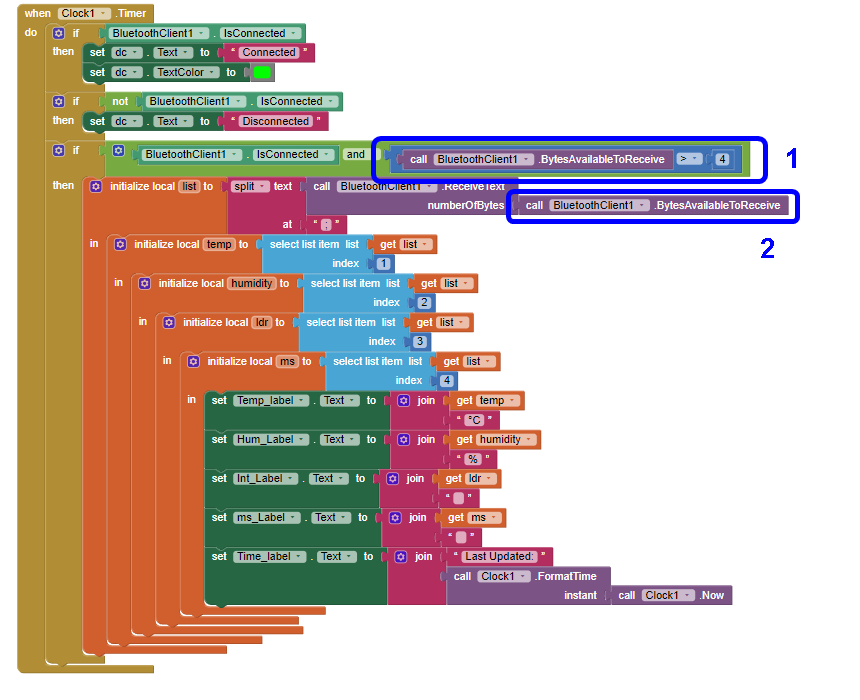
 ) improvement in your Arduino file.
 , it's just to know if you have succeeded and (in the case) how, so to share the knowledge with the community.
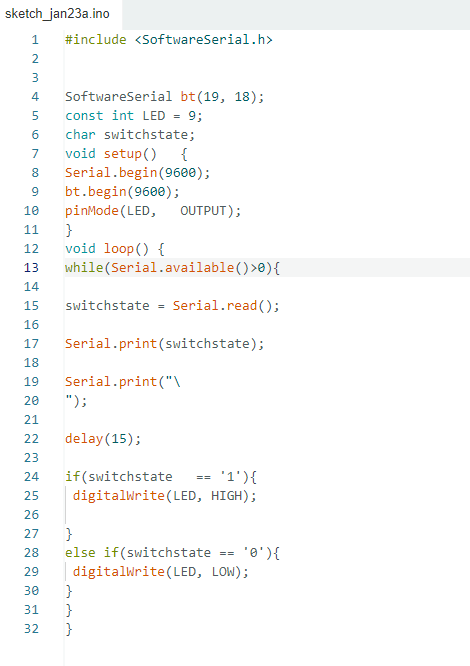


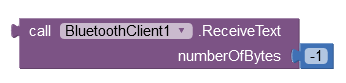
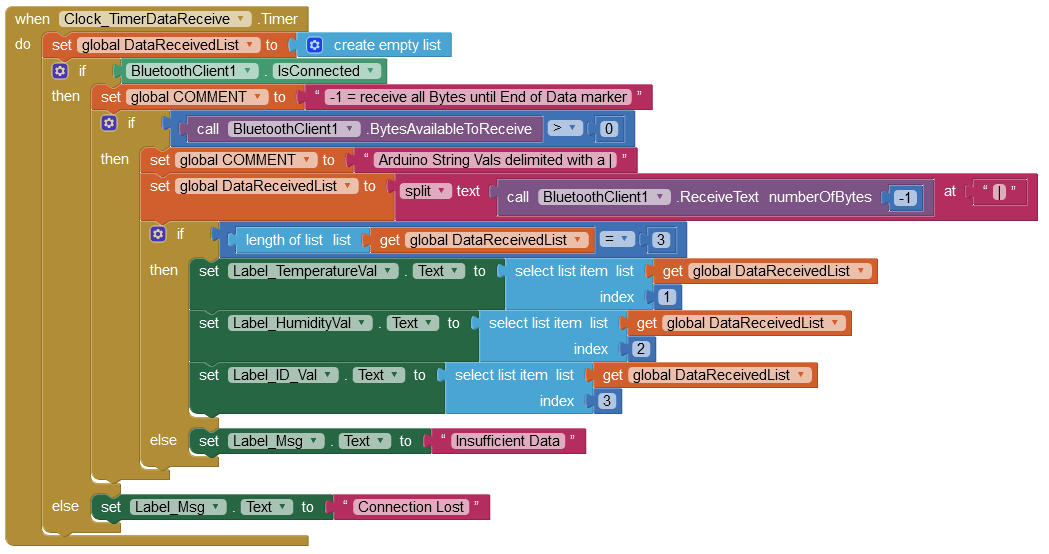
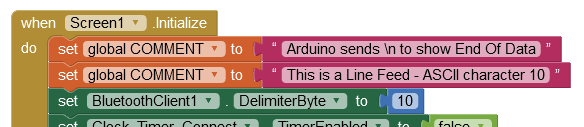
 blocks