Supercharge Your App Inventor Apps with Phone Authentication (Firebase): A Breakthrough Solution!
Video Preview
Introduction
For a long time, secure phone authentication seemed like an impossible dream for App Inventor developers. But we're about to change that! This guide unlocks a breakthrough solution, empowering you to integrate robust phone authentication using Firebase – a feature previously considered off-limits.
Why Phone Authentication Matters
-
Enhanced Security: Ditch those weak passwords! Phone authentication verifies users with one-time codes, significantly bolstering your app's security.
-
User-Friendly: Most people always have their phones nearby, making phone authentication a convenient and accessible choice for your users.
-
Personalized Experiences: Once authenticated, you can securely store user data (with their consent!) to enable personalized content, user profiles, and more engaging app experiences.
The Challenge (and Our Solution!)
App Inventor doesn't natively support the direct integration of Firebase phone authentication. To overcome this, we'll use a clever workaround:
-
Create a Simple HTML Page: We'll build a basic webpage that handles the Firebase phone authentication process, including reCAPTCHA verification.
-
Host on GitHub or Hostinger: We'll host this page on a free platform like GitHub Pages or a reliable web hosting service like Hostinger.
-
Connect to Firebase: We'll connect our hosted page to our Firebase project and add the domain to our authorized domains for authentication.
-
Integrate with App Inventor: Finally, we'll use the App Inventor WebViewer component to seamlessly embed this webpage into our app.
Let's Dive In!
1. Setting Up Firebase
-
Create a Firebase Project:
-
Go to the Firebase console: https://console.firebase.google.com
-
Click "Add project" and follow the setup wizard.
-
-
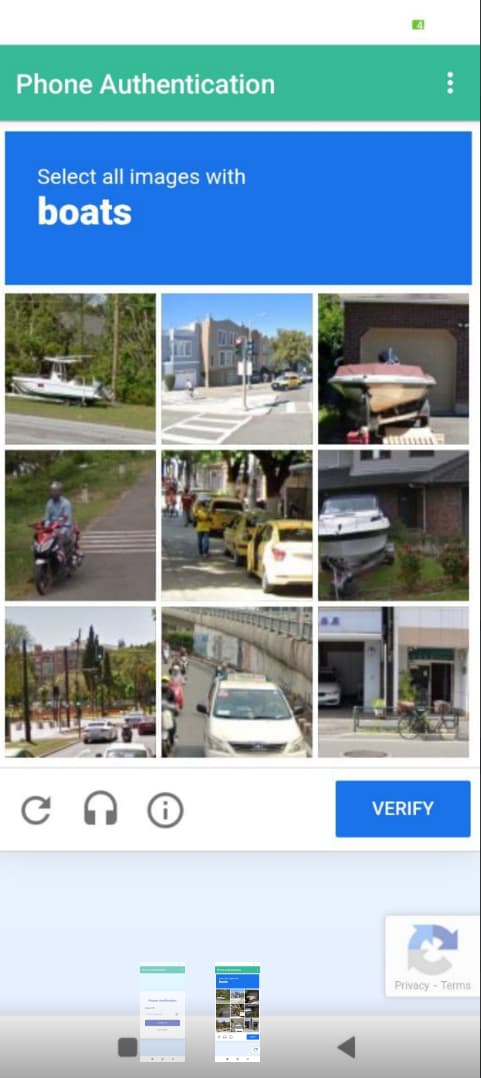
Enable Phone Authentication:
-
Navigate to "Authentication" in your Firebase project.
-
Select "Sign-in method" and enable "Phone".
-
-
Get Your Firebase Configuration:
-
In your Firebase project settings (gear icon), choose "Web" to add a web app.
-
Copy the firebaseConfig object (you'll need this for your HTML page).
-
-
Add Authorized Domain:
-
Under "Authentication" -> "Sign-in method", scroll to "Authorized domains"
-
Add the domain where you'll host your HTML page (e.g., yourusername.github.io or yourdomain.com).
-
2. Crafting the HTML Page
Create an HTML file (e.g., auth.html) with the following structure:
<!DOCTYPE html>
<html>
<head>
  <title>Phone Authentication</title>
  <script src="https://www.gstatic.com/firebasejs/8.10.1/firebase-app.js"></script>
  <script src="https://www.gstatic.com/firebasejs/8.10.1/firebase-auth.js"></script>
  <script>
    // Your firebaseConfig object goes here
    var firebaseConfig = {
      // ... paste your Firebase configuration ...
    };
    firebase.initializeApp(firebaseConfig);

    // ... (Add your phone authentication JavaScript code here) ...
  </script>
</head>
<body>
  <!-- Add your phone authentication HTML elements here -->
</body>
</html>
3. Hosting the HTML Page
-
GitHub Pages:
-
Create a new GitHub repository.
-
Push your auth.html file to the repository.
-
Enable GitHub Pages for your repository (usually found in the "Settings" tab).
-
-
Hostinger (or similar):
-
Sign up for a free or paid account.
-
Upload your auth.html file to the appropriate directory on your web server.
-
4. Integrating with App Inventor
-
Add the WebViewer Component:
- In your App Inventor project, go to "User Interface" and drag a WebViewer component onto your screen.
-
Set the WebViewer URL:
- In the WebViewer properties, set the Url to the address where you hosted your HTML page (e.g., https://yourusername.github.io/auth.html or https://yourdomain.com/auth.html).
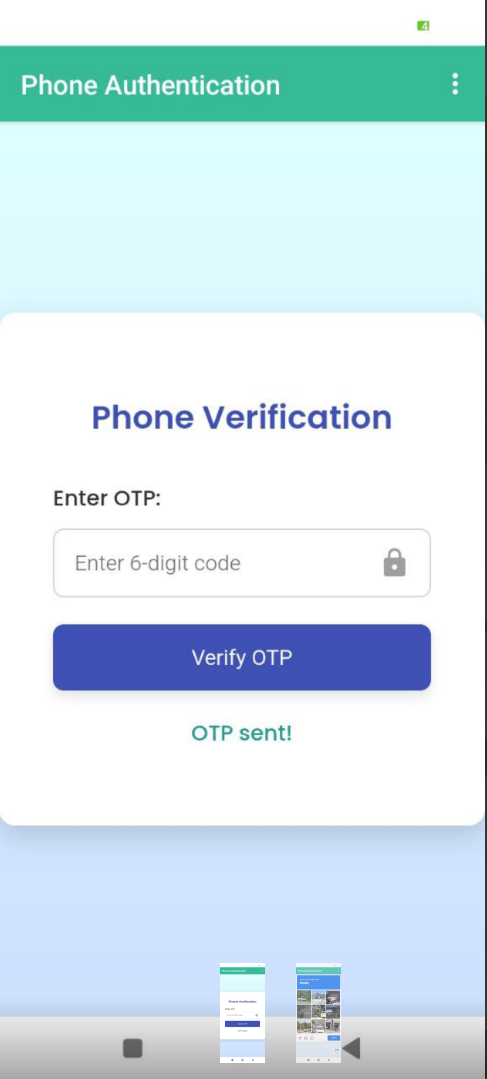
5. The Phone Authentication Logic (JavaScript in auth.html)
// ... (inside the <script> tags of your auth.html file) ...

 // Initialize reCAPTCHA
 window.recaptchaVerifier = new firebase.auth.RecaptchaVerifier(
   // ... (Add reCAPTCHA configuration) ...
 );

 // Function to send the OTP
 function sendOTP(phoneNumber) {
   // ... (Implement OTP sending logic) ...
 }

 // Function to verify the OTP
 function verifyOTP(verificationId, otp) {
   // ... (Implement OTP verification logic) ...
 }

 // Expose the sendOTP and verifyOTP functions to App Inventor
 window.sendOTP = sendOTP;
 window.verifyOTP = verifyOTP;
6. Connecting App Inventor and the Web Page
-
JavaScript in auth.html:
- Use window.AppInventor.setWebViewString() to send data (e.g., user ID, phone number) back to App Inventor.
-
App Inventor WebViewer.WebViewStringChanged Event:
- Use WebViewer1.WebViewString to receive data from the web page and update your app's UI and logic accordingly.
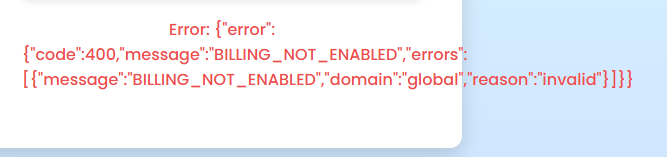
Security Considerations
While powerful, it's crucial to be aware of potential security implications:
-
Domain Security: Ensure your chosen domain is secure and protected from hijacking. Use a reputable provider, enable HTTPS, and consider domain privacy.
-
Cross-Site Scripting (XSS): Prevent XSS vulnerabilities in your auth.html file by sanitizing all user input and implementing security headers.
-
Data Protection: Minimize the sensitive data (like OTPs) transmitted between the web page and your App Inventor app.
Congratulations! You've achieved the impossible! You now have a powerful phone authentication system integrated into your App Inventor project. Remember to handle security, error messages, and user experience thoughtfully to build secure and user-friendly apps!
Tutorial video
A 5-minute tutorial video about how to set up this method in MIT App Inventor :
PhoneAuthenication Tutorial.mp4
or via youtube ![]()

Demo APK File ![]()
download APK from here
files of the Method
If you want to buy the method, you will get:
-
The
.aiafile -
An HTML page that has the script code Download Now
my socials
- My youtube channel
Where you can find useful tutorial video
my website
Where you can find useful extension share your works such as aix files aia files and more to help other and also gain money
Donate
if you find my method useful you can support me :
If you have any problem, DM me.