Yes, that was the file I asked.
In attachment you'll find my revision.
You'll see some differences.
The clock is not used to verify if the BT has been successfully connected because the "connect" block returns already a boolean: true if the connection has been successfull or false if not. Until the connection attempt is in progress the app waits there and don't do anything else.
I've instead used the clock as a "polling" system (every 10 milliseconds) to verify if the Arduino has sent something in response to a "0" or "1" sent by the app.
The clock is enabled only after a successfull BT connection has been established. If enabled before, it can generate runtime errors.
Please also note that the BT takes time to work, so you'll never have an immediate response, and you cannot check for incoming characters as soon as you have just sent something. In other words you cannot expect to receive (bytes_available_to_receive) anything immediately after a sending block. To this purpose the clock is periodically checking if something is incoming and, if not, exits, if yes, it fetches all the data. Please note the "-1" : this means until the terminator character is received (Linefeed or 0x0A). To this purpose your last sending from Arduino must use a BTSerial.println();
I've also added a Notifier just to warn the user whether the BT connection ceases to work during time.
The two buttons are enabled only after the BT comm's works fine. Enabling them before is useless and can mislead the user.
It is supposed that everything related to the permissions is already working at your side (i.e. granted by your device: phone or tablet where you are running the apk).
Lastly, I've changed the names of labels and buttons in a way to assign them a more meaningful identifier. This will ease you, when your app will become larger, to identify Labels from Buttons, List Pickers, and so on.
It's a long way....
USKled.aia (4.1 KB)
Hi, thanks for your responses and time it took you to make it, I will try if that works. What is the best way to open aia file type
Simply download it and import it

Thank you
Can you elaborate on (-1) part and whether i should modify my arduino code since i am not native english speaker, i am not familiar with buffer terminology for e.g.
-1 means that the receiver block will wait until it receives from the BT the character 0x0A (linefeed, decimal 10).
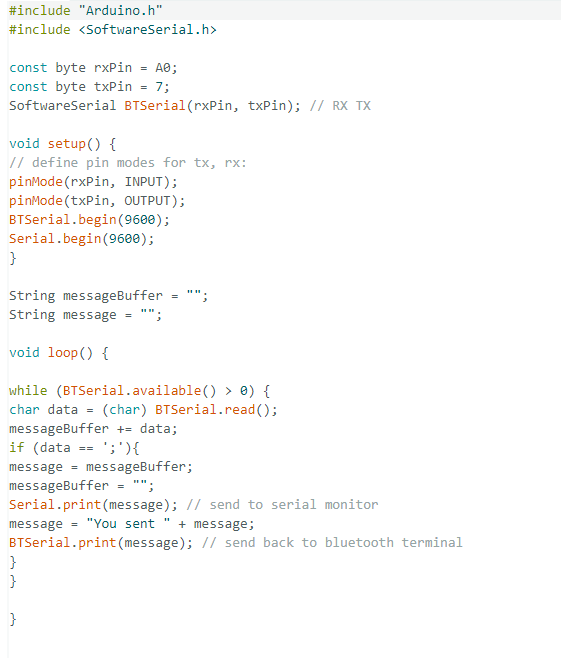
To this purpose your Arduino code shall be modified as follows:
BTSerial.print(message); // now is like this
BTSerial.println(message); // you shall change it like that by using a "println" instead of a simple "print"
"buffer" is, typically, in the programming jargon "a variable that contains a temporary value" whose contents can be retrieved for future use, and can be rewritten after its use.
In this case, a memory variable that contains the incoming characters (or string) and, once used, can be cleared or rewritten by a new received char (or string).
Moreover: by looking again to your .aia I've seen that you left set the "secure" mode for the BT comm's. It is better to untick this flag, otherwise the BT requires every time to insert the 4 digits pins to establish the connection. Please discard my previous aia an use the newly annexed one.
USKled.aia (4.1 KB)
PS I'm Italian, so I'm not a native English speaker either :grin
If the only reason you uploaded the another project is unticking the secure option, you could have just said I should do it:grin: Maybe programming isn't one of my strengths but I could probably read:rofl:
Dear Bruno,
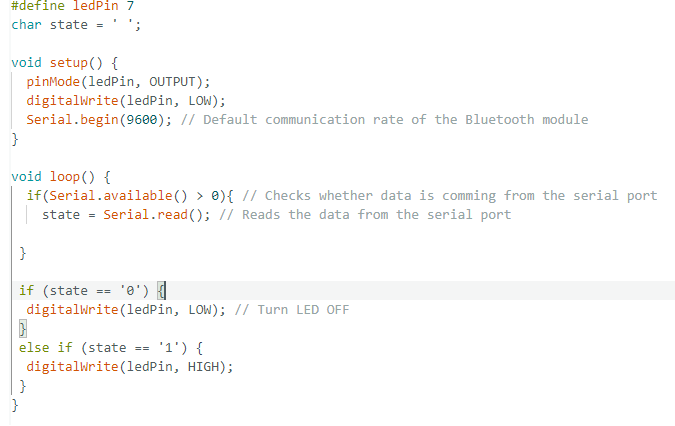
I'm getting a bit confused. Neither of the two Arduino codes you posted here are not your first, nor mine (the snapshot with the dark screen). My code was intended to just switch ON/OFF the led if (and only if) a character is received on the BT. In yours, you use an if-then-else (that I didn't use) also if nothing is received from BT. And originally you weren't using the SoftwareSerial library.
Moreover: in the first half of the code now you set as rxPin, pin A0, while before it was pin 6 and txPin was pin 13 while now is 7. Why all these changes ? Please stay in a stable configuration: for example the one that you had working with the Serial Bluetooth Terminal app.
As far as your programming capabilities is concerned, I have no doubts, but in my "old" (I'm 65!)  experience it's better to exchange always the complete code, in order to be sure that, at any moment, we have "exactly" the same code.
The following code is the one for Arduino that uses the SoftwareSerial library (as yours) intended for a UNO board type. If you have a different board, please be careful in changing the pins assignment: in particular the SoftwareSerial library requires that the pins used for the Tx and Rx must have PWM capability.
My hint is : once you have coded your Arduino board, verify if everything works fine with the Serial Bluetooth Terminal app. and, only after you are done with that, use the AI2 app (try mine).
// This code is intended to be used on an Arduino UNO board
// In case of use with other types of board, please change accordingly
// the pin assigment.
// It echoes anything received from BT on the PC screen. Serial Monitor baudrate 9600.
#include <SoftwareSerial.h>
#define ledPin 13 // default LED on the Arduino UNO board
#define TxPin 10 // required by SoftwareSerial (PWM capabilities needed)
#define RxPin 9 // required by SoftwareSerial (PWM capabilities needed)
SoftwareSerial BTSerial(RxPin,TxPin); // instantiate the library
char state = ' '; // define input buffer as char (not empty but a blank)
//===============================================================================================
void setup() // done once at reset
{
pinMode(RxPin,INPUT); // to be connected to Tx pin of HC05
pinMode(TxPin,OUTPUT); // to be connected to Rx pin of HC05
pinMode(ledPin,OUTPUT); // init port mode
BTSerial.begin(9600); // supposed baudrate of HC05 (38400 ?)
digitalWrite(ledPin,LOW); // initialize the local LED to off
Serial.begin(9600); // Used to echo on PC monitor the data received on BT
}
//===============================================================================================
void loop() // repeated forever
{
if (BTSerial.available()) // any char from BT ?
{
state = BTSerial.read(); // yes, get it
Serial.print("Received : "); // echoes it on the PC screen
Serial.println(state);
if(state=='0') // the received char to switch off the led
digitalWrite(ledPin,LOW);
if(state=='1') // the received char to switch on the led
digitalWrite(ledPin,HIGH);
}
}
Hey, thanks, the reason the pins are changed is because I tried different ones throughout these tries since I have dasduino and not arduino so I tried out different pins and I guess the code I copied here used those ones. The code might be different for the same reason, I tried combining to see whether it would work, sorry for inattention😀
No problem @Bruno_Dragas,
it's just for you: find a situation in which at least with the SBT it works, than go on from that point onward.
Cheers
Sir, I can't thank you enough!
Dear @Bruno,
your best thank is when you'll have it working 
Well it does! 
Then .... Merry Christmas !!!
This topic was automatically closed 7 days after the last reply. New replies are no longer allowed.

