Did you try my test aia?
android version 11, and bluetooth 5.0
yes, I've try it
It's same, always scanning
You can use your own and bind them to the value sent/received.
You can't get the App right without getting the Arduino Sketch right - they work together. Upload your Sketch (,ino) for someone to check alongside your Project (.aia). I'm sorry but I can't help with the detail right now.
It's possible that your Arduino has a fault, but more likely you are not running it at the correct baud rate. Search the forum for "BLE Baud Rate", I believe it should be 115200 for the BLE 33 board.
Also ensure you are using the latest available MIT BLE extension.
Tip - Google security requires Location to be switched on - you can trigger that by dragging a location sensor component into your project and requesting permission ACCESS_FINE_LOCATION.
1 Like
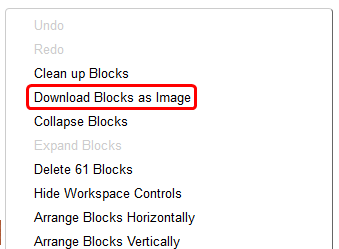
In future posts Muhammad, please use the App Inventor built-in function:
Right-mouse in the Blocks work area and select "Download Blocks as image"
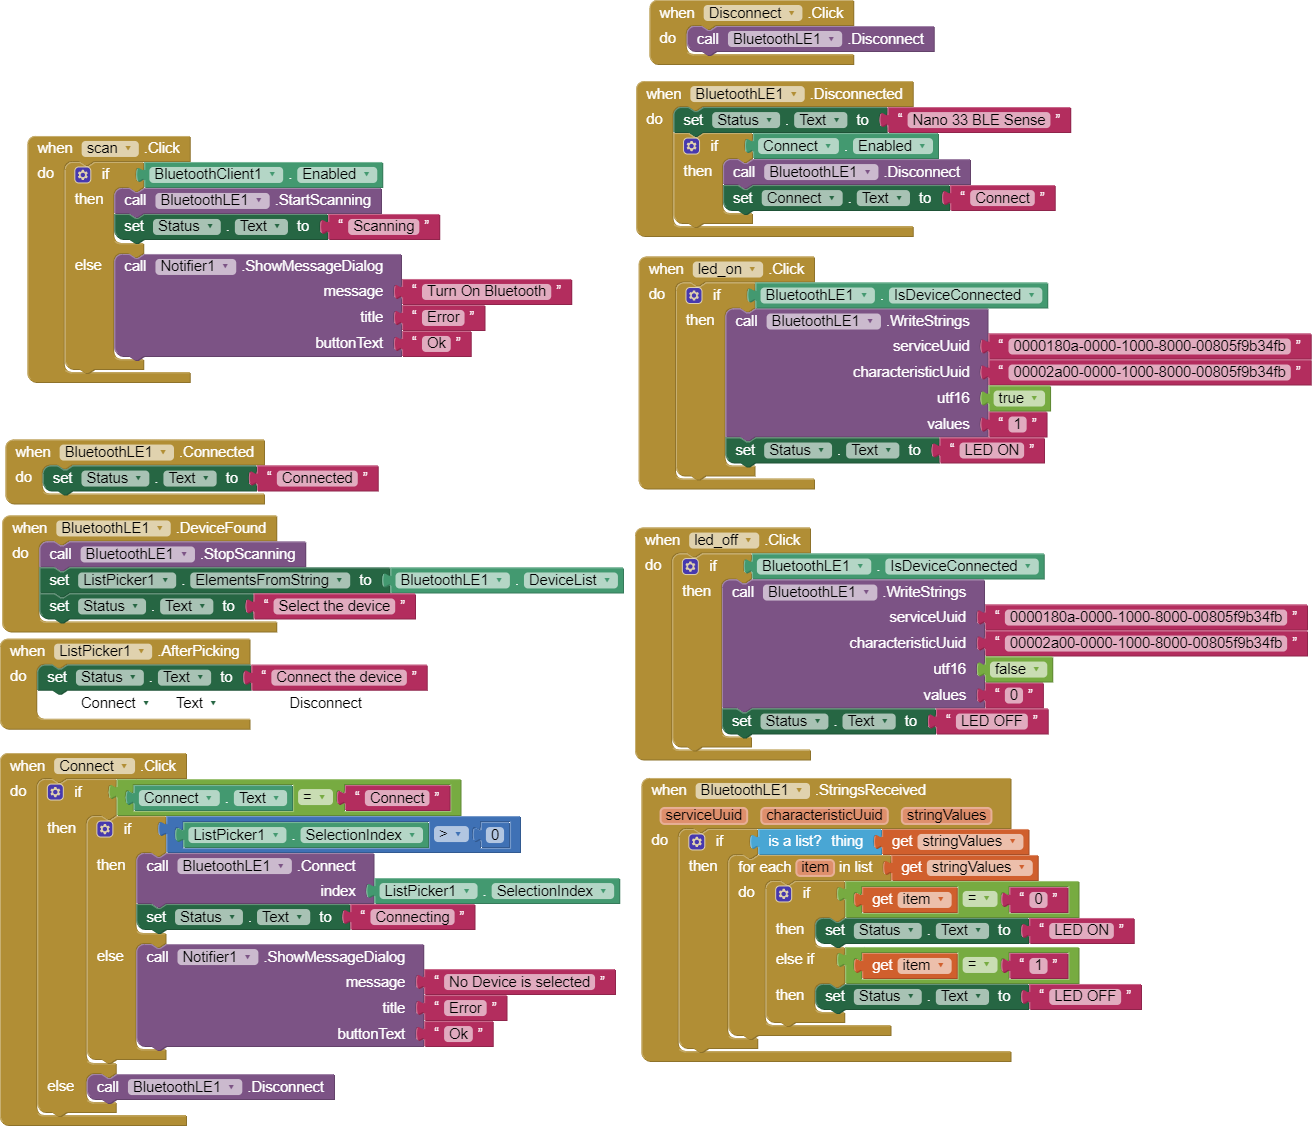
Yes i have used it before. I use this code to turn LED_BUILTIN on and off. I uploaded it and I tried it on the NRF Connection on My Android application
Okay, I'll do that. thank you so much sir
Sorry sir, I don't know what it mean.
It's like I should give the location of my BLE Board or something?
Ok, I understand sir, sorry because I'm still newbie in this MIT app
No, it's the location of your Android Device (Smartphone). A Google Security Measure.
Can you show me how to do that or maybe some tutorial?
Hi Muhammad
It can be done via Activity Starter. Attached is an example Project using Activity Starter to prompt the User to allow Location to be switched on.
BLE_BASIC_SEND_TEXT.aia (192.6 KB)
I'm sorry just show up
I have learned more about MIT App Inventor, then I found a problem again, that when I click the scan button in my status I keep scanning and if I check select device it's empty, what do I do?
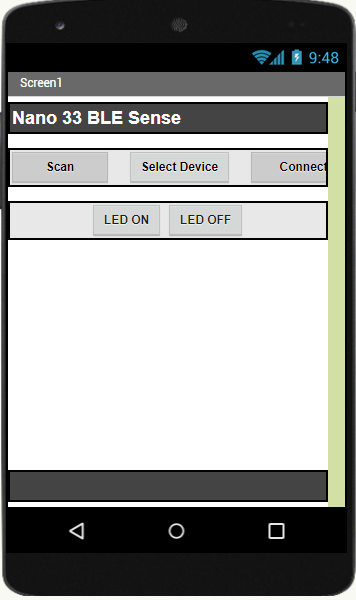
This is my block and my designer
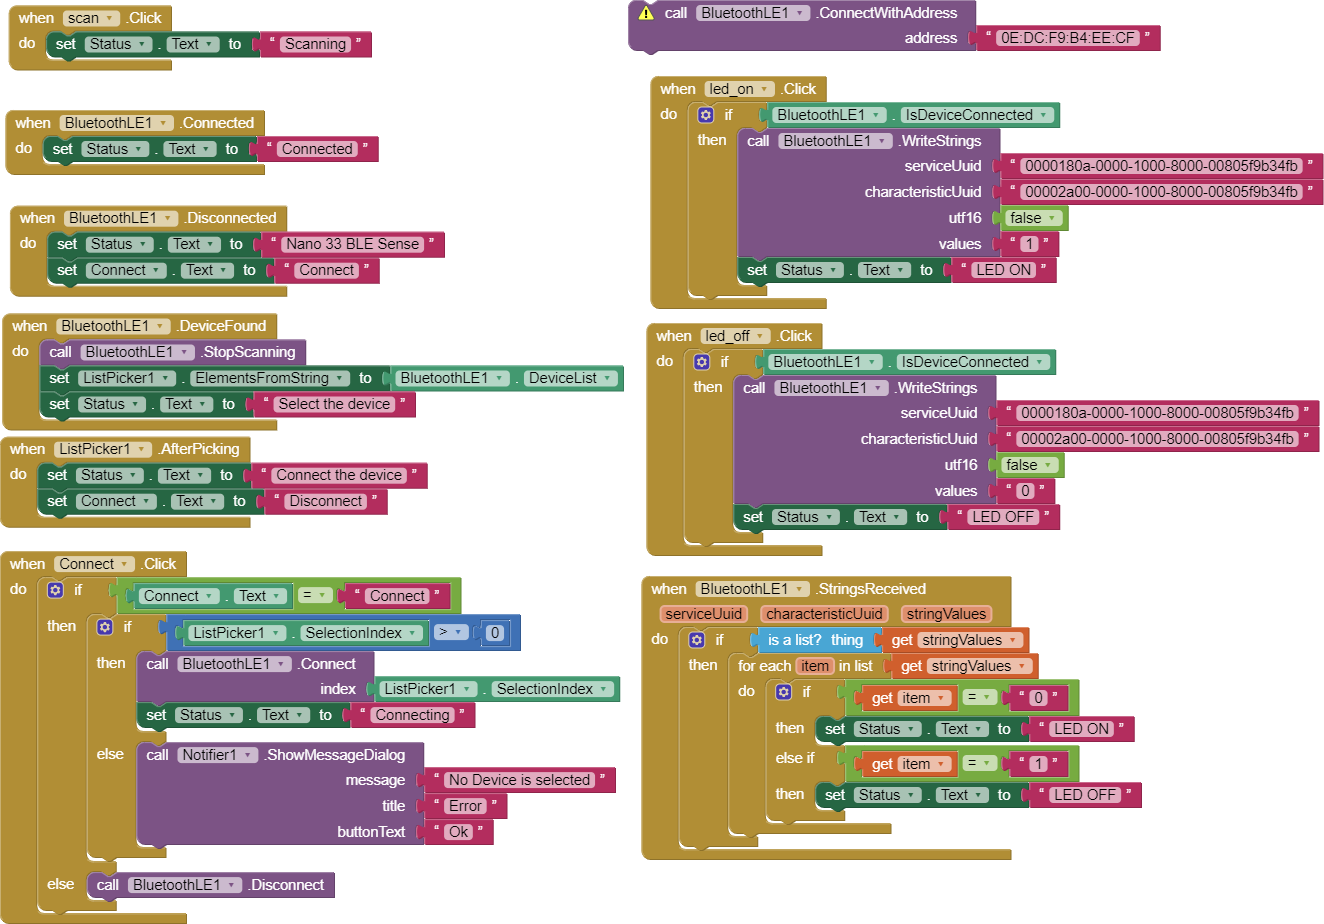
And this is my code
// ArduinoBLE - Version: Latest
#include <ArduinoBLE.h>
/*
LED
This example creates a Bluetooth® Low Energy peripheral with service that contains a
characteristic to control an LED.
The circuit:
- Arduino MKR WiFi 1010, Arduino Uno WiFi Rev2 board, Arduino Nano 33 IoT,
Arduino Nano 33 BLE, or Arduino Nano 33 BLE Sense board.
You can use a generic Bluetooth® Low Energy central app, like LightBlue (iOS and Android) or
nRF Connect (Android), to interact with the services and characteristics
created in this sketch.
This example code is in the public domain.
*/
BLEService ledService("180A"); // Bluetooth® Low Energy LED Service
// Bluetooth® Low Energy LED Switch Characteristic - custom 128-bit UUID, read and writable by central
BLEByteCharacteristic switchCharacteristic("2A57", BLERead | BLEWrite);
const int ledPin = LED_BUILTIN; // pin to use for the LED
void setup() {
Serial.begin(9600);
while (!Serial);
// set LED pin to output mode
pinMode(LEDR, OUTPUT);
pinMode(LEDG, OUTPUT);
pinMode(LEDB, OUTPUT);
pinMode(LED_BUILTIN, OUTPUT);
pinMode(5, OUTPUT);
pinMode(6, OUTPUT);
pinMode(7, OUTPUT);
pinMode(8, OUTPUT);
pinMode(9, OUTPUT);
digitalWrite(LED_BUILTIN, LOW); // when the central disconnects, turn off the LED
digitalWrite(LEDR, HIGH); // will turn the LED off
digitalWrite(LEDG, HIGH); // will turn the LED off
digitalWrite(LEDB, HIGH); // will turn the LED off
// begin initialization
if (!BLE.begin()) {
Serial.println("starting Bluetooth® Low Energy module failed!");
while (1);
}
// set advertised local name and service UUID:
BLE.setLocalName("Nano 33 BLE");
BLE.setAdvertisedService(ledService);
// add the characteristic to the service
ledService.addCharacteristic(switchCharacteristic);
// add service
BLE.addService(ledService);
// set the initial value for the characeristic:
switchCharacteristic.writeValue(0);
// start advertising
BLE.advertise();
Serial.println("BLE LED Peripheral");
}
void loop() {
// listen for Bluetooth® Low Energy peripherals to connect:
BLEDevice central = BLE.central();
// if a central is connected to peripheral:
if (central) {
Serial.print("Connected to central: ");
// print the central's MAC address:
Serial.println(central.address());
digitalWrite(LED_BUILTIN, HIGH);
// while the central is still connected to peripheral:
while (central.connected()) {

  // if the remote device wrote to the characteristic,
  // use the value to control the LED:

  if (switchCharacteristic.written()) {
    switch (switchCharacteristic.value()) {   // any value other than 0
      case 01:
        Serial.println("Red LED on");
        digitalWrite(LEDR, LOW);            // will turn the LED on
        digitalWrite(LEDG, HIGH);         // will turn the LED off
        digitalWrite(LEDB, HIGH);         // will turn the LED off
        digitalWrite(5, HIGH);
        digitalWrite(6, LOW);
        digitalWrite(7, LOW);
        digitalWrite(8, LOW);
        digitalWrite(9, LOW);
        break;
      case 02:
        Serial.println("Green LED on");
        digitalWrite(LEDR, HIGH);         // will turn the LED off
        digitalWrite(LEDG, LOW);        // will turn the LED on
        digitalWrite(LEDB, HIGH);        // will turn the LED off
        digitalWrite(5, LOW);
        digitalWrite(6, HIGH);
        digitalWrite(7, LOW);
        digitalWrite(8, LOW);
        digitalWrite(9, LOW);
        break;
      case 03:
        Serial.println("Blue LED on");
        digitalWrite(LEDR, HIGH);         // will turn the LED off
        digitalWrite(LEDG, HIGH);       // will turn the LED off
        digitalWrite(LEDB, LOW);         // will turn the LED on
        digitalWrite(5, LOW);
        digitalWrite(6, LOW);
        digitalWrite(7, HIGH);
        digitalWrite(8, LOW);
        digitalWrite(9, LOW);
        break;
      case 04:
        Serial.println("Blue LED on");
        digitalWrite(LEDR, HIGH);         // will turn the LED off
        digitalWrite(LEDG, HIGH);       // will turn the LED off
        digitalWrite(LEDB, LOW);         // will turn the LED on
        digitalWrite(5, LOW);
        digitalWrite(6, LOW);
        digitalWrite(7, LOW);
        digitalWrite(8, HIGH);
        digitalWrite(9, LOW);
        break;
      case 05:
        Serial.println("Blue LED on");
        digitalWrite(LEDR, HIGH);         // will turn the LED off
        digitalWrite(LEDG, HIGH);       // will turn the LED off
        digitalWrite(LEDB, LOW);         // will turn the LED on
        digitalWrite(5, LOW);
        digitalWrite(6, LOW);
        digitalWrite(7, LOW);
        digitalWrite(8, LOW);
        digitalWrite(9, HIGH);
        break;
      default:
        Serial.println(F("LEDs off"));
        digitalWrite(LEDR, HIGH);          // will turn the LED off
        digitalWrite(LEDG, HIGH);        // will turn the LED off
        digitalWrite(LEDB, HIGH);         // will turn the LED off
        digitalWrite(5, LOW);
        digitalWrite(6, LOW);
        digitalWrite(7, LOW);
        digitalWrite(8, LOW);
        digitalWrite(9, LOW);
        break;
    }
  }
}

// when the central disconnects, print it out:hgj
Serial.print(F("Disconnected from central: "));
Serial.println(central.address());
digitalWrite(LED_BUILTIN, LOW);         // when the central disconnects, turn off the LED
digitalWrite(LEDR, HIGH);          // will turn the LED off
digitalWrite(LEDG, HIGH);        // will turn the LED off
digitalWrite(LEDB, HIGH);         // will turn the LED off
digitalWrite(5, LOW);
digitalWrite(6, LOW);
digitalWrite(7, LOW);
digitalWrite(8, LOW);
digitalWrite(9, LOW);
}
}
Your Scan button doesn't start the Bluetooth Scan.....
Nearly - before you scan, switch on Bluetooth and Location. Of course, the scanned devices must also have Bluetooth switched on.
Bluetooth is connected, but when I press the disconnect button there is an error, why is it like that?